Affordable Sailboats You Can Build at Home

Last Updated by
Daniel Wade
September 13, 2023
Key Takeaways
- There are many sailboats that anyone can build from home depending on tastes
- Budget will be the biggest deciding factor on a majority of the process
- Consider kits that come with most of what you need or choose ones that are all-inclusive
- Design complexities and new materials may make the building time process longer
- Plan the best you can ahead of time to save money and your working hours
Buying a sailboat can be expensive, but building your own can save you money. So what are sailboats you can build from home?
Sailboats that you can build from home will likely be a small boat under 20 feet. These could be from many different boat suppliers such as B&B Yachts, Brooks Boat Designs, and Chase Small Craft. Boat plans will vary based on your budget and how much time you have on your hands.
Based on my previous experience, building your own boat will take much longer than if a professional were to do it. You also have to be able to study plans, consider various sailboat designs, and have tons of supplies such as fiberglass tape or fiberglass cloth. On top of that, you will also have to be good with your hands.
Table of contents

Top 10 Affordable Sailboats Anyone Can Build at Home
Building your own pocket cruiser or other styles from boat plans is an impressive feat, as this will need dedicated time and money to assure your boat sails safely. Boat building takes a lot of patience as well, especially since this will not be completed in a fast manner.
Finding boat plans and materials that fit your budget will be key to being able to complete the project. The time it takes to complete these projects will vary on your overall experience and needs. Below are 10 of the most affordable sailboats that you can build in the comfort of your home.
B&B Yachts

B&B Yachts have 14 different boat plans you can choose from to find the boat of your desires. Their shop is located along the Bay River in North Carolina where they construct all of the kits and have a 100 foot dock to show off your project once you complete it.
One popular model to check out is their Core Sound 15, as it is the perfect size for those wanting to build a modest size boat for a handful of people on board. Their website features some videos of completed projects and the plans or kits for purchase.
- 14 different models to choose from plus some dinghies
- Various monohull and multihull options
- Friendly customer service with attractive prices
- Might be too many options for some that are indecisive
- Not ideal for those wanting to have a motor sailer
Brooks Boat Designs

Brooks Boat Designs has a handful of options to consider for your next sailboat building project. They are located in Brookline, Maine and give the option to buy the kits or have them build one from scratch for you. They have plenty of knowledge, so do not be shy to ask about modifications or custom features you are looking for.
Depending on your specifics, they can attempt to accommodate some of their plans to help fit your desired outcome. By checking out their site, you can see many examples of their construction in progress and what the boats will look like when completed.
- Offers a variety of kits
- Plans vary around $50 and up, while materials will obviously add more costs
- Some plans can be rowing boats that can convert to sailboats
- Might take a while to hear back from them, as their contact section is a little outdated
- Their plans may not accommodate a ton of extras for your taste
Chase Small Craft

Chase Small Craft offers a simple process for building boats. Their kits are equipped with everything you need and will help save you time than just buying the materials outright and other parts you could need. This is arguably one of the best bang for buck instances if you want to save time and money searching for pieces to your boat.
They are located in Saco, Maine and will ship everything to your home from there. All the necessary materials are included and all you need are the proper tools and working space.
- All-inclusive kits with what you need
- Tons of knowledge on their site for boat building
- Easy process to order and customize
- Complete kits can range over $20,000 for larger boats
- Kits may take up to eight weeks to ship out
Chesapeake Light Craft

You can expect high-quality boat kits from Chesapeake Light Craft . They feature 18 different sailboat kits that vary from eight to 20 feet in length. This should be more than enough to find one for you if you are newer to boat building.
They also have a wide variety of other kits in addition to the sailboat, in the event that you wanted to order a small kayak or paddleboard in addition to your sailboat. The prices vary considerably when considering a small or larger boat, so check the complete list of options to in order to potentially fit your needs.
- Plenty of sailboat offerings to choose from
- Different beautiful hull form options to consider
- Easy to build and perfect for sailing
- Only has basic materials needed for kit, so you may need to purchase other items
- Has epoxy shipping fee no matter if you pick up item
Dudley Dix Yacht Design
Dudley Dix Yacht Design has an extensive list of plywood and single skin sailing boat options. They have plenty of sail plans and kits to consider depending on your goals. These follow a classic look for sailboats, which are aesthetically pleasing.
If you are wanting one to accommodate a small family, they have more than plenty to look through. The cost is not as bad compared to others, but keep in mind that you may need to throw in your own supplies or specific tools to get the job done.
- Plans start at $30 and range up to $7,500 or more for kits
- More than enough of options to consider
- Affordable variety of sailboat offerings
- Might be too many options for those new to sailing
- Most are wood without the use of aluminum or steel
Farrier Marine

If you are in search of a multihull to build, then Farrier Marine is what you need. They offer a unique folding catamaran that is trailerable and give you the option to build it yourself. This not only makes it an appealing option, but anyone can take this multihull boat wherever they want with ease.
It features a thorough construction guide once you receive all of the materials. These also come with stainless steel fasteners and an aluminum mast for high-quality materials. Pricing will vary since you must request which model type you are considering.
- Ability to build a unique catamaran
- In-depth construction guide to help
- Easily handled and trailerable
- Price may be too high
- Limited offerings since only a few multihull options
Glen-L Marine Designs

Building a boat from Glen-L Marine Designs can save you time and money. They feature an easy system to order and receive the kits, as well as an in-depth guide to building them. This is an appealing option compared to most boat kit sellers.
The beauty about Glen-L is that anyone can build these from scratch, so you do not have to be the best boat builder in the world to get it done. They offer guides and helpful insights from their team to point you in the right direction. Plans vary around $15, while kits can range well over $1,000 depending on boat size.
- Nearly 50 designs to choose from
- Complete guide to help anyone build it
- Plenty of price points depending on size
- Might be overwhelming with the amount of options
- Could take a while to get parts since they are popular
John Welsford Boat Designs

John Welsford Boat Designs invites new and veteran boat builders that want a taste of quality small wooden boats. The boat plans are designed to meet your specifications and are catered to your desires.
There are seven sailboat designs to choose from so you do not feel overwhelmed in the process. However, they do not sell kits all the time, so you would need to have the materials or be on the lookout for the best prices when they are available.
- Seven sailboat plans with different sizes
- Quality boat builder and supporting community
- In-depth knowledge provided to you when you order
- Might be too small of boat size
- Kits are not always available
Iain Oughtred
There are plenty of options on the wooden boat store, but you should narrow down your search for Iain Oughtred’s line of sailboat kits and plans. There are 25 different plans to choose from, which should accommodate most everyone looking to build their own boat.
While they do offer some kits, they do not routinely offer sailboat kits. You would need to purchase all of the materials if you are considering one of their sail plans. Keep this in mind if you are considering, as you would need to hunt down the parts yourself.
- 25 different sailboat plans to look through
- Various sizes to contemplate for you sailing needs
- Prices will vary but are not bad compared to market
- No sailboat kits, only plans
- Newer boat builders might find too many options unappealing
Paul Gartside Boat Builder and Designer
Gartside Boats is a boat builder company based in Long Island, New York that showcases a variety of boats from traditional and newer methods of boat building. Within that variety, they have boat plans meant for six to 50 feet in length.
With an abundance of options, you will need to contact them regarding prices and any customizable options. Kits may vary as well, as they typically design in-house and build for you.
- Experienced boat designer that can accommodate with custom plans
- Many options are trailerable
- Can have plans for up to a 50 foot boat
- You will need to contact them for prices
- Customized options may make process more complicated for new boat builders
How Much Does it Cost to Build a Sailboat at Home?
As you have likely already done so, the math between building your own boat and buying one may be a huge difference. Likewise, you may even enjoy the challenge of taking an older boat that is gutted and restoring with parts from a kit to build one new again.
But how much does it cost exactly to build a boat from the comfort of your own garage or workshop? The prices are going to vary dramatically depending on your situation and material needed to get the job done. In addition, the time that it takes to complete this will also vary.
Sail plans are rather inexpensive if you are aiming to build a small boat. These plans allow you to see the workings of the boat design and what you need to build the boat.
Without these plans, you will not know the exact details of the design and it can cause major issues with the boat’s hull or other areas of the boat. Think of these as the backbone or instructions of the boat’s infancy before being built.
Price Per Square Foot
You should assume to pay anywhere between $300 to $600 per square foot if you are interested in building a boat. Buying a kit outright can be a good way to save time, but oftentimes these do not come with everything you need.
Instead, you should try to source as much of the materials at the best price as possible. Thinking ahead is part of the process and you might be able to score a deal at a lumber yard or hardware store for parts.
Boat Designs Matter
The design of the boat will be much different from one boat to the next, regardless if they are the same size in length. If you are pondering boats that range anywhere between 16 and 20 feet, you should factor in the shape of the hull, any rigging, and various appendages.
Prices tend to increase when there are more complexities within the designs. If you are considering a kit with more details than others, you will also have to pay more for the designs on that as well.
Kits Can Differ
It is important to understand that all kits are not going to be the same. As you gander at sailboat kits online to stitch together, you need to thoroughly look over to see if you have everything you need before buying.
It would also be at your advantage to ask the seller if any additional parts or supplies are needed. This may change your dynamic on the kit buying process and you may pass up one for another if it has everything you need. An all-inclusive kit may cost several hundred, if not thousands, of dollars more to have the convenience of everything in the bundle.
Construction Approaches
Some boat plans may require you to have certain tools to get the job done. This means special saws or planers, which the average person simply does not have.
Purchasing specialty tools might be expensive upfront and hard to find depending on what it is. Your best bet would be to check locally for others trying to sell their tools or consider a boat plan that does not require extensive tools to finish the job.
How Long Does it Take to Build a Sailboat?
An easy to build sailboat could take a while to build from scratch. Many different variances come into play that are difficult to pinpoint for everyone. But how long is that exactly and how will your experience play into this?
A fun project to sail in the wind could take you several months to well over a year depending on the boat plan and how big your boat is going to be. In addition, the materials all need to be accounted for prior to starting in the event a hardware store does not have them in stock.
Time Varies
The time that passes for simple boat designs on small sailing vessels can be done in a few weeks. This is assuming you have everything you need and work non-stop around the clock.
Certain complex situations may make the process long, such as the difficulty of working with some materials. If you are a skilled laborer, it may take you half the time compared to a novice. The amount of time it can take will vary on your availability and skill level.
Planning ahead will undoubtedly offer the most time-saving features. It also helps if you can tackle parts of the project at your own pace.
Complexity of Design
The design of the boat may make the construction process longer. For example, it may take you longer to build a catamaran compared to a similar lengthed monohull.
More complex designs might require more materials, therefore making the process a bit longer to complete. Furthermore, you will also need more experience working with difficult designs and that will affect you more as a newbie.
Be sure to manage your expectations well and do not allow yourself to become too stressed over this fun project. If you can, seek expert boat building advice from a local builder or the company you purchased sail plans through.
Quality Materials
The quality of the materials will matter significantly when building a boat and will greatly affect the time it takes to construct it. Handling fiberglass or carbon fiber might require specialty tools, while wood also demands a certain level of craftsmanship.
If you are not skilled at working with the material at hand, it might affect the quality of the build and you may have to go back to fix mistakes. This will definitely add more time to your project, because mistakes are bound to happen with your first project.
To save time, consider adding the tools and materials throughout the year or as often as your budget allows. You may want to try testing your skills on fiberglass or other materials to get a feel for how to work with it.
Related Articles
I've personally had thousands of questions about sailing and sailboats over the years. As I learn and experience sailing, and the community, I share the answers that work and make sense to me, here on Life of Sailing.
by this author
Best Sailboats
Learn About Sailboats
Most Recent

Best Small Sailboat Ornaments
September 12, 2023

Best Small Sailboats With Standing Headroom
December 28, 2023
Important Legal Info
Lifeofsailing.com is a participant in the Amazon Services LLC Associates Program, an affiliate advertising program designed to provide a means for sites to earn advertising fees by advertising and linking to Amazon. This site also participates in other affiliate programs and is compensated for referring traffic and business to these companies.
Similar Posts

Discover the Magic of Hydrofoil Sailboats
December 11, 2023

Best Bluewater Sailboats Under $50K

Hunter Sailboats: Are They Built for Bluewater Cruising?
August 29, 2023
Popular Posts

Best Liveaboard Catamaran Sailboats

Can a Novice Sail Around the World?
Elizabeth O'Malley
June 15, 2022

4 Best Electric Outboard Motors

How Long Did It Take The Vikings To Sail To England?

10 Best Sailboat Brands (And Why)
December 20, 2023

7 Best Places To Liveaboard A Sailboat
Get the best sailing content.
Top Rated Posts
Lifeofsailing.com is a participant in the Amazon Services LLC Associates Program, an affiliate advertising program designed to provide a means for sites to earn advertising fees by advertising and linking to Amazon. This site also participates in other affiliate programs and is compensated for referring traffic and business to these companies. (866) 342-SAIL
© 2024 Life of Sailing Email: [email protected] Address: 11816 Inwood Rd #3024 Dallas, TX 75244 Disclaimer Privacy Policy
- For Sale/Wanted
- Readers Tips
- Your Yarns.
- Restoration
- Miscellaneous
- DIY Boat Yards
- Boat Building
- Cabin Cruisers
- Free Boat Plans
- Begin Boating
- Boating Terms
- Ropes and Rigs
- Just for Fun
- Celestial Navigation
- Passage Planning
- VHF Marine Radio
- Diagonal Scale
Sailboat Plans
Free Sailboat Plans
A selection of some of the Free Sailboat Plans (pdf) that were published in magazines such as “Popular Mechanics”, "Popular Science" and the "Boat Builder Handbook".
If you need help with lofting out the plans click here for an article here which should help.
- Open Dayboats/Dinghys
- Rowing Boats
Open/Dayboat, Free Sailboat Plans
Everyone who digs boating has heard of the Hobie Cat, the sleek little catamaran that burst on the scene and captured the attention of all the fast-action sailors.

Marked by asymmetrical hulls and special trampoline supports, the Hobie can reach speeds above 20 mph and perform with a rare agility.
But it has one drawback.
It costs mucho dinero.
Thus, we introduce the Hobby Kat, sailboat plans, a build-it-yourself version of the “Hobie” that should cost from half to a third of the commercial version. If you have the moola, of course, go for a Hobie and have the time of your life on the water.
If not, try our Hobby
The homebuilt is not quite the same.
But she sails sweetly and fast—qualities which have made the “Hobie” popular
Even in a light air she’ll slip through the water at a fast clip.
She has no centreboards, leeboards or keel, and needs none.
The inside of each hull has built-in lift, like an airplane wing, so that as the boat heels and one hull digs in the boat is pulled back to windward.
Click Here for the Plans
She can run in very shallow water and the rudders kick up for beaching.
You can carry her on a trailer or even disassemble her.

Many a “stink pot” addict will take a second look at Tern because she planes in modest breezes, is easy to handle, and her streamlined prow arid pod-shaped, “inland scow” type hull offer slight water resistance. Then too, there’s a charm about the tiller of a sailer that’s not matched by the wheel of a motor-powered boat. Part of it is the challenge of making the most of nature’s free-wheeling breezes. Even with her 72sq.ft of sail, this Free Sailboat Plan is remarkably stable, and packs as many as four persons aboard
For thousands of inland lakes, Tern is the answer to sailing water sport, she is rugged and easy to launch
And she’s remarkably easy to build.

Falcon is a small, speedy, sporty sailboat which handles well. Tests on the original Falcon showed that she could easily out-distance boats of comparable size such as the one design class Snipe and Comet sailers.
And she will pace neck and neck with 18 footers with considerably greater sail spread.

This strong, beamy, eight-foot pram may be sailed either cat-rigged or sloop-rigged.
The dagger-board may be adjusted forward to balance the helm when sailing with the addition of a jib sail.
Oars or a small outboard motor may also be used to power this versatile Free Sailboat Plans.

Dart” is a small two or three person sailing craft, designed for use on protected waters such as bays. lakes, rivers or wherever sheltered waters are found. Its construction will repay the builder handsomely and provide a fast sailing craft, light in weight, easily transportable and cheap to construct with all difficult joinery eliminated
It provides thrilling and economical sport.

The 'Crescent', designed by C. T. Allen, is the ideal sailboat for day sailing on a small lake, river, or protected waters of a bay.
Centreboard design (Fig. 2) reduces Crescent's draft, so Shallow is not a problem.
Its broad beam of over 5½ft. makes it an ideal family boat because there is room for a cockpit large enough to accommodate four adults or two adults and three kids, and side and forward decks big enough to stretch out on when sun bathing.
"Jewel" is a 16' Crescent Sailboat being built by Mike Allen from the free sailboat plans by C.T .Allen in the 1958 "Boat Builders Handbook". And what a superb job Mike is doing check out his photos here .
Click Here for the Free version of the Plans

Sailing enthusiasts and backyard boat builders are not likely to find free boat plans for a sailing pram that can be built faster, lighter, stronger, or less expensively than Graefin-10. Two men can begin work on a Friday evening and have a smart, lively 10-ft. 85-pound sailboat in the water by Sunday evening (it’s been done).

Zephyr Is a refinement of a type of boat developed by the English for use in the rough open waters of the English Channel. Not only is it fast under sail, but it can stand up under punishment. And it’s light enough to be easily loaded atop an auto or light trailer.
Breeze-Baby

Skimming off a brisk wind or with the wind abeam, Breeze-Baby actually planes with one person aboard. Despite her rowboat lines that make her easy to build, she handles easily under her simple sail, an ideal first boat. Simple lines are adapted to plywood construction that’s strong, light and that keeps Breeze-Baby’s bilges dry
You can take her with you atop your car or on a lightweight trailer for summer fun wherever you vacation or get in a week-end’s sailing.

Cat’s Paw is easy to build because of the straight-sided hulls. The sheer line is flat and that simplifies building the form. Bow and stern are straight, so there’s no cockeyed bevel to fit and fuss with
She Is an Ideal boat to learn or practice sailing in because she will forgive so many mistakes.
Cabin Cruiser, Free Sailboat Plans

Previous posts
See What Others Have Posted

Recent Articles
Wooden Boat Events 2024
Apr 14, 24 05:15 AM
- Boat Plan Books
- Boatbuilding Tips
- Glass Cloth
- Stitch and Glue
- Strip Plank
You might like these

Plywood and Veneer Guide for Marine use.
A guide to plywood for boat building and why you should use the best marine grade you can afford.

DIY Woodboat Building Questions
Woodboat building questions a Forum for wooden boat building, plans, lumber, caulking compounds and other boat building problems.

Boat Books for Wooden Boat Builders
Boat Books a series of boat books based on some of the 1960's, classic, Free Boat Plans that were published in magazines such as "Popular Mechanics", "Popular Science" and the "Boat Builder Handbook".

Build a Boat, tips for the DIY Wooden Boat Builder.
How to Build a Boat, Wooden Boat Building methods for the DIY, backyard, self-builders explained, carvel, lapstrake and plywood

Clench Nails, Fastening for Small Wooden Boats.
How to use Clench Nails, these provide a fast reliable method for fastening small wooden boats.

Wood Screws for Boat Building and Repair.
Wood Screws are the most widely used and versatile fasteners used on wooden boats. Which type to use and how to use them

Timber, Lumber for Boat Building.
A brief description of the most common Timber used for building Wooden Boats how to choose wood for your project boat

Timber Properties
A brief guide to timber properties and wood, characteristics such as strength, stiffness and elasticity for choosing lumber for wooden boat building and restoration.

Rivets and Copper Rove Wood Boat Fastenings.
How to use Copper Rivets and Roves construction guide to fasteners on your wooden boat.
Ring Nails for Marine Fastening.
Ring Nails sometimes call Gripfast or ring shank, silicon bronze boat nails are renowned for their holding power. but how to get them out?
Free Motorboat Plans
Free Motorboat Plans for the backyard home builder, build your own speed boat, cabin cruiser, runabout or utility boat using these simple plywood designs.

Wooden Boat Kits.
Wooden boat building is easy and inexpensive with wooden boat kits. From row boats and kayaks to sailing cruisers, boat to be proud of
Supplies for Wooden Boat building and Maintenance
Supplies for Wooden Boat Building and restoration, how to choose the materials and marine chandlery for your project.
DIY Woodboat Questions
Woodboat questions and answers forum for all Wooden Boat owners, advice and opinions on all aspects of wooden boat building, restoration and maintenance.
Small Boats, Made of Wood
What Everybody ought to know about building Small Boats, guidance and tips for self-building or restoring.
14’ 1956 Chris Craft, side rail how should it be attached?
Apr 12, 24 03:38 AM

How to laminate plywood on the hull
Apr 10, 24 03:46 AM

Woodboat Restoration questions forum
Woodboat restoration questions Forum, get advice about your Wooden Boat problems in a free, no frills, no need to sign up forum

Epoxy Resin for DIY Wooden Boat Building.
A guide to the epoxy resins and sustainable enrtopy resins to use when building wooden boats with marine plywood.
Wood Rot Repair and Treatment
Wood rot in wooden boats, how to treat, repair and replace rotten timbers in a wooden boat

Privacy Policy
Advertising Policy
Cookie Policy

I am perfectly aware that the majority of Wooden Boat aficionados are sensible folk. However, I need to point out that I am an amateur wooden boat enthusiast simply writing in order to try to help other amateur wooden boat enthusiasts. And while I take every care to ensure that the information in DIY Wood Boat.com is correct, anyone acting on the information on this website does so at their own risk.

- Basic Kayaking Knowledge , Learn
15 Free Boat Plans You Can Build This Week (with PDFs)
Boatbuilding is one of the most ancient forms of craftsmanship still alive today. As long as our ancestors have had a curiosity about exploring open waters, they have been practicing and honing their boatbuilding skills.
To be honest, however, building a boat is no small task. It will require a lot of work and patience to ultimately create a finished product that you are happy with and that is actually seaworthy.
Of course, we have also included a few free boat plans. You can keep in your back pocket for the next time you are asked to build a cardboard boat as part of a contest or lakefront teambuilding adventure.
We hope that these resources help you in your journey to build your own boat!

Photo by SeventyFour via Shutterstock
Free Boat Plans
Why build your own boat, 1. the wanigan, 2. the mouse, 3. the slipper, 4. the handy andy, 5. the junior, 6. the jolly roger, 7. the cork, 8. the hobby kat, 9. the tern, 10. the falcon, 11. the white duck, 12. the sea midge, 13. the zephyr, 14. the gypsy, 15. the crazy cardboard boat, 15 free boat plans you can build this week (with pdfs) – final thoughts, share on pinterest.
- The Wanigan
- The Slipper
The Handy Andy
- The Jolly Roger
- The Hobby Kat
The White Duck
- The Sea Midge
The Crazy Cardboard Boat

Photo by Halsey via Shutterstock
There are a lot of reasons why you should explore building your own boat versus buying a pre-made model. Here is a quick breakdown of the most obvious benefits:
- You will know the ins and outs of your finished boat better than anyone
- It can be a great project to work on with your teenage or even adult children
- You will gain valuable skills molding and shaping wood and other materials
- You can design your boat for your specific needs
- You don’t have to trust the sometimes-questionable manufacturing of mass-produced boats
- You can create a boat that functions as your second home on the water
- You can save money if you source materials mindfully
Of course, most first-time boatbuilders still experience some level of trial-and-error. With patience and perseverance, however, you can craft a one-of-a-kind vessel that has no equal anywhere in the world.
Free Boat Plans You Can Build This Week (with PDFs)
PC Duckworks Boat Builders Supply
The Wanigan boat began as a garvey design, which is one of the older boat plans known to the Americas. Traditionally, these boats were built as work scows and were very popular among American summer camps.
The design itself is very simple, but these boats can carry heavy loads. It can also handle a trolling motor being mounted to the stern so you can cover more ground if you want to use it as a fishing boat.
The creator of this boat plan became aware of some of the downsides of the garvey design, such as the heavier weight that made it less efficient than some other designs. So he combined elements of dory and wanigan designs to create a hybrid.
The main changes include an enlarged beam, tilted lathes to provide a stiffer hull, and knocking off the top strakes to reduce the boat’s overall weight.
The Wanigan text
These additional The Wanigan drawings  may also prove useful for your build process!

The Mouse is one of the most compact and nimble boat plans we have found for this list. It is an easy build and also a great boat for two kids or a single teenage paddler.
The original builder began with a one-sheet boat design in an effort to create the lightest and most affordable boat possible. This means it is only suited for calm waters and should not be used in high winds or wavy conditions.
That said, it was built in roughly 12 to 24 hours of work time and doesn’t require a full workshop to construct. The main material that is required for building this boat is quarter-inch plywood. But the builder recommends using one-inch by half-inch pine or something a little sturdier.
The plywood and pine components are held together using a method called ”˜stitch and glue’. This method requires choosing one of the best glues for kayak outfitting , which are typically made of epoxy and glass tape rather than something cheaper like polyurethane.
The Mouse Instructions
Also, here are a few extra useful The Mouse Notes for builders

The Slipper is the first of many sailboat plans on our list and it is faster, easier, and cheaper to build than most. It also features a deeper cockpit than many other sailboat designs, which makes it safer for intermediate sailors.
This sailboat plan features dual steering stations so that you can sail from inside or outside of the helm. It also includes a centerboard trunk that hardly intrudes into the cabin at all. So that, it is easier to work around while you are in the cockpit.
The exterior hull and cabin of this sailboat feature a modified dory design using two sheets of plywood ripped to three feet wide before being joined together. The resulting hull is a modified V-shape that reduces drag.
The centerboard of this boat can also be winched up to the level of the top of the cabin or lowered down to alter the draft. This allows you to customize the boat design for a stiffer and more weather-worthy vessel if you need it.
The Slipper was also intentionally designed with an aft cabin that naturally helps to keep the bow pointed into the wind whether you are underway or the boat is anchored in the port.
The Building Slipper

PC DIY Wood Boat
The Handy Andy is a great little 10-foot portable rowboat for hunting, camping, fishing, and other recreational uses. It is actually the only folding boat design on our list, which makes it best for folks that need the most portable boat plan possible.
This boat features a 42-inch beam and a depth of about 15 inches at the mid-section. It also weighs roughly 80 pounds when assembled and can handle up to three average-sized human passengers.
The design boasts a flat bottom with canvas-bound edges and the primary material used for construction is ⅜-inch marine-grade plywood. Despite its lightweight nature, this rowboat can handle trolling motors or even outboard motors with a maximum of five horsepower.
Once finished, the hull can be folded or unfolded in less than a minute’s time.
This design makes it one of the only boats on this list that can be stored in a truck bed or easily carried by two people to be launched at more remote locations.

If you are looking for an all-purpose dinghy that can handle almost any use you might imagine, look no further than The Junior free boat plan. It can carry three or four average-sized adults and is much easier to row than a traditional dinghy.
It is also durable enough to be equipped with a small outboard motor. You could even set it up with sailing equipment if you want to use it as a sailing vessel. As we said, this is truly an all-around boat design!
This boat plan requires constructing three frames that will provide the majority of the load-bearing support. The builder recommends using ¾-inch framing with ⅜-inch plywood as the exterior material for this boat build.
Resin glue and flathead screws are also required to hold this boat together. But there is a full list of materials included in the plans we have linked to below. Sticking to that plan should also give you enough leftover materials to construct two six-foot oars for rowing this boat until you install a trolling motor or outboard motor down the line!

Channel your inner Captain Morgan when you are following these plans to build your very own Jolly Roger boat. This flat bottom boat design is designed for pond fishing . It can also be a useful yacht dinghy for getting from your dock to a larger vessel anchored offshore.
The plan follows conventional dinghy construction methods but also includes a few modifications that will save you time and energy. The wide design is super stable for boaters of all ages.
The keel, frame, chines, and risers are all cut from ¾-inch oak, ash, or any other trusted hardwood you can get your hands on. For the smaller components, the builder recommends using cedar, cypress, fir, or white or yellow pine.
Because this boat plan is also sturdy enough to handle a small motor, it includes important points for protecting the wooden hull from spark plug damage.
Be careful to follow these guidelines to build the safest boat possible if you imagine installing a motor down the line.
The Jollyroger

The Cork is another simple rowboat design. This one trends away from the flat bottom plans that we have included thus far. Instead, it features a deeper, V-shaped hull that makes it better suited to more efficient rowing and easier maneuverability.
It can be rowed easily from either seating position and is durable enough to handle up to three average-sized adult passengers. The ends of the boat are identical, which allows for multi-directional rowing.
The list of materials required for this boat plan should cost you between $30 and $50, depending on your location and hardware costs there. The resulting build is lightweight enough for two people to be carried and also to be transported on top of a vehicle .
Inside the boat, the builders use aluminum tubing to secure the struts that hold the seats. This material choice keeps the overall weight of the boat down while still adding the necessary rigidity across the beam of the boat.

The Hobie Cat is one of the most iconic and recognizable small sailing vessels ever made. This Hobby Kat plan is your answer to building your own iconic sailboat without spending thousands of dollars.
Your finished boat will be able to handle speeds of up to 20 miles per hour. It will be a super fun vessel for windy days on the lake or bay. The builder was able to construct the hulls, decking, and rudder for this boat while spending little more than $200.
From there, they purchased and installed the mast, boom, sail, and rigging, which brought the total amount spent to roughly $650 (still much less than a name-brand Hobie!). Without the mast and sail, this boat weighs roughly 165 pounds and is constructed using primarily 3/16-inch marine plywood.
You can also elect to build your own mast, boom, and sail if you have the time and skills to do so.
Those elements are not included in this boat plan, but they do offer some recommendations for where to buy these components!
The HobbyKat

Named after the common seabird found around the world, the Tern is a lightweight and nimble sailboat with a 72 square foot base design. She is made for inland sailing and planes very well in moderate breezes.
The hull design also provides minimal water resistance and the small floor plan makes this boat easier for intermediate sailors to handle. Even though it offers a small footprint, this boat is sturdy enough to handle up to four adult passengers.
One of the best things about this boat plan is that it can be built almost entirely by using only common hand tools.
Of course, you can speed things up if you have power tools and you are skilled enough to use them correctly.
The Tern boat plan includes a 20-foot mast, but you can shorten that length if you desire. The plan includes a complete list of materials and step-by-step instructions on how to plane and assemble each element.

As you might expect from its name alone, the Falcon is an incredibly speedy sailboat for its size. It boasts a 14-foot centerboard and can handle two to four passengers, depending on its size and weight.
In tests of the original build, the creators claim that this boat out-distanced many Snipe and Comet sailing vessels as well as pacing evenly alongside longer 18-foot sailboats. When finished, your boat will have a six-foot beam and a total weight of roughly 475 pounds.
For the main framing components, they recommend using white oak and plywood will be the main material used in the hull construction. The hull features a V-shaped that was inspired by larger schooners.
The Falcon is best suited to sailing on bays, lakes, and wide rivers. It is also a boat plan with just under 120 square feet of deck space and it is a great build for amateur craftsmen and sailors.

The White Duck is a flat-bottomed rowboat with a total length of 13’6” and a four-foot beam. The cockpit is approximately 15 inches deep all the way around and this boat can handle up to five passengers while maintaining buoyancy and stability.
When fully constructed, it will weigh roughly 200 pounds, but the final weight will depend on the type of lumber you choose for your build. This boat plan features plywood planking over solid wooden frames.
The White Duck is built with a pointed bow that cuts nicely through the water. The flat stern of this boat design will make it easy to attach a small outboard motor with a maximum of six horsepower.
As you might expect from its name, this rowboat is a great option for duck hunting trips. That being said, it is a highly versatile craft that can also be used for pond fishing or casual rowing on your nearby lake.

The Sea Midge is one of the smallest rowboats on our list and it is ideally suited for one average-sized rower or two small paddlers. It is only about 8 feet in length and offers a 52-inch beam at its widest point.
The Midge’s small dimensions make her ideal for navigating narrower creeks and streams. With an approximate weight of 62 pounds, she is easy to maneuver on the water and can also be much more easily transported than some of the larger boat plans on our list
The Seamidge

The Zephyr is a compact and speedy dinghy sailboat that measures roughly 14 feet long and approximately five feet across. This boat style was originally developed for safely crossing the English Channel. This means it can stand up well in rough waters.
When finished, it is also light enough to be transported on a small trailer or on top of a larger vehicle.
The boat plan calls for using hemlock or fir for the framing and oak or Douglas fir for the keel and chines.

The Gypsy is a small cruising sailboat that is meant to be equipped with an outboard motor for powered locomotion. The original design resulted in an incredibly seaworthy vessel that logged more than 6,000 nautical miles in her lifetime.
It includes a comfortable cabin that makes it well-suited for multi-day sailing adventures. This boat plan includes improvements on the original design that will help you build an extremely durable and long-lasting sailboat.
The Gypsy boat design will help you construct a vessel that can handle a motor up to 25 horsepower so that you can enjoy cruising speeds of up to nine miles per hour.
While it may require a bit more of an investment in time and money, it will also help you produce one of the best boats you can build with a free boat plan!

PC Saint Dominic Catholic School
Finally, let’s talk about a crazy cardboard boat plan that you can build in less than a day. This is a great boat plan to bookmark for your next teambuilding project so that you can earn bragging rights with your coworkers.
The plan calls for using 1.5 sheets of cardboard. But you can use the remaining half sheet to build your own boat paddle if you want to get creative.
Triple-thick cardboard is best for this boat plan. But you can always double up thinner sheets if that is all you can find.
These plans include an easy-to-follow diagram for marking, cutting, and folding the cardboard sheets to create the hull of your boat. From there, it calls for using contact cement and construction adhesive to seal the edges and corners.
If you are looking to save a little money on this build you could also use duct tape and then wrap the entire design in plastic sheeting to provide waterproof qualities.
Overall, this build is one of the cheapest and easiest on our list. It is also a great project for hot summer camp days on the lake or river!

Photo by Alexandra Soloviova via Shutterstock
We hope that you now have a couple of free boat plans to inspire you to begin your own construction project.
Don’t hesitate to check out YouTube for some useful boat-building videos when you are getting into the nitty-gritty of these build processes!
Enjoyed 15 Free Boat Plans You Can Build This Week (with PDFs)? Share it with your friends so they too can follow the Kayakhelp journey.

Peter Salisbury
Pete is the Owner of KayakHelp.com. Born and raised in Cleveland, Ohio, he grew up kayaking, fishing, sailing, and partaking in outdoor adventures around the Great Lakes. When he’s not out on the water, you can find him skiing in the mountains, reading his favorite books, and spending time with his family.


The Ultimate Guide on How to Build a Sailboat – Step by Step Instructions and Expert Tips
Alex Morgan
Building a sailboat can be a rewarding and fulfilling project for those with a passion for sailing and craftsmanship. Whether you’re an experienced builder or a novice, constructing your own sailboat allows you to customize it to your specific needs and preferences. This comprehensive guide will take you through the step-by-step process of building a sailboat.
To start, gather the necessary tools and materials required for the construction. The specific tools needed may vary depending on the design and complexity of the sailboat. Basic tools such as measuring tape, saws, drills, and sandpaper are commonly used during the building process. specialized tools like a planer, router, and clamps may be required for more intricate details.
In terms of materials, you’ll need various types of wood for the hull, frames, and deck, as well as epoxy resin, fiberglass cloth, and marine-grade plywood. Other materials like stainless steel screws, bolts, and fittings will be needed for assembling and securing the different components of the sailboat.
Choosing the right sailboat design is a crucial step in the building process. Consider factors such as the intended use, sailing conditions, and your own level of experience. Factors like the boat’s size, stability, and performance characteristics should also be taken into account.
Before diving into the construction, it’s important to prepare a suitable building site. This includes having enough space to work on the boat, a clean and organized area, and proper ventilation. A sturdy workbench or support system is necessary for holding the boat’s components during assembly.
The hull of the sailboat is a fundamental part of the construction process. Follow a step-by-step process for constructing the sailboat hull, which involves shaping and assembling the frames, planking the hull with marine-grade plywood, and applying epoxy resin and fiberglass for added strength and durability.
Once the hull is completed, it’s time to install the sails and rigging. Properly attaching and rigging the sails is essential for optimal performance and maneuverability. This includes setting up the mast, boom, and other rigging components in accordance with the sailboat’s design specifications.
Next, focus on essential systems and finishing touches. Install electrical and plumbing systems as per your requirements, ensuring they are safe and efficient. Applying finishes and sealants to the boat’s exterior not only enhances its appearance but also protects it from the elements.
Before launching your sailboat, conduct safety checks to ensure everything is in proper working order. Inspect the hull, rigging, and other components for any potential issues. Once you have done all the necessary checks, follow tips for a successful sailboat launch, ensuring a smooth transition from construction to the open water.
By following this guide, you’ll be well-equipped to embark on the exciting journey of building your own sailboat. With careful planning, attention to detail, and patience, you’ll soon have a vessel that reflects your skills and passion for sailing.
Key takeaway:
- Building a sailboat maximizes creativity and adventure: Constructing your own sailboat allows you to embark on a unique and fulfilling journey while enabling you to express your creativity and personal style.
- Gathering the right tools and materials is crucial: Having the necessary tools and materials is essential for building a sailboat successfully. Ensure you have the appropriate tools and high-quality materials to construct a sturdy and reliable sailboat.
- Choosing the right sailboat design is vital: Consider various factors such as size, intended use, and sailing conditions when selecting a sailboat design. This will ensure you build a sailboat that meets your specific needs and provides optimal performance.
Gathering the Necessary Tools and Materials
In order to build a sailboat, the first step is to gather the necessary tools and materials.
- Start by researching the specific type of sailboat you want to build to determine the required tools and materials.
- Make a list of tools in good working condition, including a saw, hammer, drill, measuring tape, and screwdrivers.
- Create a material list that includes plywood, fiberglass, epoxy resin, screws, and nails . Calculate the quantities based on the sailboat plans.
- Find reliable suppliers and compare prices and quality for the materials.
- Set a budget for the project, taking into account the cost of both tools and materials.
- Plan the layout of your workspace for maximum efficiency and keep the tools and materials easily accessible and organized.
Throughout the building process, it is important to prioritize safety by wearing protective gear and following the guidelines for tool usage. If needed, seek assistance from experts or experienced builders. Building a sailboat may pose challenges but it is also a rewarding experience. So, enjoy the process and take satisfaction in creating something with your own hands.
What Tools Do You Need to Build a Sailboat?
To build a sailboat, you need the following tools:
1. Measuring tools: To accurately measure and mark dimensions, use a tape measure, ruler, and carpenter’s square.
2. Cutting tools: For cutting large pieces of wood, use a jigsaw or circular saw, and for intricate cuts, use a coping saw or handsaw.
3. Joinery tools: Assemble and join parts using a hammer, screwdriver, drills, and chisels.
4. Sanding tools: Smooth and shape wood surfaces using sandpaper or a power sander.
5. Clamping tools: Hold pieces together while working using clamps and a vise.
6. Safety equipment: Ensure your safety with gloves, safety glasses, and a dust mask.
In addition to these tools, you’ll need a well-ventilated workspace with a sturdy workbench. This is crucial for building a sailboat. It’s also advisable to have a set of plans or blueprints to guide you through the construction process.
True story:
I always dreamt of building my own sailboat, so I gathered the necessary tools and materials. With dedication and passion, I started constructing the hull, following the step-by-step process. It was challenging but rewarding. Installing the sails and rigging was exciting too. I could already envision the boat sailing on open water. After applying the finishing touches and conducting safety checks, it was time for the sailboat’s launch. With a mix of nerves and anticipation, I set the boat into the water. To my delight, it sailed smoothly, taking me on incredible adventures. Building a sailboat was a labor of love that fulfilled my lifelong dream of being a boat builder.
What Materials Are Required to Build a Sailboat?
Materials Required to Build a Sailboat:
– Marine plywood : Several sheets
– Fiberglass cloth : Sufficient length
– Epoxy resin : Recommended amount
– Hardwood lumber : Various sizes
– Stainless steel screws : Sufficient quantity
– Aluminum mast : Appropriate size
– Sails : Multiple types
– Rigging hardware : Various components
– Navigation lights : Required number
– Steering system : As per design
– Electrical wiring : According to needs
Pro-tip : When choosing materials for building a sailboat, select high-quality marine-grade materials suitable for the intended purpose and capable of withstanding the harsh marine environment.
Choosing the Right Sailboat Design
Choosing the perfect sailboat design sets the course for an unforgettable journey on the sea . Discover the key factors to consider in selecting the ideal sailboat design that suits your needs. Get ready to navigate through a sea of options and explore the world of sailboat aesthetics , performance , and practicality . So, prepare to steer your way into understanding the vital elements that influence the decision-making process when it comes to selecting the ultimate sailboat design .
Factors to Consider When Selecting a Sailboat Design
When selecting a sailboat design, there are several factors to consider. First and foremost is the intended use of the sailboat. You need to determine whether you plan to race , cruise , or day sail . It is important that the design aligns with your activities on the water.
Another crucial factor is the size of the sailboat. Consider your experience and crew when deciding on the sailboat size. Keep in mind that larger sailboats may require more crew members and expertise to handle.
It is essential to evaluate the stability of different sailboat designs. Factors such as keel type and hull shape can significantly impact the stability and seaworthiness of the sailboat.
Performance is another important consideration. Determine the level of performance you desire. Some designs prioritize speed and agility , while others focus on comfort and ease of handling .
Budget is also a significant factor to keep in mind. Take into account the price of owning and maintaining different sailboat designs, as well as ongoing expenses.
The construction material of the sailboat is yet another factor to consider. Options include fiberglass , wood , aluminum , and steel , each with its own advantages and considerations.
It is important to note that sailboats come in various designs, each with unique features catering to different sailing preferences and conditions.
Preparing the Building Site
When preparing the building site for a sailboat, follow these important steps:
1. Clear the area: Remove vegetation, debris, and obstructions to create a clean workspace.
2. Level the ground: Ensure the site is level and stable for a solid foundation.
3. Mark out the dimensions: Use measuring tools to accurately mark the sailboat’s length, width, and height on the ground.
4. Prepare the ground: Dig or fill the ground to create a smooth surface that meets the required dimensions.
5. Install boundary markers: Place stakes or markers around the perimeter of the building site to clearly define the boundaries and prevent encroachment.
6. Establish access points: Create pathways or access points to allow for easy movement of materials and equipment.
7. Ensure safety: Take necessary precautions such as putting up warning signs, setting up barriers, and having appropriate safety equipment on site.
By following these steps, you can effectively prepare the building site for constructing your sailboat.
What Are the Requirements for a Suitable Building Site?
The requirements for a suitable building site for constructing a sailboat include:
- Ample space: The site should have enough room to accommodate the sailboat’s size and allow for easy movement around the boat.
- Flat and level ground: The ground must be stable and even to prevent structural issues during construction.
- Protection from weather: The site should be sheltered from strong winds, rain, and direct sunlight to prevent material damage and ensure optimal working conditions.
- Access to utilities: Electricity and running water are necessary for powering tools, equipment, cleaning, and maintenance.
- Proper drainage: The site needs good drainage to prevent water accumulation, which can damage materials and hinder progress.
- Secure storage: A secure storage area is essential to protect tools, materials, and equipment from theft and damage.
- Accessibility: The site should be easily accessible for material delivery and transportation of the completed sailboat.
- Permits and regulations: Compliance with local building codes, permits, and regulations is necessary for safety and legal compliance throughout the construction process.
Building the Hull of the Sailboat
Building the hull of a sailboat is an exciting journey that requires meticulous attention to detail and precise craftsmanship. In this section, we will embark on a step-by-step process for constructing the sailboat hull, guiding you through the essential stages of this intricate endeavor. From selecting the right materials to shaping the structure, we’ll cover everything you need to know to create a sturdy and seaworthy foundation . So, grab your tools and let’s dive into the art of crafting the perfect sailboat hull.
Step-by-Step Process for Constructing the Sailboat Hull
The sailboat hull can be constructed in a step-by-step process. Here is how you can construct a strong and durable sailboat hull:
Step 1. Create the hull mold : Start by building a robust and long-lasting frame that accurately represents the shape and size of the hull.
Step 2. Prepare the mold surface: Apply a release agent to ensure that the hull does not stick to the mold.
Step 3. Lay fiberglass : Soak fiberglass cloth in epoxy resin and carefully place it on the mold, forming multiple layers to create a sturdy hull.
Step 4. Apply resin and cure: Distribute epoxy resin evenly across the entire surface in order to bond the layers together. Let it cure as per the instructions provided by the manufacturer.
Step 5. Sand and fair: Smooth out any imperfections on the hull, creating a sleek and flawless shape.
Step 6. Paint the hull: Enhance both appearance and protection by applying high-quality marine paint to the hull.
Step 7. Install hardware: Securely attach cleats, hatches, and fittings to prevent any leaks or damages.
By following these step-by-step instructions, you will be able to construct a sailboat hull that is strong, durable, and ready for the next stages of building your sailboat.
Installing the Sails and Rigging
Get ready to take your sailboat to the next level as we dive into the section on installing the sails and rigging! We’ll be revealing the secrets to properly attaching and rigging the sails for optimal performance. With expert insights and practical tips , you’ll soon be harnessing the wind like a pro. So, tighten your ropes and get ready to set sail on this exciting adventure of sailboat building!
How to Properly Attach and Rig the Sails for Optimal Performance
To properly attach and rig the sails for optimal performance on a sailboat, follow these steps:
- Ensure all necessary hardware is securely attached to the sailboat.
- Attach the halyard to the head of the sail and hoist it up the mast to the desired height.
- Secure the tack of the sail to the tack fitting at the bottom of the mast.
- Attach one end of the mainsheet to the boom and the other end to the traveler .
- Connect the jib sheets to the clew of the jib sail.
- Rig any additional sails according to manufacturer’s instructions.
- Check all lines and rigging for proper tension and alignment.
- Test the rigging and sails in different wind conditions for optimal performance.
- Regularly inspect and maintain the rigging and sails.
By following these steps, you can learn how to properly attach and rig the sails for optimal performance on your sailboat.
Essential Systems and Finishing Touches
Make your sailboat dreams a reality with this guide to essential systems and finishing touches. Discover the ins and outs of installing electrical and plumbing systems, ensuring your vessel is equipped with everything you need for a smooth sailing experience . Learn the art of applying finishes and sealants to protect your sailboat from the harsh marine environment. Get ready to set sail with confidence and style !
Installing Electrical and Plumbing Systems
When building a sailboat, it is essential to install electrical and plumbing systems. Here is a step-by-step process to guide you:
1. Plan the electrical and plumbing layout: Determine locations for electrical outlets, switches, and plumbing fixtures like sinks and toilets. Consider placement for batteries, freshwater tanks, and wastewater holding tanks.
2. Install electrical wiring: Start by installing the main electrical panel and run wires to various components and outlets. Use appropriate wiring sizes and ensure secure connections. Include safety features like circuit breakers and grounding.
3. Connect plumbing lines: Begin by installing freshwater supply lines and connecting them to the freshwater tank. Install plumbing fixtures like sinks and toilets, ensuring proper sealing and secure connections. Then, install the wastewater plumbing system, including drain lines and a holding tank.
4. Install electrical and plumbing components: This involves installing electrical outlets, switches, and lighting fixtures. Ensure proper wiring connections and test the electrical system for functionality. For plumbing, install faucets, showerheads, and toilets, ensuring proper water flow and drainage.
5. Test the systems: Once everything is installed, test the electrical and plumbing systems to ensure correct functioning. Check for leaks, proper water pressure, and operational lights and switches.
6. Make necessary adjustments: If any issues are found during testing, make the necessary adjustments and repairs to ensure optimal functioning of the systems.
7. Secure and protect the systems: Once everything is working correctly, secure and protect the electrical and plumbing systems by organizing wires and pipes, using appropriate insulation, and securing any loose components.
By following these steps, you can successfully install the electrical and plumbing systems in your sailboat, ensuring functionality and convenience on your sailing adventures.
Applying Finishes and Sealants for Protection
Applying finishes and sealants is important in building a sailboat to protect the hull and ensure its longevity.
Clean the hull: Make sure the hull is clean and free from debris or contaminants. Use a marine-friendly cleaner and rinse thoroughly.
Sand the hull: Lightly sand the hull using fine-grit sandpaper to create a smooth surface. This will help the finishes adhere better.
Choose the right finish: Select a high-quality marine-grade finish suitable for the hull material, such as varnish, paint, or gelcoat.
Apply the finish: Follow the manufacturer’s instructions. Apply thin, even coats using a brush or roller and allow proper drying time between coats.
Seal the hull: After applying finishes and sealants for protection, use a marine-grade sealant specifically designed for boat hulls to protect it from water penetration.
Apply multiple coats: Depending on the desired level of protection, it may be necessary to apply multiple coats of finish and sealant.
Inspect and maintain: Regularly inspect the finishes and sealants for signs of wear or damage. Touch up or reapply as needed to maintain optimal protection.
In history, boat builders recognized the importance of protecting the hulls from the sea’s harsh elements by applying finishes and sealants for protection. They used natural materials like tar, pitch, or wax to seal the wood and prevent waterlogging. Advancements in technology and materials have led to more durable finishes and sealants. Today, boat builders have access to marine-grade products designed to provide exceptional protection and enhance the longevity of sailboats. By applying finishes and sealants for protection with care and proper maintenance, sailors can ensure their sailboats remain in excellent condition for years of sailing adventures.
Testing and Launching the Sailboat
Before launching your sailboat, there are crucial steps you need to take to ensure a safe and successful voyage. In this section, we will dive into the necessary safety checks to conduct before setting sail. We will also provide valuable tips from seasoned sailors to ensure that your sailboat launch goes smoothly. So, buckle up and get ready to embark on your sailing adventure with confidence !
Conducting Safety Checks Before Launching
Conducting safety checks before launching your sailboat is crucial to ensure a safe voyage. To guarantee a smooth sailing experience, follow these steps:
1. Carefully inspect the hull of the sailboat for any damage or cracks. Be sure to check the seams and joints thoroughly.
2. Take the time to check the rigging , including the mast , shrouds , stays , and halyards , for signs of wear, fraying, or corrosion.
3. Hoist the sails and test them to ensure they are functioning properly. Make sure that all sail controls are in good condition and working as they should.
4. It is important to examine the electrical system of the sailboat. Check the battery and wiring for any signs of damage. Verify that all lights and instruments are functioning correctly.
5. Inspect the plumbing system , testing the freshwater system and searching for any leaks or clogs that may cause issues during your voyage.
6. Take the time to review all the necessary safety equipment . Ensure that everything is on board and in proper working order.
7. Confirm that all navigation aids , such as the compass , GPS , and any other navigation instruments, are functioning correctly.
8. It is crucial to verify the functioning of all communication devices . Take the time to test the radio or any other communication devices that you may have on board.
9. Inspect the fuel and engine carefully. Check the fuel level, oil levels, and overall engine condition. Test the engine to make sure it is running smoothly.
By conducting these necessary safety checks before launching your sailboat, you can minimize the risk of encountering any issues during your sailing experience.
Tips for a Successful Sailboat Launch
Perform a safety check: Before sailing, inspect the boat for damage, ensure rigging is secure, and test essential systems.
Check weather conditions: Choose a day with favorable weather for launching. Avoid high winds or rough seas.
Prepare a launch area: Clear a suitable pathway, remove obstacles, and ensure sufficient depth and space.
Use adequate support : Use sturdy boat trailers or launch ramps for stability during launch.
Properly position the boat: Center and balance the sailboat parallel to the water’s edge using dock lines or ropes.
Release the boat gradually: Release the boat steadily to prevent damage or injuries.
Monitor the boat’s movements: Check for leaks or instability and address issues immediately. Adjust sails and rigging if necessary.
Enjoy your sail: Follow boating safety guidelines and have a great time on the water.
A friend built a sailboat from scratch and successfully launched it by following these tips. The weather was perfect, and everything went smoothly. With the boat securely supported and positioned, they released it into the water, and it floated beautifully. They had a memorable experience sailing without any issues. By following these tips, they ensured a safe and enjoyable journey on their newly built sailboat.
Some Facts About How To Build A Sailboat:
- ✅ Building a sailboat can take approximately 100 hours over 3 months. (Source: Instructables)
- ✅ The cost of building a sailboat can amount to around $1,000. (Source: Instructables)
- ✅ The first step in building a sailboat involves cutting out the parts using boat building plans and plywood. (Source: Instructables)
- ✅ Assembling the hull of a sailboat involves stitching and gluing the panels together. (Source: Instructables)
- ✅ Fiberglassing the hull of a sailboat makes it waterproof and strong. (Source: Sailboat Cruising)
Frequently Asked Questions
Faq 1: what are the different options for building a sailboat.
There are three main options for building a sailboat. The first option is refurbishing an old boat, the second option is purchasing a hull with the deck moulding already fitted, and the third option is to build a boat from scratch.
FAQ 2: How long does it take to build a sailboat?
Building a sailboat takes approximately 100 hours over a span of 3 months.
FAQ 3: Can I learn the necessary skills for building a sailboat along the way?
Yes, you can learn the necessary skills for building a sailboat slowly and avoid making mistakes along the way.
FAQ 4: Should I hire a professional surveyor before refurbishing an old sailboat?
Yes, it is advisable to involve a professional surveyor before taking on the project of refurbishing an old sailboat.
FAQ 5: What materials are needed for building a sailboat?
The materials required for building a sailboat include oak plywood, epoxy resin, epoxy hardener, silica thickener, wood flour thickener, masking tape, Japanese pull-saw, table saw, router, sander, jigsaw, drill, wire cutter, C-clamps, mixing cups, fiberglass cloth, glue, screws, and fasteners.
FAQ 6: How much does it cost to build a sailboat?
The cost of building a sailboat is approximately $1,000, excluding any additional costs for customization or specific features.
About the author

Leave a Reply Cancel reply
Your email address will not be published. Required fields are marked *
Save my name, email, and website in this browser for the next time I comment.
Latest posts

The history of sailing – from ancient times to modern adventures
History of Sailing Sailing is a time-honored tradition that has evolved over millennia, from its humble beginnings as a means of transportation to a beloved modern-day recreational activity. The history of sailing is a fascinating journey that spans cultures and centuries, rich in innovation and adventure. In this article, we’ll explore the remarkable evolution of…

Sailing Solo: Adventures and Challenges of Single-Handed Sailing
Solo Sailing Sailing has always been a pursuit of freedom, adventure, and self-discovery. While sailing with a crew is a fantastic experience, there’s a unique allure to sailing solo – just you, the wind, and the open sea. Single-handed sailing, as it’s often called, is a journey of self-reliance, resilience, and the ultimate test of…

Sustainable Sailing: Eco-Friendly Practices on the boat
Eco Friendly Sailing Sailing is an exhilarating and timeless way to explore the beauty of the open water, but it’s important to remember that our oceans and environment need our protection. Sustainable sailing, which involves eco-friendly practices and mindful decision-making, allows sailors to enjoy their adventures while minimizing their impact on the environment. In this…

How to Build a Wood Sailboat

Introduction: How to Build a Wood Sailboat

I've been wanting to combine my two favorite hobbies - woodworking and sailing for a long time, so I thought I'd build a boat. It's got classic lines and looks so dazzling in the sunshine that people constantly stop me at the boat ramp to ask me about it. There's something unbelievably rewarding about building something like this from scratch. This is definitely a boat that is much better built than bought . Here's how I did it.
The boat takes about 100 hours to build. I did it over 3 months, working a little bit just about every day and full days when my schedule permitted.
It will take about $1,000 in total to build if you buy everything at full retail cost (not including tools you might need to buy), but you can spread that across the length of the project. For example, you only need to buy one $30 sheet of plywood at a time, take it home, draw out the parts (loft) that fit on just that sheet and cut them out. That will take a couple of hours right there. Some boating supply stores (chandleries) might let you setup an account which might give you a discount if you tell them you're building a boat.
All of the skills needed to build a sailboat can be learned slowly, one step at a time. For example, if you've never fiber-glassed plywood before, just practice on a small piece first to get your confidence up. This was my first boat build, so I did a lot of learn as you go . Not only am I going to show you the right way to successfully build your own sailboat, but I'm going to share with you the mistakes I made along the way to hopefully save you from repeating them.
The end result will be a very attractive little 8 foot long pram, that is easily made out of 4x8 sheets of plywood that is light enough to put in the back of a small pickup truck or roll down to the local lake on the optional dolly. Anything longer would require you to either make a scarf joint (which is a bit tricky) or buy longer sheets of plywood (which is considerably more expensive).
What you will need:
Boat building plans
8 panels of 1/4" oak plywood 4'x8'
Pencil, Sharpie, ruler, tape measure, yard stick, etc.
Long flexible straight edge
Box of 1" brad nails
2 gallons of epoxy resin
1 gallon of epoxy hardener - SLOW
1 quart silica thickener
5 quarts wood flour thickener
1" masking tape
Japanese pull-saw
Table saw (helps, but optional)
Round-over router bit
Flush trim router bit
Palm/random orbital sander
220 sanding discs
Combination square
Drill bit set
Drill bit extension
Basic hand tools
Small diameter wire or zip ties
Wire cutter
12 C-clamps - 3"
Mixing cups, mixing sticks, rubber/nitrile gloves
16' x 60" of 6oz fiberglass cloth
2" plastic spreader
Gallon of waterproof glue
Glue roller
Silicone bronze screws
Stainless steel fasteners
Small blocks
Gudgeon & pintle - dinghy size
Patience - large
Elbow grease - large
For more detailed explanations on each step and more specific info/reviews on the materials and parts used, check out my boat build blog: www.Midnight-Maker.com
Step 1: Cutting Out the Parts...

First, you'll need boat building plans. I purchased some very nice ones from a popular boat building website because I had a specific style in mind to build, a "pram". It's a Norwegian design with lots of buoyancy in the bow and building a pointy boat is a little more difficult. There are a bunch of free boat building plans (search "dinghy") online. Also, I wanted my boat parts to fit in a standard (read cheap) 4'x8' sheet of plywood. It also had to be light enough for me to load/unload/move myself. This boat weighs in at about 70 pounds. When on the custom dolly I built, it's very easy to move from the parking lot to the lake.
Next, you'll need to draw out the parts of the boat full-sized onto the plywood (lofting). I actually did this step on hardboard/masonite because I wanted to make templates of all the parts in case I ever wanted to build another one.
This step requires you to be very meticulous. Carefully transfer the measurements (offsets). They may or may not look correct because it's very non-intuitive to look at curved boat parts that are laying flat. Some parts actually bend the opposite way you think they should. To make the curves, I nailed a bunch of 1" brads into the panel and used a long, flexible straight edge (yard stick, etc.) bent to follow the curve, then I traced the curve with pencil/Sharpie. Once I removed the brads, I had perfectly smooth curves. Keep in mind that with the side panels that are symmetrical to both sides of the boat, only draw out one version and cut two stacked sheets at a time. This ensures the boat will not be lop-sided. Make sure to immobilize the two sheets together with screws outside of the boat parts or use double-sided tape/clamps, etc. to keep the parts registered properly.
Using a Japanese pull-saw allows you to control the cuts very carefully and it can follow the graceful curves. They cut on the pull stroke which means they're very easy to control. Make sure you leave a bit of your cut line, meaning cut just outside the line. This allows you a bit of a safety margin and you can always sand to the line to sweeten it up. This is where the elbow grease really kicks in. It takes hours to cut out the hull panels by hand, but it's worth it. I tried cutting the first part out with the jigsaw and it wandered all over the place and quickly cut inside the line before I knew it. Also, a jig saw blade can lean to one side which could mean two panels might not be the exact same shape. Using hand tools is a classic way to do woodworking and is a very gratifying process. With hand tools, things happen slow enough for you to be in total control, whereas power tools can quickly do unexpected damage. With the understanding that you're building a classic boat, using hand tools wherever possible is part of the philosophy.
The plans I bought were in metric and called for 6mm (1/4") and 9mm (3/8") plywood, but I wanted to make everything out of 1/4" plywood so the thicker parts in the plans were glued together with two layers of 1/4" (so at 1/2" they were a bit thicker than designed). I actually liked this because it made the boat feel sturdier and of course it was cheaper that way. The trade-off was that the boat would be a bit heavier.
For any of the parts that need to be doubled-up/laminated (e.g. the transoms), now is a good time to do that. Make sure you use "waterproof" glue instead of "weatherproof" glue like I did...
Spread a thin layer of glue over one of the "bad" sides (plywood usually has a good side and a bad side, glue bad sides together so good sides show on both outside faces), making sure it's completely covered (I used a special glue roller), then carefully place the other half on top. Align all of the edges together, then clamp them in place. Now put heavy things carefully on top to press the parts together. The glue should be dry in about 6 hours.
NOTE: It's considerably easier and safer to do any woodworking processes to the parts before you assemble the boat. This way, you can safely clamp pieces to the work bench and cut out handle holes, etc. Since my boat is a "lapstrake" design, I had to route a rabbet (groove located on the edge) carefully on the bottom edge of each side panel. This creates a shoulder for the parts to sit on, positively locating them while you're stitching the panels together. Likewise, the grab handles in the transoms are much easier to cut out before putting the boat together.
Also keep in mind that any mistake will be considerably more painful the further you are along in the build. For example, if I biff cutting out the grab handle holes while they're just loose pieces rather than when they're a permanent part of the boat, it's much easier to recover - just make another transom. If you had to patch a hole in the boat, it would be difficult and possibly never look perfect. No pressure...
Step 2: Assembling the Hull...

Once you have the bottom and sides cut out, you can start to "stitch and glue" the hull together. This is a technique used usually for smaller boats to be able to pull the hull form together without the need to build a frame or mold (which can take almost as long and as much wood as the boat itself).
I built a gauge stick to make sure my holes were perfectly spaced at 4" at 1/2" in from the plywood edge. It was 1" wide so either edge was the required 1/2" from the centerline. I worked my way down one side of each of each mated seam and drilled all those holes at once while the panels could lay flat on the bench. Make sure to use a backer block to prevent tear out on the back side, even with such a small drill bit.
With one mating panel drilled with a 1/16" drill bit, hold the mating panel in it's relative position. I used some spare twine to wrangle my panels into the proper orientation as I was marking them. Make a pencil mark where the mating hole should be, remove the pre-drilled panel and drill the second set of holes 1/2" in from the edge. This makes sure there's enough strength to hold the boat together.
The first pass on the stitches is just to get the hull together structurally. You can always go back and make the stitches fancier/tighter and tweak the position of the panels.
The stitches go from the inside out. Cut 6" lengths of wire and bend them into long, narrow U's that are the width of the distance between the holes. Stick the ends through the holes and carefully twist the tails together on the outside of the hull, making sure not to damage the plywood. If you're using zip ties, then the holes you drill will need to be bigger and you'll have to start on the outside, go in, turn around, then back out, then "zip".
Make sure your panels' rabbet shoulders are resting securely on the mating panel and carefully tighten all the stitches. For my boat, once I had two panels stitched to the bottom panel on each side, it was time to attach the transoms (ends). Once all of the exterior parts are stitched together, you should have something that looks like a boat. It will be a little rickety at this stage, but that's okay.
NOTE: In the photos I took of my build, you'll notice that the transom doublers (reinforcers) aren't in place. That was because I was following the instruction manual, but I think that was a mistake, so I highly recommend laminating (gluing) the doublers to the transoms before you stitch the boat together.
Step 3: Reinforcing the Hull Joints...

Now that the hull is stitched together, flip it over upside down. You'll be surprised at how stiff it is, considering how difficult it was to wrangle all those panels into position. Be careful, there's lots of poky wire ends sticking out all over the place.
I used a technique called "tabbing", meaning I made small, structural tabs from thickened epoxy that fit between the stitches, then I removed the stitches and made one long, larger fillet to connect the hull panels together.
Make sure your panels are perfectly aligned and tightened. I used a nipper to lop off most of the tails so they wouldn't get in the way, but that left very sharp spikes.
Make sure your boat is square. Take diagonal measurements from corner to corner, make sure the boat parts are parallel to each other, etc. because if there's a twist in your boat, the next step will make it permanent, which will affect the boat's performance.
Now mix up a batch of epoxy and silica thickener according to the manufacturer's directions (meaning each type of epoxy has a different resin to hardener ratio) until it's between the consistency of thick ketchup, but runnier than peanut butter (make sure to mix the 2 parts of epoxy together first very well before adding a thickener). Too thick and it won't fill the void, too thin and it'll run down inside the boat. Both are bad. I used a small syringe to inject the mix into the V intersection between the panels and checked underneath/inside to see if there were any runs.
Once the epoxy has partially set, use a glove wet with denatured alcohol to smooth out the "tabs" so they fit inside the V groove and don't extend above the intersection between the panels. This will give you good practice for the seams that will show on the finished boat. Be careful of the wire spikes.
Repeat this process for every seam on the hull. Let it cure overnight.
Once the tabs have cured, carefully remove the stitches. If the wire seems to be epoxied permanently to the hull, heat the wire with a lighter. That will soften the epoxy enough to pull the wire out. Be careful not to scorch the boat (you don't want a Viking funeral). Now repeat the thickened epoxy process for each overlap, except this time each seam will need to be one long, smooth joint. Let it cure overnight. This goes a long way in making the boat hull structural.
Step 4: Fiberglassing the Hull...

Now that you've got a permanent hull shape, it's time to make it waterproof and rugged. Fiberglass and resin over plywood is a tried and true Do It Yourself boat building technique which makes it strong and light.
Mask off the bottom panel and roll out your fiberglass cloth. Smooth the cloth out very carefully so as not to snag or tweak the fibers' orientation. Mix up an unthickened batch of epoxy (it will be the consistency of syrup). Starting at the stern, pour a small puddle of epoxy and spread it out nice and thin. You should be able to squeeze most of the epoxy out of the cloth, leaving only saturated cloth with no dry spots (which will appear white) but the weave should still be showing (meaning no extra epoxy is pooling). You should easily be able to see the wood grain through the cloth now.
Let the epoxy partially cure and using a razor, slice the dry fiberglass cloth away on the taped seam. Then remove the masking tape. Let the epoxy cure overnight.
Flip the hull over and mix up a batch of epoxy that is the consistency of peanut butter. I masked off the joint, but this step is optional, but keep in mind that it will be visible if you plan on finishing the interior bright (varnished wood). It's not as critical if you're painting the interior. With a plastic spreader, carefully make a large radius transition (fillet) between the bottom panel and the first side panel (garboard). Remove the masking tape when the epoxy mixture is partially cured and carefully scrape/wipe any unwanted mixture. It's much easier to remove now than having to sand it all off later. At this point, it's also a good time to fillet the transoms to the sides using 3/4" radius tabs between stitches and 1" finished fillets after you've removed the stitches. Let the fillets cure overnight.
Now, repeat the entire fiberglassing process on the inside. Except instead of just doing the bottom panel, make sure both the bottom and the garboard are fiberglassed. This is basically the waterline of the boat. The fillet should allow the fiberglass cloth to smoothly make the bend between boards. Remove the excess cloth when partially cured and let sit overnight. Some people fiberglass up onto the transom at this stage which will make the boat stronger, but that means you have to have already filleted the transoms to the bottom.
Step 5: Installing Interior Parts...

The bulkheads get stitched in place just like the panels. They will make the already stiff (and much heavier boat) completely structurally sound and push/pull the sides into their final shape. Then make 3/4" "tab" fillets between the stitches to lock them in place, remove the stitches and make long, smooth 1" fillets. The smaller fillets will get covered by the larger fillets. I used two different modified plastic spreaders to do this step. Each spreader was cut with a box knife and filed/sanded into its final shape.
While you're doing the previous steps, if you're in a time crunch, go ahead and build the daggerboard trunk. It's made of numerous parts that are pre-coated with a couple layers of unthickened epoxy, then glued together with silica-thickened epoxy. This makes it strong and waterproof as it will be below the waterline so must be completely waterproof.
The daggerboard trunk is the most important part of the boat, especially if you're making a sailboat version (this boat can easily just be used as a rowboat). Not only does it support the center seat (thwart), but it has to transfer all of the force from the sail to the water and if you run the boat aground, it takes all the shock loading from the daggerboard.
The daggerboard gets filleted into place like everything else. Make sure it's perfectly on the centerline of the boat as that will affect its sailing characteristics.
Next, let's make the daggerboard slot in the center thwart. I set up a straight edge with a spiral upcutting router bit. Make sure to enlarge the slots at the end of the center thwart so that it can fit around the fillets of the center bulkhead. Now is the time to ease the edges of the center thwart because you'll be sitting on it a lot, so it needs to be comfortable. Because it's so thin, I only routed the top edge of the center thwart that shows and just hand sanded the edge underneath (it's very problematic to use a round-over bit on the second side of a thin board). Paint all of the thwarts with three coats of unthickened epoxy, especially the undersides. Once the woodworking is done, the thwart can be epoxied into place with peanut butter (or you can jump to cutting the daggerboard slot in the bottom of the hull). Make sure the thwart fits snugly in place. Drop dollops of peanut butter on the top edges of the center bulkhead and daggerboard case and spread it out evenly (make sure none gets inside the slot to interfere with the daggerboard). Firmly seat the thwart (pun intended) into the goop and weight it down. Let it cure overnight.
While you've making sawdust, cut out the mast hole (partner) in the forward thwart by drilling holes in the four corners (for the square mast we're going to make), then cut out the sides, file it smooth, then round over the top edge with the router.
Any time after the bulkhead thwart fillets have cured, you can seal the airtank chambers. Paint the bottom, sides, inside of the bulkhead and transom up to the level where the thwart will be.
Step 6: Rail & Sailboat Parts...

There are several processes in this boat building instructable that can be done concurrently. While you're waiting for the epoxy on one part to cure, you can be doing woodworking or epoxying another part. This step illustrates that point. While you're waiting for the epoxy on the rub rail (outwale) to cure, you can be fabricating the sailboat accessories (e.g. daggerboard, rudder, tiller, spars, etc.).
In order for the outwale to be thick/strong enough to be effective, you'll need to laminate it in two strips on each side. You can't bend a single piece that thick around the curvature of the hull without either breaking the wood or softening it by steaming it which is a complicated process.
Take a strip that's half the final thickness and a little longer than the boat edge (I made mine a bit beefier), mix up some peanut butter with the colloidal silica and carefully spread it on the inside of the strip. Starting at the stern, clamp it in place, perfectly align it with the top edge of the plywood. Now you have a long, springy lever to bend the wood strip along the compound curve. It dips both vertically (shear), and bows out at the widest part of the boat (beam), then back in toward the bow. At least every foot, clamp it as you go, moving forward. More is better. Toward the bow, the strip will get stiffer as it gets shorter. Once clamped in place, scrape/wipe off all the squeeze-out. It's much easier to remove now than after it hardens. Let it sit overnight. You'll have to repeat this three more times, meaning this step takes four days (if you're using "slow" epoxy hardener).
During those four days that you're dealing with the outwale, you can make major progress on the sailboat parts. They're completely separate from the hull. If you're just making a rowboat, then you can skip making these parts.
The daggerboard and rudder are cut out and laminated. Then a bevel is ground onto the leading and trailing edges to make it slice through the water more efficiently. Then they're covered in layers of epoxy. The mast step is assembled. This has to be very strong because all of the force of the sail is transmitted to the boat through the mast step and the mast is a very long lever arm. The rudder cheek plates and tiller also have to be assembled similarly to the daggerboard case.
NOTE: Whenever there's a hole to be drilled into any part of the boat, you must take additional steps to make sure the water doesn't penetrate and damage the wood. The correct procedure is to drill an over-sized hole, completely fill that hole with epoxy (I usually put a piece of masking tape on the back side to act as a dam), then once the epoxy cures, re-drill in the center of the epoxy plug the correct hole size. That makes each hole in the boat possibly a 2 day process, so plan accordingly. You can also use 5 minute epoxy to knock out a bunch of holes quickly, but be careful, they're not kidding. This stuff gets rock hard very quickly and will permanently glue anything touching. This is exactly how you drill the hole for the pivot point for the rudder/cheek plate assembly. If the pin is 1/4", then drill 1/2" hole and fill that with epoxy. Now the 1/4" hole will fit nicely in the center and be completely waterproof.
Since all the parts need several coats of unthickened epoxy and they just about all have holes in them, I hung them up with some twine and painted them on all sides, one layer at a time, for several days. Make sure the rudder doesn't get too thick to fit inside the cheek plates.
Step 7: Making the Spars...

More sailboat parts you can make while waiting for other parts to cure are the spars, the structural parts that support the sail. The mast is another glue up. I used 3 - 1x3's of hemlock. A relatively soft wood, but with a nice tight grain with no knots. A mast would break at a knot, regardless of how strong the wood is. Using the waterproof glue, align the pieces as perfectly as you can then clamp up the assembly and let dry overnight. Then run it through a table saw to get the final dimensions. Use a router and a round-over bit to ease the edges. Cut to length and sand the sharp corners. It should fit easily, but snugly into the forward thwart.
The boom (bottom of sail) is a little more complicated. Cut out the gooseneck (boom pivot point) by using a hole saw first, making sure to clamp it securely to the workbench, then cut out the profile. This gets attached to another piece of 1x3 hemlock, after it's been cut to length and the edges have been rounded over.
The yard (top of sail) is easy. Just cut to length and round over the edges. Drill and fill any holes in the spars at this time. You'll need at least one hole on each end to lash the sail grommets to.
This time, everything gets covered with several coats of varnish, epoxy is not necessary. The varnish protects the wood from water and UV damage.
The reason we had to make at least the mast at this point is because we'll need it in the next step to establish the location of the mast step.
Step 8: Finishing Up the Interior & Exterior...

Once the outwales are successfully attached, trim them flush with the face of the transom(s). While you're at it, use a flush cut saw (with no sawtooth offset to mar the wood) to trim the sides flush with the transom. This will show you how well your injected silica mix worked earlier. Now you're ready to install the mast step.
The mast step must be precisely located on the floor (sole) of the boat to give the mast the proper angle (rake). This is very important because it directly affects the boat's ability to sail upwind. Using your mast, insert it into the forward thwart (partner) and into the mast step. With the mast at a 3° angle (mostly vertical but with a small, yet noticeable and graceful tilt toward the stern of the boat), trace the location of the mast step. Use a combination square to make sure it's perfectly aligned side to side (athwartship). You can now set the mast aside. Drill and fill holes in the bottom of the boat so that you can securely screw the mast step from the outside of the hull. The mast base must also be epoxied to the sole with peanut butter. After it's screwed into place but before the epoxy cures, make sure to test fit the mast again and verify the rake angle is correct. It would be a little messy at this point if you had to tweak it, but at least you wouldn't have to cut it off.
Now comes the most unpleasant part of the whole build. On your hands and knees, make a 1" radius fillet on the underside of every part in the boat. I didn't worry about making these pretty, just structural and water tight (these create the flotation tanks that keep the boat from sinking if you capsize). Let that cure overnight.
Next is the scariest part of the build, making the slot in the hull for the daggerboard. Using a drill bit extension, from the inside of the boat, reach down through the daggerboard case and drill a hole at each end of the slot through the bottom of the boat (make sure to use a backer board). Drill a couple holes in between, then take a jigsaw and connect the dots. This weakens the hull enough so that the router won't tear out any extra wood. Note, this step can easily be done prior to affixing the center thwart. Using a flush trim/laminate router bit, let the bearing run around the inside of the daggerboard case. This will make the hole in the hull perfectly match the slot. This is important because you don't want a shoulder on the inside for the daggerboard to hit and you don't want to damage the waterproof lining of the case. Last, ease the sharp edge of the daggerboard slot with the router and a small radius round-over bit.
The skeg must be cut to fit the curve of the hull (rocker), then using silicone bronze screws, attach it to the hull using the same drill and fill/peanut butter techniques. Make sure to snap a chalk line on the centerline of the boat for reference. Then make a 1" fillet where it meets the hull which will support the skeg and make it strong. The skeg keeps the boat tracking straight in the water. I optionally used some fiberglass cloth to cover the skeg and overlap onto the bottom to make the entire assembly stronger and more waterproof. The skeg will take the brunt of the abuse when launching, beaching, loading and unloading, etc. I also installed a stainless steel rubstrake on the aft end of the skeg with this in mind. In wooden boat building, silicone bronze screws are often used because they won't corrode when encapsulated like stainless steel screws can.
Install the skids parallel to the skeg. These are solid pieces of hardwood because they will also take a lot of abuse when the boat is sitting on shore, protecting the thin hull from rocks, etc. They get installed the same way as the skeg, although it's a little tough to bend the wood along the rocker. Scrape off the excess peanut butter once they're screwed in place.
I also installed the optional outboard motor pad at this point because I plan to use an electric trolling motor on the back to quietly putter around the lake in the evenings to relax with the family after work.
That should be the last parts that go into making the boat!
Step 9: Finishing the Hull...

Now comes the last dash to the finish line. One of the more tedious steps is that you now have to sand the entire boat. I actually built the entire boat inside, but for the sanding stage, I took her outside. Several hours of sanding all of the fillets nice and smooth. Everything will show in the finished product whether you paint the boat or leave it "bright" (unpainted). If you've been careful about cleaning up the peanut butter as you go, you should be able to sand the boat with mostly 220 grit. Be careful not to sand through the thin veneer of the plywood. After the sanding is done (make sure to use a dust mask), vacuum the entire boat and then wipe it down with a tack cloth to remove any dust. I also reversed the hose on the shop vac and used it to blow the sawdust off since I was outside.
Next, you must coat the entire interior and exterior with 3-4 coats of unthickened epoxy. This makes the entire boat waterproof. It will also give you an idea of how beautiful the wood will look when varnished. This is why a lot of boat builders decide to leave their boats bright so the beauty of the wood shows through.
Mix up 1 cup batches of unthickened epoxy and pour out large puddles onto the surface. Taking a foam roller, distribute the epoxy in a smooth coat. Now take a wide foam brush and gently smooth (tip) the rolled out surface. This should remove any lap marks or bubbles. Move along to the next area, making sure to not touch the wet parts. Also, make sure no dust or bugs get on your finish or it'll mean even more sanding later.
Start with the exterior first. It'll be much easier to get good by practicing on the convex surfaces. The interior is more tricky because you want to prevent sags and pooling by only applying very thin coats.
Make sure to check with the manufacturer's directions during this step in case you have to deal with "blushing", a thin layer that can sometimes form on the surface of epoxy when it cures. This could cause your layers to not stick to each other. If your epoxy does blush, it's easy to just wipe the entire boat down with a rag soaked in acetone after each coat has cured. Some people sand between coats of epoxy. This is how you would make an extremely smooth/shiny finish, so if you want your boat to be museum quality, invest the effort. I'm planning on banging my boat around so opted out of an extreme, fancy, mirror finish.
I was originally going to paint the exterior of the hull, which would require priming and painting, but I'm leaving it bright for the time being. The good news is that you can always paint later if you change your mind, but if you paint it and change your mind, it's tough to go back. There aren't a lot of pics of this step, which took a couple of days because there wasn't much visible progress after that first coat went on. At this point, any surface that's not painted should be varnished using the same "roll and tip" method as the epoxy, with the optional sanding between coats. Note that epoxy has no UV resistance, so to keep your boat from getting sunburned, you must either paint or varnish every surface. Giving a boat a "museum quality" paint and/or varnish finish can literally take as long as building the boat.
Step 10: Making the Sail...

Another step you can do while other parts are curing is make the sail. This particular design uses a "lug" sail, a classic looking sail for small boats with wood masts. It increases the sail area (therefore the force generated by the wind) without it having to be as tall as a modern sailboat mast made of aluminum. There is a kit from an online sailmaking company that you can get for a reasonable price. The Dacron cloth panels are all cut out by a CNC machine, so they fit perfectly together. I used a regular, domestic sewing machine, not an industrial one. The only time I had trouble was when sewing through all 7 layers at the reinforcement patches. When I got to those parts, I had to manually push down on the foot of the sewing machine with a flat-bladed screwdriver (minus) to help push the needle through the Dacron. We jokingly call Philips head screwdrivers "plus".
The panels/parts all come labeled. The directions were a bit confusing because they suggest you make sub-assemblies after the fact to make wrangling the large sail easier but they mention it after you've already sewn the large panels together. It's important to understand what parts go together while the panels are still small and more manageable. For example, the batten pockets are tricky enough to build on a single panel, much less the finished sail. Building the sail was about as difficult for me as building the boat, but it was worth it.
The lug sail gets reinforcement patches on all four corners where you attach it to the spars (bend), and there's also a reefing point for when the wind starts to pick up (freshen). Modern sails have three corners (Marconi rig).
I opted for the less expensive white Dacron sail kit, but there's also a classic red (tanbark) colored kit that's $100 more expensive. Before I sewed a single stitch, I carefully traced every part of the sail kit onto painter's tarp poly film so I can always use the templates to build another sail, all I need to do is buy the tanbark cloth.
Step 11: Rigging Your Sailboat...

This seems to be the trickiest part for most people, probably because there are numerous ways it can be successfully rigged, depending on your experience, preferences or criteria. It's confusing because you have to know what the finished setup will look like in your mind while you're staring at a pile of ropes. I chose a setup that allows the most room in the cockpit for a full-sized adult, so the mainsheet is led forward of the skipper's position. This keeps the skipper's attention forward so they're looking where they're going. I have another boat where the mainsheet is behind the skipper and it takes some practice getting used to.
The lines I made up (rope becomes a line when you give it a job description) were the halyard (hauls the sail up), the mainsheet (adjusts the angle of the sail to the wind = trim) and a traveler bridle (where the mainsheet attaches to the boat). I got fancy and spliced all my ends, but you can just as well use a bowline knot.
I installed a cheek block at the top of the mast instead of the large diameter hole in the directions. I wanted the halyard to run as smoothly as possible when setting the sail. Then I installed a pair of cleats at the base of the mast, one for the halyard and one for the downhaul (cunningham). With both of these lines pulling in opposite directions, it locks the sail in place, flat, so it effectivley acts like a wing. The main halyard attaches to the gaff with a snap onto a padeye. This allows easy on/easy off when rigging at the boat ramp. I also used a small loop (parrel) around the mast and through the eye to keep the gaff located close to the mast. I looped the downhaul over the boom and down to the cleat to try to keep the gooseneck from twisting. Note, except for the blocks, just about all of the hardware used on rigging a boat this size can come in stainless steel or brass/bronze, depending on the look you're going for. If you plan on installing oarlocks to row the boat, this decision becomes even more important to the final look of the boat.
For the mainsheet, I made a short bridle between the handles on the transom with a small eye tied in the center. This allows a place for the snap on the end of the mainsheet to attach to. I could've just as easily allowed the snap to slide, which would give the bridle the function of a traveler, but would affect its pointing ability (sail upwind). The mainsheet is then run to a block on the end of the boom, then to another block in the middle of the boom. This leaves the main cockpit area unobstructed with running rigging. Make sure your mainsheet is long enough for your boom to swing forward of 90° to the boat, with enough to still come back to the cockpit for the skipper to control. A stop knot at the end of the mainsheet will keep the mainsheet from getting away from you and give you something to grip.
The rudder pivot hardware (gudgeons and pintles) must be installed perfectly vertical and on the exact centerline of the boat so that she will sail well. Drill and fill the necessary holes for this hardware. Be careful with the spacing. It's designed to be easily installed and uninstalled while underway.
With this particular rigging layout, when under sail, the skipper must constantly keep the mainsheet in hand, which is a good idea anyway for safety reasons (if you get hit by a gust of wind = puff, you won't get blown over = capsize). The tension on the mainsheet is easily manageable for any size skipper. On larger boats, the mainsheet is held by a fiddle block with a cam cleat, which is not necessary for a boat this size. With that being said, a possible future upgrade would be to install a block and a camcleat somewhere on the centerline of the boat so that more advanced sailors wouldn't need to constantly have to oppose the tension on the mainsheet. Of course the trade-off would be the hardware would probably be somewhere you might want to sit.
Another upgrade I figured out after actually taking her sailing would be to rig up a bungee/shock cord system that will hold the daggerboard both in an up and down position. With the current setup, the centerboard is held down by gravity and must be pulled out of the slot when beaching.
Step 12: Go SAILING!

Because I wanted to be able to go sailing by myself if needed, I made a dolly out of 2x4's and large pneumatic tires (which makes the dolly float). The dolly fits securely between the center and aft thwarts when driving out to the lake. The sides on the dolly lock against the skids on the bottom of the boat so it can't twist. Roll the sail up with the spars and wrap it with the main halyard. At the designed length, the mast doesn't fit inside the boat, but it seems a bit long, so some people have cut the mast down enough so that it fits inside the boat.
Out at the lake, unload the boat, slide the dolly underneath and you're ready to roll down to the ramp. At the launch, roll the boat out into the water until it floats off the dolly, toss the dolly off to the side out of everybody else's way. Drop the daggerboard into the slot and install the rudder assembly. Facing into the wind (important), stick the mast into the receiver hole (partner), tie off the downhaul (cunningham) and hoist the sail until the downhaul is tight, then cleat off the main halyard. Reave the mainsheet (run the line through the blocks) and you're ready to go sailing.
I've found that this boat sails very well. The lug sail makes it very easy to sail upwind (weather helm), it's a little more tender for a large adult, more so than a boat with a hard chine, like an El Toro/Optimist but it's a lot more graceful looking. The payload is very reasonable for a boat this size. My wife and son can easily (and safely) go sailing with me and I don't even need anyone's help to get it rigged and launched. All in all, this is one of the best projects I've every built. I hope you too can discover the joy of building your own boat and then take her sailing. Remember, in sailing, the wind is free, but nothing else is...
This is my very first Instructable after many years of referencing this excellent site to build numerous cool projects (you should see my next post). Anyway, I hope you enjoy it and please feel free to ask any questions you may have and I'll do my best to answer them. I'm planning on building a larger boat in the near future so stay tuned...

Participated in the On a Budget Contest

Participated in the Wood Contest

Recommendations

Build-A-Tool Contest

Text Contest

Remake It - Autodesk Design & Make - Student Contest

RETURN TO HOME PAGE
- About Modern Wooden Boats
- Tips & tricks
- What’s inside a boat plan ?
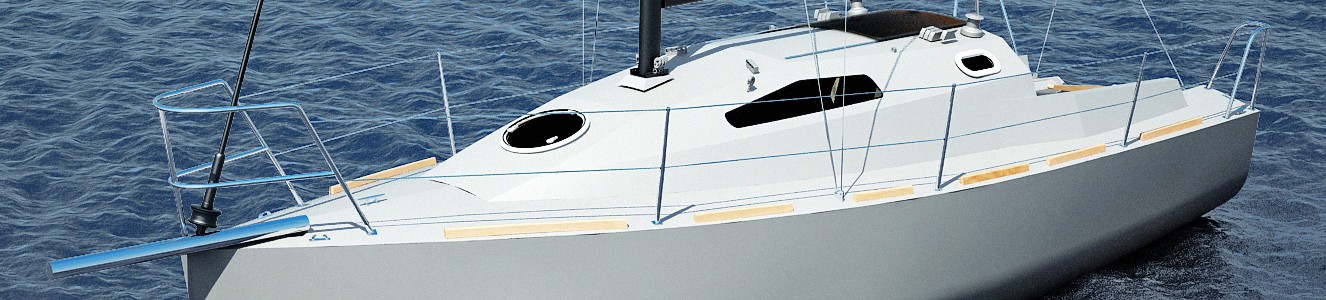
Hirundo 750
Hirundo is trailerable, with her 2.5 meters of maximum beam and lifting keel; she can be considered on the heavy edge of a trailerable sailboat.

IDEA19 is a 6 m fast paced trailerable sailboat; she can be built by homebuilders in both GRP and wood-plywood & epoxy resin.

Saltaspiaggia
A mimimal coastal cruiser, easy and cheap to build (plywood and epoxy and “stitch and glue” system ) and to sail; the perfect on budget solution to escape from crowded beach
“Saltaspiaggia”, can be translated as “Beach-hopper”; this sailboat is a minimal coastal cruiser, a sailboat to hop from one beach to another with a small group of friends, and to be garage-built by a homebuilder with plywood and epoxy. This was my goal when I decide to develop this plan, which had to be: easy to build and rig , quite cheap, and produce a small sturdy trailerable sailboat enough roomy to allow a small family of four to travel for a week holiday.
I decided to stretch the “stitch & glue ” plywood and epoxy system somehow to its limit; a 6,20 m multichined hull was the result, to be built by an homebuilder as a dinghy “on steroids”, keeping things easy, in plywood sheets and epoxy resins starting from a very detailed set of drawings.
Hull is quite simple, with a good balance between interiors and cockpit volume, a shallow draft lifting keel, with a decent amount of lead ballast poured in the lifting keel; sail area is the low range, since I was more interested in a small light manageable sailboat than in absolute performances; I choose a somehow peculiar cutter configurations, with a mainsail, a small olympic jib and a bigger genoa/MPS to be used in light conditions or downwind/reaching; bow sails are quite small so they can be furled with a cheap dinghy furler , avoiding expensive cruising boat furler; a second option in the plans is the classical gaff rig mainsail, which keeps the centre of effort of sailplan even lower, increasing stability in windy conditions.
Plans are, as always, richly detailed; this time I decided to add a drawing about mast building, to allow an even cheaper realizations (alloy masts are quite expensive, in this case you can built your own wooden mast by plans). Engine is a 5-8 HP long shaft outboard fitted on transom, aside from a transom hung rudder, simple and effective.

By continuing to use the site, you agree to the use of cookies. more information Accept
The cookie settings on this website are set to "allow cookies" to give you the best browsing experience possible. If you continue to use this website without changing your cookie settings or you click "Accept" below then you are consenting to this.
Great Projects
Build a small sailboat free plans.

These plans are for a small 15 foot knockabout sailboat.
I like these plans for their ease. Building a smaller boat is a lot more attainable than a cabin cruiser! And these plans get right to the specifics of building. From the plans:
ANY SAILBOAT fancier will like "Tramp," the trim, 15-ft. knockabout that's so easy to build in plywood. The first operation is to cut the stem, transom and side planks and assemble the forms.
Use casein or waterproof glue under the butt strap joining the side planks together. Forms can be made of almost any scrap material on hand. If you are a good enough mechanic, they can be dispensed with and correctly beveled frames made to their exact shape can be placed permanently in the boat. Screw-fasten the oak frame at sides and bottom on the inside of the transom. Then notch out the bottom of the frame to receive the keel batten...
The transom is placed last and must be beveled so that the side planks fit tightly against the cleats and the transom edge. Be sure to place white lead and a thin thread of cotton between planks and stem and transom prior to joining them together...
Related Plans

All Our Vintage Projects Categories
Vintage projects.
All rights reserved, 2020 [email protected] Copyright, Safety and Legal Information Terms of Use - Privacy Policy Site Map
Discussion Forum
Ask questions, get answers, share stories in our discussion forum!

How to Build a Boat
Classic boat plans from a 1937 issue of Popular Mechanics , updated for the 21st century.

It was a long time since anyone in my family had built a boat. The last was my Uncle Paul. He was a shipbuilder who learned his trade beginning at age 14 in Hamburg, Germany. Every morning, the boy rowed from the family's dock out across the shipping lanes of the Elbe River, which flows into the North Sea.
The trip to the shipyard where he was apprenticed took an hour and a half, longer in winter, when there was fog and floating ice on the water. After three years, Paul received a journeyman's certificate and a berth aboard a gigantic four-masted windjammer named Passat—"trade wind" in English. That was in the 1920s, before the fascists confiscated his family's own small shipyard and the Berendsohns left for America.
A few months ago, I decided to try my hand at the ancestral trade. I've built everything from houses to a blacksmith's forge , but there's no more evocative project than a boat, at least to me. Since before Austronesians first gazed across the Pacific, wooden vessels have stood for craftsmanship and the drive to explore. I sifted through PM's archives looking for a classic design and eventually settled on a 10-foot dinghy from our May 1937 issue . It looked elegant, yet simple enough to build on a pair of sawhorses.
It's been many years since my Uncle Paul was around to lend advice, so I ran the drawings past Timo White, a boatbuilder at Tuckerton Seaport, a small maritime museum on the New Jersey coast. It turned out that Timo was in the midst of restoring a surfboard built from plans in the July 1937 issue of PM. (It was a big year for seafaring projects, I guess.)
He confirmed that the dinghy was a good candidate for a first-time builder and agreed to lend a hand if needed.
Shipyard in the Driveway

On a wintry early spring morning I set out for Willard Brothers Woodcutters, a sawmill and lumber dealer in Trenton, N.J. You can spend hours there, roaming stacks of delicious-looking walnut, cherry and oak, some of the boards as wide as your arm is long. I bought red oak for the Sea Scout's frames (that was the name of the craft in the plans, and I chose to keep it) and a 2-inch-thick slab of white oak for the wedge-shaped stem at the bow.
Back home, I started making a racket feeding planks through a table saw. My skills were creaky--I've spent too much time in recent years fixing stuff and not enough building--but over a few days my old confidence returned. The Sea Scout began to take form.
Most boats begin with the frames, the ribs that provide structure to the hull. I roughed them into shape, along with the stem and the gracefully shaped stern wall, or transom, which I cut from ¾-inch plywood. Then I braced it all to a building board--which is nothing more than a 2 x 10 with a chalk line marked down the center.

⚠️ To simplify the project, I omitted the mast and centerboard. Instead, I built the Sea Scout, named after the craft in the original article, to be rowed or powered by an outboard motor. She works well in either configuration. You can find the original plans and materials list here.
The boat's skeleton was in place, but each member still needed to be precisely beveled before I could secure the curved planks of the hull. The next step was to clamp thin strips of wood, called battens, to the frame to stand in for the planks, so I could measure and mark all those angles. Then, I took the parts off the board and finished shaping them.
Often, the weather confined me to the garage, but when the sun emerged I worked in the driveway. If you want to get to know the neighbors, start building a boat. Linda from next door asked whether the craft would be sailed, rowed or powered by an outboard motor. Others wondered where I would go with it, how I'd get it there and what I would name it. A truck driver from Tulnoy Lumber, dropping off some marine plywood, approached respectfully. "This is beautiful," he said, with an old-fashioned New York accent as broad as the hand he ran over the frames.
Anatomy of a Boat

Working the Plank

I don't know how Uncle Paul felt about it, but boatbuilding can be acutely frustrating. The bane of my weekends proved to be a small bronze screw. A No. 6 Frearson flat-head, to be exact. Like most modern DIYers, I'd been spoiled by drywall screws and other aggressive fasteners that practically plow into the lumber. Even using a specialized, tapered drill bit and a waxlike lubricant with the unlikely name of Akempucky, I managed to wreck screws by the dozen. The head on one would strip a moment before the screw was fully seated, while another would shear off on the last eighth of a turn, leaving me with a shiny Frearson-head penny.
Timo had tried to downplay the arcana I'd face--"It's more like house carpentry than fine-furniture building," he had said--but I still found myself floundering on occasion. One challenge was that the 1937 article was more an overview than a detailed set of plans. And, though it pains me to find fault with my forebears at Popular Mechanics, the sketch contained suspicious discrepancies. Timo helped me recalibrate some of the dimensions midway through the project—and I had to trim several pieces after they were assembled.
The biggest hurdle came when it was time to plank the hull. The classic way is to bend strips of solid wood to the frames. I'd chosen marine-grade fir plywood instead to save time, but now I was barely able to force the hull's 14-inch sheets into place. There was no way the half-inch plywood I'd planned for the bottom was going to work.
Timo advised me to switch to a special, wafer-thin marine-grade plywood and plank the bottom in two layers. He came swooping in one Thursday morning to show me the technique. He stepped out of his truck with a broad smile, and a block plane in each hand, and my mood lifted. He politely took a sighting down the chine logs where we'd attach the bottom, and spent a few minutes planing them to the last measure of precision. Then we got to work with staples, glue and screws--and in a couple of hours the project went from a plywood flower bed to a small craft with sensuous compound curves.
It was satisfying, but my mistakes still showed in details like the placement of screws and the shape of the stem. "You know what they say," Timo told me. "Putty and paint makes a boat what it ain't." I got out my paintbrushes.
Maiden Voyage

We launched the boat at Tuckerton Seaport on a cool, overcast day that felt more like September than June. Down at the dock, Timo produced a can of Amstel Light in lieu of champagne. "Go ahead," he said, "pour it over the bow." I popped it open and emptied the beer over the paint. "I christen thee Sea Scout," I said. Then we slid the little craft off the dock and into the water.
You might think a feeling of triumph came over me. Not so. The Sea Scout looked very small, almost helpless, as she sat bobbing at the end of the painter, the little rope that Timo had threaded across the bow. I felt humbled. A phrase from the Book of Psalms flashed in my mind: "They that go down to the sea in ships, that do business on great waters."
I wasn't aiming for any great waters myself. I eased off the dock and into the boat. Timo handed me the oars. Awkwardly, I drew the handles back, just above my hips. The craft slid forward gracefully, almost like she was on ice. As Timo watched, I braced the left oar down in the water and swept the surface with the right. The Sea Scout pivoted neatly, unexpectedly elegant and spry.
If the oars were a kick, you can imagine the thrill I felt when I mounted the 2.5-hp Mercury Marine outboard on the transom. It's a clean-running four-stroke engine, compact yet almost zippy on a boat this small. I gave the engine full throttle and cut some nice straight lines and a pleasingly tight curve complete with a crisp little wake.
With the afternoon gone, my first voyage was complete. In the end, I decided to donate the boat and engine to Tuckerton Seaport. Frankly, I needed the space in my garage and driveway: The Sea Scout was a good first foray into wooden boatbuilding, but I knew I could do better—and I'm already sifting through plans.
The Sea Scout, a Decade Later

Ask anybody who’s ever built a boat, and they’ll tell you one thing about it: you’re not the same after you’ve built one. And that goes for me, too. The little boat, which I built back in 2009, shaped me as much—or perhaps more—than I shaped it.
The Sea Scout project brought a flood of mail from our readers, some of whom had built the boat or knew someone who did. One woman still had the boat that her father built. She sent a picture of it and recalled the many pleasant hours she spent with her dad as her father taught her how to sail in it. She kindly offered to donate the boat to us, thinking that perhaps we could put it in our lobby. I wish I could have taken her up on the offer.
When you build a boat, you take your place in the long line of craftspeople—professional and amateurs alike—who have plied that trade and learned about the unique burden of building a craft upon whom someone’s safety and enjoyment will depend. Building a boat is humbling, you remember every mistake you made building the thing as it bobs up and down, and waves wash over its bow or crash into it from the side.
You feel it shudder, but it doesn’t give way as you look over the side at the murky depths. And afterward, you look at every boat with a more knowing eye, a greater respect...and you wonder if you could build it.

Roy Berendsohn has worked for more than 25 years at Popular Mechanics, where he has written on carpentry, masonry, painting, plumbing, electrical, woodworking, blacksmithing, welding, lawn care, chainsaw use, and outdoor power equipment. When he’s not working on his own house, he volunteers with Sovereign Grace Church doing home repair for families in rural, suburban and urban locations throughout central and southern New Jersey.

.css-cuqpxl:before{padding-right:0.3125rem;content:'//';display:inline;} Pop Mech Pro .css-xtujxj:before{padding-left:0.3125rem;content:'//';display:inline;}

Skunk Works Unveils Stealthy Tanker Design

Rebuilding the Maze

A Groundbreaking Discovery For Light-Speed Travel

Russia Is Now Using Golf Carts in Combat

The Bradley Gets a New Iron Fist

South Africa Wins Fight for 'Indian Titanic' Loot

Can the Army’s New Rifle Take on Russian Armor?

Overhaul Your Shop

The Source of All Consciousness May Be Black Holes

F-22s are Flocking to This Island in the Pacific

Special Ops Gunship Shreds “Fishing Boat”

Boat Plans, Patterns and Supplies For the Amateur Boat Builder!
- Boat Plans Catalog – 300 Boats You Can Build!
- Boatbuilding Supplies & Epoxy
- Inboard Hardware
- Electrical Design Plans
- Books, DVD’s & Audio
- Boat Trailer Plans
- Raptor® Fastenings & Tools
- Glen-L RV Plans
- Gift Certificates
- Boatbuilder Blogs
- Boatbuilder Galleries
- Newsletter Archives
- Customer Photos Archives
- Where Do I Start…
- About Our Plans & Kits
- Boatbuilder Forum
- Boatbuilder Gatherings
- Boatbuilding Methods
- Featured Design on TV’s NCIS
- Our Boats in Action
Boat Plans Catalog – 300 Boats You Can Build!
“Building boats from Glen-L plans is simple and straight forward…I honestly have never run into a problem, unless it was of my own making. Follow Glen-L’s plans and you can’t go wrong.” Dr. Norman Cove, Bahamas
“Boat building is one of the few pursuits where utilization of the end product is as rewarding as its construction.” Marc Bourassa, Wilmington, MA (built the Power Skiff and 2 Kidyaks)
With Glen-L proven plans & kits, building your own boat can be a reality. Choose one of the categories below, click on a boat for the listing of items available plus more info and photos. Simple as that… get started today!
If you know the boat design name, use our Alphabetical Design Index
Design Characteristics – Boat drawing with all parts listed.
Order a Hard-copy of the Catalog
Click here for more information about our plans and kits.
One Response to Boat Plans Catalog – 300 Boats You Can Build!
[…] am building a 16′ wooden bass boat using the Glen-L design and it is about 80% complete. I am now getting ready to outfit the interior, build the helm, […]
Connect with us:
Customer builds.

Useful Information
- Cost & Time To Build
- Links & Suppliers
- Online Glossary
- Support Knowledge Base
- Teleseminars
- Wood & Plywood
Building Links
- How Fast Does It Go?
- Install A Jet Ski Motor
- Modifying The Motorwell
- Sailboat Hardware Notes
Glen L Marine Design
- About Glen L
- How To Place an Order
- Privacy Policy
Copyright Info.
Copyright 2006-2022 by Glen L Marine Designs. All rights reserved.
Mailing Address: 826 East Park Ave. Port Townsend, WA 98368
Web design by Big Guns Marketing , LLC.
I’m Arch Davis – I learned boatbuilding and design in New Zealand in the 1970s. I have been helping people to build beautiful wooden boats since 1988. You can see a few of them by clicking on Picture Gallery . My approach to design is to put into your hands the means to use modern materials – marine plywood and epoxy resin – to build a truly lovely boat with classic lines.
I believe that a boat should be beautiful, not just by virtue of her lines, but also in her construction. No material makes this possible like wood. My aim is to take advantage of wood’s unique strengths, in a structure that captivates the eye. I want you to feel that you are always doing good work in building one of these boats.

You’ll see that I have a small collection of designs. That is because I understand your need for clear, comprehensible, detailed plans and instructions. I put a lot of time into my drawings, building manuals and DVDs. I also spend a lot of time helping people through their projects, on the phone or by e-mail. I really am here to help!

If you see something that you like in my collection, please feel free to contact me with any questions. I am available on the phone at 207-930-9873, or email me at [email protected] .
Wooden Boat Plans and Boat Kits by Arch Davis

Grace's Tender - More than just a tender, this little dinghy is a fine vessel in her own right. She is a pleasure to row, and sprightly under her simple sailing rig - a great boat for youngsters to mess about in. Bay Pilot 18 - an 18 ft pilothouse cruiser for outboard power. Laughing Gull - 16 ft self-bailing sailing/rowing skiff. Ace 14 - 14 ft performance daysailer Penobscot 13 - 13 ft little sister to Penobscot 14. Penobscot 14 - 14 ft glued lapstrake sailing/rowing skiff. Penobscot 17 - big sister to the Penobscot 14 Sand Dollar - 11 ft sailing/rowing skiff. Jack Tar - 26 ft plywood lobster boat design Jiffy 9-7 - suitable for rowing or a small outboard motor Jiffy 22 - outboard powered cabin skiff Jiffv V-22 - vee-bottom sister of the Jiffy 22
About My Boat Kits
I also have epoxy kits and plywood packages for all my designs, plus sails, rigging, and numerous other items. Here's my daughter, Grace, setting up the frames for a Grace's Tender kit.

Please call or write to me at: Arch Davis Design 37 Doak Road Belfast, Maine 04915 Tel:207-930-9873
If you would like to receive a newsletter from Arch Davis Design, send me an e-mail at [email protected]

Oz Goose Sailboat, easy to Build. Excellent Family or Club Sailing Fun
The Oz Goose Sailboat is not the prettiest sailing dinghy in the universe but it works very very well on the water. Check the video below.
Also it is very affordable. Build from local materials, sail very well in all conditions. And carries one to three adults or two adults and a couple of kids.
Cost to build in advanced economies is around $1500 to 2000. In emerging economies $800 to 1000. Less if you make your own sail (included in the plan). Though there are professionally made sails of reasonable cost from reallysimplesails.com delivered internationally .
Plans for the Oz Goose are $40 – click on the “ Buy Plans ” item in the menu above. The plans are very detailed and step by step with illustrations and photos.
I have a question about the Oz Goose
Our Oz Goose Sailboat Facebook Group is very useful to ask questions:
- Good Suppliers
- Building questions
- Sailing advice
Teach or Sail for Fun with up to 3 adults or 2 Adults with Kids
The numbers of Oz Geese are growing worldwide with boats in many countries. But the big area of growth is in the Philippines. Over 100 boats built in the past 5 years. Hundreds of people introduced to sailing. And the formation of sailing clubs in the North, South and Central regions. Because the Oz Goose is affordable and does not require expensive materials.
We also have Oz Goose groups forming in the USA and Hungary. Fleets building in the USA.
The 11 Geese in the photo here cost the same as importing a single ILCA Laser Dinghy. That is about 20 people introduced to sailing for the price of getting one person sailing in developing nations.
With the Detailed Plans and Instructional Videos you can build your own Oz Goose Sailboat
All the photos in this section are people who have not built a boat before.
There are six sheets of plywood in the Oz Goose.
There are Oz Goose Sailboat Kits Available, but it is easy to make your own from the plan
See “KITS” in the main menu above.
There are Precut kits available for the Oz Goose Sailboat in North America, the Philippines, UK, France, Hungary, South Africa and Australia – see menu above. We can often organise an experienced builder to cut a kit for you in other countries.
Kit specifications differ from country to country. From simply plywood, to having some of the gluing done (as below). But talk to the kit supplier about what you want (see menu). Kit suppliers can also supply sails, rigging, glue, fibreglass.
The Instant Yacht Club Concept.
We have undertaken several projects to help a group of friends set up or revive a yacht club. Through building a group of Oz Geese. Affordable and getting people on the water.
The Albay Yacht Club in the Philippines is one of the oldest yacht clubs in the region (1907) but had not operated for decades. Two years ago in the middle of Covid there were 12 boats built by individual builders from kits.
Since then the Albay Yacht Club has sailing events three times a week. It now holds the record of the biggest fleet of boats of the same type ever in the Philippines. The highly visibility of sailing influences the whole community involving people of all generations and all economic groups. Below is one of their weekday sailing events.
Our other project three years ago was working with the St Joseph’s College Maritime College cadets in Butuan on the top of the South Island.
These talented students were taught by a small group of more experienced builders on how to build 10 Oz Geese. They went on to build another 10 boats for a total fleet of 20 boat.
As they are training to be seafarers. Sailing with the Geeese for the last three years they now know a great deal about boat handling, navigation, boat repair. Not to mention such a love for the sea that they would rather go sailing on the weekends rather than go home.
There is often the question – can a blunt boat like the Oz Goose handle waves and rough weather?
Well – Yes it can. The Oz Goose Sailboat has a record of being the boat that goes out when the other boats are scared of the rough weather. It is very well behaved and always goes where you steer it. No matter if there a waves or the boat is well heeled.
With one person aboard it pays to steer around the biggest wave peaks. But with two on the boat it just smashes the waves out of the way.
If it does capsize it comes up again with no water in the cockpit. And it comes up easily with one person pulling down on the end of the centreboard. No acrobatics.
Not worried by waves
The blue boat top middle has just hit a wave. But if you click on the image you can see from the wake that the boat is still moving fast. The middle bottom is the goose coming in after a sudden wind increase with adult coach and two adult learners aboard.
Plans $40 from Our Agents Worldwide
OZ Goose Sailboat for Affordable Sailing for everyone including developing Nations.
LIST of WOODEN BOAT PLANS – By Michael Storer
Plywood boat plans and wooden canoe plans. sailing dinghy . power . row . paddle . overnight, a boat building course in a book.
Click on an image for more information about our inexpensive, highly detailed boat plans and wooden canoe plans
Viola 14 Sailing Canoe Boat Plan
A sailing canoe to make dinghy sailors happy – 75lbs and for a simple boat, beautiful beyond belief – visit page.
Viola 14 Sailing Canoe is fun and exciting. But easier than a sailing dinghy to transport and store.
Canoe performance and Dinghy stability. 14ft – 75 pounds (34kg)
Viola is extremely stable allowing the crew to stand up and step and unstep the lug rig mast while on the water. Try that in a symmetric paddling canoe hullform! If righted correctly she is almost dry after capsize.
Three Sailing rigs with two piece masts 4.7 and 6.0sqm full batten rigs. 6.3m balance lug with three reefs for distance sailing. 75lb hull. Four sheets 4mm plywood.
More about the Viola 14 Sailing Canoe Plan here
Kits For Viola 14 Canoe Europe – Viola 14 Sailing Canoe Precut Plywood and Timber Kits Americas – Viola 14 Saling Canoe Precut Plywood and Timber Kits
16ft Kombi Sail and Paddle Canoe Plan
A 50/50 Sail and Paddle Canoe for one or two with more stabililty for sailing – visit page
The Kombi Canoe is a development of our recent sailing canoes to bring paddling ability up equal to the sailing ability.
Great for families as it can be used as a pure paddling canoe, but also sail well with one or two adults aboard.
More about the Kombi Sail and Paddle Canoe here.
NEW Plan – Mini Outriggers for Adding stability to sailing canoes and small dinghies
The Mini Outriggers are to add stability to a sailing canoe or small dinghy and aid stability to reduce the risk of capsize on other relatively slender boats.
They are set above the water to allow a sailing canoe or narrow dinghy to be sailed normally .
More about the Mini Outriggers here.
Taal Stand Up Paddleboard in Plywood
Both speed and stability at the same time.
A beautiful plywood Stand Up Paddleboard designed for distance paddling.
The user feels the stability, the water thinks it is a low drag pintail. 12ft
We created a board that hits the numbers for a good canoe or rowboat. Less wetted surface with a stable midsection and excellent weight carrying.
12ft and Stable for beginners but with the low drag of a kayak/pintail type hull (see the stern photos).
More about the Taal Touring Stand Up Paddleboard Plan here
Goat Island Skiff Sail Boat Plan
Simple, modern performance and famous worldwide.
Justifiably famous.
Simple to build but light, fast, pretty. Fast with 1 to 4 adults
Rows and Motors and will sail rings around other character boats. 15.8ft
More information about the Goat Island Skiff Plan Facebook Group for asking questions about the Goat Island Skiff
Quick Canoe 155 – build in 2 weekends
Very simple plywood canoe that handles well and looks right.
Quick DIY wooden canoe that works better than most flat-bottomed canoes and many fibreglass ones.
Even looks good on the beach. 15.5ft
First one took the builder 4 1/2 hours to get on the water – but most take 2 weekends. Half the weight of many fibreglass canoes. Lighter than most plastic. 55lbs from big store plywood. Another took 5 1/2 hours .
It has been designed to be as easy to build as possible while keeping most of the qualities of a nice paddling wooden canoe.
In particular the ability to track – excellent first boat plan. Click here for a comparison between our fast and our classic paddling canoe plans
More Information about the plywood Quick Canoe Plan
Eureka Canoe – Classic Plywood Canoe Plan
Light and lovely to paddle. simple plywood boat plan.
Light on the land, Prettiest Plywood or wooden Canoes anywhere. 15.5ft
Excellent distance touring boats.
15’6″, simple construction for a wooden canoe. 32 – 45lbs (15 to 20kg)
Click here for a comparison between our paddling canoe plans.
Click here for more information about the Eureka Plywood Canoe
Quick Canoe Electric Cargo Canoe Plan
Wooden cargo canoe for electric trolling motor 34lbs thrust.
5 to 6mph using a 34lb thrust Minn Kota or other electric trolling motors. DIY plywood canoe for fishing and roof racking.
Keeps the simplicity and low materials cost of the Quick Canoe Family. 15.5ft
Cartop transport. Very detailed Wooden Canoe Plans.
Click here for more information about the Plywood Quick Canoe Electric
Oz Goose Light Family and Club Sail Boat Plan
Low-cost family sailing dinghy, regattas and club training and learn to sail.
The Oz Goose is a small boat that is super easy to build.
Cruising or teaching with three adults or excellent club racing performance sailing with 1 or 2 in the boat. 12ft
The famous line is we can build 10 of these in the Philippines for the price of importing a single Laser sailboat. Boat speeds are very matched for excellent tactical racing when not heading off for a family picnic with two adults and a bunch of kids aboard
For training, the goose will carry an instructor and two adults to sail with good sensitivity and speed. In stronger winds, we commonly see downwind speeds of 10 to 13knots and sometimes much more.
Also, visit the Oz Goose Group on Facebook More information about the Plywood Oz Goose – see the website
“BETH” Sailing Canoe – Elegant plywood boat plan
Simple, brilliant performance – one person cartop – sailing canoe portability.
A touch of the 1870s but fast about as much fun as is possible on a plywood boat.
Yawl Rig with speed – a wooden canoe that can scare the Lasers at your local club .
Racing dinghy experience recommended!
A small boat for amateur boat building that is light enough for one person to roofrack 70lbs plywood canoe hull. Sailing Canoe boat plan
Click here for more about the plywood BETH Sailing Canoe Plan
Drop-in sail Rig Plan for Canoes and Kayaks
Convert a canoe or dinghy into a serious sailboat.
Convert most Kayaks or Canoes into an INSTANT SAILBOAT.
Everything removes as one unit except for the mast step
Also fits some rowing dinghies that are small or narrow.
Very cheap beginners plan.
Read more about the Drop-In Sailing Rig Boat Plan
Drop in Outrigger Canoe conversion Plan
Convert canoe, kayak or dinghy to a fast sailboat trimaran with amas..
Create a paddle or sailing outrigger canoe from a fibreglass or wooden Canoe or Kayak.
Even an elderly Grumman!
Convert your old canoe into an awesome sailing machine or fishing or diving platform.
Each component is under 10 pounds and everything removes cleanly from the boat apart from 4 small fittings and a mast step.
These Amas and crossbeams work for fibreglass and wooden canoes and dinghies, Fibreglass, Aluminium and some plastic canoes.
Performance sailing (see the video on the plan page ) or as a stable fishing platform or to make a super quick sailing multihull.
If you buy the plywood boat plan for the outriggers there is a free supplement available to set it up for sailing. Very cheap plan for a big boost in performance.
Find out how to convert your canoe, kayak or dinghy to a fast sailing outrigger canoe
Handy Punt – simple fishing punt Boat plan
Light cartop load, simple to build and stable – ideal first plywood boat plan.
Outboard motored Punts are the simplest plywood boats.
Good performance, easy construction, stable fishing platforms.
And lightweight for cartopping on roof racks.
An easy first boat plan for first-time boatbuilders.
6 to 8hp – 10 in some regions
Click here to find out more Outboard Punt Boat Plan
Russki Wave Ski, Surf Ski, Sit Down Paddleboard Boat Plan
Easy to build sit down paddleboard from two sheets ply.
Simple plywood waveski or paddleboard from two sheets of plywood.
Paint it and keep it on the car roof ready for use after work.
Small light boats usually are used more frequently than complicated and expensive boats.
Find out more about the Russki Plywood Wave Ski Plan
15 1/2 ft Storer Rowing Skiff Plan
Easy pretty plywood rowing skiff plan for oar.
Simple lightweight rowing skiff for one person and maybe a passenger based on the Goat Island Skiff.
Or Adult and a couple of kids.
Pretty and quick rowing boat on the water.
Simple lightweight rowing skiff for one person and maybe a passenger or a couple of kids. Based on the Goat Island Skiff. I used to get enquiries about using the Goat Island Skiff sailboat hull for rowing. It does row well but blows around too much.
This is much, much better. Pretty and quick rowing boat on the water.
Find out more about the plywood Rowboat Plan
Dayboat/Launches Boat Plan Bundle 23 plus 27ft (7/8.4m) Venezia
Boat plans for two simple prefabricated cruisers for low power outboard in one package – 23 and 27ft.
Picnic boat, party boat, river-cruiser, camp aboard, mini home-away-from-home.
Cuts through river and lake chop with zero bouncing and pitching.
Pack includes 23 and 27ft Dayboat versions in one plan pack includes Venezia below.
Simple plywood construction. 10 or 15hp 4-stroke for 8 to 10 knots. Venezia and Dayboat Launch Boat Plan Package
More about the 23ft Plywood Dayboat/Launch Boat Plan
“Venezia” 27ft trailerable canal boat
Stretched version of 23ft – both included in the plan above.
An 8.2m (27ft) boat for gentle cruising in rivers and canals.
Great appearance, sleeping accom., separate toilet – your layout.
10 to 15hp 4-stroke. 2 wooden cruising motor boat plans for the price of one – Venezia and Dayboat Launch Boat Plan Package
Read more about the 27ft Venezia cruiser canal boat plan
TC35 Riverboat – Prefab, Economical Liveaboard for Two
Minimal liveaboard plywood boat 35ft.
Very economical, near wakeless cruising motorboat.
Light on the gas and light on building materials.
Revised wooden boat plan for an extremely economical, efficient low horsepower riverboat.
35ft. 1 x 15hp or 2 x 10/15hp. Simple Prefab Plywood Construction.
Find out more about the TC35 River Cruiser Plywood boat plan.
OZ RACER – 8ft Sailing Dinghies.
Smaller versions of the 12ft oz goose sailing dinghy – 8ft for easier storage..
12ft Oz Goose for Capacity and Performance
- Same easy construction
- Same Sail and Foils
- Much higher performance
- Much larger capacity
OzRacer RV 8ft – General purpose version
OzRacer RV is the same small boat hull but with more space in the cockpit and is a slightly simpler build.
4 sheets plywood.
These Boat plans are a modern boatbuilding course in a book. Capacity 1 adult and one child or maybe 2 adults
Find out more about the OzRacer RV
OZ RACER Mk2 8ft – Race Version
OzRacer Mk 2 has a centreboard for more performance but a bit less room for extra crew.
Three sheets plywood. Simple Plywood Boat Plans. Capacity 1 adult and one child or maybe 2 adults
Find out more
Free plans Oars and Single Paddle & Double paddles.
Simplified paddles and oars based on classic designs – free plan.
- Free Plans for Wooden Oars
- Single Paddles
- Double Paddles.
I didn’t want to charge extra for nice paddles to go with our nice wooden Canoe plans
Download Free Oar and Paddle Plans from this page.
Tips and Tricks for Boatbuilding, Woodwork, Use of epoxy.
CLICK HERE for many helpful articles about the selection of materials, boatbuilding and boat repair techniques. All to help home boatbuilders.
The Master list of Articles we have written to explain and help out home boatbuilders
Blog Articles about a whole range of design, building, sailing technique articles.
- Skerry Scale Model
- Wherry Scale Model
- Dory Scale Model
- Bevin's Skiff Scale Model Kit
- Autumn Leaves
- Lake Union Swift
Faering Cruiser
- Madness Proa
Outrigger Junior
- Skerry Raid
Waterlust Sailing Canoe
- Whitby Pilot Gig
- Rhode Runner Runabout
- Wharram Mana 24
- CLC Teardrop Camper
- Assembled Teardrop Camper
- Recreational
- Performance
- Light Touring
- Traditional Canoes
- Decked Canoes
- Lighthouse Tender Peapod
Jimmy Skiff II
- Tenderly Dinghy
Northeaster Dory
Southwester dory.
- Passagemaker Dinghies
- Eastport Prams
- Sailing Dinghies
- Kayak-Canoe Sailrig
- Pacific Proas
- Independence R/C Model
- Peeler Skiff
- Rhode Runner
- Cocktail Class Racer
- Oxford Shell II
- Chester Yawl
- Fixed Seat Rowing
- Sliding Seat Rowing
- Annapolis Wherry Tandem
- Expedition Wherry
- Annapolis Wherry
- Bevin Skiff
- Cradle Boat
- Stand-Up Paddleboards
- Prone Paddleboards
- Surf Kayaks
- Grain Surfboards
- W17 Trimaran
- Gemini & Telstar Centerboards
- Kayak Plans
- Canoe Plans
- Sailboat Plans
- Rowboat Plans
- Powerboat Plans
- Paddleboard Plans
- Downloadable Plans
- Stitch & Glue Designs
- Strip-Planked Designs
- Hybrid Designs
- Night Herons
- Other Strippers
- Microbootleggers
- Mill Creek Hybrid
- Shearwater Hybrids
- Wood Duck Hybrids
- Chesapeakes
- Shearwaters
- Mill Creeks
- Petrel Play SG
- Night Heron SG
- Sit On Top Kayak
- Arctic Hawk
- Overstock & Closeouts
- Boatbuilding Deals
- New Plans Sets
- New Supplies
- T-Shirts & Caps
- Scale Model Kits
- Modeling Tools
- Gift Certificates
- Small Projects
- Gift Ideas for Sailors
- Gift Ideas for SUPers
- Gift Ideas for Rowers
- Gift Ideas for Paddlers
- Gift Ideas for Campers
- Safety Gear
- NRS Camping Gear
- NRS Boating Gear
- Rowing Gear
- Paddling Gear
- Seats & Foam
- Rope & Cordage
- Sailing Gear
- Custom Boat Covers
- Transport & Storage
- Footbraces & Rudders
- MALONE Auto Racks
- THULE Roof Racks
- TRAILEX Trailers
- HARKEN Hardware
- WERNER Paddles
- Customize Your Boat
- Boatbuilding Tools
- Finishing Supplies
- Paint & Varnish
- INTERLUX Paint & Varnish
- PETTIT Paint & Varnish
- Composite Supplies
- Epoxy & Fiberglass
- MAS Epoxies
- WEST SYSTEM Epoxy
- Fasteners & Hardware
- Bronze & Brass Hardware
- Rigging Hardware
- Plywood & Cedar Strips
- Marine Lumber: Regular Stock
- Inlays & Onlays
- Vinyl Lettering
- Camper Accessories
- Camper Door Hardware
- Camper Hatch Hardware
- Camper Electrical Hardware
- Factory Sale
- May 20-25: Jimmy Skiff II (WA)
- Jun 1: Boat Transport Workshop (MD)
- Jun 3-8: Northeaster Dory (MD)
- Jun 10-15: Skerry Daysailer (WA)
- Jun 10-21: Lapstrake Dinghy (CA)
- Jun 16-22: Annapolis Wherry (ME)
- Jun 17: Champlain Discovery Teen Expeditions (VT)
- Jun 23-29: Building a Hybrid Kayak (ME)
- Jun 30-Jul 6: Sassafras Canoe (ME)
- Jun 30-Jul 6: Remote Control Sailing Model (ME)
- Jul 7-13: Lapstrake Dinghy (ME)
- Jul 14-20: Skerry Daysailer (ME)
- Jul 15-27: Teardrop Camper (MD)
- Jul 15-21: Stitch-and-Glue Kayak (Shearwater or Wood Duck) or Stand-Up Paddleboard (WA)
- Aug 5-10: Northeaster Dory (WA)
- Aug 11-17: Stitch & Glue Boatbuilding with John Harris (ME)
- Aug 26-31: Lapstrake Dinghy (WA)
- Sep 1-7: Annapolis Wherry (ME)
- Sep 8-14: Shearwater or Wood Duck Sea Kayak (ME)
- Sep 16-21: Annapolis Wherry (WA)
- Sep 16-21: Skerry Daysailer (MD)
- Sep 23-28: Lapstrake Dinghy (MD)
- Sep 30-Oct 25: Chesapeake Light Craft Workshop Takeover (WA)
- Sep 30-Oct 11: Teardrop Camper (MD)
- Oct 21-26: Tenderly Dinghy (MD)
- Nov 4-9: Chester Yawl (MD)
- Great Reasons to Build Your Own Kaholo Paddleboard
- Photo Contest Winners: March 31st, 2024
- Photo Contest Winners: December 31st, 2023
- Design Spotlight: Petrel Play SG
- Photo Contest Winners: September 2023
- 2023 Calfornia Boatbuilder Rendezvous
- CLC Photo Contest Open for Entries!
- Cool New Teardrop Camper Video
- 2023 Big Little Boat Festival Recap - Part 1
- Strip Kit Update: More Western Red & Alaskan Yellow Cedar!
- Browse the Archives . . .
- May 18: Big Little Boat Festival 2024
- Jun 28-30: WoodenBoat Show at Mystic Seaport
- Sep 6-8: The Wooden Boat Festival in Port Townsend, WA
- Oct 5: Mid-Atlantic Small Craft Festival
- Oct 10-14: Annapolis Sailboat Show
- 23 Years of the Skerry: A Retrospective
- A Midwinter PocketShip Cruise
- Three Hulls: A Sailing Outrigger for Adventures Near and Far
- Lugs and Jibs: An Update on Autumn Leaves
- Ollie: Another Pretty Canoe Yawl for Sailing Purists
- "Small Wooden Boat Design": A Panel Discussion
- The Sharpie That Got Away
- Modifying a Northeaster Dory for Camp-Cruising
- Encore, Autumn Leaves: The Canoe Yawl Sails
- The Most Peculiar Client
- Browse all Articles . . .
- Arbortech Tools
- Boatbuilding Schools
- Box of Rain
- Jackman Works
- Small Boats Magazine
- Xyla Foxlin
Sailboat plans for our earlier designs are on 24" x 36" paper; parts that fit within those dimensions are shown full size. Other components are scaled and dimensioned.
Our newest sailboat plans are rendered with all parts shown full-size on long scrolls of paper.
Choosing the Right Small Craft

"PocketShip" is a small cruising sailboat of refined model, meant to sail well on all points, provide dry camping accommodations for two adults, and tow behind a four-cylinder car. More than 60 are sailing or under construction on six continents....
Kits from $4799.00 Plans from $299.00

A dory is a lot of boat for the money, which explains the enduring popularity of the type going back 150 years or more. Relatively few planks means less construction work. The narrow waterline results in a fast hull under sail or...
Kits from $2125.00 Plans from $159.00

Easy to build, easy to row, and easy to sail: the Skerry is a terrific rowing and sailing boat with timeless good looks.The Skerry design combines elements of traditional working craft of the British Isles and Scandinavia, with a little bit...
Kits from $1998.00 Plans from $159.00

CLC Kayak/Canoe SailRig
Kayaks are so easily driven that the urge to equip them for sailing must be as old as kayaks themselves. This neat trimaran-conversion kit, first introduced in 1995, has been built in vast numbers. Read this article for the entire 17-year...
Kits from $1785.00 Plans from $89.00

Kits and Plans online, at last.Designed in 2003 for a proposed youth sailing program, plans for this lively 15-foot sailing machine languished for nearly a decade before being revived and updated for the 2013 launch of a pair of...
Kits from $3775.00 Plans from $249.00

Tenderly 10-foot Dinghy
Here's a beautiful 10-foot dinghy or daysailer that slots between our 7'9" Eastport Pram and the 11'7" Passagemaker Dinghy. The Eastport and Passagemaker are "prams," meaning they have flat transoms at the bow as well as at the stern....
Kits from $2269.00 Plans from $65.00

Autumn Leaves Canoe
The Humber Yawl Club was created in 1883 by canoe enthusiasts who wanted to cruise the rugged estuaries of Britain's east coast. The club oversaw the evolution of a uniquely elegant and capable class of pocket-cruising sailboats, led by...
Kits from $3848.00 Plans from $59.00

The Southwester Dory is a lightweight and highly capable expedition boat, designed for sailing, rowing, motoring, or any combination of the three. Elegant and straightforward to build from a kit or plans, this is an ideal boat for family...
Kits from $3125.00 Plans from $185.00

In the summer of 2016 Chesapeake Light Craft partnered with the filmmaking team Waterlust to design and build a pair of 17-foot sailing canoes. Waterlust - Patrick Rynne, Fiona Graham, Laura Graham, and Jennah Caster - then...
Kits from $1730.00 Plans from $30.00

Faerings are the indigenous smallcraft of Scandinavia, direct descendants of the Viking ships that raided and traded throughout Europe starting more than a thousand years ago. Lightly but strongly built, the distinctive double-ended hulls...
Kits from $4650.00 Plans from $299.00

The original Jimmy Skiff was launched by Chesapeake Light Craft in 1998. An immediate success, this straightforward 13-foot skiff has remained popular for twenty years. Designer John C. Harris has been working on a clean-sheet redesign since...
Kits from $2285.00 Plans from $219.00

Eastport Nesting Pram
"Dinghy" is derived from an old Hindi word for a sailing or rowing passenger vessel. In English, a dinghy is a small rowing and sailing boat, often (but not necessarily) serving as a tender to a mother ship. At Chesapeake Light Craft,...
Kits from $1585.00 Plans from $119.00

John's Sharpie
There is certainly no other boat that offers the performance under sail and ease of construction of a sharpie. Developed in southern New England as workboats, their speed, shallow draft, easy handling, and quick construction caused sharpies to...
from $89.00

Eastport Pram
The Eastport Pram, with more than 800 built, is one of the most popular small dinghies in the world. Classic good looks, stand-out performance, and ease of construction are hallmarks of this John C. Harris design. Now in production for ten...
Kits from $1325.00 Plans from $119.00

Madness 31-foot Pacific Proa
One big hull, one little hull. Lots of speed, not much money.Madness is a lightweight “Pacific” or windward proa, intended for fast cruising with two adults or daysailing with four. With a payload of just under...
Kits from $499.00 Plans from $2.99

Passagemaker Take-Apart
Here's a handy boat that can be rowed, sailed, and powered with up to three large adults, and it "nests" to take up less space. The Passagemaker Dinghy is easy to build but looks great and performs beautifully. A smooth glide when rowing,...

Passagemaker Standard
Here's a handy boat that can be rowed, sailed, and powered with up to three large adults. The Passagemaker Dinghy is easy to build but looks great and performs beautifully. A smooth glide when rowing, spirited performance when sailing, and steady...
Kits from $1769.00 Plans from $159.00

Independence R/C Sailing Model
Build this boat in a week! 2024: June 30-July 6: Brooklin, ME Our friend Eric Schade, with assistance from Dave Jackson, developed this 48-inch long radio controlled model sailboat, which Eric has named the...
Kits from $299.00 Plans from $89.00

1805 GEORGE AVENUE ANNAPOLIS, MARYLAND 21401 USA © 2018 Chesapeake Light Craft, LLC All rights reserved. Reproduction in whole or in part without written permission is prohibited.
» YouTube/clcboats1 » Instagram / clcboats » FaceBook/clcboats
» Boatbuilders' Forum » CLC Builders' Club » CLC Around The Web » Customer Testimonials » Compare Our Boats » Kayak Specs Table » Homebuilt Boat Bazaar » International Orders » Manage Account » Customer Service » Refunds & Returns » Shipping Schedule » Live ShopCam » Site Map
BoatNews.com
Free model boat plans: the MiniX, an easy-to-build radio-controlled sailboat
We set ourselves a challenge: to make a sailing model. In the end, after hours of reflection and work, we discovered that we took as much pleasure in designing and building as we did sailing our yachts. Here is the description of our project and the plans to download. Another article follows with the steps of the realization.
An easy-to-build, eye-catching, high-performance sailboat
Who hasn't dreamed of a little wooden sailboat with a beautiful canvas cover? The idea for this project is a child's dream.
Sailing on a regular basis in "scale 1", we had the idea of having fun by sailing two boats to race in our "spare time". The boats had to meet the following specifications:
- Easy to transport . Measuring just 50 cm, our MiniX doesn't take up much space in a trunk. However, the keel and mast can be dismantled. If need be, the MiniX can even be included in our vacation luggage.
- Able to be thrown into the water "out the back of the car" without complicated implementation.
- No investment that would jeopardize our homes. As this is not a one-off activity, we didn't want to invest in expensive radio controls (our boat's biggest expense). A basic radio control kit is powerful enough to handle "small" sail surfaces.
- Resembling a sailboat at best, hence the presence of the deckhouse and cockpit. These two elements give a sense of scale without resorting to model-building. Above all, a sailboat must be beautiful. Don't we also sail for the pleasure of our eyes?
Modern construction

To keep it light (ready to sail , the MiniX weighs just 800 g), the hull is an extruded polystyrene/epoxy resin sandwich (laminated Depron). While this process is not impact-resistant (though...), the structure and sandwich make it very rigid. Together with the deck, the whole thing forms a kind of egg whose strength is astonishing. It's impossible to apply the slightest twist to the hull, despite its lightness (the bare hull weighs just 260 g).
Our yacht has a chine hull. But this doesn't detract from the look, as the chines are largely rounded and, combined with the straight bow, give the illusion of a beautifully shaped hull. When sailing close-hauled, the stern of the MiniX lifts off, limiting drag in the water.
Technical data
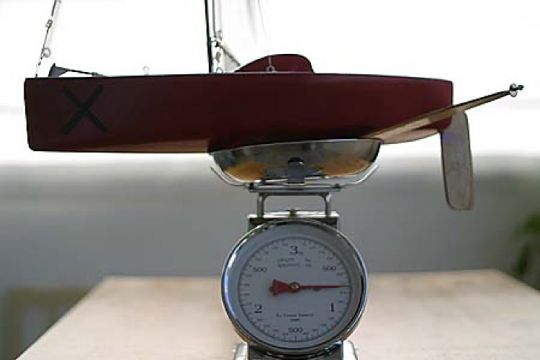
- Overall length (with rudder): 56 cm
- Hull length: 51 cm
- Width: 17.6 cm
- Draft: 25 cm (but this may change...)
- Air draft: 92 cm (mast: 86 cm)
- Operating weight (with sails, servos, batteries and keel ): 800 g
- Bare hull weight (without servos and keel ): 260 g
- Weight of ballast: 240 g (but may vary according to draught...)
- Wing surfaces: Jib= 6 dm² GV= 15 dm²
MiniX drawings
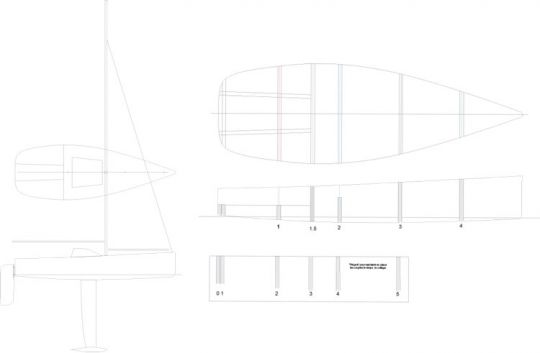
You can download the plans. They're simple and precise. We made our two boats by printing them on a basic A4 printer. Then we simply assembled the sheets by superimposing them and gluing them (repositionable spray glue) to Depron. A sharp cutter is all it takes to build the MiniX with precision.
Just one thing: we've put a lot of heart and soul into building this yacht. We'd be delighted if our experience could be put to good use. Don't hesitate, help yourself! But be so kind as to let us know with a little comment. We'd love to hear from you.
Here you can download the first part of the plan in A4 PDF format .
With this you already have the complete boat. Based on the construction photos, there's not much missing to build the whole MiniX. But since we're taking care of you, here are the sail plans too:
- Mainsail plan
Real sails with webs for their shape.
The construction budget
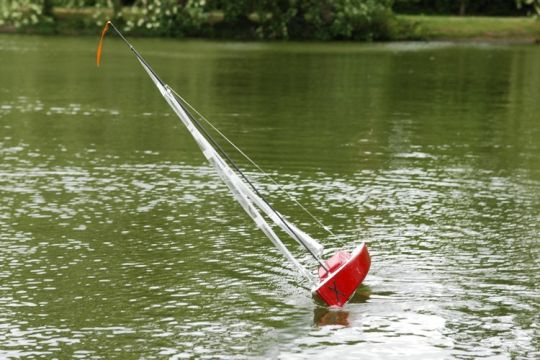
MiniX doesn't have to be expensive. We've always tried to find a way of "diverting" objects to make our project a reality. So it's hard to come up with an exact budget. It will be higher for someone who doesn't even own the basic tools , and much lower for someone who does it in the back of his already well-stocked workshop.
- 6 mm Depron sheet (2 sheets, 125 x 60 cm)
- Epoxy resin + fillers
- Glass fabric
- 4 mm plywood (a small piece for the keel , keel shaft and rudder)
- Carbon tubes (6 mm for the mast and 4 mm for the booms)
- GV carbon batten (1/10 mm in kite stores)
- Remote control servos kit ( first price: ?60)
- Florist paper for the sails (a good opportunity to give pleasure...)
- Blenderm (surgical tape), available from chemists, to join the sails. Cut the 20 mm roll in half to double its length.
In the end, we estimate a maximum budget of ?120 per boat (calculated in 2021).
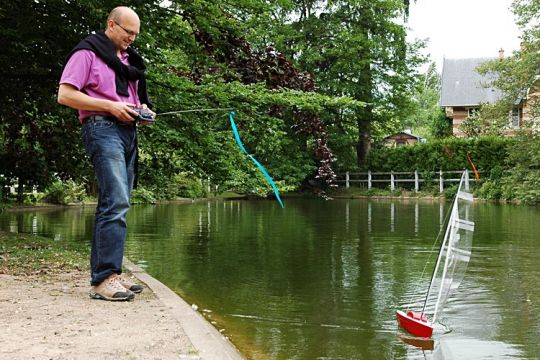
Because a construction project like MiniX is above all a team project... And in a team it's good to be complementary.
The MiniX project went through a long phase of gestation - reflection - intellectualization - drawings - exchanges - helping hands to get to this stage. Today, it's sailing thanks to this pooling of skills. We hope you'll enjoy this project as much as we have. And we look forward to hearing from you in the comments or on the forum. Enjoy!

Free Boat Plans
The plans offered here are free public domain boat plans.
Cabin Cruisers

Canoes and Kayaks

Fishing and Utility

Speed Boats

Privacy Overview
MorningChores
20 Budget-Friendly DIY Boat Plans for Loads of Water Fun
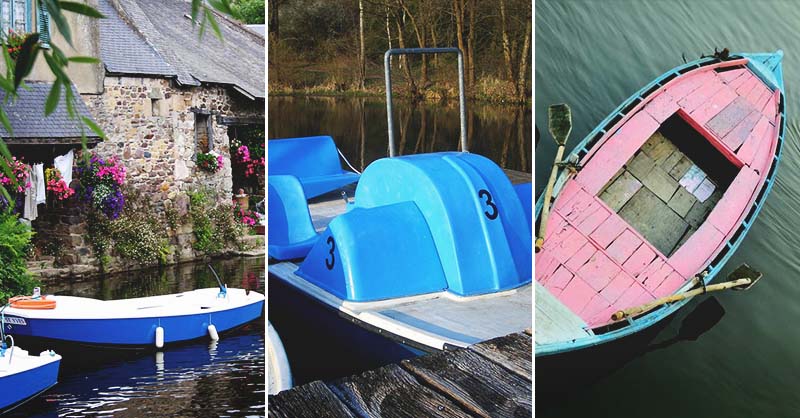
Do you enjoy spending a day out on the water every now and again? But does your budget allow you to purchase a new boat?
Well, even if you’re working on a meager budget, you could still own a boat. “How?” you might ask.
Rather simply in fact… make your own. I probably wouldn’t have thought of this idea either until a few months ago when my husband developed the itch for a boat.
He traded for a boat with a title, but it didn’t run. We’ve spent quite a few dollars and hours into making it work, and now we have a decent boat to enjoy on the water.
If you aren’t into fixing something up, I’m going to bring you some of the internet’s best ideas for making your own DIY boat. Here they are:
1. The DIY Tiny House Boat
We’re going to jump right in with a doozy to choose from. If you’re in the market for not only a boat but a houseboat, you may be wondering if this could ever fit in your budget.
Well, when you see this wood framed pontoon tiny houseboat , you’ll soon learn it can become a reality for you with a little hard work.
2. Basic Wooden Boat
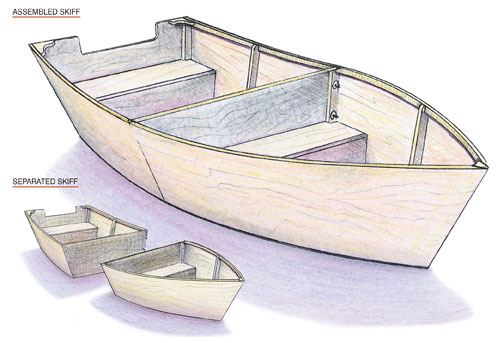
Whether you need a small fishing boat or a smaller boat to paddle around a pond, these plans are great for either.
The plans for this boat walk you through each step of the process. If you’re a beginner in the world of carpentry, this boat could still be feasible for you.
3. PVC DIY Kayak

I wasn’t aware of how expensive kayaks could be until our oldest recently caught the urge to purchase one. Suddenly, I realized how much money a person could invest in one.
However, this kayak appears to be quite buoyant and should be quite a bit cheaper because it’s constructed from PVC pipes . How neat does it look?
4. Recumbent Pontoon Pedal Boat
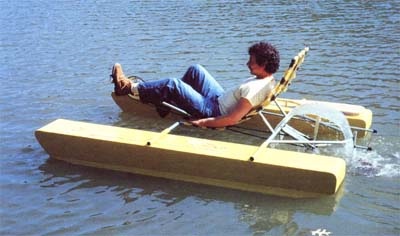
Do you enjoy renting a paddle boat and heading out on the water? Then you’ll love this boat. It’s a DIY version of a paddle boat.
However, it has large floats on the side which makes it a smaller version of a pontoon boat . Also, it’s made to recline for a more relaxing ride.
5. Plywood Canoe
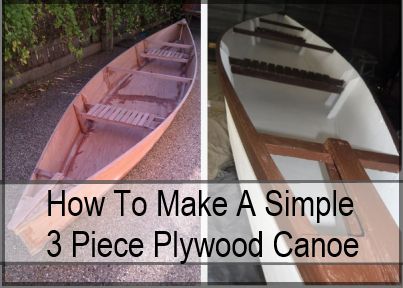
Canoes are a fun way to go up and down a river or other smaller bodies of water. If you’d like to have one, consider building it.
You can use these plans which show you how to construct a canoe out of plywood. This should make it more affordable yet functional too.
6. DIY Pontoon Boat
Pontoon boats are amazing boats to own. They’re great for fishing and luxurious enough to be a comforting way to cruise the water on a gorgeous day.
If you’d like to own one but can’t afford to buy, consider using these tips to help you build a pontoon boat all on your own.
7. Flat Bottom Boat Plans
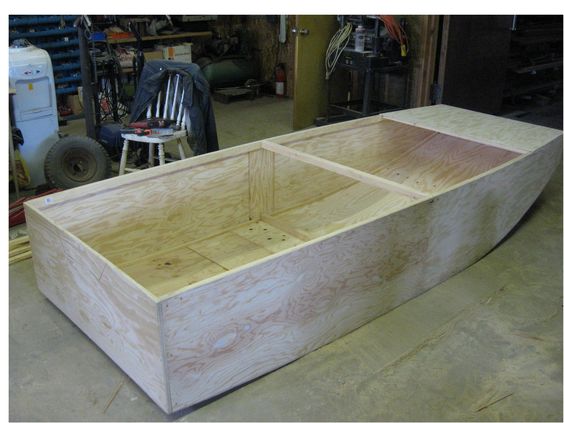
One thing I’ve learned over the past few months of renovating a boat, is you don’t need anything fancy for a fishing boat – unless you want it to be fancy.
However, if you’re in the market for something simple and functional, the plans for this flat-bottomed boat should do it.
8. PVC Johnboat
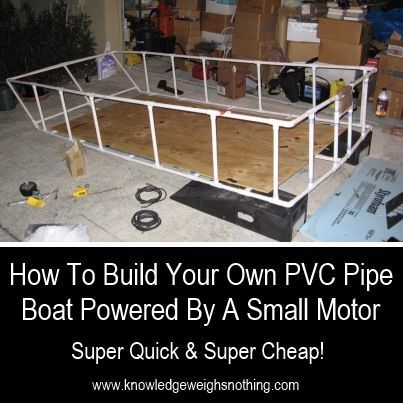
A Johnboat is a great way to get out on the water and have lots of fun. They’re also functional enough to make a nice fishing boat too.
Either way, if you’re in the market for a fishing boat, consider building your own johnboat with these plans.
9. DIY Simple Wooden Boat
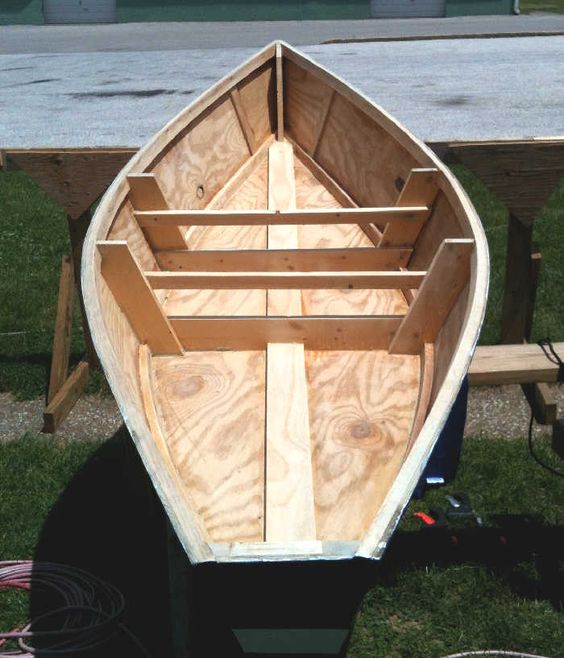
This option doesn’t come with plans which I could find. However, it could still be used as inspiration for building your boat.
Again, these boats would be good options if you’re someone looking for an inexpensive way to go fishing.
10. Homemade PVC Raft
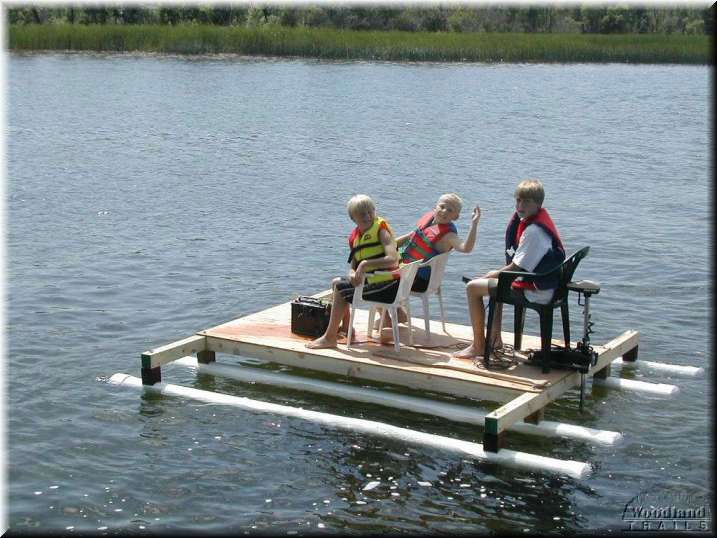
This PVC raft is another option which doesn’t come with plans, but it looks simple enough to build. If you have experience in carpentry, you should be able to figure it out rather quickly.
However, this looks like a fun way to get the whole family out on the water uniquely and cost-effectively.
11. The DIY Pontoon Double Hulled Kayak
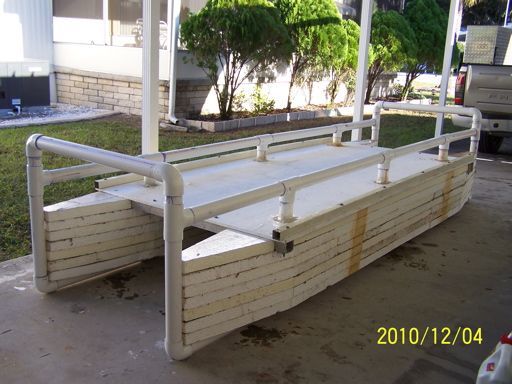
This pontoon boat is built in an abnormal but intriguing way. Instead of having typical floaters on the bottom of the boat, they used kayaks.
From there, the rest of the boat was built of foam insulation and PVC pipe. When you get creative, you can build a boat with little expense.
12. The Fishing Punt
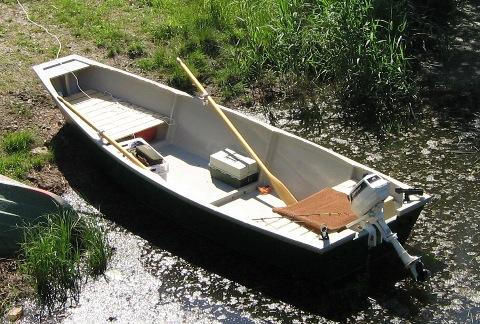
This is another cost-effective option for a fishing boat. However, there’s no guesswork on this one. The plans are laid out and easy to read.
Whether you’re an experienced carpenter or someone who has recently begun to build things, this could be a viable option for you.
13. Inflatable Raft Fishing Boat
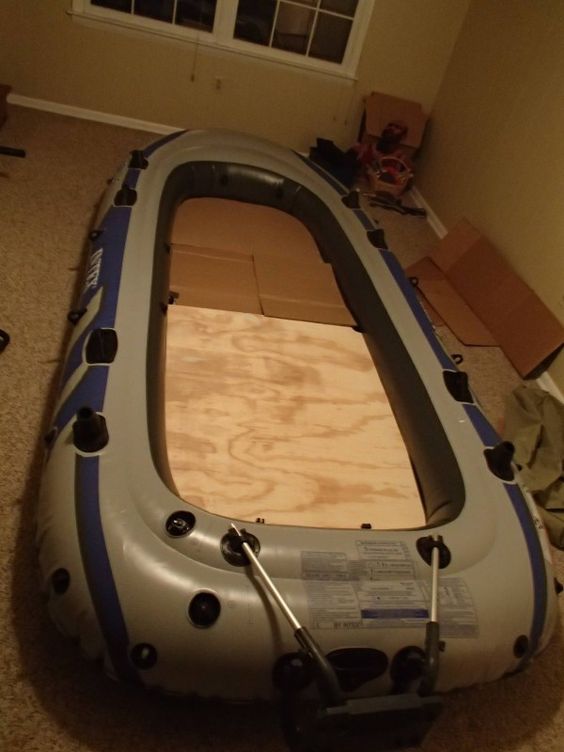
Are you struggling to come up with enough room in your budget to build a new fishing boat? What if you could use your inflatable raft as a boat?
Well, thanks to this idea, you can. The person who created this put a plywood bottom in a raft and turned it into an amazing little fishing boat for little money.
14. Single Plywood Boat
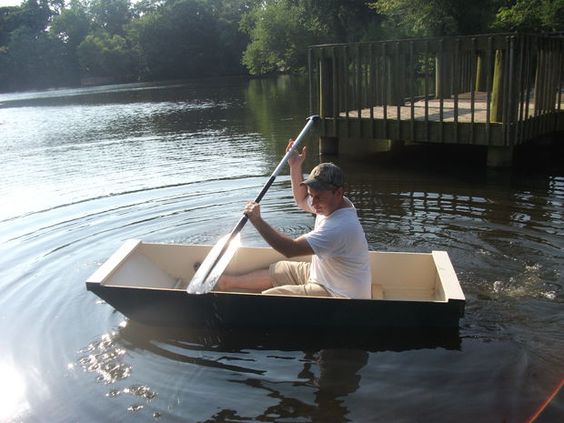
If you don’t need a larger boat, this could be the answer for you. It’s cost-effective because the whole thing is built from one sheet of plywood.
Even though this boat isn’t the biggest, it would make a great fishing boat for a one-person fishing trip .
15. Zip Tie and Ply Mini Boat
If you’d like to get out on the water for a fun day of fishing or sight-seeing, consider building this unique mini-boat .
It’s made from zip ties and plywood. Though it may sound a little sketchy on the surface, it seems quite buoyant and inexpensive too.
16. The Homemade Pontoon
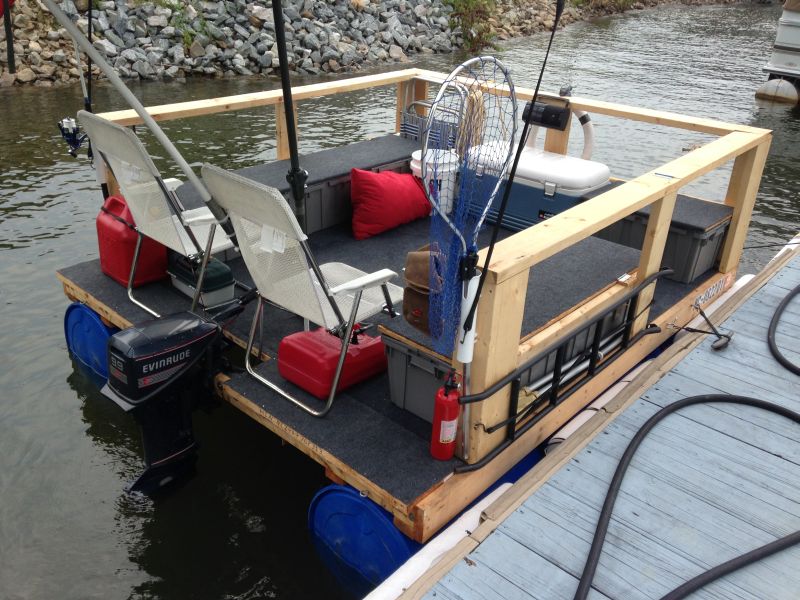
When I saw this boat , I instantly sent it to my husband and said, “Can you build this? I may need it a little bigger to fit the kids and dog on board.” This should tell you; I love it!
But it actually is a cool idea. It looks comfortable for both cruising and fishing. Plus, it should be possible for most budgets.
17. PVC Pontoon Boat

Some of you may be looking at these ideas and saying, “This is great, but I’d prefer to have a motor attached to my boat.”
Well, you’re in luck. This pontoon boat is easy to build and also shows you how to attach a motor to keep you from having to paddle everywhere you go.
18. The Micro Houseboat
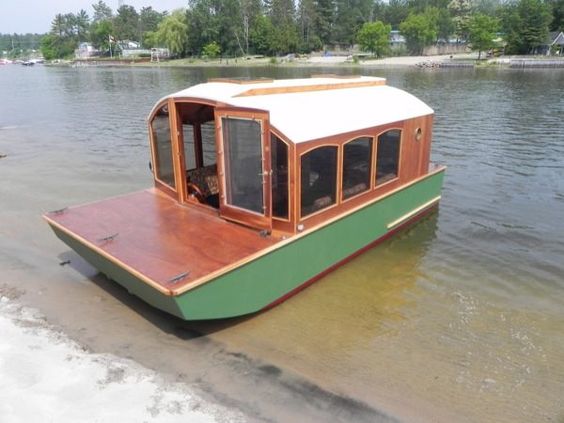
If you’ve ever searched for a houseboat, you know how expensive they can be. But don’t give up on your dream yet.
Instead, look into building this tiny houseboat . It has a gorgeous interior and would make a great full-time home or a small vacation home.
19. DIY River Raft
Who says you have to build something overly complicated to enjoy a day out on the river? Well, you don’t.
Instead, build this simple raft . It’s constructed from PVC pipe and has a few seats add onto it. It looks buoyant and can help you to have many enjoyable days out on the water.
20. Seafoam Kayak

Would you like a light-weight kayak you can build yourself? Consider creating this kayak made from sea foam.
It only weighs 16 pounds and is built to be eight feet long. This could be a great way to enjoy many days out on the water without much fuss.
Now you have 20 different options for a DIY boat. You can choose between kayaks, johnboats, houseboats, tiny homes, pontoons, and much more.
We hope you’ll find something on this list to inspire you and be able to create something you can enjoy all summer long.
Was this article helpful?
What went wrong.
This article contains incorrect information
This article does not have the information I am looking for
How can we improve it?
We appreciate your helpful feedback.
Your answer will be used to improve our content. The more feedback you give us, the better our pages can be.
Follow us on social media:

How to Make Pine Pitch Glue at Home

How to Build a Hay Feeder for (Practically) Free from Scraps

How to Create A Multi-Purpose Outbuilding to Make Homesteading Easier

How to Make Your Own DIY Christmas Fruit Decorations

How to Make a Cast Iron Pot Holder from a Repurposed Gun Rack

12 Fun Tire Swing Ideas to Make Your Backyard Better Than The Playpark

60 DIY Curtain Ideas That Will Improve Your Room in a Flash

33 Free DIY Tree House Plans to Make Your Childhood (or Adulthood) Dream a Reality

34 Unique DIY Bath Bombs to Enjoy Bathtime Like Never Before

How to Make a Quilt: A Getting Started Guide for Beginners
How to Build a Sturdy, Functional Pole Barn Fast and For Under $600

4 DIY Conditioner Recipes to Make Your Hair Shiny and Healthy

Local News | ‘The ultimate downtown’: Up to 50 acres could…
Share this:.
- Click to share on Facebook (Opens in new window)
- Click to share on X (Opens in new window)
Daily e-Edition
Evening e-Edition
- Palm Beach County News
- Broward County News
- Miami-Dade County News
SUBSCRIBER ONLY
Local news | ‘the ultimate downtown’: up to 50 acres could be redeveloped to create margate destination.
")
It’s starting anew with plans to create a destination that draws people to converge on the city — to eat, shop and play there. And some visitors may like it so much, they decide to move there, enticed by the many new apartments that’d be built there.

Margate’s plan originally called for developing 38 acres on both sides of State Road 7, and a strip shopping center on the southwest corner of Margate Boulevard and State Road 7. But now, the city is offering a developer a larger opportunity — 50 acres to work with. Exactly what would be built remains to be seen.
The land will be a “blank slate of property,” where prospective developers will be encouraged to “give us your best pitch what will match our vision,” Margate City Manager Cale Curtis said. Development in the area can go up to eight stories, or 122 feet in height, and the city is seeking businesses and entertainment “with components of residential to help support it,” Curtis said.
Mayor Tommy Ruzzano, who is also the chair of the city’s Community Redevelopment Agency, said the city stands to make money from the leases from businesses and apartment rentals. The city will “make it beautiful. We’re going to have the ultimate downtown. It’s going to be top notch.”
Here’s a look at the efforts, years in the making.
Facing delays
The downtown plans have faced years of delay, lawsuits and debate.
Recently, the city’s Community Redevelopment Agency formally signed off on a settlement with New Urban Communities, which was the developer previously set to build the future downtown off State Road 7.
The deal with New Urban was to develop 38 acres.
Ruzzano said the last attempt by New Urban soured after an argument over its plans for 968 apartments , the city ultimately decided was a “concrete jungle” and the city wanted it downsized.
After plans for the downtown crumbled after debate over the size of the project, the developer ultimately lost its case in court.
The settlement deal allows for the city’s CRA to keep New Urban’s $150,000 deposit to pay its legal fees, according to the city and developer.
“We’re truly disappointed we were unable to create a truly walkable, mixed-use, transit-oriented downtown on this site,” said Tim Hernandez, New Urban Communities co-founder and principal. “It would have been unbelievable.”
Now, Margate is ready to try again. Last year, the city hired the real estate firm Colliers, which this month will publicly begin to seek “qualified real estate developers and investors to enter into a long-term ground lease” for 50 acres for Margate’s future downtown.
Their ad describes the area as “the heart of Margate,” where “the city is looking to create a place for their residents to live, work and play.”
To offer as much as 50 acres, the additional parcels for construction could include David Park, City Hall, the police department and a fire station that are right nearby.
“If it makes sense to move City Hall and build a new City Hall, we want to make that all part of (the) blank canvas,” Curtis said. “I would love to have new a (new) City Hall built, police and fire, to accommodate our growth.”
If the shopping plaza were to be demolished in the final plan, businesses would have the option to relocate elsewhere in the downtown.
Stirring debate
Curtis acknowledges the city is in for a long slog of debate regarding the State Road 7 parcel of land, which was once a hopping outdoor flea market.
“It’s polarizing what people want, some people want the old flea market back, there’s talk of affordable housing, which is very polarizing. How many units go in there, which is very polarizing. Some folks want strictly an entertainment area.”
The details for that entertainment area still have to be hashed out. The “entertainment we envision are activated storefront restaurants,” Curtis said. That could include “street vendors and craft fairs and music. But it’s all kind of up for grabs.”
Once Colliers prequalifies developers who are up for the task, they’ll come to City Hall for public presentations, with artists’ renderings at the ready and information, including “what can go where and when and how, what will it cost to build it.”
There is no timetable yet for construction and the developer is not expected to be chosen until the end of the year.
“There are hard decisions that have to be made,” Curtis said. And there will be a “whole lot of horse trading.”
Mayor Ruzzano said he expects the final product to be a showpiece, vowing the city will “make it beautiful. We’re going to have the ultimate downtown, it’s going to be top notch.”
“I’m super excited.”
A walkable downtown
Preliminary estimates are a cost of $750 million to $1 billion to build the downtown, but who will pay what and the financial structure has not yet been decided.
“Now we can have green space, a walkable downtown with green space. It’s not going to be jampacked, we own the property, we can regulate what goes there,” Ruzzano said.
The land is formerly the site of a 50-room motel on State Road 7, a 17-acre Swap Shop flea market , among other buildings.
The empty flea market land has been used for a carnival , which drew headlines through years, either from incidents that drew police responses, or from activists’ complaints about how some animal-related shows were presented.
Once the downtown construction begins, the carnival won’t be allowed to operate there — and it won’t be relocated elsewhere in Margate, Curtis said.
There is “no space for it,” he said.
The history of Margate’s downtown
In 2016, Margate was on track to build its first downtown, a city center of 968 apartments, 100,000 square feet of retail and restaurants, a hotel and an amphitheater — all along or within walking distance of State Road 7.
The project was supposed to peak at three stories and construction was planned to start the following year.
But in 2017 , plans were scuttled after the city and developer couldn’t agree on the final size. They two sides had been in legal proceedings until the recent final agreement.
The downtown itself has been in the works in some fashion since a 2003 citizen planning session, where residents complained that Margate did not have a recognizable downtown or city center, does not have “any recognizable identity or strong sense of place,” and you could pass through “without even knowing that you had been there,” according to a planning document.
There was a focus on State Road 7 since “this road represents Margate’s front door.”
Lisa J. Huriash can be reached at [email protected]. Follow on X, formerly Twitter, @LisaHuriash
More in Local News

Local News | ‘Wildly popular’: Watch a new live fish cam that just debuted in South Florida

Politics | South Florida’s Jewish Democrats are split on Israel weapons vote

Education | Florida threatens to revoke Muslim school’s vouchers over imam’s anti-Jewish remarks

Health | From shark bites to yacht fires, South Florida trauma survivors show gratitude for their medical teams
Press Herald
Account Subscription: ACTIVE
Questions about your account? Our customer service team can be reached at [email protected] during business hours at (207) 791-6000 .
Garden tours, plants sales and more ways to spend time among flowers
Visit Maine's botanical gardens or get a sneak peek of what your neighbors are growing in their back yards.

You are able to gift 5 more articles this month.
Anyone can access the link you share with no account required. Learn more .
With a Press Herald subscription, you can gift 5 articles each month.
It looks like you do not have any active subscriptions. To get one, go to the subscriptions page .
Loading....
One of the loveliest ways to ease yourself fully out of the post-winter blahs and into springtime is to quit being a wallflower and instead surround yourself with living, blooming plants.
From botanical gardens to plant sales and garden tours, it’s time to make like the Scarecrow in “The Wizard of Oz” and while away the hours, conferring with flowers.

The waterfall at Coastal Maine Botanical Gardens in Boothbay. Photo by Tory Paxson, Courtesy of Coastal Maine Botanical Gardens
TOTALLY BOTANICAL
Coastal Maine Botanical Gardens in Boothbay is open for the season, daily from 9 a.m. to 5 p.m. Maine Days are May 31 to June 2, when anyone with a Maine driver’s license or state ID gets in for free. Ditto for dads/father figures on Father’s Day (June 16). Advance registration is required. With more than 300 acres of gardens and natural spaces, including a waterfall, there will be plenty to see, smell and bask in the scenery.
Here are more things to do in Boothbay

A tour group walks on the boardwalk at Viles Arboretum in Augusta. Joe Phelan/Kennebec Journal
Viles Arboretum is a botanical garden in Augusta with 6 miles of trails and more than 20 botanical collections. It’s open daily from sunrise to sunset, and admission is free. There are 224 acres with all sorts of flora and fauna to discover. Leashed dogs are welcome, and the visitor center is open from 10:30 a.m. to 4:30 p.m. Wednesday through Saturday.
Viles Arboretum offers medicinal plant walks, and although the May 18 session is full, you can still register for the June 15 and Sept. 14 events, lead by herbalist, homeopath and flower essence practitioner Debra Bluth. Tickets are $25. Advertisement
The Mount Desert Land & Garden Preserve has four areas to explore on its property in Northeast Harbor: the Asticou Azelea Garden (dawn to dusk daily), the Abby Aldrich Rockefeller Garden (noon to 4 p.m. Tuesday through Sunday from July 9 to Sept. 8, reservations required), Thuya Garden (dawn to dusk daily, June 15 to Oct. 14) and Little Long Pond Natural Lands (hiking trails and carriage roads open dawn to dusk daily). On June 26, at the Wildflowers of Little Long Pond event, participants can wander around the garden’s fields and forest, spotting wildflowers along the way while practicing how to identify them.

Joyce Saltman, right, and Beth Anisbeck embrace a tree for 60 seconds during a tree hugging event sponsored by Portland Parks and Recreation, at Deering Oaks Park last year. Carl D. Walsh/Staff Photographer
TOURS AND MORE
2nd Annual Tree Hugging 11 a.m. to 1 p.m. Saturday. Deering Oaks Park, Portland. portlandmaine.gov The tree hugging is a family-friendly community gathering to celebrate Portland’s many trees. Park ranger Liz Collado will lead a sensory awakening and forest bathing session. Along with tree hugging, there will be a storytime, and you can touch a forestry truck and meet naturalist Noah Querido and Portland city arborist Mark Reiland. Just down the road, you’ll find Fessenden Park, on the corner of Brighton and Deering Avenues. The tulips have arrived, and it’s worth a visit to see them.
McLaughlin Garden Lilac Festival 10 a.m. to 4 p.m. May 24. McLaughlin Garden and Homestead, 97 Main St., South Paris, $5. mclaughlingardens.org You’ll find more than 125 varieties of lilacs at the McLaughlin Garden Lilac Festival. Explore on your own or take a guided tour led by a horticulturist. There will also be family-friendly activities, and you can shop for native and unusual plants.
4th annual Woodfords Community Garden Tour 1-4 p.m. June 8. Woodfords Corner Community in Back Cove, Deering Highlands, Oakdale and Deering Center, $20 suggested donation. woodfordscorner.org Presented by Friends of Woodfords Corner, this self-guided tour features at least 10 gardens. As you make your way down the list, you’ll find yourself pleasantly surprised by all of the hidden havens bursting with flowers, plants and impressive yardscaping elements.
Peony Society of Maine 23rd annual Garden Tour 10 a.m. to 3 p.m. June 8 and 15. Both tours start at 1348 Ohio St., Bangor, $5 donation. peonysocietyofmaine.net You’ll visit multiple gardens in Bangor, Winterport, Ripley and St. Albans, and your senses will be filled with countless peonies. A peony plant will be raffled off at the end of each tour. Advertisement
Hidden Gardens of Historic Bath 10 a.m. to 2 p.m. June 22. Sagadahoc Preservation Inc., 880 Washington St., Bath, $40. sagadahocpreservation.org The Hidden Gardens of Historic Bath house and garden tour features several homes in North Bath. Every stop on the tour will be a treat for your senses and may motivate you to make some of your own magic when you get back home.
Garden Conservancy Open Garden Days 10 a.m. to 4 p.m. June 29. Beckett Castle Rose Garden, Singles Road, Cape Elizabeth, $10. gardenconservancy.org You’ll see plenty of roses as well as ocean views at Beckett Castle, which sits right on the water, with views of five lighthouses. The castle was built in 1871, and its rose garden features more than 70 varieties of heirloom roses. A 50-foot stone tower doubles as the rose arbor entrance to the castle.
PICK A PLANT SALE
Tate House Museum’s Annual Plant and Herb Sale 9 a.m. to 1 p.m. May 18. Tate House Museum, 1267 Westbrook St., Portland, 207-774-6177. tatehouse.org The wide selection includes perennials divided from the museum’s 18th century reproduction garden. Visitors can also make their own “seed bombs” and get a sneak peak at a new installation by artist Ashley Page from 10 a.m. to noon.
Animal Refuge League of Greater Portland Spring Plant S ale 9 a.m. to 11 a.m. May 18, Animal Refuge League of Greater Portland, 217 Landing Road, Westbrook, 207-854-9771. arlgp.org Perennials, house plants and more will be on sale, and plants that don’t have specific pricing are “name your own fee.” Anyone interested in donating plants or pots to the sale should send a message to [email protected] .
Taking Root Plant Sale 9 a.m. to 1 p.m. June 1, Tom Settlemire Community Garden, Maurice Drive, Brunswick, 207-729-7694. btlt.org This annual sale is organized by the Brunswick-Topsham Land Trust. Proceeds benefit the Common Good Garden, which provides food and gardening education for the Mid Coast Hunger Prevention Program. Master gardeners will be on hand to help shoppers choose their best options.
Scarborough Land Trust Native Plant Sale and Spring Festival 9 a.m. to 1 p.m. June 1, Broadturn Farm, 388 Broadturn Road, Scarborough, 207-289-1199. scarboroughlandtrust.org Visitors will find native plants, food vendors, local artisans, guided nature walks and activities for kids. To preorder plants, visit the Scarborough Land Trust website.
Maine Audubon Society Native Plants Sale and Festival 9 a.m. to 3 p.m., June 8, Gilsland Farm Audubon Center, 20 Gilsland Farm Road, Falmouth, 207-781-2330. maineaudubon.org More than 75 species of native wildflowers, shrubs and tree seedlings will be available, along with workshops, info tables and experts.
Staff writer Megan Gray contributed to this report.
Related Headlines
Headed to Coastal Maine Botanical Gardens? Here’s what else to check out in Boothbay
Success. Please wait for the page to reload. If the page does not reload within 5 seconds, please refresh the page.
Enter your email and password to access comments.
Forgot Password?
Don't have a commenting profile? Create one.
Hi, to comment on stories you must create a commenting profile . This profile is in addition to your subscription and website login. Already have a commenting profile? Login .
Invalid username/password.
Please check your email to confirm and complete your registration.
Create a commenting profile by providing an email address, password and display name. You will receive an email to complete the registration. Please note the display name will appear on screen when you participate.
Already registered? Log in to join the discussion.
Only subscribers are eligible to post comments. Please subscribe or login first for digital access. Here’s why .
Use the form below to reset your password. When you've submitted your account email, we will send an email with a reset code.
Send questions/comments to the editors.
Member Log In
Please enter your username and password below. Already a subscriber but don't have one? Click here .
Not a subscriber? Click here to see your options
IMAGES
VIDEO
COMMENTS
Sailboats that you can build from home will likely be a small boat under 20 feet. These could be from many different boat suppliers such as B&B Yachts, Brooks Boat Designs, and Chase Small Craft. Boat plans will vary based on your budget and how much time you have on your hands. Based on my previous experience, building your own boat will take ...
affiliate links Cabin Cruiser, Free Sailboat Plans Petrel You can build this 16ft boat as a day sailer or an overnighter with cabin. Petrel is a Free Sailboat Plan that fulfils the greatest possible variety of uses in one model, offering the builder either an open-cockpit racing craft with comfortable accommodation for day sailing or a snug cabin model with accommodation for overnight trips to ...
Know how: Build Your Own Boat. There's nothing like a simple boat with a simple rig and the simple joy of having built her yourself... Not many events in life are as emotionally convoluted as when the plans for a sailboat arrive at the amateur builder's home. The plans flutter out on the dining table and quickly there arise intertwining ...
Free Boat Plans You Can Build This Week (with PDFs) 1. The Wanigan. PC Duckworks Boat Builders Supply. The Wanigan boat began as a garvey design, which is one of the older boat plans known to the Americas. Traditionally, these boats were built as work scows and were very popular among American summer camps.
When building a wooden sailboat, it is important to pay attention to every step, including the installation of the cabin and interior features. To install these features, follow the following steps: 1. First, measure and cut the materials for the cabin walls, floor, and ceiling. 2.
The sailboat hull can be constructed in a step-by-step process. Here is how you can construct a strong and durable sailboat hull: Step 1. Create the hull mold: Start by building a robust and long-lasting frame that accurately represents the shape and size of the hull. Step 2.
Boat building plans. 8 panels of 1/4" oak plywood 4'x8' Pencil, Sharpie, ruler, tape measure, yard stick, etc. Long flexible straight edge. Box of 1" brad nails. 2 gallons of epoxy resin. ... This allows easy on/easy off when rigging at the boat ramp. I also used a small loop (parrel) around the mast and through the eye to keep the gaff located ...
Idea 21 small sailboat plan is the latest development of my family of small plywood & epoxy sailboats plans for homebuilders: it was quite a time since I was thinking of an evolution of her smaller 19 footer sister, so I finally take the decision to publish this new plan. The goals of this plan is simple: add interior volume, simplify the work for homebuilders switching to a complete plywood ...
BOAT PLANS & FULL SIZE PATTERNS - Package Includes latest sail boat plans, SAILBOAT building plan updates & revisions, PLUS direct contact with the designer. This design is for those that want a fast cruising sailboat and one that can accommodate the family or a racing crew and is a joy to sail as well as being easy to build in a variety of ...
A homebuild wooden boat plan - but simple to build and fast. The result is that this traditional-looking sailing skiff is lighter than many racing dinghies. Peter's Gruff weighs in at a very light 127lbs (58kg). Not bad for a boat a little under 16ft (4.8m). A geographic/historical advantage of Australian and NZ boat design and construction.
Draft (keel down-up): 1,00 - 0,30 m. Reacher/mps: 13 m2. Design displacement: 1000 kg. Engine: outboard 6-10 HP. Plans can be purchased here: Nautikit Saltaspiaggia order page. "Saltaspiaggia", can be translated as "Beach-hopper"; this sailboat is a minimal coastal cruiser, a sailboat to hop from one beach to another with a small ...
These plans are for a small 15 foot knockabout sailboat. I like these plans for their ease. Building a smaller boat is a lot more attainable than a cabin cruiser! And these plans get right to the specifics of building. From the plans: ANY SAILBOAT fancier will like "Tramp," the trim, 15-ft. knockabout that's so easy to build in plywood.
The next step was to clamp thin strips of wood, called battens, to the frame to stand in for the planks, so I could measure and mark all those angles. Then, I took the parts off the board and ...
With Glen-L proven plans & kits, building your own boat can be a reality. Choose one of the categories below, click on a boat for the listing of items available plus more info and photos. Simple as that… get started today! If you know the boat design name, use our Alphabetical Design Index. Design Characteristics - Boat drawing with all ...
Large range of boat plans for Professional and Amateur construction. Stock plans for cruising and racing sailboats, powerboats, recreational fishing trawlers, catamarans and ocean rowing boats. ... Easy to build cruising sailboat with modern shape and functional concept. Corruira 42. Comfortable and beautiful trawler suitable for long ocean ...
The base price for a rowing version is $6,175.00, with a choice of sailing rigs available as optional extras. You can also order a bare hull to finish yourself. Give me a call at 207 930 9873, or send me an e-mail at [email protected]. I'm Arch Davis - I learned boatbuilding and design in New Zealand in the 1970s.
With the Detailed Plans and Instructional Videos you can build your own Oz Goose Sailboat. All the photos in this section are people who have not built a boat before. There are six sheets of plywood in the Oz Goose. There are Oz Goose Sailboat Kits Available, but it is easy to make your own from the plan. See "KITS" in the main menu above.
Buy Canoe Plan - $75. Light and lovely to paddle. Simple Plywood Boat Plan. Light on the land, Prettiest Plywood or wooden Canoes anywhere. 15.5ft. Excellent distance touring boats. 15'6″, simple construction for a wooden canoe. 32 - 45lbs (15 to 20kg) Click here for a comparison between our paddling canoe plans.
Sailboat plans for our earlier designs are on 24" x 36" paper; parts that fit within those dimensions are shown full size. Other components are scaled and dimensioned. ... Plans from $159.00 Skerry. Easy to build, easy to row, and easy to sail: the Skerry is a terrific rowing and sailing boat with timeless good looks.The Skerry design combines ...
An easy-to-build, eye-catching, high-performance sailboat. Who hasn't dreamed of a little wooden sailboat with a beautiful canvas cover? The idea for this project is a child's dream. Sailing on a regular basis in "scale 1", we had the idea of having fun by sailing two boats to race in our "spare time".
Free Boat Plans The plans offered here are free public domain boat plans. Cabin Cruisers Caballero Flight Dolphin Eager Eve Ha'Penny Ranger Sea Angler Sea Babe SeaHawk Whizz Sportsman Canoes and Kayaks Blue Bill 13 Canvas Back Canvas Kayak for Junior Glide Easy Hunting Kayak King Canvasback Pintail Little Chief Plyak Fishing and Utility Buddy […]
Purchase Plans. The Pop 25 is cruising sailboat with modern shape, functional concept and ideal for those aspiring sustainability in carbon emissions. Its lines show a collection of new trends in the field of yacht design, such as close to triangular beam distribution, twin keels and rudders, no backstay and vertical topsides.
15. Zip Tie and Ply Mini Boat. If you'd like to get out on the water for a fun day of fishing or sight-seeing, consider building this unique mini-boat. It's made from zip ties and plywood. Though it may sound a little sketchy on the surface, it seems quite buoyant and inexpensive too.
Margate's new downtown could rise after years of delay, lawsuits and debate. The city is starting anew with plans to create a destination that draws people to converge on the city — to eat, shop ...
Viles Arboretum is a botanical garden in Augusta with 6 miles of trails and more than 20 botanical collections. It's open daily from sunrise to sunset, and admission is free. There are 224 acres ...