

The Ultimate Guide: How to Make a Sailboat – A Step-by-Step Tutorial
Alex Morgan

Making a sailboat can be an exciting and rewarding project for those who love the thrill of the open water. Whether you’re an experienced sailor or a beginner, building your own sailboat allows you to customize the design and create a vessel that suits your needs. This guide will take you through the step-by-step process of making a sailboat, from gathering materials and tools to launching and testing the final product.
Introduction to Making a Sailboat
Building a sailboat is a complex and intricate endeavor that requires careful planning, attention to detail, and a love for craftsmanship. In this article, we will explore the various steps involved in making a sailboat, including gathering materials and tools, designing and planning the sailboat, constructing the hull, building and rigging the sail, adding finishing touches, and finally, launching and testing the sailboat.
Gathering Materials and Tools
Before diving into the construction process, it is essential to gather all the necessary materials and tools. We will discuss the essential materials required for building a sailboat, such as wood, fiberglass, epoxy resin, and fasteners. we will explore the various tools needed, including saws, drills, clamps, and measuring instruments. Having the right materials and tools is crucial for a successful sailboat-building project.
Designing and Planning the Sailboat
When it comes to designing a sailboat, there are several factors to consider. We will delve into these considerations, including the type of sailboat, its intended use, and the desired performance characteristics. We will discuss how to create a blueprint or design plan that outlines the specific dimensions, layout, and structural details of the sailboat.
Constructing the Hull
The hull is the foundation of any sailboat, providing buoyancy and stability on the water. We will explore the process of building the framework of the hull, including shaping and assembling the different components. we will discuss the techniques used for planking the hull, such as carvel planking or cold-molded construction.
Building and Rigging the Sail
The sail is a vital component of a sailboat, harnessing the power of the wind to propel the vessel forward. We will discuss the materials required for constructing the sail, including fabric, battens, and hardware. we will cover the steps involved in assembling and attaching the sail to the sailboat, ensuring proper rigging for optimal performance.
Finishing Touches and Final Steps
To add the finishing touch to your sailboat, there are several details to consider. We will explore how to add decorative elements and functional accessories to enhance the overall appearance and functionality of the vessel. we will discuss the steps involved in painting and varnishing the sailboat, protecting it from the elements and giving it a polished finish.
Launching and Testing the Sailboat
After months of hard work and dedication, it’s time to launch your sailboat and test its performance on the water. We will guide you through the necessary preparations before the first launch, including ensuring the boat is properly balanced and rigged. we will discuss the safety precautions to follow when testing the sailboat, ensuring a smooth and enjoyable sailing experience.
By following this comprehensive guide, you will gain the knowledge and confidence to embark on your sailboat-building journey. So, let’s set sail on this exciting adventure of creating your very own sailboat.
Key takeaway:
- Making a sailboat maximizes creativity: Building your own sailboat allows you to express your creativity and create a unique vessel tailored to your preferences.
- Gathering essential materials is crucial: To build a sailboat, you need materials such as wood, epoxy, fiberglass, and marine plywood, which are vital for constructing a sturdy and seaworthy vessel.
- Proper planning ensures a successful build: Designing and planning a sailboat involves considering factors like stability, weight distribution, and sail area to ensure the boat performs well in various conditions.
Gathering materials and tools is crucial when it comes to making a sailboat. Follow these steps:
1. Begin by researching the type and size of sailboat you wish to build. Gather information on the required materials and tools.
2. Create a comprehensive list of all the necessary materials including marine-grade plywood, fiberglass, epoxy resin, screws, and hardware.
3. Make a separate list of all the tools that you will need such as a circular saw, jigsaw, drill, sander, clamps, and measuring tape.
4. Take the time to find reliable suppliers for the materials. Compare prices and quality to find the best options available.
5. Once you have identified the suppliers , go ahead and place orders for all the materials you need. Make sure to order sufficient quantities.
6. If you don’t already have the required tools in your workshop, consider purchasing or borrowing them from someone reliable.
7. It is important to set up a dedicated workspace that provides enough room for you to work comfortably and store both materials and tools.
8. Ensure that your workspace is clean and well-organized. Pay special attention to proper lighting and ventilation.
9. As soon as you receive the materials , inspect them thoroughly for any signs of damage or defects. If you find any issues, contact the supplier immediately.
By following these steps, you will be able to successfully gather all the necessary materials and tools to begin building your sailboat.
What are the Essential Materials for Building a Sailboat?
What are the essential materials for building a sailboat? The necessary materials for constructing a sailboat include high-quality marine-grade plywood for the hull and deck. To reinforce the structure, fiberglass cloth and epoxy resin are employed. As for the assembly, stainless steel hardware is utilized, along with various types of sailcloth for the sails. The rigging is composed of stainless steel mast, boom, and rigging wires . To protect the wooden surfaces, marine-grade paint and varnish are applied. Joint sealing is achieved by utilizing adhesive, sealant, and caulking . Finishing touches are made with bungs, plugs, and filler materials . By using these materials in conjunction with the appropriate tools, one can build a sailboat that is robust and dependable for countless enjoyable hours on the water.
What Tools are Needed for Building a Sailboat?
To successfully build a sailboat, you will require a number of essential tools. Below is a comprehensive list of the necessary tools needed for the construction process:
1. Measuring tools: To accurately measure and mark the boat’s dimensions, you will need a tape measure , ruler , and protractor .
2. Saws: In order to cut materials, both a hand saw and a power saw, such as a jigsaw or circular saw , are indispensable.
3. Drill: A drill with various sizes of drill bits is crucial for creating holes in the boat’s structure and attaching components.
4. Screwdriver: To tighten screws and fasten hardware, you will need both flathead and Phillips head screwdrivers.
5. Clamps: Clamps are necessary to hold components together while they are being glued or screwed.
6. Sanding tools: To achieve smooth surfaces and eliminate imperfections, you will require sandpaper and sanding blocks .
7. Chisels: Chisels are essential for shaping and carving wood for intricate details or joints.
8. Planer: A planer is necessary to level surfaces and reduce the thickness of wooden components.
9. Painting tools: Brushes and rollers are indispensable for the application of paint or varnish, which serves to protect and enhance the sailboat’s appearance.
10. Safety equipment: Make sure to have safety goggles , gloves , and a dust mask to ensure your protection while working.
By utilizing these tools effectively, you will be able to successfully and safely complete your sailboat building project.
When designing and planning the sailboat, it is important to follow these steps:
1. Research different sailboat designs and hull types to gather information and ideas.
2. Determine the size and dimensions of your sailboat based on your needs and the resources available to you.
3. Create a detailed blueprint or design that includes important aspects such as hull shape, rigging, and deck layout.
4. Select materials for the construction of your sailboat based on factors like durability, weight, and cost.
5. Ensure the inclusion of safety features and necessary equipment, such as navigation instruments and life jackets.
6. Calculate the sail area and carefully choose the appropriate sails for optimal performance.
7. Evaluate the stability and balance of the sailboat to ensure safe sailing.
8. It is always helpful to consult experts for advice and guidance throughout the designing and planning process.
To guarantee success, it is crucial to consider your needs, seek expert opinions, and give utmost importance to thorough research, attention to detail, and careful planning.
What Factors to Consider when Designing a Sailboat?
When designing a sailboat, there are several factors to consider for a successful and efficient vessel. These factors include the intended use, hull design, sail plan, structural integrity, and ergonomics and comfort.
Firstly , the intended use of the sailboat must be determined. This involves deciding whether the sailboat will be used for racing, cruising, or both. The intended use will determine the size, shape, and necessary features for optimal performance.
Next , the hull design plays a crucial role in sailing performance. Factors such as stability, speed, and maneuverability should be considered when choosing a design.
The sail plan is another important aspect to take into account. The type and configuration of the sails will depend on the boat size, intended use, and sailing conditions. Factors like ease of handling, sail material, and the number and size of sails should be considered.
Structural integrity is essential for safety and longevity. It is important to consider the materials and construction techniques that can withstand water and wind forces.
Lastly , the sailboat should be designed with ergonomics and comfort in mind. This involves considering factors such as seating arrangements, control access, and storage space.
To ensure the best sailboat design, it is advisable to consult naval architects or experienced sailors for expert advice and guidance. Their knowledge and expertise will help in creating a well-designed and functional vessel.
When designing a sailboat, it is important to consider these factors to ensure a successful and efficient vessel that meets the specific needs of the owner.
How to Create a Blueprint or Design Plan?
When creating a sailboat blueprint or design plan, follow these steps on how to create a blueprint or design plan:
- Research sailboat designs based on sailing conditions and intended use.
- Measure and calculate sailboat dimensions, including length, width, and height.
- Create a detailed sketch, indicating parts like the hull, mast, keel, and rigging.
- Specify durable, lightweight, and cost-effective materials for each part.
- Develop a comprehensive list of materials and resources required, including quantities and specifications.
- Add precise measurements and dimensions to ensure accuracy and alignment.
- Annotate the blueprint with construction notes and instructions, including specific techniques.
To create an effective blueprint or design plan, consult experienced boat designers or naval architects for structural integrity and functionality. Utilize software or online tools for enhanced precision and efficiency. Careful planning and considering all aspects of the sailboat’s design will lead to a successful construction process.
To successfully construct a sailboat hull, it is important to follow these steps:
1. Begin by designing the hull, taking into consideration factors such as size, shape, and the materials that will be used.
2. Gather all the necessary materials for the construction process, including fiberglass, wood, or aluminum, depending on your preference.
3. Prepare the mold if fiberglass is the chosen material. Create a mold that matches the desired shape and apply a release agent to ensure easy removal.
4. Once the mold is prepared, start applying layers of fiberglass sheets and resin smoothly, making sure to avoid any air bubbles.
5. After the fiberglass has cured, carefully remove the hull from the mold and use sandpaper to smooth out any rough edges or imperfections.
6. To strengthen the hull, consider adding reinforcements such as bulkheads or ribs to provide structural support.
7. Install any necessary fittings according to the design, including cleats, ports, and drains.
8. For added protection and to enhance the appearance, apply a suitable coating or paint to the hull.
9. Prior to completing the construction process, it is important to thoroughly inspect the hull for any defects or leaks. Test the sailboat in water to ensure its proper performance.
To ensure a successful sailboat hull construction, it is crucial to plan properly, paying attention to detail, and following safety standards. If needed, consult professional boat builders or utilize resources that offer specific guidance tailored to your project. Happy sailboat construction!
How to Build the Framework of the Hull?
To learn how to build the framework of the hull, follow these step-by-step instructions. First, measure and mark your desired hull length on the building board. Next, cut long, straight pieces of lumber that match the hull length. Place these pieces parallel on the building board, making sure there is equal spacing. Secure the lumber to the building board using clamps or screws. Then, measure and mark the desired hull width on the lumber pieces. Cut shorter pieces of lumber that match the hull width. Attach these shorter pieces perpendicular to the longer ones, using screws or nails. Add any additional shorter pieces needed to complete the framework, ensuring even spacing. It’s important to check the framework for accuracy and make any necessary adjustments. Secure all connections with extra screws or nails for added stability.
Building the framework of the hull is a crucial step in sailboat construction. It provides the necessary structure and shape for stability and functionality in the water. By following proper measurements and securely fastening the lumber together, builders create a strong foundation for the rest of the sailboat. The framework acts as the backbone of the sailboat, allowing it to withstand wind and waves while providing structural support for other components. A sturdy framework ensures a well-built and seaworthy sailboat, enhancing the thrill of sailing.
What Techniques to Use for Planking the Hull?
To plank a sailboat’s hull , it is important to use the following techniques:
– First , prepare the planks by cutting them to the desired dimensions. Make sure they are smooth and free of defects.
– One effective technique is steam bending . Heat the planks in a steam box until they become pliable, and then shape them to fit the curvature of the hull.
– Next , fasten the planks securely to the hull’s framework using screws or nails. Ensure proper spacing and secure penetration.
– To prevent water from entering the hull through the seams, it is crucial to seal them. Apply a waterproof sealant like epoxy or polyurethane.
– After the sealant dries, sand the planks for improved appearance and performance.
Pro Tip: When planking the hull, take precise measurements and cut the planks carefully to achieve a tight fit. Properly securing and sealing the planks will result in a strong and watertight hull for your sailboat.
Building and rigging the sail is a crucial skill in sailing. Throughout history, civilizations like the Egyptians and Phoenicians utilized unconventional materials such as papyrus and animal hides to construct sails. In modern times, sailmaking has advanced using innovative techniques and high-quality materials. Today, the process of building and rigging sails involves precise measurements, intricate designs, and the utilization of high-performance materials. Sailmakers play a critical role in providing sailors with sails that are both durable and efficient, enabling them to harness the power of the wind and navigate through open waters.
To successfully build and rig a sail , follow these steps:
1. Choose the appropriate sail material: Begin by deciding on the type of material you wish to use for your sail, such as Dacron , nylon , or laminate .
2. Measure and cut the sail panels: Use a sharp fabric cutting tool to accurately measure and delineate the dimensions of the sail panels on the chosen material. Then, cut along the marked lines.
3. Assemble the panels: Arrange the sail panels in the desired order and position. Employ a sewing machine to securely stitch the panels together, ensuring that you follow the specified seam allowance.
4. Add reinforcements: Affix reinforcements, like corner patches and reefing points, to the relevant areas of the sail. These reinforcements enhance the sail’s strength and durability.
5. Install the sail hardware: Attach the necessary hardware, such as grommets, luff tape, and battens, to the sail. These components facilitate rigging and effective control of the sail.
6. Rig the sail to the mast and boom: Connect the sail to the sailboat’s mast and boom using suitable connectors, such as hanks or slides, securing the sail firmly in place.
7. Tune the sail: Adjust the sail’s tension by tightening or loosening the halyard and other control lines. This ensures optimal performance and shape during sailing.
What Materials are Required for Constructing the Sail?
To construct a sail for a sailboat, you will need several materials. First, you will need a durable and lightweight sailcloth made from materials such as Dacron or Nylon . This will provide strength and resistance to tearing. Next, you will need high-quality UV-resistant thread to sew the sail together, ensuring it can withstand the elements and maintain its integrity.
To strengthen areas of the sail that experience higher stress, such as corners and reef points, you will need adhesive-backed polyester tapes or webbing. These reinforcements will help keep the sail in good condition during use. You will need grommets or eyelets to create attachment points on the sail for halyards, sheets, and other lines. These can either be made of metal or plastic fittings.
It is important to insert battens into pockets on the sail to provide shape and stability. These thin and flexible strips can be made of fiberglass, carbon fiber, or wood, depending on your preferences. You will need hardware such as shackles, blocks, and cleats to attach and adjust the sail on the sailboat.
When constructing your sail, make sure to choose materials that are suitable for the size and type of sailboat you have, as well as the intended use of the sail. The materials should be durable, resistant to UV damage, and able to withstand the forces and conditions encountered while sailing.
How to Assemble and Attach the Sail to the Sailboat?
To learn how to assemble and attach the sail to the sailboat, follow these steps:
1. Prepare the sail and sail track: Lay out the sail, check for damage/debris, and ensure the sail track on the mast and boom is clear and in good condition.
2. Attach the halyard: Connect the halyard to the head of the sail and hoist it up the mast securely.
3. Attach the luff and tack: Slide the luff (front edge) of the sail into the sail track on the mast. Attach the tack (bottom front corner) of the sail to the fitting on the boat’s bow.
4. Attach the leech and clew: Slide the leech (back edge) of the sail into the sail track on the boom. Attach the clew (bottom back corner) of the sail to the fitting on the boom.
5. Tension the sail: Thoroughly tighten the halyard to remove any wrinkles or flapping in the sail. Ensure the sail is evenly tensioned along its edges.
6. Secure the sheets: Attach the sheets (lines that control the angle of the sail) to the clew and route them back to the cockpit, ensuring they are free from obstructions.
7. Test the sail: Adjust the sheets and the angle of the sail for optimal performance. Ensure the sail is properly trimmed and responding to the wind.
By following these steps, you can successfully assemble and attach the sail to your sailboat. Remember to always prioritize safety and seek guidance from experienced sailors if needed.
When applying the finishing touches to a sailboat, there are important final steps to consider:
1. Apply a final coat of paint or varnish to protect the wood and enhance appearance.
2. Securely install the rudder and tiller for smooth steering.
3. Tighten the attachment of the mast and rigging for optimal sailing performance.
4. Properly install the boom and attach the main sail .
5. Efficiently attach the jib sail to the forestay to capture the wind effectively.
6. Rig the halyards and sheets for easy sail control.
7. Securely mount any additional equipment.
8. Double-check all connections, fastenings, and fittings.
9. Thoroughly inspect the sailboat for any defects or issues.
10. Launch the sailboat and enjoy your completed creation.
How to Add Finishing Details to the Sailboat?
When it comes to adding finishing details to a sailboat, many people wonder how to do it correctly. Fortunately, I can guide you through the process step-by-step. By following these instructions, you will be able to achieve a polished final product that is both beautiful and functional.
Step 1: Sand
To start, you need to sand the entire surface of the sailboat. This will create a smooth texture and prepare it for the varnish or paint that you will be applying later.
Step 2: Clean
After sanding, it is important to clean the surface to remove any dust or debris. You can use a damp cloth for this task. Make sure the surface is completely clean and dry before proceeding.
Step 3: Prime
To protect the sailboat against water damage and create a smooth base, apply marine-grade primer. This step is crucial for the longevity of the finishing details. Allow the primer to dry completely before moving on to the next step.
Step 4: Varnish or Paint
Now comes the fun part – applying the varnish or paint. For a natural wood look, use multiple coats of marine-grade varnish. If you prefer some color and design, opt for marine-grade paint instead. Make sure to apply each coat evenly and allow enough time for drying between coats.
Step 5: Add Hardware
Once the varnish or paint has dried, it’s time to install any necessary hardware on the sailboat. This includes items such as cleats, handles, or hinges. Ensure that they are securely attached and in the correct positions.
Step 6: Detail
To enhance the aesthetic appeal of the sailboat, consider adding some decorative elements. Pinstripes, decals, or other decorative touches can really make a difference. Get creative with this step and add your personal touch to the sailboat.
Step 7: Inspect
Before you launch the sailboat, take the time to thoroughly inspect all the finishing details. Check for security and quality. If any adjustments or touch-ups are needed, make sure to address them before hitting the water.
By following these steps, you will be able to successfully add the finishing details to your sailboat. The end result will be a beautiful and functional watercraft that you can be proud of.
What Steps are Involved in Painting and Varnishing the Sailboat?
The steps involved in painting and varnishing a sailboat are:
- Clean the sailboat’s surface using a mild detergent and water to remove dirt and debris.
- Sand the surface with fine-grit sandpaper to create a smooth base for painting and varnishing.
- Apply a primer coat evenly to create a strong base.
- Let the primer coat dry completely as per instructions.
- Use a brush or roller to apply the desired paint color , starting from the top and working down.
- Allow the paint to dry between coats and apply more coats if needed.
- To varnish the sailboat, apply a thin and even coat in the direction of the wood grain.
- Let the varnish dry between coats and apply more coats for desired shine and protection.
Suggestions for painting and varnishing the sailboat:
- Use high-quality marine-grade paint and varnish for durability and protection against the elements.
- Consider using a marine-grade polyurethane varnish for a glossy finish.
- Take your time and ensure proper preparation and application techniques for a professional result .
- Follow safety precautions such as wearing gloves , goggles , and a mask to protect against fumes.
- Regularly inspect and maintain the painted and varnished surfaces for longevity.
When I launched and tested my newly built sailboat, I felt excitement and anticipation . Launching and testing a sailboat involves important steps to ensure functionality and safety. The calm waters were perfect for my maiden voyage. As I hoisted the sails and caught the wind, I tested the sailboat’s functionality by adjusting their angles to catch the wind. The sailboat glided effortlessly, showcasing the successful launch and testing process. The boat’s responsiveness and stability were remarkable, proving that launching and testing the sailboat properly resulted in optimal performance. I knew that my hard work had paid off. The sailboat performed flawlessly , and I felt proud as I navigated the open waters. It was an exhilarating experience , marking the successful launching and testing of my sailboat and the beginning of many memorable adventures.
How to Prepare the Sailboat for its First Launch?
To prepare the sailboat for its first launch, follow these steps:
- Check the hull: Inspect for damage or cracks. Ensure proper sealing and no leaks.
- Verify essential equipment: Have necessary safety equipment on board, including life jackets, flares, and a first aid kit.
- Secure the rigging: Check the mast, boom, and rigging lines for wear or damage. Tighten and secure them.
- Check the sails: Examine for tears or fraying. Ensure proper attachment to the mast and boom.
- Test the navigation equipment: Ensure proper functioning of the compass, GPS, and other navigational instruments.
- Inspect the engine: Check oil, fuel, and coolant levels. Start the engine to ensure smooth operation.
- Verify the bilge pump: Test to ensure it functions correctly and can remove accumulated water.
- Fuel and water: Ensure sufficient fuel and freshwater on board.
- Inform someone: Share sailing plans, including estimated time of departure and return, with someone onshore.
- Perform a safety briefing: Gather passengers and explain safety equipment location and emergency procedures.
Pro-tip: Before longer trips, it’s recommended to have a practice sail near shore. This will build confidence in handling the sailboat and verify proper functioning.
What Safety Precautions to Follow when Testing the Sailboat?
When testing a sailboat, it is important to follow safety precautions for a successful and safe experience. Here are some steps to consider:
1. Check the weather forecast: Before testing the sailboat, check the weather to avoid severe conditions like high winds or storms.
2. Inspect the sailboat: Thoroughly check the sailboat for any damages or issues with the hull, rigging, and sail.
3. Wear appropriate safety gear: Always wear a life jacket and suitable footwear.
4. Inform someone about your plans: Let someone know your plans, including location and duration, as a safety precaution.
5. Use proper navigation equipment: Have a compass and charts for safe navigation.
6. Start with calm waters: Choose calm and shallow water, especially if you are a beginner, and avoid strong currents or heavy boat traffic.
7. Be cautious of capsize risks: Understand the risk of capsize and practice self-rescue techniques.
8. Be aware of other boats and obstacles: Watch out for other boats, objects, or obstacles in the water to avoid accidents.
9. Follow boating regulations: Familiarize yourself with local regulations and follow them for a safe and legal experience.
10. Stay alert and maintain control: Always stay alert and in control of the boat, adjust to changing weather conditions.
Remember, safety should always be the top priority when testing a sailboat. By following these precautions, you can enjoy a safe and enjoyable sailing experience.
Some Facts About How To Make A Sailboat:
- ✅ Building a wood sailboat takes approximately 100 hours over a span of 3 months. (Source: www.instructables.com)
- ✅ The cost of building a wood sailboat is around $1,000, excluding tools. (Source: www.instructables.com)
- ✅ A wood sailboat requires materials such as oak plywood, brad nails, epoxy resin, etc. (Source: www.instructables.com)
- ✅ An origami paper boat can be made by folding a sheet of paper in a specific pattern. (Source: www.wikihow.com)
- ✅ Aluminum foil can be used instead of paper to make a waterproof origami boat. (Source: www.wikihow.com)
Frequently Asked Questions
1. how long does it take to build a wood sailboat.
Building a wood sailboat typically takes around 100 hours over a span of 3 months.
2. How much does it cost to build a wood sailboat?
The cost of building a wood sailboat is estimated to be around $1,000, excluding tools.
3. What materials are needed to build a wood sailboat?
To build a wood sailboat, you will need boat building plans, oak plywood, pencils, ruler, tape measure, brad nails, epoxy resin, epoxy hardener, silica thickener, wood flour thickener, masking tape, Japanese pull-saw, table saw, router, sanding discs, jigsaw, combination square, drill, wire or zip ties, C-clamps, mixing cups, mixing sticks, gloves, wax paper, fiberglass cloth, plastic spreader, waterproof glue, screws, fasteners, blocks, pad eyes, gudgeon & pintle, patience, and elbow grease.
4. How do you make a paper boat?
To make a paper boat, start by folding an 8 ½ in x 11 in sheet of paper in half. Follow the step-by-step instructions outlined in the reference to create the boat shape.
5. What materials are needed to make a paper boat?
To make a paper boat, you will need a sheet of printer paper or origami paper. Additional materials such as clear tape, waxed paper, or a crayon can be used to reinforce or waterproof the boat.
6. How do you increase the water resistance of a sailboat?
To increase the water resistance of a sailboat, you can use an outdoor craft sealant. Spray the entire boat with the sealant and let it dry before using.
About the author

Leave a Reply Cancel reply
Your email address will not be published. Required fields are marked *
Save my name, email, and website in this browser for the next time I comment.
Latest posts

The history of sailing – from ancient times to modern adventures
History of Sailing Sailing is a time-honored tradition that has evolved over millennia, from its humble beginnings as a means of transportation to a beloved modern-day recreational activity. The history of sailing is a fascinating journey that spans cultures and centuries, rich in innovation and adventure. In this article, we’ll explore the remarkable evolution of…

Sailing Solo: Adventures and Challenges of Single-Handed Sailing
Solo Sailing Sailing has always been a pursuit of freedom, adventure, and self-discovery. While sailing with a crew is a fantastic experience, there’s a unique allure to sailing solo – just you, the wind, and the open sea. Single-handed sailing, as it’s often called, is a journey of self-reliance, resilience, and the ultimate test of…

Sustainable Sailing: Eco-Friendly Practices on the boat
Eco Friendly Sailing Sailing is an exhilarating and timeless way to explore the beauty of the open water, but it’s important to remember that our oceans and environment need our protection. Sustainable sailing, which involves eco-friendly practices and mindful decision-making, allows sailors to enjoy their adventures while minimizing their impact on the environment. In this…
- For Sale/Wanted
- Readers Tips
- Your Yarns.
- Restoration
- Miscellaneous
- DIY Boat Yards
- Boat Building
- Cabin Cruisers
- Free Boat Plans
- Begin Boating
- Boating Terms
- Ropes and Rigs
- Just for Fun
- Celestial Navigation
- Passage Planning
- VHF Marine Radio
- Diagonal Scale
Sailboat Plans
Free Sailboat Plans
A selection of some of the Free Sailboat Plans (pdf) that were published in magazines such as “Popular Mechanics”, "Popular Science" and the "Boat Builder Handbook".
If you need help with lofting out the plans click here for an article here which should help.
- Open Dayboats/Dinghys
- Rowing Boats
Open/Dayboat, Free Sailboat Plans
Everyone who digs boating has heard of the Hobie Cat, the sleek little catamaran that burst on the scene and captured the attention of all the fast-action sailors.

Marked by asymmetrical hulls and special trampoline supports, the Hobie can reach speeds above 20 mph and perform with a rare agility.
But it has one drawback.
It costs mucho dinero.
Thus, we introduce the Hobby Kat, sailboat plans, a build-it-yourself version of the “Hobie” that should cost from half to a third of the commercial version. If you have the moola, of course, go for a Hobie and have the time of your life on the water.
If not, try our Hobby
The homebuilt is not quite the same.
But she sails sweetly and fast—qualities which have made the “Hobie” popular
Even in a light air she’ll slip through the water at a fast clip.
She has no centreboards, leeboards or keel, and needs none.
The inside of each hull has built-in lift, like an airplane wing, so that as the boat heels and one hull digs in the boat is pulled back to windward.
Click Here for the Plans
She can run in very shallow water and the rudders kick up for beaching.
You can carry her on a trailer or even disassemble her.

Many a “stink pot” addict will take a second look at Tern because she planes in modest breezes, is easy to handle, and her streamlined prow arid pod-shaped, “inland scow” type hull offer slight water resistance. Then too, there’s a charm about the tiller of a sailer that’s not matched by the wheel of a motor-powered boat. Part of it is the challenge of making the most of nature’s free-wheeling breezes. Even with her 72sq.ft of sail, this Free Sailboat Plan is remarkably stable, and packs as many as four persons aboard
For thousands of inland lakes, Tern is the answer to sailing water sport, she is rugged and easy to launch
And she’s remarkably easy to build.

Falcon is a small, speedy, sporty sailboat which handles well. Tests on the original Falcon showed that she could easily out-distance boats of comparable size such as the one design class Snipe and Comet sailers.
And she will pace neck and neck with 18 footers with considerably greater sail spread.

This strong, beamy, eight-foot pram may be sailed either cat-rigged or sloop-rigged.
The dagger-board may be adjusted forward to balance the helm when sailing with the addition of a jib sail.
Oars or a small outboard motor may also be used to power this versatile Free Sailboat Plans.

Dart” is a small two or three person sailing craft, designed for use on protected waters such as bays. lakes, rivers or wherever sheltered waters are found. Its construction will repay the builder handsomely and provide a fast sailing craft, light in weight, easily transportable and cheap to construct with all difficult joinery eliminated
It provides thrilling and economical sport.

The 'Crescent', designed by C. T. Allen, is the ideal sailboat for day sailing on a small lake, river, or protected waters of a bay.
Centreboard design (Fig. 2) reduces Crescent's draft, so Shallow is not a problem.
Its broad beam of over 5½ft. makes it an ideal family boat because there is room for a cockpit large enough to accommodate four adults or two adults and three kids, and side and forward decks big enough to stretch out on when sun bathing.
"Jewel" is a 16' Crescent Sailboat being built by Mike Allen from the free sailboat plans by C.T .Allen in the 1958 "Boat Builders Handbook". And what a superb job Mike is doing check out his photos here .
Click Here for the Free version of the Plans

Sailing enthusiasts and backyard boat builders are not likely to find free boat plans for a sailing pram that can be built faster, lighter, stronger, or less expensively than Graefin-10. Two men can begin work on a Friday evening and have a smart, lively 10-ft. 85-pound sailboat in the water by Sunday evening (it’s been done).

Zephyr Is a refinement of a type of boat developed by the English for use in the rough open waters of the English Channel. Not only is it fast under sail, but it can stand up under punishment. And it’s light enough to be easily loaded atop an auto or light trailer.
Breeze-Baby

Skimming off a brisk wind or with the wind abeam, Breeze-Baby actually planes with one person aboard. Despite her rowboat lines that make her easy to build, she handles easily under her simple sail, an ideal first boat. Simple lines are adapted to plywood construction that’s strong, light and that keeps Breeze-Baby’s bilges dry
You can take her with you atop your car or on a lightweight trailer for summer fun wherever you vacation or get in a week-end’s sailing.

Cat’s Paw is easy to build because of the straight-sided hulls. The sheer line is flat and that simplifies building the form. Bow and stern are straight, so there’s no cockeyed bevel to fit and fuss with
She Is an Ideal boat to learn or practice sailing in because she will forgive so many mistakes.
Cabin Cruiser, Free Sailboat Plans

Previous posts
See What Others Have Posted

Recent Articles
Wooden Boat Events 2024
Apr 14, 24 05:15 AM
- Boat Plan Books
- Boatbuilding Tips
- Glass Cloth
- Stitch and Glue
- Strip Plank
You might like these

Plywood and Veneer Guide for Marine use.
A guide to plywood for boat building and why you should use the best marine grade you can afford.

DIY Woodboat Building Questions
Woodboat building questions a Forum for wooden boat building, plans, lumber, caulking compounds and other boat building problems.

Boat Books for Wooden Boat Builders
Boat Books a series of boat books based on some of the 1960's, classic, Free Boat Plans that were published in magazines such as "Popular Mechanics", "Popular Science" and the "Boat Builder Handbook".

Build a Boat, tips for the DIY Wooden Boat Builder.
How to Build a Boat, Wooden Boat Building methods for the DIY, backyard, self-builders explained, carvel, lapstrake and plywood

Clench Nails, Fastening for Small Wooden Boats.
How to use Clench Nails, these provide a fast reliable method for fastening small wooden boats.

Wood Screws for Boat Building and Repair.
Wood Screws are the most widely used and versatile fasteners used on wooden boats. Which type to use and how to use them

Timber, Lumber for Boat Building.
A brief description of the most common Timber used for building Wooden Boats how to choose wood for your project boat

Timber Properties
A brief guide to timber properties and wood, characteristics such as strength, stiffness and elasticity for choosing lumber for wooden boat building and restoration.

Rivets and Copper Rove Wood Boat Fastenings.
How to use Copper Rivets and Roves construction guide to fasteners on your wooden boat.
Ring Nails for Marine Fastening.
Ring Nails sometimes call Gripfast or ring shank, silicon bronze boat nails are renowned for their holding power. but how to get them out?
Free Motorboat Plans
Free Motorboat Plans for the backyard home builder, build your own speed boat, cabin cruiser, runabout or utility boat using these simple plywood designs.

Wooden Boat Kits.
Wooden boat building is easy and inexpensive with wooden boat kits. From row boats and kayaks to sailing cruisers, boat to be proud of
Supplies for Wooden Boat building and Maintenance
Supplies for Wooden Boat Building and restoration, how to choose the materials and marine chandlery for your project.
DIY Woodboat Questions
Woodboat questions and answers forum for all Wooden Boat owners, advice and opinions on all aspects of wooden boat building, restoration and maintenance.
Small Boats, Made of Wood
What Everybody ought to know about building Small Boats, guidance and tips for self-building or restoring.
14’ 1956 Chris Craft, side rail how should it be attached?
Apr 12, 24 03:38 AM

How to laminate plywood on the hull
Apr 10, 24 03:46 AM

Woodboat Restoration questions forum
Woodboat restoration questions Forum, get advice about your Wooden Boat problems in a free, no frills, no need to sign up forum

Epoxy Resin for DIY Wooden Boat Building.
A guide to the epoxy resins and sustainable enrtopy resins to use when building wooden boats with marine plywood.
Wood Rot Repair and Treatment
Wood rot in wooden boats, how to treat, repair and replace rotten timbers in a wooden boat

Privacy Policy
Advertising Policy
Cookie Policy

I am perfectly aware that the majority of Wooden Boat aficionados are sensible folk. However, I need to point out that I am an amateur wooden boat enthusiast simply writing in order to try to help other amateur wooden boat enthusiasts. And while I take every care to ensure that the information in DIY Wood Boat.com is correct, anyone acting on the information on this website does so at their own risk.
WOODEN BOW TIES
How to build a wooden sailboat: a beginner's guide.
Are you interested in building your own sailboat? If so, building a wooden sailboat can be a rewarding and fulfilling experience. Not only will you have a unique vessel to call your own, but you’ll also learn valuable woodworking skills along the way.
To get started, you’ll need to gather the necessary materials and tools. This may include oak plywood, epoxy resin and hardener, thickener, brad nails, masking tape, a pull-saw, and a table saw. Once you have everything you need, you can begin the process of building your sailboat. From creating a jig and frame assembly to making the mast, there are many steps involved in building a wooden sailboat. But with patience and attention to detail, you can create a beautiful and functional vessel that will bring you joy for years to come.
Understanding the Basics of a Wooden Sailboat
If you are interested in building a wooden sailboat, it’s important to understand the basics of how a sailboat is constructed. In this section, we’ll cover the parts of a wooden sailboat and the different types of wooden sailboats.
Parts of a Wooden Sailboat
A wooden sailboat is made up of several parts, each with its own unique function. Here are some of the most important parts:
- Hull : The hull is the main body of the boat. It is the part of the boat that sits in the water and provides buoyancy.
- Keel : The keel is a long, narrow fin that extends down from the bottom of the hull. It helps to keep the boat from capsizing by providing stability.
- Rudder : The rudder is a flat piece of wood or metal that is attached to the back of the boat. It helps to steer the boat.
- Mast : The mast is a tall, vertical pole that supports the sails.
- Sails : The sails are large pieces of fabric that are attached to the mast and other parts of the boat. They catch the wind and propel the boat forward.
- Boom : The boom is a horizontal pole that is attached to the bottom of the mast. It helps to control the shape of the sail.
Types of Wooden Sailboats
There are many different types of wooden sailboats, each with its own unique characteristics. Here are some of the most common types:
- Dinghy : A dinghy is a small sailboat that is typically used for recreational sailing or racing.
- Sloop : A sloop is a sailboat with a single mast and a fore-and-aft rig.
- Ketch : A ketch is a sailboat with two masts, with the main mast taller than the mizzen mast.
- Yawl : A yawl is a sailboat with two masts, with the mizzen mast located aft of the rudder post.
When choosing a type of wooden sailboat to build, it’s important to consider your needs and experience level. A dinghy is a good choice for beginners, while a ketch or yawl may be more suitable for experienced sailors.
By understanding the basics of a wooden sailboat and the different types available, you can make an informed decision about which type of boat to build.
Choosing the Right Materials
When building a wooden sailboat, choosing the right materials is crucial to ensure the boat’s durability and performance. In this section, we will discuss the two most important materials you’ll need to choose: wood and sails/rigging materials.
Selecting the Right Wood
Choosing the right type of wood for your sailboat is critical. You want a wood that is strong, lightweight, and resistant to rot and decay. Some of the most popular types of wood used in sailboat building include:
- Cedar: Lightweight and easy to work with, cedar is an excellent choice for planking and decking.
- Mahogany: Strong and durable, mahogany is often used for building frames and keels.
- Oak: A dense and hard wood, oak is commonly used for building frames and planking.
When selecting your wood, make sure it is free of knots, cracks, and other defects that could weaken the boat’s structure. You should also consider the wood’s grain pattern, as this can affect the boat’s strength and appearance.
Choosing Sails and Rigging Materials
The type of sails and rigging materials you choose will depend on the type of sailboat you’re building and your sailing needs. Some of the most common materials used in sail and rigging construction include:
- Dacron: A strong and durable synthetic material, dacron is commonly used for sailcloth.
- Nylon: Lightweight and flexible, nylon is often used for spinnaker sails.
- Stainless Steel: Strong and corrosion-resistant, stainless steel is commonly used for rigging hardware.
When selecting your sails and rigging materials, consider the conditions you’ll be sailing in and the type of sailing you’ll be doing. For example, if you’ll be racing, you may want to choose lightweight sails and rigging materials that will help you achieve maximum speed. On the other hand, if you’ll be cruising, you may want to choose more durable materials that can withstand rougher conditions.
By choosing the right materials for your wooden sailboat, you can ensure that your boat is strong, durable, and performs well on the water.
Designing Your Sailboat
Before you start building your wooden sailboat, you need to design it. This will involve creating a blueprint and determining the size and shape of your boat.
Creating a Blueprint
Creating a blueprint is an essential step in designing your sailboat. It will help you visualize your boat and ensure that you have all the necessary components in place. You can create a blueprint using software such as AutoCAD or SketchUp, or you can draw it by hand.
When creating your blueprint, consider the following:
- The length, width, and height of your boat
- The position of the mast and sails
- The location of the rudder and keel
- The number of cabins and their layout
- The placement of any storage compartments or equipment
Determining the Size and Shape
The size and shape of your sailboat will depend on several factors, including your budget, the type of sailing you plan to do, and the number of people who will be on board.
Consider the following when determining the size and shape of your sailboat:
- The type of sailing you plan to do (coastal cruising, racing, etc.)
- The number of people who will be on board
- The amount of storage space you will need
- The amount of deck space you will need
- Your budget
Once you have determined the size and shape of your sailboat, you can start gathering materials and building your boat.
Building the Hull
When building a wooden sailboat, the hull is the most important part of the boat. It is the main structure that holds everything together and keeps the boat afloat. Building the hull requires cutting and assembling the wooden frame.
Cutting the Wood
To begin building the hull, you will need to cut the wood into the appropriate sizes and shapes. The wood should be cut according to the plans or blueprints that you have created. You can use a saw or a jigsaw to make the cuts.
It is important to use high-quality wood that is free of knots or other defects. The wood should be strong enough to withstand the pressure and weight of the water. Common types of wood used for building a wooden sailboat include cedar, oak, and mahogany.
Assembling the Frame
Once you have cut the wood, you can begin assembling the frame of the hull. The frame is made up of vertical pieces of wood called frames, which hold the shape of the boat. The frames are attached to the keel, which is the main structure that runs down the center of the boat.
To assemble the frame, you will need to use a sawhorse or other support to hold the lumber in place. You can then use screws or bolts to attach the frames to the keel. It is important to ensure that the frames are level and straight.
After the frames are attached to the keel, you can add the planks to the hull. The planks are attached to the frames and keel using screws or nails. It is important to ensure that the planks are properly aligned and spaced.
Once the planks are attached, you can sand and finish the hull to give it a smooth and polished look. This will also help to protect the wood from the elements.
Building the hull of a wooden sailboat requires patience and attention to detail. With the right tools and materials, you can create a strong and beautiful hull that will last for years to come.
Installing the Deck and Cabin
Installing the deck and cabin of your wooden sailboat is a crucial step in the construction process. It not only adds to the aesthetics of your boat but also provides structural support. Here are some tips to help you through the process.
Deck Installation
The deck of your wooden sailboat should be installed after the hull has been completed and before the cabin is built. It is important to ensure that the deck is watertight to prevent any leaks. Here are the steps to follow when installing the deck:
- Cut the deck to fit the hull and sand the edges to ensure a tight fit.
- Apply a layer of epoxy to the hull and deck joint to seal it.
- Secure the deck to the hull using screws or bolts.
- Apply a layer of fiberglass cloth and epoxy to the deck to make it watertight.
- Sand the surface of the deck to prepare it for painting or varnishing.
Cabin Installation
The cabin of your wooden sailboat provides shelter and storage space. It is important to ensure that it is properly installed to prevent any leaks. Here are the steps to follow when installing the cabin:
- Build the cabin on a flat surface using marine-grade plywood.
- Cut the cabin to fit the deck and hull and sand the edges to ensure a tight fit.
- Apply a layer of epoxy to the cabin and deck joint to seal it.
- Secure the cabin to the deck using screws or bolts.
- Apply a layer of fiberglass cloth and epoxy to the cabin to make it watertight.
- Install any windows, hatches, or doors in the cabin.
- Sand the surface of the cabin to prepare it for painting or varnishing.
By following these steps, you can ensure that your wooden sailboat’s deck and cabin are properly installed and watertight. This will not only make your boat look great but also ensure that you have a safe and enjoyable sailing experience.
Setting Up the Mast and Sails
Now that you have built your wooden sailboat, it is time to set up the mast and sails. This process may seem daunting, but with a little patience and attention to detail, you can have your boat ready to sail in no time.
Step 1: Install the Mast
The first step is to install the mast. Depending on the design of your boat, the mast may be a single piece or assembled from multiple sections. Make sure the mast is secured properly and is straight. Use a level to ensure the mast is vertical in both directions.
Step 2: Prepare the Sails
Next, prepare the sails. Make sure the sails are clean and free of any debris or damage. Attach the sail to the mast using the halyard, which is a rope used to raise and lower the sail. Make sure the sail is hoisted all the way to the top of the mast.
Step 3: Attach the Boom
Attach the boom to the mast and secure it with a boom vang, which is a rope used to control the angle of the boom. The boom is the horizontal spar that holds the bottom edge of the sail.
Step 4: Set the Sail
Once the boom is attached, set the sail. Adjust the angle of the boom and the sail to catch the wind and start moving. You can use the main sheet to control the angle of the sail and the boat’s speed.
Step 5: Trim the Sail
Finally, trim the sail to optimize its performance. This involves adjusting the sail’s shape and position to maximize its power and minimize drag. Use the sail controls, such as the cunningham and outhaul, to adjust the sail’s shape. Use the main sheet to control the sail’s position relative to the wind.
Congratulations! You have successfully set up the mast and sails of your wooden sailboat. Now it’s time to hit the water and enjoy the thrill of sailing.
Applying Finishing Touches
When it comes to building a wooden sailboat, applying the finishing touches is a crucial step that can make all the difference in the final product. Here are some tips and tricks to help you get the perfect finish.
Sanding and Finishing
Before you can apply any finish, you need to make sure the surface is smooth and free of imperfections. This means sanding the wood with progressively finer grits of sandpaper until you achieve the desired smoothness. Once you’ve finished sanding, you can apply a wood conditioner to help the wood absorb the finish more evenly.
When it comes to choosing a finish, you have several options. Some popular choices include varnish, paint, and oil. Varnish is a popular choice for wooden boats because it provides a durable, glossy finish that can withstand the harsh marine environment. Paint is another option, but it requires more maintenance than varnish and may not provide as much protection against the elements. Oil is a good choice if you want a more natural look, but it may not provide as much protection as varnish or paint.
Painting and Varnishing
If you decide to go with paint or varnish, there are a few things to keep in mind. First, make sure you apply the finish in a well-ventilated area to avoid inhaling fumes. Second, make sure you apply thin, even coats and allow each coat to dry completely before applying the next. This will help prevent drips and ensure a smooth finish.
When it comes to varnishing, it’s important to use a high-quality brush and work quickly to avoid brush marks. You may also want to consider using a foam brush for hard-to-reach areas. Once you’ve applied the final coat of varnish, you can buff the surface with a soft cloth to achieve a high-gloss finish.
Painting requires a different approach. You’ll need to choose the right type of paint for your boat and make sure you apply it evenly. If you’re painting a large area, you may want to consider using a paint sprayer to achieve a smooth, even finish. Once the paint has dried, you can apply a clear coat to protect the paint and give it a glossy finish.
In conclusion, applying the finishing touches to your wooden sailboat is an important step that requires careful attention to detail. By following these tips and using the right tools and materials, you can achieve a beautiful, long-lasting finish that will protect your boat and make it stand out on the water.
Safety Measures
When building a wooden sailboat, safety should always be your top priority. Here are some safety measures you should take to ensure a safe and successful build.
Installing Safety Equipment
Before you start building, make sure you have all the necessary safety equipment installed in your workshop. This includes fire extinguishers, smoke detectors, and first aid kits. You should also have a clear and unobstructed path to the exit in case of an emergency.
When working with power tools, always wear eye and ear protection, as well as a dust mask to protect your lungs. If you are using chemicals, make sure you are working in a well-ventilated area and wear gloves and a respirator if necessary.
Conducting a Safety Check
Before you start working on your sailboat, conduct a safety check to make sure everything is in order. Check that all tools and equipment are in good working order and that there are no loose or damaged parts. Make sure your work area is clean and free of clutter, and that all cords and cables are properly secured.
When working with wood, be aware of any knots or cracks in the wood that could weaken the structure of your sailboat. Use only high-quality marine-grade wood and be sure to follow the plans carefully to ensure a strong and safe boat.
By following these safety measures, you can ensure that your wooden sailboat build is a safe and enjoyable experience.
Maintaining Your Wooden Sailboat
Congratulations on building your own wooden sailboat! Now that you have a beautiful vessel, it’s important to keep it well-maintained to ensure its longevity and safety on the water.
Regular Maintenance
Regular maintenance is essential to keep your wooden sailboat in top condition. Here are some tips to keep in mind:
- Clean your boat regularly with a mild soap and water to prevent dirt and grime buildup.
- Check for any signs of damage, such as cracks, rot, or loose fittings, and address them promptly.
- Apply a fresh coat of varnish or paint every few years to protect the wood from the elements.
- Keep your boat covered when not in use to protect it from the sun and rain.
Seasonal Maintenance
In addition to regular maintenance, there are also some seasonal tasks that you should perform to keep your wooden sailboat in top condition:
- At the beginning of the season, inspect the hull for any damage or wear and make any necessary repairs.
- Check the rigging and sails to make sure they are in good condition and make any necessary repairs or replacements.
- Before storing your boat for the winter, make sure to properly winterize it to protect it from the cold and moisture.
Additional Tips
Here are some additional tips to keep in mind when maintaining your wooden sailboat:
- Use high-quality marine-grade products when cleaning and maintaining your boat.
- Avoid using harsh chemicals or abrasive materials that can damage the wood.
- Regularly check the bilge for any water buildup and pump it out as needed.
- Keep your boat well-ventilated to prevent moisture buildup and mold growth.
By following these tips, you can keep your wooden sailboat in top condition and enjoy many years of safe and fun sailing.
Leave a Reply Cancel reply
You must be logged in to post a comment.

How to Build a Boat
Classic boat plans from a 1937 issue of Popular Mechanics , updated for the 21st century.

It was a long time since anyone in my family had built a boat. The last was my Uncle Paul. He was a shipbuilder who learned his trade beginning at age 14 in Hamburg, Germany. Every morning, the boy rowed from the family's dock out across the shipping lanes of the Elbe River, which flows into the North Sea.
The trip to the shipyard where he was apprenticed took an hour and a half, longer in winter, when there was fog and floating ice on the water. After three years, Paul received a journeyman's certificate and a berth aboard a gigantic four-masted windjammer named Passat—"trade wind" in English. That was in the 1920s, before the fascists confiscated his family's own small shipyard and the Berendsohns left for America.
A few months ago, I decided to try my hand at the ancestral trade. I've built everything from houses to a blacksmith's forge , but there's no more evocative project than a boat, at least to me. Since before Austronesians first gazed across the Pacific, wooden vessels have stood for craftsmanship and the drive to explore. I sifted through PM's archives looking for a classic design and eventually settled on a 10-foot dinghy from our May 1937 issue . It looked elegant, yet simple enough to build on a pair of sawhorses.
It's been many years since my Uncle Paul was around to lend advice, so I ran the drawings past Timo White, a boatbuilder at Tuckerton Seaport, a small maritime museum on the New Jersey coast. It turned out that Timo was in the midst of restoring a surfboard built from plans in the July 1937 issue of PM. (It was a big year for seafaring projects, I guess.)
He confirmed that the dinghy was a good candidate for a first-time builder and agreed to lend a hand if needed.
Shipyard in the Driveway

On a wintry early spring morning I set out for Willard Brothers Woodcutters, a sawmill and lumber dealer in Trenton, N.J. You can spend hours there, roaming stacks of delicious-looking walnut, cherry and oak, some of the boards as wide as your arm is long. I bought red oak for the Sea Scout's frames (that was the name of the craft in the plans, and I chose to keep it) and a 2-inch-thick slab of white oak for the wedge-shaped stem at the bow.
Back home, I started making a racket feeding planks through a table saw. My skills were creaky--I've spent too much time in recent years fixing stuff and not enough building--but over a few days my old confidence returned. The Sea Scout began to take form.
Most boats begin with the frames, the ribs that provide structure to the hull. I roughed them into shape, along with the stem and the gracefully shaped stern wall, or transom, which I cut from ¾-inch plywood. Then I braced it all to a building board--which is nothing more than a 2 x 10 with a chalk line marked down the center.

⚠️ To simplify the project, I omitted the mast and centerboard. Instead, I built the Sea Scout, named after the craft in the original article, to be rowed or powered by an outboard motor. She works well in either configuration. You can find the original plans and materials list here.
The boat's skeleton was in place, but each member still needed to be precisely beveled before I could secure the curved planks of the hull. The next step was to clamp thin strips of wood, called battens, to the frame to stand in for the planks, so I could measure and mark all those angles. Then, I took the parts off the board and finished shaping them.
Often, the weather confined me to the garage, but when the sun emerged I worked in the driveway. If you want to get to know the neighbors, start building a boat. Linda from next door asked whether the craft would be sailed, rowed or powered by an outboard motor. Others wondered where I would go with it, how I'd get it there and what I would name it. A truck driver from Tulnoy Lumber, dropping off some marine plywood, approached respectfully. "This is beautiful," he said, with an old-fashioned New York accent as broad as the hand he ran over the frames.
Anatomy of a Boat

Working the Plank

I don't know how Uncle Paul felt about it, but boatbuilding can be acutely frustrating. The bane of my weekends proved to be a small bronze screw. A No. 6 Frearson flat-head, to be exact. Like most modern DIYers, I'd been spoiled by drywall screws and other aggressive fasteners that practically plow into the lumber. Even using a specialized, tapered drill bit and a waxlike lubricant with the unlikely name of Akempucky, I managed to wreck screws by the dozen. The head on one would strip a moment before the screw was fully seated, while another would shear off on the last eighth of a turn, leaving me with a shiny Frearson-head penny.
Timo had tried to downplay the arcana I'd face--"It's more like house carpentry than fine-furniture building," he had said--but I still found myself floundering on occasion. One challenge was that the 1937 article was more an overview than a detailed set of plans. And, though it pains me to find fault with my forebears at Popular Mechanics, the sketch contained suspicious discrepancies. Timo helped me recalibrate some of the dimensions midway through the project—and I had to trim several pieces after they were assembled.
The biggest hurdle came when it was time to plank the hull. The classic way is to bend strips of solid wood to the frames. I'd chosen marine-grade fir plywood instead to save time, but now I was barely able to force the hull's 14-inch sheets into place. There was no way the half-inch plywood I'd planned for the bottom was going to work.
Timo advised me to switch to a special, wafer-thin marine-grade plywood and plank the bottom in two layers. He came swooping in one Thursday morning to show me the technique. He stepped out of his truck with a broad smile, and a block plane in each hand, and my mood lifted. He politely took a sighting down the chine logs where we'd attach the bottom, and spent a few minutes planing them to the last measure of precision. Then we got to work with staples, glue and screws--and in a couple of hours the project went from a plywood flower bed to a small craft with sensuous compound curves.
It was satisfying, but my mistakes still showed in details like the placement of screws and the shape of the stem. "You know what they say," Timo told me. "Putty and paint makes a boat what it ain't." I got out my paintbrushes.
Maiden Voyage

We launched the boat at Tuckerton Seaport on a cool, overcast day that felt more like September than June. Down at the dock, Timo produced a can of Amstel Light in lieu of champagne. "Go ahead," he said, "pour it over the bow." I popped it open and emptied the beer over the paint. "I christen thee Sea Scout," I said. Then we slid the little craft off the dock and into the water.
You might think a feeling of triumph came over me. Not so. The Sea Scout looked very small, almost helpless, as she sat bobbing at the end of the painter, the little rope that Timo had threaded across the bow. I felt humbled. A phrase from the Book of Psalms flashed in my mind: "They that go down to the sea in ships, that do business on great waters."
I wasn't aiming for any great waters myself. I eased off the dock and into the boat. Timo handed me the oars. Awkwardly, I drew the handles back, just above my hips. The craft slid forward gracefully, almost like she was on ice. As Timo watched, I braced the left oar down in the water and swept the surface with the right. The Sea Scout pivoted neatly, unexpectedly elegant and spry.
If the oars were a kick, you can imagine the thrill I felt when I mounted the 2.5-hp Mercury Marine outboard on the transom. It's a clean-running four-stroke engine, compact yet almost zippy on a boat this small. I gave the engine full throttle and cut some nice straight lines and a pleasingly tight curve complete with a crisp little wake.
With the afternoon gone, my first voyage was complete. In the end, I decided to donate the boat and engine to Tuckerton Seaport. Frankly, I needed the space in my garage and driveway: The Sea Scout was a good first foray into wooden boatbuilding, but I knew I could do better—and I'm already sifting through plans.
The Sea Scout, a Decade Later

Ask anybody who’s ever built a boat, and they’ll tell you one thing about it: you’re not the same after you’ve built one. And that goes for me, too. The little boat, which I built back in 2009, shaped me as much—or perhaps more—than I shaped it.
The Sea Scout project brought a flood of mail from our readers, some of whom had built the boat or knew someone who did. One woman still had the boat that her father built. She sent a picture of it and recalled the many pleasant hours she spent with her dad as her father taught her how to sail in it. She kindly offered to donate the boat to us, thinking that perhaps we could put it in our lobby. I wish I could have taken her up on the offer.
When you build a boat, you take your place in the long line of craftspeople—professional and amateurs alike—who have plied that trade and learned about the unique burden of building a craft upon whom someone’s safety and enjoyment will depend. Building a boat is humbling, you remember every mistake you made building the thing as it bobs up and down, and waves wash over its bow or crash into it from the side.
You feel it shudder, but it doesn’t give way as you look over the side at the murky depths. And afterward, you look at every boat with a more knowing eye, a greater respect...and you wonder if you could build it.

Roy Berendsohn has worked for more than 25 years at Popular Mechanics, where he has written on carpentry, masonry, painting, plumbing, electrical, woodworking, blacksmithing, welding, lawn care, chainsaw use, and outdoor power equipment. When he’s not working on his own house, he volunteers with Sovereign Grace Church doing home repair for families in rural, suburban and urban locations throughout central and southern New Jersey.

.css-cuqpxl:before{padding-right:0.3125rem;content:'//';display:inline;} Pop Mech Pro .css-xtujxj:before{padding-left:0.3125rem;content:'//';display:inline;}

A Groundbreaking Discovery For Light-Speed Travel

Russia Is Now Using Golf Carts in Combat

The Bradley Gets a New Iron Fist

South Africa Wins Fight for 'Indian Titanic' Loot

Can the Army’s New Rifle Take on Russian Armor?

Overhaul Your Shop

The Source of All Consciousness May Be Black Holes

F-22s are Flocking to This Island in the Pacific

Special Ops Gunship Shreds “Fishing Boat”

Russia's Unprecedented Nuclear Drills

Henrietta Lacks Never Asked to Be Immortal
Affordable Sailboats You Can Build at Home

Last Updated by
Daniel Wade
September 13, 2023
Key Takeaways
- There are many sailboats that anyone can build from home depending on tastes
- Budget will be the biggest deciding factor on a majority of the process
- Consider kits that come with most of what you need or choose ones that are all-inclusive
- Design complexities and new materials may make the building time process longer
- Plan the best you can ahead of time to save money and your working hours
Buying a sailboat can be expensive, but building your own can save you money. So what are sailboats you can build from home?
Sailboats that you can build from home will likely be a small boat under 20 feet. These could be from many different boat suppliers such as B&B Yachts, Brooks Boat Designs, and Chase Small Craft. Boat plans will vary based on your budget and how much time you have on your hands.
Based on my previous experience, building your own boat will take much longer than if a professional were to do it. You also have to be able to study plans, consider various sailboat designs, and have tons of supplies such as fiberglass tape or fiberglass cloth. On top of that, you will also have to be good with your hands.
Table of contents
Top 10 Affordable Sailboats Anyone Can Build at Home
Building your own pocket cruiser or other styles from boat plans is an impressive feat, as this will need dedicated time and money to assure your boat sails safely. Boat building takes a lot of patience as well, especially since this will not be completed in a fast manner.
Finding boat plans and materials that fit your budget will be key to being able to complete the project. The time it takes to complete these projects will vary on your overall experience and needs. Below are 10 of the most affordable sailboats that you can build in the comfort of your home.
B&B Yachts

B&B Yachts have 14 different boat plans you can choose from to find the boat of your desires. Their shop is located along the Bay River in North Carolina where they construct all of the kits and have a 100 foot dock to show off your project once you complete it.
One popular model to check out is their Core Sound 15, as it is the perfect size for those wanting to build a modest size boat for a handful of people on board. Their website features some videos of completed projects and the plans or kits for purchase.
- 14 different models to choose from plus some dinghies
- Various monohull and multihull options
- Friendly customer service with attractive prices
- Might be too many options for some that are indecisive
- Not ideal for those wanting to have a motor sailer
Brooks Boat Designs

Brooks Boat Designs has a handful of options to consider for your next sailboat building project. They are located in Brookline, Maine and give the option to buy the kits or have them build one from scratch for you. They have plenty of knowledge, so do not be shy to ask about modifications or custom features you are looking for.
Depending on your specifics, they can attempt to accommodate some of their plans to help fit your desired outcome. By checking out their site, you can see many examples of their construction in progress and what the boats will look like when completed.
- Offers a variety of kits
- Plans vary around $50 and up, while materials will obviously add more costs
- Some plans can be rowing boats that can convert to sailboats
- Might take a while to hear back from them, as their contact section is a little outdated
- Their plans may not accommodate a ton of extras for your taste
Chase Small Craft

Chase Small Craft offers a simple process for building boats. Their kits are equipped with everything you need and will help save you time than just buying the materials outright and other parts you could need. This is arguably one of the best bang for buck instances if you want to save time and money searching for pieces to your boat.
They are located in Saco, Maine and will ship everything to your home from there. All the necessary materials are included and all you need are the proper tools and working space.
- All-inclusive kits with what you need
- Tons of knowledge on their site for boat building
- Easy process to order and customize
- Complete kits can range over $20,000 for larger boats
- Kits may take up to eight weeks to ship out
Chesapeake Light Craft

You can expect high-quality boat kits from Chesapeake Light Craft . They feature 18 different sailboat kits that vary from eight to 20 feet in length. This should be more than enough to find one for you if you are newer to boat building.
They also have a wide variety of other kits in addition to the sailboat, in the event that you wanted to order a small kayak or paddleboard in addition to your sailboat. The prices vary considerably when considering a small or larger boat, so check the complete list of options to in order to potentially fit your needs.
- Plenty of sailboat offerings to choose from
- Different beautiful hull form options to consider
- Easy to build and perfect for sailing
- Only has basic materials needed for kit, so you may need to purchase other items
- Has epoxy shipping fee no matter if you pick up item
Dudley Dix Yacht Design
Dudley Dix Yacht Design has an extensive list of plywood and single skin sailing boat options. They have plenty of sail plans and kits to consider depending on your goals. These follow a classic look for sailboats, which are aesthetically pleasing.
If you are wanting one to accommodate a small family, they have more than plenty to look through. The cost is not as bad compared to others, but keep in mind that you may need to throw in your own supplies or specific tools to get the job done.
- Plans start at $30 and range up to $7,500 or more for kits
- More than enough of options to consider
- Affordable variety of sailboat offerings
- Might be too many options for those new to sailing
- Most are wood without the use of aluminum or steel
Farrier Marine

If you are in search of a multihull to build, then Farrier Marine is what you need. They offer a unique folding catamaran that is trailerable and give you the option to build it yourself. This not only makes it an appealing option, but anyone can take this multihull boat wherever they want with ease.
It features a thorough construction guide once you receive all of the materials. These also come with stainless steel fasteners and an aluminum mast for high-quality materials. Pricing will vary since you must request which model type you are considering.
- Ability to build a unique catamaran
- In-depth construction guide to help
- Easily handled and trailerable
- Price may be too high
- Limited offerings since only a few multihull options
Glen-L Marine Designs

Building a boat from Glen-L Marine Designs can save you time and money. They feature an easy system to order and receive the kits, as well as an in-depth guide to building them. This is an appealing option compared to most boat kit sellers.
The beauty about Glen-L is that anyone can build these from scratch, so you do not have to be the best boat builder in the world to get it done. They offer guides and helpful insights from their team to point you in the right direction. Plans vary around $15, while kits can range well over $1,000 depending on boat size.
- Nearly 50 designs to choose from
- Complete guide to help anyone build it
- Plenty of price points depending on size
- Might be overwhelming with the amount of options
- Could take a while to get parts since they are popular
John Welsford Boat Designs

John Welsford Boat Designs invites new and veteran boat builders that want a taste of quality small wooden boats. The boat plans are designed to meet your specifications and are catered to your desires.
There are seven sailboat designs to choose from so you do not feel overwhelmed in the process. However, they do not sell kits all the time, so you would need to have the materials or be on the lookout for the best prices when they are available.
- Seven sailboat plans with different sizes
- Quality boat builder and supporting community
- In-depth knowledge provided to you when you order
- Might be too small of boat size
- Kits are not always available
Iain Oughtred
There are plenty of options on the wooden boat store, but you should narrow down your search for Iain Oughtred’s line of sailboat kits and plans. There are 25 different plans to choose from, which should accommodate most everyone looking to build their own boat.
While they do offer some kits, they do not routinely offer sailboat kits. You would need to purchase all of the materials if you are considering one of their sail plans. Keep this in mind if you are considering, as you would need to hunt down the parts yourself.
- 25 different sailboat plans to look through
- Various sizes to contemplate for you sailing needs
- Prices will vary but are not bad compared to market
- No sailboat kits, only plans
- Newer boat builders might find too many options unappealing
Paul Gartside Boat Builder and Designer
Gartside Boats is a boat builder company based in Long Island, New York that showcases a variety of boats from traditional and newer methods of boat building. Within that variety, they have boat plans meant for six to 50 feet in length.
With an abundance of options, you will need to contact them regarding prices and any customizable options. Kits may vary as well, as they typically design in-house and build for you.
- Experienced boat designer that can accommodate with custom plans
- Many options are trailerable
- Can have plans for up to a 50 foot boat
- You will need to contact them for prices
- Customized options may make process more complicated for new boat builders
How Much Does it Cost to Build a Sailboat at Home?
As you have likely already done so, the math between building your own boat and buying one may be a huge difference. Likewise, you may even enjoy the challenge of taking an older boat that is gutted and restoring with parts from a kit to build one new again.
But how much does it cost exactly to build a boat from the comfort of your own garage or workshop? The prices are going to vary dramatically depending on your situation and material needed to get the job done. In addition, the time that it takes to complete this will also vary.
Sail plans are rather inexpensive if you are aiming to build a small boat. These plans allow you to see the workings of the boat design and what you need to build the boat.
Without these plans, you will not know the exact details of the design and it can cause major issues with the boat’s hull or other areas of the boat. Think of these as the backbone or instructions of the boat’s infancy before being built.
Price Per Square Foot
You should assume to pay anywhere between $300 to $600 per square foot if you are interested in building a boat. Buying a kit outright can be a good way to save time, but oftentimes these do not come with everything you need.
Instead, you should try to source as much of the materials at the best price as possible. Thinking ahead is part of the process and you might be able to score a deal at a lumber yard or hardware store for parts.
Boat Designs Matter
The design of the boat will be much different from one boat to the next, regardless if they are the same size in length. If you are pondering boats that range anywhere between 16 and 20 feet, you should factor in the shape of the hull, any rigging, and various appendages.
Prices tend to increase when there are more complexities within the designs. If you are considering a kit with more details than others, you will also have to pay more for the designs on that as well.
Kits Can Differ
It is important to understand that all kits are not going to be the same. As you gander at sailboat kits online to stitch together, you need to thoroughly look over to see if you have everything you need before buying.
It would also be at your advantage to ask the seller if any additional parts or supplies are needed. This may change your dynamic on the kit buying process and you may pass up one for another if it has everything you need. An all-inclusive kit may cost several hundred, if not thousands, of dollars more to have the convenience of everything in the bundle.
Construction Approaches
Some boat plans may require you to have certain tools to get the job done. This means special saws or planers, which the average person simply does not have.
Purchasing specialty tools might be expensive upfront and hard to find depending on what it is. Your best bet would be to check locally for others trying to sell their tools or consider a boat plan that does not require extensive tools to finish the job.
How Long Does it Take to Build a Sailboat?
An easy to build sailboat could take a while to build from scratch. Many different variances come into play that are difficult to pinpoint for everyone. But how long is that exactly and how will your experience play into this?
A fun project to sail in the wind could take you several months to well over a year depending on the boat plan and how big your boat is going to be. In addition, the materials all need to be accounted for prior to starting in the event a hardware store does not have them in stock.
Time Varies
The time that passes for simple boat designs on small sailing vessels can be done in a few weeks. This is assuming you have everything you need and work non-stop around the clock.
Certain complex situations may make the process long, such as the difficulty of working with some materials. If you are a skilled laborer, it may take you half the time compared to a novice. The amount of time it can take will vary on your availability and skill level.
Planning ahead will undoubtedly offer the most time-saving features. It also helps if you can tackle parts of the project at your own pace.
Complexity of Design
The design of the boat may make the construction process longer. For example, it may take you longer to build a catamaran compared to a similar lengthed monohull.
More complex designs might require more materials, therefore making the process a bit longer to complete. Furthermore, you will also need more experience working with difficult designs and that will affect you more as a newbie.
Be sure to manage your expectations well and do not allow yourself to become too stressed over this fun project. If you can, seek expert boat building advice from a local builder or the company you purchased sail plans through.
Quality Materials
The quality of the materials will matter significantly when building a boat and will greatly affect the time it takes to construct it. Handling fiberglass or carbon fiber might require specialty tools, while wood also demands a certain level of craftsmanship.
If you are not skilled at working with the material at hand, it might affect the quality of the build and you may have to go back to fix mistakes. This will definitely add more time to your project, because mistakes are bound to happen with your first project.
To save time, consider adding the tools and materials throughout the year or as often as your budget allows. You may want to try testing your skills on fiberglass or other materials to get a feel for how to work with it.
Related Articles
I've personally had thousands of questions about sailing and sailboats over the years. As I learn and experience sailing, and the community, I share the answers that work and make sense to me, here on Life of Sailing.
by this author
Best Sailboats
Learn About Sailboats
Most Recent

Best Small Sailboat Ornaments
September 12, 2023

Best Small Sailboats With Standing Headroom
December 28, 2023
Important Legal Info
Lifeofsailing.com is a participant in the Amazon Services LLC Associates Program, an affiliate advertising program designed to provide a means for sites to earn advertising fees by advertising and linking to Amazon. This site also participates in other affiliate programs and is compensated for referring traffic and business to these companies.
Similar Posts

Discover the Magic of Hydrofoil Sailboats
December 11, 2023

Best Bluewater Sailboats Under $50K

Hunter Sailboats: Are They Built for Bluewater Cruising?
August 29, 2023
Popular Posts

Best Liveaboard Catamaran Sailboats

Can a Novice Sail Around the World?
Elizabeth O'Malley
June 15, 2022

4 Best Electric Outboard Motors

How Long Did It Take The Vikings To Sail To England?

10 Best Sailboat Brands (And Why)
December 20, 2023

7 Best Places To Liveaboard A Sailboat
Get the best sailing content.
Top Rated Posts
Lifeofsailing.com is a participant in the Amazon Services LLC Associates Program, an affiliate advertising program designed to provide a means for sites to earn advertising fees by advertising and linking to Amazon. This site also participates in other affiliate programs and is compensated for referring traffic and business to these companies. (866) 342-SAIL
© 2024 Life of Sailing Email: [email protected] Address: 11816 Inwood Rd #3024 Dallas, TX 75244 Disclaimer Privacy Policy

How to Build a Sailboat Rudder From Scratch

Introduction: How to Build a Sailboat Rudder From Scratch

This particular rudder is built off of the original rudder for a ~20' Bayliner Buccaneer sailboat. The original had cracked and rotted pretty badly. The owner of the sailboat cut the top of the rudder off and made a wooden 'boot' to cap the rudder. However, it wasn't water sealed with fiberglass, and over time more and more moisture got in until it became so flimsy that it wasn't reliable. While this instructable is specifically for this Bayliner sailboat with a tiller-style rudder, the instructions should be general enough for you to modify it to work for many sailboats. With that said, there are many many nuances to fiberglass/composite marine construction, so this type of build will require more research beyond what is covered here.
Step 1: Previous Rudder

In these photos you can see the extent of the damage. The rudder was foam-core/fiberglass sandwich. Think of it as a Big Mac; the three buns of the Big Mac were layers of fiberglass, and the meat was the foam (the yellow stuff). The only difference was that the buns would have all been connected and fully enclose the meat. First, I cut apart the rudder along its perimeter with an oscillating saw, so that I could use the pieces as templates for the build. In the fifth image you are seeing a piece of balsa (I think) at the edge of the rudder where the mounting hardware was located so as to provide compressive stability for the tightened hardware. In the last image, if you look at the top of the image you can see where the previous owner had chopped off the top of the rudder. There was a rudimentary wooden cap on that, so you can see how easy it would have been for water to get in.
Step 2: Rebuild

Because of the difficulty of rebuilding the rudder the same way, I chose to use two sheets of 3/4" solid plywood. While this increased the overall weight of the rudder, it ensured maximum strength and stability. There is a good reason that I chose to do it in two pieces: I wanted to be able to sand the exterior faces of the rudder in order to get a tapered surface, and by doing it in two pieces allowed me to have the piece be level on one side. In the first image below, you can see the old pieces of the rudder all stripped of foam next to the new plywood pieces. In the background you can see the middle fiberglass 'bun' of the whole kit 'n caboodle. I scraped away all of the foam because I had originally wanted to save the exterior pieces and reuse them, but the Big Mac style construction made it more difficult to reuse them. Simply place the old pieces on your sheet of plywood, trace, then cut out with a jigsaw. If for some reason, you only have one template to work with, and you are using two pieces of ply that will later get glued together, be sure to flip the template over before tracing, so you have mirrored pieces. The customer asked for a little more material at the top of the rudder, as you will see in the last images of the Instructable. It ended up making it look a little strange, however.
Step 3: Sanding

Unfortunately, I only took one image of the sanding process, shown below. As I mentioned, it is good to sand the two pieces separately, although this picture is of the two already glued together. A handy trick is to imagine your surface and the lines of ply as the lines on a topography map. The curved edge of the rudder closest to us in the image is the narrowest edge, from the little notch all the way down the side to the very bottom of the rudder. This is because it is the edge of the rudder that points forward when it is on the boat. I started by using a disc sander, but it was too slow, so I switched to a grinder. The grinder worked well, but it was a bit too fast, so if you decide to use one, be very judicious in your use of it, otherwise you will end up with big divots.
Step 4: Fiberglass Layup

As I already alluded, there are many many variations to fiberglass construction. For this project I used chopped strand mat (which you can see in the first image), and a woven fiberglass cloth on top of that, with vinylester resin. Later on in the project I switched to West Systems Epoxy 105 and 205, because it was on hand. This type of layup requires you to use both the mat and the cloth in one process. The general idea is that you cut your mat to about the same size as your rudder, pour your resin on top, spread it and around, then immediately lay on the cloth (that you have also already cut to size), and the resin underneath should be enough to saturate the cloth. Often, however, it wasn't, and I had to mix more up really quick and pour it on top of the cloth to get it fully saturated. This is where you will need to conduct more research on mixing ratios of resin, temperature, amount per surface area, etc. Generally, I was able to get about 30 minutes of working time out of each batch. In the back is a finned roller that you use after you mix and start pouring the resin to remove the air bubbles from under the chopped strand mat and to spread the resin around. After a while the roller gets all gummed up, and I ended up using just my gloved hand to push out the bubbles, and I found that a simple plastic spreader worked best for spreading. Don't worry about the stuff that hangs over the sides. Originally I wanted to have it fold over and seal the edges at the same time, but this was near impossible, as we will see soon, and I just let it hang and harden from any of the spilled over resin. I dealt with it later with a lot of sanding.
Step 5: First Layer and Sanding

The order I used was as follows: Glass one side of the rudder, let cure. Cut off excess edge stuff and rough sand/grind. Glass other side of rudder, let cure. Cut off excess, sand until flush. Glass edges based upon which were generally 'up' when clamped in a mostly horizontal way (images 4 and 5). Glass the remaining edges. Sand the nasty edges until flush. The first image is after the glass on the faces have cured, showing the excess. The third image was after sanding the excess from the faces. The following images were taken doing first layers of the edges, after the faces.
Step 6: Additional Layers and Difficult Spots

I don't remember exactly how many layers went on total, because after sanding where necessary, sometimes more wood gets exposed, and all that's required is a simple patch. The first image is after fully sanded face and edge layers. There are some really difficult spots that you need to pay attention to. Generally, corners are the spots you need to look out for. It's like trying to wrap a piece of paper over a 3D form without letting any edges lift. They will tend to lift up one end of your saturated cloth and allow air to get right in there, which means you'll have to sand that air bubble out and re-do it later. The very bottom tip of the rudder was one of them. Although the second picture is after I had drilled the holes for the hardware, it's useful to see the method for tackling those difficult spots. Visibile at the tip of the rudder is a bit of blue painter's tape. For that spot and others, which I will mention later, I basically taped the heck out of it, making a small well, and poured in enough resin to cover it. You can also see in this picture, how it has started to get thick/bulky. That's normal as layers build, you just need to sand it down flush later. Sometimes the tape gets sealed in there, so I just left it in.
Step 7: Notes of Caution

If, after a good amount of sanding, your rudder has patches of white at the surface and you can feel a clothy texture when you run your fingers over them, it means the cloth did not get fully saturated and means the surface is not fully sealed. When this happens, it is sufficient to mix up a new batch of epoxy/resin, and spread it over the surface(s) without the need for another layer of cloth. The entire surface is sealed when all of it feels smooth/looks glossy and hard, although some spots may still be bumpy. After you think you've sealed the whole rudder and you go to sand it smooth, you may uncover more white patches or air bubbles. It's extremely frustrating to think you're almost done and find another one of those, but it pays off to patch them properly. If there are some air bubbles or pockets that just don't seem to patch up and keeps reappearing after you sand this product is really helpful: http://www.marinetex.com/marinetexepoxyputty.html. It's a putty-like marine epoxy, so it serves the same purpose as regular epoxy, but it is much more workable and can be packed into a hole to completely seal it. The is the best product for repairs of deep scratches or small punctures in a fiberglass surface. The notch at the top of the first image was one spot that I taped significantly in order seal every spot with epoxy. This is the point where I switched to epoxy from resin, as I had run out. The purple is the natural color of the epoxy after it hardens.
Step 8: Hardware Holes

This step is extremely important and tricky. If, by chance, you have the previous hardware which mounts the rudder to the transom of the boat, great. Use them as guides as you don't want to make your rudder thicker than the original and not fit into the hardware. If you don't have previous hardware and your boat needs a very specific bracket, go buy it early so you can make sure to construct your rudder to fit into those, otherwise, just buy some to suit. Use this tutorial to help you get the holes right: http://www.boat-project.com/tutorials/drill.htm. Basically, you need to drill your holes bigger (1.5x, I think. The tutorial with specify this.) than the hardware needs. You then fill the hole with epoxy and let cure. Then you drill your holes again with a bit sized for your hardware. After painting, get some sealant (specified in the tutorial) and coat the bolts, holes and the inside face of the bracket immediately before placing them on the rudder. It's really important to drill your holes square through the rudder. If you don't, you'll find when putting the bolts through, that they won't meet with the bracket holes. If you're slightly off (like I was), you can just enlarge the hole at the problem end. If you're really off, you'll have to sand the paint away, drill the new hole, fill with epoxy again, re drill, then paint.
Step 9: Painting

Painting a boat or any underwater surface is another realm that has a large amount of nuance, specificity, and also varying opinions. It is still a bit unclear to me, but the most ideal situation is to find a marine paint that actually bonds with your fiberglass/epoxy surface. Interlux makes really good products and they have tutorials on which paints to buy and how to apply them: http://www.yachtpaint.com/usa/diy/default.aspx. Before painting, you must 'cut' the surface (a light sanding), so there is surface for the paint to bond to, and you will need to remove any oils or chemicals that are on the surface with acetone or a similar product. The paint will usually specify a total thickness of paint required to be considered sealed, and will allow you to calculate the number of coats from the average thickness per coat. Next use a top-side paint (I think we used an auto-body paint) to cover the surfaces above the waterline to make it look nice. Lastly, apply a bottom paint (also called anti-fouling paint) below the waterline of the rudder. Bottom paints, especially, vary greatly by geographical location, type of water, EPA legal restrictions, etc. Their purpose is to prevent organisms from attaching to the submerged surfaces, so naturally, they will contain certain chemicals and/or metals. Copper is a common ingredient in anti-fouling paint, as it slowly leeches from the paint, preventing any organisms from attaching permanently.
Step 10: The End!

Attach the hardware and tiller, and you're ready to put it on the boat!!! (That's my pops holding the rudder.)

Recommendations

For the Home Contest

Remake It - Autodesk Design & Make - Student Contest

Green Future Student Design Challenge

- PRO Courses Guides New Tech Help Pro Expert Videos About wikiHow Pro Upgrade Sign In
- EDIT Edit this Article
- EXPLORE Tech Help Pro About Us Random Article Quizzes Request a New Article Community Dashboard This Or That Game Popular Categories Arts and Entertainment Artwork Books Movies Computers and Electronics Computers Phone Skills Technology Hacks Health Men's Health Mental Health Women's Health Relationships Dating Love Relationship Issues Hobbies and Crafts Crafts Drawing Games Education & Communication Communication Skills Personal Development Studying Personal Care and Style Fashion Hair Care Personal Hygiene Youth Personal Care School Stuff Dating All Categories Arts and Entertainment Finance and Business Home and Garden Relationship Quizzes Cars & Other Vehicles Food and Entertaining Personal Care and Style Sports and Fitness Computers and Electronics Health Pets and Animals Travel Education & Communication Hobbies and Crafts Philosophy and Religion Work World Family Life Holidays and Traditions Relationships Youth
- Browse Articles
- Learn Something New
- Quizzes Hot
- This Or That Game
- Train Your Brain
- Explore More
- Support wikiHow
- About wikiHow
- Log in / Sign up
- Cars & Other Vehicles
- Boat Building
How to Make a Sail
Last Updated: November 8, 2023
This article was co-authored by Nitzan Levy . Captain Nitzan Levy is a Sailor, Social Entrepreneur, and the Founder of Sailors NYC, a recreational sailors’ club based in Jersey City, New Jersey that specializes in cruising boats and a variety of community programs. Capt. Levy has over 20 years of sailing experience and has sailed in many places around the world including: the Atlantic Ocean, the Mediterranean Sea, The Caribbean, and the Indian Ocean. Capt. Levy is a U.S. Coast Guard Licensed Master of vessels up to 50 Tons with Auxiliary Sail and Assistance Towing Endorsements. Capt. Levy is also a NauticEd Level V Captain Rank Chief Instructor, an American National Standards Assessor, an SLC instructor, an ASA (American Sailing Association) Certified Instructor Bareboat Chartering, and an Israeli licensed skipper on Boats for International Voyages. This article has been viewed 109,484 times.
Ships and boats of all sizes have harnessed the power of wind for centuries. Sailing boats have continued to use sails to this day for recreational sports and hobbies. Whether you’re looking for a calm day on the water or to compete in a race, making your own sail can be a beneficial skill.
Getting Started

- Research the dimensions of similar sails and have an idea of what kind of sailing you’d like to do. This gives basic reference points to research and execute.

- If you are planning to sew the sail yourself, you will also need a special sewing table to be able to support the industrial sewing machine. This table needs to be about twice the size of a table tennis table in order to support the size of the sail.

- Shorter booms give you more maneuverability.
Designing the Sail

- The luff curve won’t match the curve of the mast. The top third of the luff curve will be slight and the bottom of the curve, close to the boom, will be greater than the mast curve. There are different theories on what the perfect luff curve should be so research how to optimize the luff curve for your prefered type of sailing.

- If you want more stability, add more battens; however, use less battens to make your boat easier to manoeuvre and more lightweight.

- Use heavier materials near the bottom of the sail. Seams also help to optimize the amount of material you use.

- Tape fabric or newspaper together for more surface area when creating a large sail.
- The luff curve and shaping the seam will create a three dimensional sail so don’t worry if your sail lies flat as you construct your pattern.

- Ensure that the material you choose resist stretching and can withstand rips.
- Heavy monofilm and woven sailcloth are common choices.
Assembling the Sail

- Stick and sew two panels at a time until the sail is all in one piece. You can now trim it to your design on the table and draw on the batten pockets.

- Create an adjustable head for your sleeve if this is your first attempt at a sail.
- Use pulleys from old sails or get them from a sail maker.
Expert Q&A

- Know what shape you want and rig your sail until it takes that exact shape. Thanks Helpful 0 Not Helpful 0
- Learn what type of sails work best for your vessel relative to the sailing conditions. Thanks Helpful 0 Not Helpful 0

- Create a budget to ensure you optimize your resources. Thanks Helpful 1 Not Helpful 1
- Design with safety first, do not cut corners to favor aesthetics or cost. Thanks Helpful 0 Not Helpful 0
Things You'll Need
- Sailcloth, polytarp, nylon or Dacron sail material
- Industrial sewing machine
- Measuring tape
- Sail pattern
- Double sided adhesive tape
- Dacron tape or reinforced monofilm tape
You Might Also Like

- ↑ http://www.startedsailing.com/sail-battens.html
- ↑ http://jezebel.com/5916905/how-to-turn-your-dress-idea-into-reality-by-making-your-very-own-custom-pattern
- ↑ Nitzan Levy. Sailing Instructor. Expert Interview. 24 April 2020.
About This Article

To make a sail, first sketch the luff curve using your boom and mast measurements. Next, choose a scratch-resistant material that works best for your budget and sailing needs, such as Monofilm or Pentex taffeta scrim laminate. Then, place your pattern onto your material and outline the panel, battens, and seams. Once you have your sail’s shape, cut out the panels, and stitch them together, leaving extra cloth at the edges for seams. For more tips from our Nautical co-author, such as how to reinforce your sail against the elements, read on! Did this summary help you? Yes No
- Send fan mail to authors
Did this article help you?

Featured Articles

Trending Articles

Watch Articles

- Terms of Use
- Privacy Policy
- Do Not Sell or Share My Info
- Not Selling Info
Get all the best how-tos!
Sign up for wikiHow's weekly email newsletter
MorningChores
20 Budget-Friendly DIY Boat Plans for Loads of Water Fun
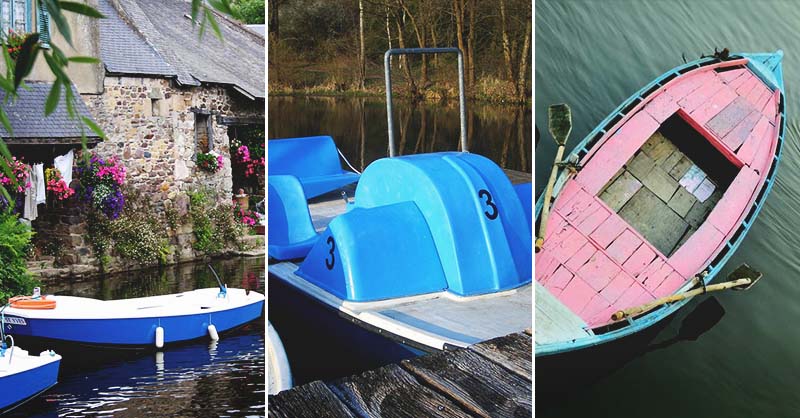
Do you enjoy spending a day out on the water every now and again? But does your budget allow you to purchase a new boat?
Well, even if you’re working on a meager budget, you could still own a boat. “How?” you might ask.
Rather simply in fact… make your own. I probably wouldn’t have thought of this idea either until a few months ago when my husband developed the itch for a boat.
He traded for a boat with a title, but it didn’t run. We’ve spent quite a few dollars and hours into making it work, and now we have a decent boat to enjoy on the water.
If you aren’t into fixing something up, I’m going to bring you some of the internet’s best ideas for making your own DIY boat. Here they are:
1. The DIY Tiny House Boat
We’re going to jump right in with a doozy to choose from. If you’re in the market for not only a boat but a houseboat, you may be wondering if this could ever fit in your budget.
Well, when you see this wood framed pontoon tiny houseboat , you’ll soon learn it can become a reality for you with a little hard work.
2. Basic Wooden Boat
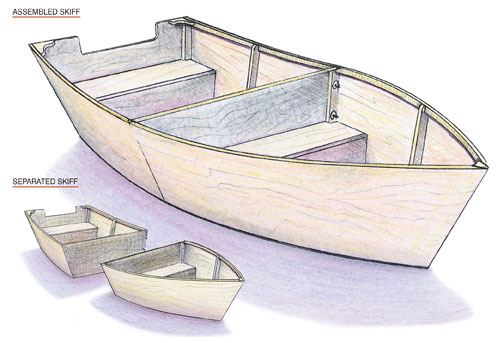
Whether you need a small fishing boat or a smaller boat to paddle around a pond, these plans are great for either.
The plans for this boat walk you through each step of the process. If you’re a beginner in the world of carpentry, this boat could still be feasible for you.
3. PVC DIY Kayak

I wasn’t aware of how expensive kayaks could be until our oldest recently caught the urge to purchase one. Suddenly, I realized how much money a person could invest in one.
However, this kayak appears to be quite buoyant and should be quite a bit cheaper because it’s constructed from PVC pipes . How neat does it look?
4. Recumbent Pontoon Pedal Boat
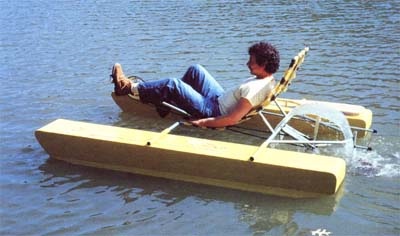
Do you enjoy renting a paddle boat and heading out on the water? Then you’ll love this boat. It’s a DIY version of a paddle boat.
However, it has large floats on the side which makes it a smaller version of a pontoon boat . Also, it’s made to recline for a more relaxing ride.
5. Plywood Canoe
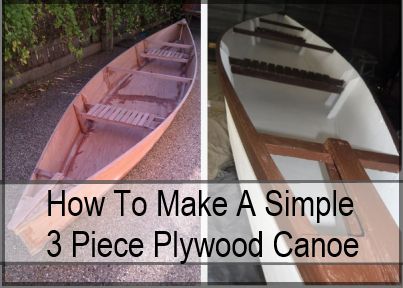
Canoes are a fun way to go up and down a river or other smaller bodies of water. If you’d like to have one, consider building it.
You can use these plans which show you how to construct a canoe out of plywood. This should make it more affordable yet functional too.
6. DIY Pontoon Boat
Pontoon boats are amazing boats to own. They’re great for fishing and luxurious enough to be a comforting way to cruise the water on a gorgeous day.
If you’d like to own one but can’t afford to buy, consider using these tips to help you build a pontoon boat all on your own.
7. Flat Bottom Boat Plans
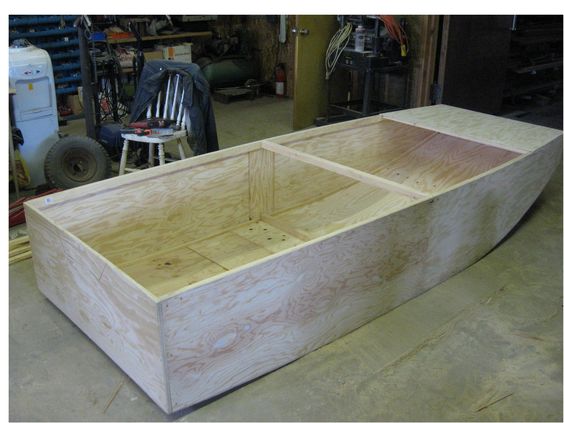
One thing I’ve learned over the past few months of renovating a boat, is you don’t need anything fancy for a fishing boat – unless you want it to be fancy.
However, if you’re in the market for something simple and functional, the plans for this flat-bottomed boat should do it.
8. PVC Johnboat
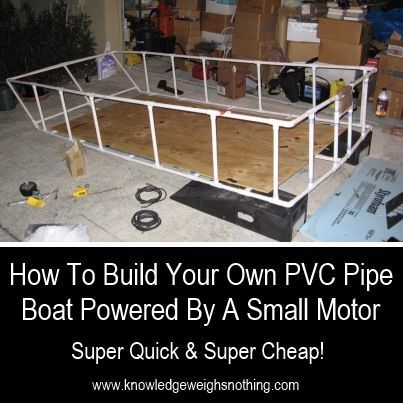
A Johnboat is a great way to get out on the water and have lots of fun. They’re also functional enough to make a nice fishing boat too.
Either way, if you’re in the market for a fishing boat, consider building your own johnboat with these plans.
9. DIY Simple Wooden Boat
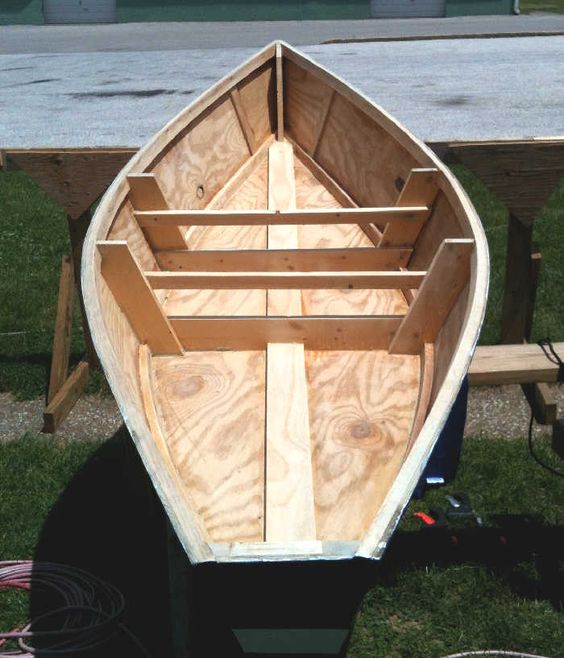
This option doesn’t come with plans which I could find. However, it could still be used as inspiration for building your boat.
Again, these boats would be good options if you’re someone looking for an inexpensive way to go fishing.
10. Homemade PVC Raft
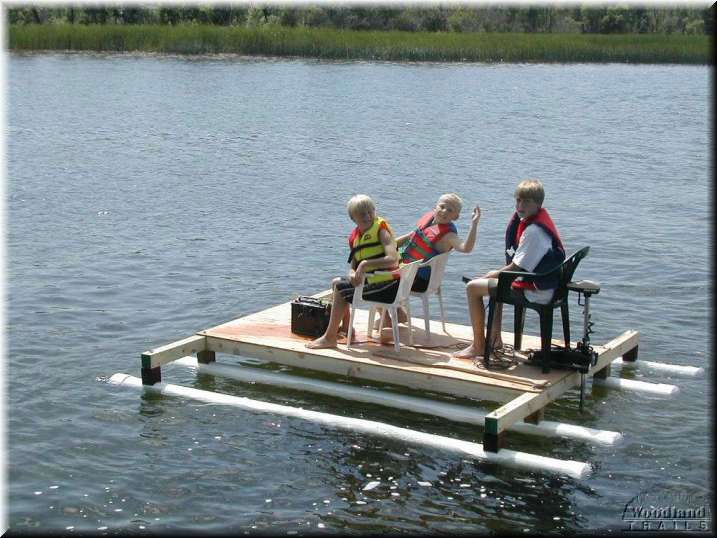
This PVC raft is another option which doesn’t come with plans, but it looks simple enough to build. If you have experience in carpentry, you should be able to figure it out rather quickly.
However, this looks like a fun way to get the whole family out on the water uniquely and cost-effectively.
11. The DIY Pontoon Double Hulled Kayak
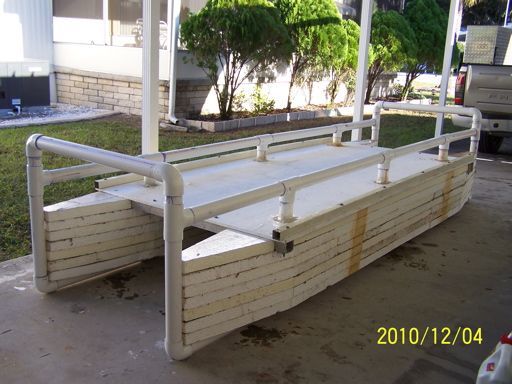
This pontoon boat is built in an abnormal but intriguing way. Instead of having typical floaters on the bottom of the boat, they used kayaks.
From there, the rest of the boat was built of foam insulation and PVC pipe. When you get creative, you can build a boat with little expense.
12. The Fishing Punt
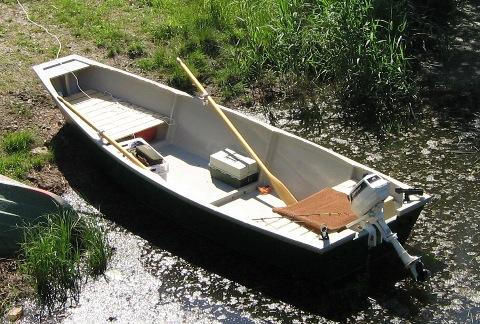
This is another cost-effective option for a fishing boat. However, there’s no guesswork on this one. The plans are laid out and easy to read.
Whether you’re an experienced carpenter or someone who has recently begun to build things, this could be a viable option for you.
13. Inflatable Raft Fishing Boat
Are you struggling to come up with enough room in your budget to build a new fishing boat? What if you could use your inflatable raft as a boat?
Well, thanks to this idea, you can. The person who created this put a plywood bottom in a raft and turned it into an amazing little fishing boat for little money.
14. Single Plywood Boat
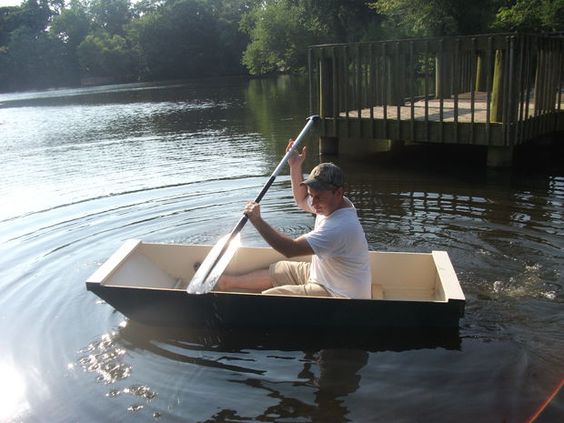
If you don’t need a larger boat, this could be the answer for you. It’s cost-effective because the whole thing is built from one sheet of plywood.
Even though this boat isn’t the biggest, it would make a great fishing boat for a one-person fishing trip .
15. Zip Tie and Ply Mini Boat
If you’d like to get out on the water for a fun day of fishing or sight-seeing, consider building this unique mini-boat .
It’s made from zip ties and plywood. Though it may sound a little sketchy on the surface, it seems quite buoyant and inexpensive too.
16. The Homemade Pontoon
When I saw this boat , I instantly sent it to my husband and said, “Can you build this? I may need it a little bigger to fit the kids and dog on board.” This should tell you; I love it!
But it actually is a cool idea. It looks comfortable for both cruising and fishing. Plus, it should be possible for most budgets.
17. PVC Pontoon Boat

Some of you may be looking at these ideas and saying, “This is great, but I’d prefer to have a motor attached to my boat.”
Well, you’re in luck. This pontoon boat is easy to build and also shows you how to attach a motor to keep you from having to paddle everywhere you go.
18. The Micro Houseboat
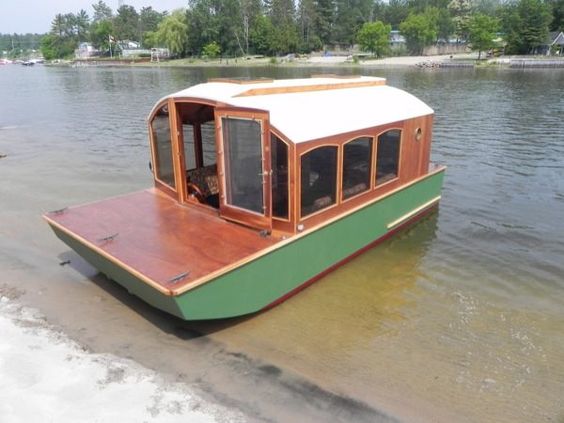
If you’ve ever searched for a houseboat, you know how expensive they can be. But don’t give up on your dream yet.
Instead, look into building this tiny houseboat . It has a gorgeous interior and would make a great full-time home or a small vacation home.
19. DIY River Raft
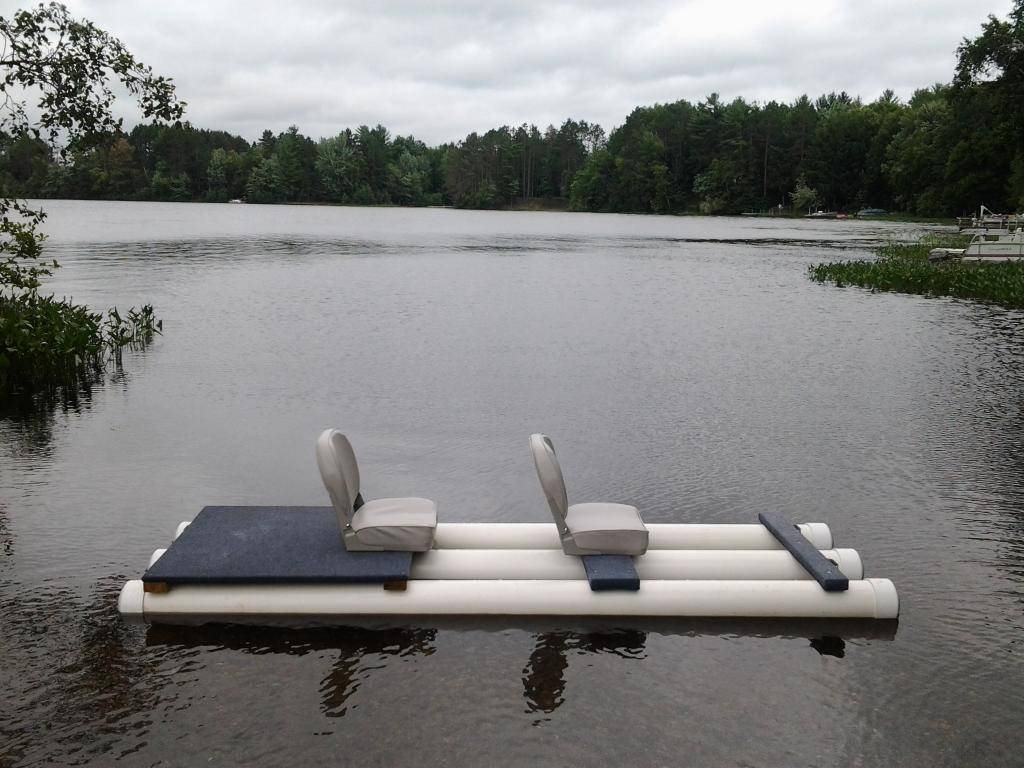
Who says you have to build something overly complicated to enjoy a day out on the river? Well, you don’t.
Instead, build this simple raft . It’s constructed from PVC pipe and has a few seats add onto it. It looks buoyant and can help you to have many enjoyable days out on the water.
20. Seafoam Kayak

Would you like a light-weight kayak you can build yourself? Consider creating this kayak made from sea foam.
It only weighs 16 pounds and is built to be eight feet long. This could be a great way to enjoy many days out on the water without much fuss.
Now you have 20 different options for a DIY boat. You can choose between kayaks, johnboats, houseboats, tiny homes, pontoons, and much more.
We hope you’ll find something on this list to inspire you and be able to create something you can enjoy all summer long.
Was this article helpful?
What went wrong.
This article contains incorrect information
This article does not have the information I am looking for
How can we improve it?
We appreciate your helpful feedback.
Your answer will be used to improve our content. The more feedback you give us, the better our pages can be.
Follow us on social media:

How to Fix an Awkward Corner Cabinet in 5 Easy Steps

40 Free DIY Farmhouse Table Plans to Give a Rustic Feel to Your Dining Room

How to Build an Outdoor Cob Oven for Under $30
How to Build a Dry Freestanding Stone Wall the Right Way
17 Impressive Old Door Uses You’re Going to Love
22 Spacious DIY Platform Bed Plans Suited to Any Cramped Budget

32 Fun and Creative DIY Indoor Activities Your Kids Will Love
30 Unique DIY Rag Rug Designs So You Can Create Your Own

30 Beautiful DIY Cabin Plans You Can Actually Build

How We Make a DIY King Size Bed Frame on a Budget (in 8 Easy Steps)

26 Clothesline Ideas to Hang Dry Your Clothes and Save You Money

How to Weave an Elegant Living Fence or Tunnel with Tree Cuttings
- The Inventory
Meet The DIY Mastermind Building A 74-Foot Sailboat By Hand In His Front Yard
Seeing a boat in someone’s yard is not uncommon. However, when that boat is a 74 foot long, 16 foot wide steel behemoth hand-built from scratch by the owner, it begins to raise eyebrows. Doug Jackson, of Tulsa, Oklahoma has such a boat in his front yard. It’s called SV Seeker, and it’s not something you see every day.
For the past six years Doug has been working to create a boat. It’s the ultimate DIY project which he documents on his YouTube Channel, SV Seeker . He outsources practically nothing. Look at any portion of the boat and you’ll see his work. He even cast his own giant brass propeller .
Related Content
This isn’t his first vessel either. He built and launched a wooden submarine and began another sub before deciding to build a sailboat.
Doug, and his girlfriend Betsy, have opened their doors to anyone who wants to come and work on the boat. Their gracious hospitality is overwhelming. There is even an apartment on the premises for people who want to stay and work a few nights in a row.
Why did Doug commit his life to building this massive craft? Scientific research, believe it or not. And because he can, because the task itself is like a mountain that demands to be climbed.
Here’s what Doug says on his website about the project:
SV Seeker not just a sailboat. She is certainly not a yacht. She is a work boat. A dream and a tool for making dreams come true. I’ve always wanted to do something grand and daring. Something that filled my passions, not just the hours of my day or a bank account. It started with building submarines, and with confidence it became building Seeker. And when completed I will have every skill I need to keep her in shape, and she will have the strength to take us to the wonders and treasures of the worlds oceans. Seeker will cater to adventurers, explorers, oceanographers, divers, wreck hunters, marine biologists and archaeologists. If you want to be a part, then allow me to welcome you aboard.
And so people from all walks of life make the pilgrimage to Tulsa to lend a hand. Some come just to see the boat in person. The first visitor arrived after driving a motor home all the way from Chicago with his family to volunteer.
Doug purchased his property for just $1500. When I asked him how, he told me a story about how he smiled pretty and talked sweetly and ended up paying twice what the lady wanted for it. Since purchasing it, he made improvements including remodeling the house, building a shop and an enclosed courtyard.
Doug’s life is built around the boat project. His home is modest but comfortable. Essentially, it’s one room with a bathroom and kitchen. The shop he built is actually larger than his house. Out back there’s a shed. In the front yard there’s a school bus body used for storage and, oh yeah, an enormous ocean-going sailboat. Photographs just don’t do it justice. It’s immense.
My fascination with the project began a couple years ago when I saw my first SV Seeker video. I saw a guy, Doug, welding together enormous sheets of quarter-inch steel plate to create the hull of a boat that would be more than 70 feet long when completed.
Building a boat of this magnitude on your own is a feat most people wouldn’t even consider possible. Since then I’ve followed the progress of the boat as Doug published each new episode.
I set out to find out what makes Doug tick. I contacted him to arrange a weekend to come up and work on the boat and then made the four-hour trek to Tulsa. Once there, I made my way through town and took a left down a sedate street. As I did I caught my first glimpse of the boat looming up from behind the other homes.
I saw a pair of huge gantries more suited to a dockyard than a residential neighborhood. And nestled beneath them is the SV Seeker, a hulking, rusty hulk adorned with twinkling Christmas lights.
Upon entering the gate and a thorough sniffing by the dogs, I was dwarfed by the bow towering above me, completely dominating the front yard of Doug’s home.
I was giddy with excitement. It was so surreal to finally see the boat in person. Not simply because I’d only seen it on YouTube, but because it’s a towering boat planted in the middle of a neighborhood.
That’s a full-size school bus sitting next to the boat.
I unceremoniously hustled up the aluminum ladder and immediately went to work with a pneumatic impact wrench in the belly of the boat. We were bolting down a hatch to prevent the rain from falling in. It wasn’t long before I was stuffed to capacity with pizza and Buffalo wings. Then it was back to work.
The rest of the weekend was spent working and talking with Doug. We welded and did a lot of grinding on deck. You can see his video featuring yours truly here . When Sunday rolled around and we sat down for a formal interview, I found most of my questions were already answered.
I asked how he has stayed so committed to one goal for so long. He said that within the span of your life you can build huge things if you’ll only commit to them. But how do you stay so committed?
When I asked him whether he ever considers not finishing the boat, his short answer was no.
He went on to say, “I would consider switching it for something better... Failure is always an option, I’m the king of failure. I love doing what I’m doing, but what I’m doing it on doesn’t particularly matter.”
Doug describes his project as “the boat the Internet built.” There’s a whole community of people online who want to see him succeed.
With such a big project there is always something to do whether it’s welding, grinding, or preparing to cast port lids. Orchestrating such a big build must be a feat in planning and organization, right? Well, to a degree it is, but mostly Doug allows the project dictate what happens next. He lets it happen organically. He tried to make a list once but he never went back to look at it.
You can’t make a steering wheel until you’ve made the rudder and all the pieces in between and you can’t fill your keels with lead until you’ve made them. This seems to be the way Doug is living his life. He forges ahead based on what knowledge is available now, and just has faith the answers will become clear the closer he gets to them.
Building the boat has convinced him that people worry unnecessarily. Making an excuse, or thinking of a reason not to do something, is easier than taking action. Doug watches no TV; he doesn’t read the newspaper and he preferred conversation to radio while we were riding in the car.
Doug suffers from dyslexia, which makes reading long texts difficult. And in the late 1980s, he found out he had a heart murmur after joining the Army. If Doug allowed himself to use these setbacks as excuses, he never would have picked up a welder to begin this project.
Even though the boat seems like a monument to a singular vision, Doug says his end goal is flexible. He doesn’t see the end of his project as merely completing the sailboat. He wants to provide a platform for conducting marine research for little or no cost. He isn’t just building a boat. He’s building a career for himself and he’s building opportunities for researchers who may not have the opportunity to go to sea otherwise.
There’s a picture on the wall in his house that says, “wear your passion.” I guess that explains the rather large tattoo of his boat on his forearm.
What makes Doug tick? The best I can come up with is that he possesses an irrepressible desire to eliminate excuses and fears that would otherwise control him and keep him from achieving his goal. He’s not scared to dream big.
I see Doug as a guy who chose live by his own rules. He isn’t grasping for that next rung. He’s not trying like hell to move up into the next social class, or give the appearance of having money. He has liberated himself from all that, and by doing so has aligned his priorities in a way that seems totally uncommon. He hopes his build will inspire more people to take on projects of a similar magnitude.
What he does have in indefatigable faith in himself to complete his goals. He has chosen to define his own criteria for success. SV Seeker is a concrete manifestation of one man’s will, a man who has taken the helm of his life firmly in both hands and stayed the course, whatever storms may come be damned.
Two years ago Aaron Vick Starnes quit his well-paying bank job to grind it out as an automotive writer. He has experience in automotive restoration, and works at a shop restoring and customizing cars. Follow him on Twitter at @AaronVStarnes and check out his blog .
- Activities for Kids
- Arts & Crafts
How to Build & Float Your Own Mini Sailboat

Crafting and outdoor exploration come together with this project—learn how to build a boat that floats and sails. The best part? You’ll only need to buy a couple of supplies because the main part of this barge is made from sticks that you find outside. Read on for the step-by-step instructions and you’ll soon have a ship to sail the high seas (or slow streams).
What You’ll Need
1 piece of paper (patterned scrapbook paper is nice, but plain construction paper also works)
2 craft sticks
string or twine
hot glue gun
14 sticks in similar sizes (5-6 inches long works well)
How to Make the Boat
1. Start by wrapping 12 the sticks together with your twine. We used Kid Made Modern Craft Twine ( target.com , $9.99) to add a pop of color, but white string would also work just fine. Tie one end of the twine to the end of one stick and wrap the string around a few more times, then move on to the next stick. Wrap the twine around that stick a few times and then use the same piece of twine to wrap the third stick and so on and so on until 12 of your sticks are connected. (You’ll use two elsewhere.) Don’t worry too much about how many times you loop around or how perfect your wrapping is. Knot off the twine on the last stick. Then, do the same thing on the opposite side of your sticks.
2. Wrap two sticks onto the bottom. Now add two more sticks, one on each end of your boat, to the bottom of your group of sticks. Again, tie a knot on one end of the stick then weave your twine in and out of the connected sticks, looping the twine around each stick and then around the stick on the bottom. Repeat for the second stick.
3. Cut 2 triangles out of your paper. Ours measured 5-inches along the side and bottom, but you may want to adjust based on the length of your sticks. We used Kid Made Modern Print Palooza patterned paper ( target.com , $7.99 for 150 sheets). However, if you have plain construction paper, ask your child to decorate it with stickers, crayons, markers, or any other way you like.
4. Add the craft sticks as your mast. Line up the craft sticks along the edge of the triangle to create your mast. Use a hot glue to secure the craft sticks.
5. Glue the triangles together. Ask your child to cover the two triangles with glue, using the glue stick. Then, press them together to complete your sail.
6. Connect the sail to the raft. Slip the craft stick in between two of the sticks in the middle of your boat. Use a piece of twine to wrap around the craft stick and around the two middle sticks until it feels fairly secure. To give it extra support, add hot glue all around the area where the craft stick and twigs come together.
7. Sail your boat. Once the glue has cooled and dried, your craft is ready for its first voyage. Fill a baby pool or other vessel (even the bath tub!) with water and watch your homemade schooner float.
8. Create some wind. Want to get your boat moving faster? Use a straw to blow it across the water.
9. Take it to the park. For further experimentation, we took our model to the park so it could sail in a real stream. Even after several sails and a few capsizes, our sailboat has held up.
Happy sailing!
Project inspired by Minieco’s handmade boats .
Have you crafted any boats with your kid? Tell us about your design in a comment.
–Julie Seguss
Need some fresh ideas?
Subscribe to our weekly newsletter for expert parenting tips and simple solutions that make life instantly better.
By subscribing you agree to Tinybeans Terms and Privacy Policy
Related reads

Why Are Gen Z Kids Covering Their Noses in Family Photos?

Screen Time for Babies Linked to Sensory Differences in Toddlerhood, Study Shows

Kids Shouldn’t Have to Finish Dinner to Get Dessert, Dietitian Explains

The Questions Parents Should Be Asking Their Pediatrician—but Aren’t

6 Better Phrases to Say Instead of ‘Be Careful’ When Kids Are Taking Risks
- your daily dose

- and connection

- Your daily dose

DIY Driftwood Sailboats

. I’ve been wanting to make driftwood sailboats for quite some time and finally I did it this week … three of them. This craft project has been formulating in my mind for awhile. I’ve combined bits and pieces of ideas from other driftwood sailboats I’ve seen in magazines, Pinterest, and at some retail stores to make these. The two steps during the process that took the most time and tested my patience were working with tiny eyelets and eyelet screws. Do not skip these steps because they gave the sailboats a clean finish. Last thing, there will be no sewing involve in this project.

The driftwood I used were collected during our recent family trip to the beach at Seabrook, Washington, click here to read more.

1. fabric pieces, slightly heavy weight fabric will hold its shape best for the sails 2. twine 3. wood glue 4. stop fabric fraying liquid 5. glue gun & glue sticks 6. paper to make sail patterns 7. eyelet screws, 15/32″ 8. eyelet tools & 1/8″ eyelets 9. scissors 10. two driftwood pieces for the boat and a mast
Instructions

step 1. Drill a hole in the center of the driftwood large enough to accommodate a long stick for the mast. Squeeze wood glue into the hole and push the stick in it and let dry.
Step 2. Use a pencil to draw the pattern on paper for the two sails (triangle shape with a right angle – see image below). Pin the pattern onto the fabric and cut it out. Apply fabric fraying liquid sparingly along the fabric edges to prevent it from fraying over time.

Step 3. Add eyelets to the corners of the two fabric sails. Cut a tiny slit close to the corner, push the back side of the eyelet through, turn the fabric over with the back of the eyelet facing up. To secure the eyelet to the fabric, place the setter over the unfinished end of the eyelet and firmly strike the top of the setter with the hammer two to three times to spread it open. Remove the setter and firmly strike the eyelet directly two to three times with the hammer to flatten the sides down around the fabric {o ptional/not required: use an eyelet finisher on the back of the eyelet to give it a smooth professional finish } .
The instructions to apply eyelets will vary depending on the tools used. The end result will be similar and it will also help to prevent the fabric from tearing and to keep it’s shape.

The two finished sails with eyelets attached to the corners.

Step 4. Attach sails to the mast. Near the top of the wooden stick, leaving enough room to glue a flag on later, screw the eyelet screw into the wood {use a pair of pliers to screw it into the wood if needed} . Cut a piece of twine about 3-4 inches long, string it through the eyelet on the large sail and the eyelet screw, tie a knot to secure them together. Repeat the process for the second eyelet screw at the bottom of the wooden stick and the third eyelet screw on the large driftwood near the end.
Attach the other smaller sail to the opposite side of the wooden stick slightly lower down from the other sail { see image below }. Snip off all the extra loose twine from the knots, leaving about a quarter of an inch, dab a little bit of fabric fraying liquid to the ends of twine to prevent unraveling.

The finished sails should spread out nicely across the driftwood.

Step 5. Add decorative flag banner. Cut 5-7 little triangle flag pieces. Cut twine long enough to go from the top of the mast down to the eyelet screw at the end of the large driftwood piece. Be sure to add about two to four inches of extra twine.
On a flat surface, lay a fabric triangle piece down and line twine along the top edge of the flag, apply hot glue, and roll the top edge of the fabric around twine and hot glue to secure together. Repeat the steps with the rest of the flag banner pieces.
Step 6. Attach the flag banner to the sailboat. Thread one end of the flag banner through the top eyelet screw on the mast and make a simple knot on the twine to keep it from slipping out of the eyelet screw hole. Thread the other end through the eyelet screw on the driftwood and make a simple knot on the twine to secure it in place.

Driftwood sailboat #1 . Step 7. Cut a triangle piece of fabric for the flag and attach it to the top of the mast with hot glue.

Driftwood sailboat #2

Driftwood sailboat #3

I couldn’t decide which one I like the most.

Hannah was assisting me.

A great summer craft project!
posted by Kay
Share this:
- Click to share on Twitter (Opens in new window)
- Click to share on Facebook (Opens in new window)
2014 , crafts , diy , driftwood sailboat
26 Responses to DIY Driftwood Sailboats
Kay, These turned out great, and your tutorial is excellent. Now the question is where to find driftwood around here. Hmmmm….
I like the light blue and white striped sail the most.
That was the first sailboat I made. The striped fabric I used for the sail came from a pair of pants 🙂
Judith, contact me with a ship to address, I would love to send you some of the extra driftwood I have left.
Kay, I adore your sailboats!!! They are cute and so clean and fresh looking and it’s such a fun idea to use driftwood. We have a sailboat and spend our summers sailing so I’m definitely going to make one {or more} of these. Thanks for the fun idea.
I’m glad you like this craft project Lori. There will be lots of driftwood waiting for you here in the Puget Sound area if you decide to come back and to do a little more sailing this summer.
We’ll be sailing the San Juans next month so I’ll definitely pick up a bag full of driftwood for this fun project.
I love these! I grew up on the Olympic Peninsula in Washington, and now that I’m landlocked in Chattanooga, TN and trying to pull off a costal living room, I really miss the ready availability of natural elements we had access to! Lovely work!
Nice to meet you April and glad you had a few minutes to visit and share with us. We try as a family to make a trip out to the Pacific coast once a year, Seabrook Wa. We drove to Forks WA once, that was a loooong drive. I hope your coastal living room is coming along nicely.
Love your little sailboats. Am making my first one now from driftwood I collected at Ocean Shores and Ruby Beach … 🙂
The Northwest beaches have such a nice supply of driftwood to choose from. I hope you had fun making the sailboat Karen.
You have inspired me! Love these boats. I live by Lake Ontario in NY so driftwood is abundant. Off to the lake…..
Hi there! I I’m so in love of these sailboat what type of fabric did you used or any suggestions? Thank you!!
Hi Carmen The fabrics I used were made of cotton with a little bit of weight to them-cotton canvas. The soft blue ticking fabric came from a pair of pants I purchased at the Gap a few years ago in hopes that I might use the fabric to make something.
I hope you have fun making these sailboats!
It’s so beautiful!!! I featured these driftwood sailboats here http://esikfloresik.blogspot.com/2016/08/beach-please-inspiration-board.html xoxo
Love these live in Littlehampton west Sussex united kingdom trying to make some little boats you have inspired me so more beautiful than shop ones
Love them, have not tried them yet but wanted to thank you for sharing instructions.
Hey I’m writing from Pakistan. I loved the whole tutorial and your work is amazing I was wondering if you can give another tutorial on how to make driftwood tiny houses! How do you shape drift wood into fine shapes I have always wondered I would really appreciate your response. Waiting for it! Love, Khizra
I love these! I was wondering if these would float? I live with a lake in my back yard. During the winter I thought it would be nice to see the sailboats floating next to our dock. I thought I would attach a sailboat to a fishing line attached to a large rock but thought it might flip over. Has anyone tried floating them?
Love these! Thank you for sharing!!
I love these sailboats! Would love it if you sold them
Loved the sailboats am going to make some for my nieces babies first birthday. Where is the best place to purchase the driftwood
Piękne, piękne, piękne … 🙂 Beautiful, beautiful, beautiful … 🙂
I love your sailboats. I live in the CA desert 6 months out of the year so the wood I collect for my sailboats is a bit more gnarled but still beautiful. Thank you for sharing.
Trackbacks/Pingbacks
[…] Driftwood Sailboats ~ Kay at White Gunpowder. I know I’m partial to sailboats but are these driftwood sailboats […]
[…] ♥ DIY Driftwood Sailboat […]
[…] helped me to develop my ideas. The favourite thing I made was the driftwood boats – I adapted a guide I found on Pinterest. I used some of Ian’s old shirts and we collected a lot of driftwood from Rest Bay. They’re not […]
[…] Vía […]
Leave a Reply Click here to cancel reply.
Name (required)
Email (will not be published) (required)
Notify me of follow-up comments by email.
Notify me of new posts by email.
27 Homemade Boat Plans You Can DIY Easily

Building a boat might sound like a big project – and depending on the kind of boat you want, it can be. However, with the right plan, it’s far from impossible, offering you the prospect of owning a boat without spending huge amounts of money on it.
For anyone who thinks that sounds like a fun challenge, we’ve had a look online to see what other people have been trying – and as a result, here are our favorite 27 DIY boat plans you might like to have a go at copying at home.
Table of Contents
1. How to Build a Boat – Popularmechanics.com
2. how to build a sneak boat – kara hummer plans, 3. know how: build your own boat – sail magazine, 4. build a 7.5ft boat with 2 sheets of plywood, 5. build your own 12′ x 4′ simple aluminum boat – boat design net, 6. diy foldable boat for only 30$ fits in car backseat, 7. build a wooden boat – mother earth news, 8. portable boat plans, 9. weekender sailboat build, 10. swamp boats, 11. welcome to my dreamboat project, 12. homemade pontoon boat: 8 steps (with pictures) – instructables, 13. $100 homemade kayak, 14. how to build a recumbent pontoon pedal boat – mother earth news, 15. how to make boat using pvc pipe and 42cc 2-stroke engine, 16. pontoon boat picnic table: 8 steps (with pictures) – instructables, 17. wooden boat building step 1: lofting boat plans, 18. homebuilt pontoon boat/double-hull kayak, 19. homemade cooler fishing boat with foldable pontoons, 21. diy boat plan: a rowboat can support a trolling motor, 22. building a wooden boat: 12 steps (with pictures) – instructables, 23. one sheet sampan, 24. building a cheap sail catamaran, 25. couple builds wooden yacht in backyard – 5-year amazing time lapse, 26. plywood lath coracle, 27. diy simple wooden toy boat: woodworking for kids, lots of great plans for all kinds of boats.

If you’re toying with the idea of building your own boat , this post will be a fascinating read. In it, this DIYer explains how he dusted off some decades-old plans for building a boat to try his hand at his ancestral trade. It takes you through the process in great detail, giving you plenty of info about each step, so once you’ve finished reading, you’ll have a much better idea about whether this is a project you want to tackle.
Check More Details
For anyone who enjoys duck hunting and who wants to try building their own sneak boat, this is a video for you. In it, this YouTuber explains how he tackled a similar project, giving you all the tips and advice you’ll need to make a success of your project when it’s your turn to try.

This post is not exactly a plan as such, but it’s full of the kind of useful information that any first-time boatbuilder should know. The writer starts off by listing all the reasons why you really shouldn’t build your own boat – and if after reading that, you’re still determined to go ahead with it, his experience and advice will help make sure you make the best job of it.
Depending on what you hope to achieve – as well as your previous DIY and boat-building experience – your chances of success when trying to build your own boat can vary enormously. However, if what you hope to make is a modest boat of the kind you can take into a lake for a day of fishing, that’s the kind of thing most people can hope to achieve. And if that sounds like you, this video tutorial will show you how to make a serviceable 7.5ft craft from two sheets of plywood.

The aluminum boat this post teaches you to make is suitable for rowing or being propelled by a small motor . It’s ideal for sheltered inland waterways for activities like fishing, and if that sounds like the kind of thing you want to make, this post includes pdf plans that tell you exactly how to do it.
Making a DIY boat doesn’t need to cost a fortune, and if you’re on a limited budget, this is the plan for you. In it, you’ll learn how to make a small foldable boat that you’ll be able to fit in the back seat of your car – without spending more than about $30. Sound like something you’d like to try? Then give the video a watch!

In this post, you’ll find detailed instructions for making a simple yet elegant wooden boat that would be perfect for fishing trips out onto a lake or many other similar activities. We like the way this plan includes a simple step-by-step guide along with plenty of diagrams to show you exactly what you need to do, allowing you to make something just like it at home.

This is a great resource for anyone who is thinking of building themselves a simple pleasure craft since it contains not just one but several relatively easy boat-building plans. You can browse the plan and choose from a swan boat, a sheet ply skiff, a composite cruiser and several others. And then when you know which one you want to build, this site has all the details you’ll need to make a success of it.
For those looking for a more ambitious project, this video should be worth a look. In it, you get to see the development as this YouTuber’s sailboat took shape between September 2001 and summer 2002. It’s not exactly the kind of plan you’ll be able to follow exactly, but his impressive work should be a source of inspiration. Then it’s just down to you to find out how to build something similar yourself.

As you can see from the photos in this post, boats like this have been around for many years – and boats like this are found around the world anywhere that shallow waters or swamps exist. They’re simple to make too, and this plan gives you all the info you need to make one, including sourcing the wood from growing trees and putting the whole thing together. A fun project and one we’re sure plenty of people will enjoy attempting.
If you’re looking for a long watch – and a possible source of inspiration – this video is the first part of a multi-episode series about how this YouTuber went about building his dream boat . For those who are interested, it’s sure to give you some ideas about what’s possible – as well as plenty of ideas for how to tackle it.

We love the way the boat in this tutorial looks. It’s so basic and unpretentious, but it also looks like a whole lot of fun. Want to know how to make one yourself? Then check out this post for more details.
Buying a ready-made kayak can set you back a whole lot of money, but with a few basic DIY skills and a little bit of determination, you can build one yourself for much less. This video teaches you how to make one for only $100, offering a saving that sounds too good to refuse.

If you’ve ever wanted to own your own pedal boat , this is the plan for you because it teaches you how to build one yourself! It discusses important issues like flotation and gives you all the information you need to complete the project. And if you think you’d like to have a go, why not see if you can build something similar?
Here’s an original idea we loved! In this video, this YouTuber shows us how he built a functioning boat – out of PVC pipe! It’s certainly unconventional, but it looks like it works perfectly. So if anyone is looking for a fun and off-the-wall to try project, this could be just the thing!

The boat in this plan is one of our favorites because, while technically it’s a DIY pontoon boat , in practice, it’s more like a floating picnic table. With a boat like this, you can power out to the middle of the lake before cutting the engine and enjoying a nice lunch in perfect tranquility. This is something we’re thinking of trying ourselves!
This video is the first instalment in a series of tutorials detailing how this YouTuber built a boat from scratch. This part deals with the start of the project and lofting the boat plans , but if you like the way he works, you can also check out the other videos he’s uploaded and see how the final thing turns out.

For anyone who wants to make a functional boat without spending a fortune, this plan is perfect. The boat it teaches you to make is very “DIY” since it’s made of nothing more than PVC piping and some other similarly inexpensive materials. However, it looks like it floats, so if that’s all you need – and you aren’t too worried about looking flash – this is a plan that could be fun to copy.
If you like fishing and you’re looking for ideas for an individual fishing boat, you’re going to love this video. In it, we get to see this YouTuber’s eccentric creation that, to us, looks a bit like a floating armchair perched on top of three coolers. But that sounds like all you need for a great fishing trip, right? And we’re sure lots of people will enjoy trying to make something similar.

The sub-heading to this plan is “as simple as it can get”, and that’s a pretty accurate way of describing this boat, both in terms of design and construction. The details state it has a displacement of 230lbs, so it can comfortably accommodate one person, allowing you to get out on the water without spending much money at all.
This short tutorial gives you a simple suggestion for building a motorboat that is both easy and inexpensive to make. In the video, you can see that the boat struggles a little with two people in it, but it still works. This could be a great project to attempt for anyone who wants to have a go at building their first boat, and if that includes you, it’s recommended watching.

This is the third plan we’ve included from the Instructables website, but this is by far the most professional of the three. The boat this tutorial teaches you to build looks as though it could have been made by a professional. The plan is easy to follow though, so if this is the kind of boat you want , this is a post that should be well worth a look.

As this post explains, a sampan is a type of boat from Southeast Asia, and the word “sampan” comes from the Chinese meaning “three planks”. They are a popular boat in the region because they are easy to construct and extremely reliable, and if you’d like to try building one yourself, this plan will teach you how to do it.
This is a plan for anyone who’s up for a challenge because in it, you’ll learn how to make a DIY sail catamaran. The video is only about five minutes long, but as long you have some reasonable DIY skills and a bit of common sense, it shouldn’t be too hard to replicate, so why not see if you’re up to the task?
While not many people will have the time, skills or determination to finish a project like the one in this video, we still thought it merits a place on our list because of how impressive what they did is. Over five years, this couple built their own boat from scratch, and this video documents their progress. Check it out – it will blow your mind!

Among the very first boats ever invented, the coracle is a simple design that’s easy to make and fun to play about in. And if you think you might like to have a go, this is the plan that will teach you how to do it!

Perhaps building a real full-sized boat might be a bit much for you – but if you have kids, maybe making a miniature toy one with them could still be fun. It could also be a way to fire their creativity and imagination, and who knows? When they grow up, maybe they’ll build a real one for you in return!
As you can see, whatever kind of boat you hope to build, there are all kinds of plans that will show you how to do it.
We’ve enjoyed collecting these plans for you, so we hope you’ve enjoyed reading and watching them too. And above all, we hope we’ve helped you find the plan you were looking for to build a DIY boat of your own.
Related posts:
- 27 Homemade Pontoon Boat Plans You Can DIY Easily
- 16 Homemade Boat Blinds Plans You Can DIY Easily
- 17 Homemade Boat Seats Plans You Can DIY Easily
- 18 Homemade Boat Upholstery Plans You Can DIY Easily
3 thoughts on “27 Homemade Boat Plans You Can DIY Easily”
What makes a boat stable in the water is it the keel
i want to make a model for a school project out of tinfoil and hot glue it together and were going to put pennies in and see if it floats is there too much wait?
i meant to say weight not wait
Leave a Comment Cancel reply
Save my name, email, and website in this browser for the next time I comment.
DIY Sailboat Kit: How To Impress Your Wife By Saying You Are Building A Boat From Scratch
Sure, you can always just buy a little sailboat for taking with you during the summer’s weekend trips. But why not impress the wife and kids by pretending to build one from scratch? That’s exactly what you can do with the DIY Sailboat Kit.
Made by the Balmain Boat Company, it’s a DIY sailboat kit that includes everything you need to assemble your own little sailer. Everything is pre-cut, too, so you don’t have to do any difficult cutting work (not that you have to admit that to anybody else) — just follow the instructions to put the individual parts together and you’ve got yourself a real boat you can take down the waters.
The DIY Sailboat Kit includes all the individual plywood pieces, screws, nails, glue, and even marine sealants for building your boat, as well as the mast, boom, gaff, sail and rope for catching the winds during your boat rides. You’ll need a hammer, a caulking gun and a drill, though, so make sure you have those ready if you’re trying to impress the wife and kids with your crazy boatbuilding skills. It ships in a flat-packed box measuring 3,000 x 700 x 230 mm that turns into a 3,000 x 1,300 x 515 mm boat once completely put together.
The Best Tennis Aids And Gadgets To Help You Ace Your Next Game
According to the product page, the boat takes approximately 30 hours to complete, so it will probably take you about 60, which still sounds awesome. You’ll need to give the epoxy and sealant two weeks to set, though, so don’t just drive down to the beach as soon as you finish the thing.
You can order the DIY Sailboat Kit directly from the BBCo website, priced at $2,590.
IMAGES
VIDEO
COMMENTS
For example, the 21ft gaff-rigged cutter I'm currently building will end up costing between $33,000 and $35,000, fully outfitted—several thousand dollars more than the new prices of a couple of popular fiberglass boats near the same size. And yes, since it's wood, it will demand more maintenance.
Check out my Patreon to help support the boat build! - https://www.patreon.com/jackwood25Guten Morgen! After months of building and filming, I'm finally post...
The cost of building a sailboat can amount to around $1,000. (Source: Instructables) The first step in building a sailboat involves cutting out the parts using boat building plans and plywood. (Source: Instructables) Assembling the hull of a sailboat involves stitching and gluing the panels together. (Source: Instructables)
A wooden sailboat can cost around $1,000 to build. (Source: Instructables) The boat is typically built from 4×8 sheets of plywood and measures 8 feet in length. (Source: Instructables) Various tools such as a pull-saw, table saw, router, sander, and drill are needed for building a wooden sailboat. (Source: Instructables)
More sailboat parts you can make while waiting for other parts to cure are the spars, the structural parts that support the sail. The mast is another glue up. I used 3 - 1x3's of hemlock. A relatively soft wood, but with a nice tight grain with no knots. A mast would break at a knot, regardless of how strong the wood is.
Let the primer coat dry completely as per instructions. Use a brush or roller to apply the desired paint color, starting from the top and working down. Allow the paint to dry between coats and apply more coats if needed. To varnish the sailboat, apply a thin and even coat in the direction of the wood grain.
A selection of some of the free sailboat plans that were published in magazines such as "Popular Mechanics", "Popular Science" and the "Boat Builder Handbook". Learn how to build your own sailboat with these pdf files, from open dayboats to cabin cruisers, from canoes to motorboats.
Here are the steps to follow when installing the cabin: Build the cabin on a flat surface using marine-grade plywood. Cut the cabin to fit the deck and hull and sand the edges to ensure a tight fit. Apply a layer of epoxy to the cabin and deck joint to seal it. Secure the cabin to the deck using screws or bolts.
A compilation of the 30 weeks I spent building my Goat Island Skiff . Yes, a plywood sailing boat full build!from lofting to cutting and coating the panels w...
The next step was to clamp thin strips of wood, called battens, to the frame to stand in for the planks, so I could measure and mark all those angles. Then, I took the parts off the board and ...
A short overview of the building of Southern Cross, a Matt Layden influenced shoal draft coastal cruising sailboat. I built this boat in my house over the c...
Sailboats that you can build from home will likely be a small boat under 20 feet. These could be from many different boat suppliers such as B&B Yachts, Brooks Boat Designs, and Chase Small Craft. Boat plans will vary based on your budget and how much time you have on your hands. Based on my previous experience, building your own boat will take ...
Build a Short Dragon (16 Foot 3-Board Outrigger Sailing Canoe) 20 Boats You Can Build Yourself: It's getting warm again, so why not build yourself a boat for some summer adventures? The authors on Instructables have you covered with all sorts of amazing boats you can build yourself!These boats range from easy to advanced, and some can be built….
Glass one side of the rudder, let cure. Cut off excess edge stuff and rough sand/grind. Glass other side of rudder, let cure. Cut off excess, sand until flush. Glass edges based upon which were generally 'up' when clamped in a mostly horizontal way (images 4 and 5). Glass the remaining edges.
1. Draw the front of the sail. The front of the sail is called the luff curve. The luff curve is the most important part of the sail because the rest of the sail's integrity depends on it. The luff curve at front of the sail relates to how your mast will bend. The luff curve won't match the curve of the mast.
If you have children, bring a smile to their faces with this project, and if you don't, you always have your inner child who's desperate for fun, playful times. This project looks so fun that we cannot wait to to DIY one for ourselves! 11. Wooden boat Build - 17ft Flat Bottom Skiff.
15. Zip Tie and Ply Mini Boat. If you'd like to get out on the water for a fun day of fishing or sight-seeing, consider building this unique mini-boat. It's made from zip ties and plywood. Though it may sound a little sketchy on the surface, it seems quite buoyant and inexpensive too.
Published January 29, 2016. Comments ( 151) Seeing a boat in someone's yard is not uncommon. However, when that boat is a 74 foot long, 16 foot wide steel behemoth hand-built from scratch by the ...
Use a hot glue to secure the craft sticks. 5. Glue the triangles together. Ask your child to cover the two triangles with glue, using the glue stick. Then, press them together to complete your sail. 6. Connect the sail to the raft. Slip the craft stick in between two of the sticks in the middle of your boat.
Instructions. step 1. Drill a hole in the center of the driftwood large enough to accommodate a long stick for the mast. Squeeze wood glue into the hole and push the stick in it and let dry. Step 2. Use a pencil to draw the pattern on paper for the two sails (triangle shape with a right angle - see image below).
How to Build A Sneak Boat - Kara Hummer Plans. 3. Know how: Build Your Own Boat - Sail Magazine. 4. Build a 7.5ft Boat with 2 Sheets of Plywood. 5. Build your own 12′ X 4′ Simple Aluminum Boat - Boat Design Net. 6. DIY Foldable Boat for Only 30$!
The DIY Sailboat Kit includes all the individual plywood pieces, screws, nails, glue, and even marine sealants for building your boat, as well as the mast, boom, gaff, sail and rope for catching the winds during your boat rides. You'll need a hammer, a caulking gun and a drill, though, so make sure you have those ready if you're trying to ...
4. A Plywood Box. The simplest and fastest way to build your own boat is to craft a glorified plywood box with a pointy or up-turned end. Plenty of examples and how-to videos can be found on YouTube, including one which costs less than $200 to put together called "Boat Built in Two Days."