Great choice! Your favorites are temporarily saved for this session. Sign in to save them permanently, access them on any device, and receive relevant alerts.
- Sailboat Guide
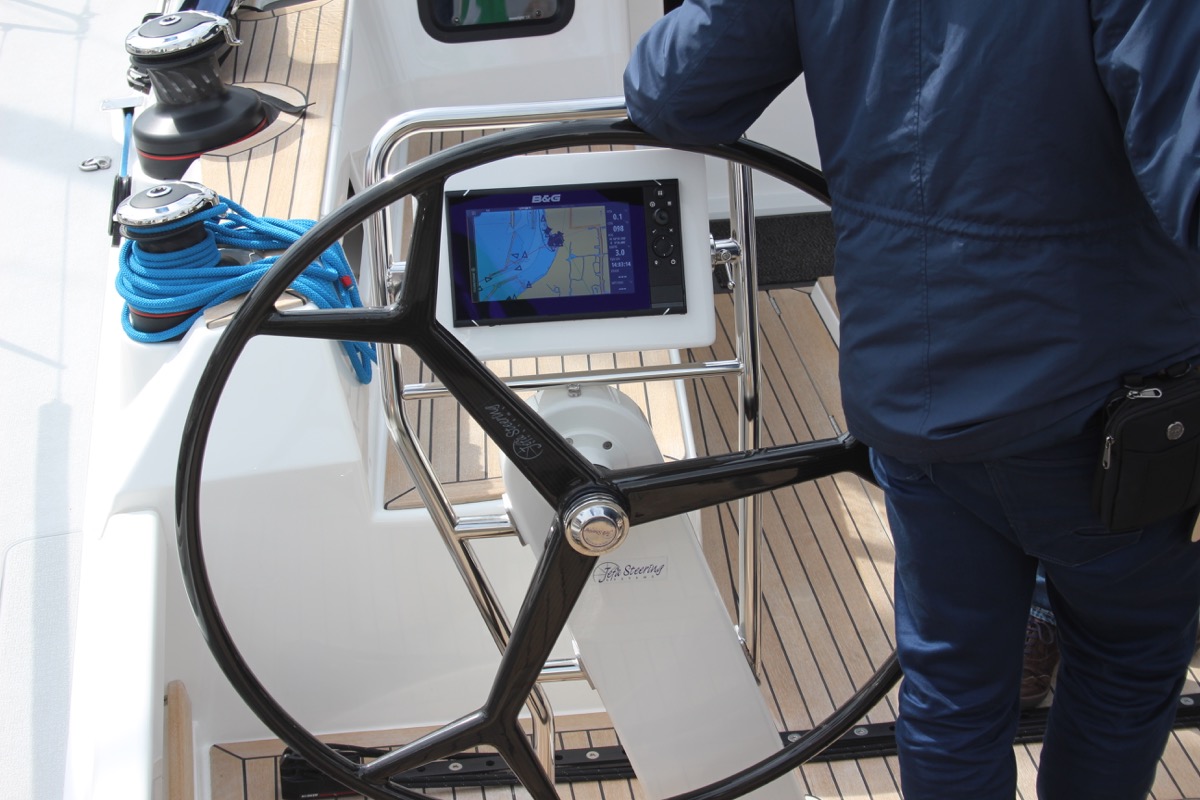
CL 16 is a 16 ′ 0 ″ / 4.9 m monohull sailboat designed by Ian Proctor/Graham Dodd / George Blanchard and built by C&L Boatworks starting in 1967.

Rig and Sails
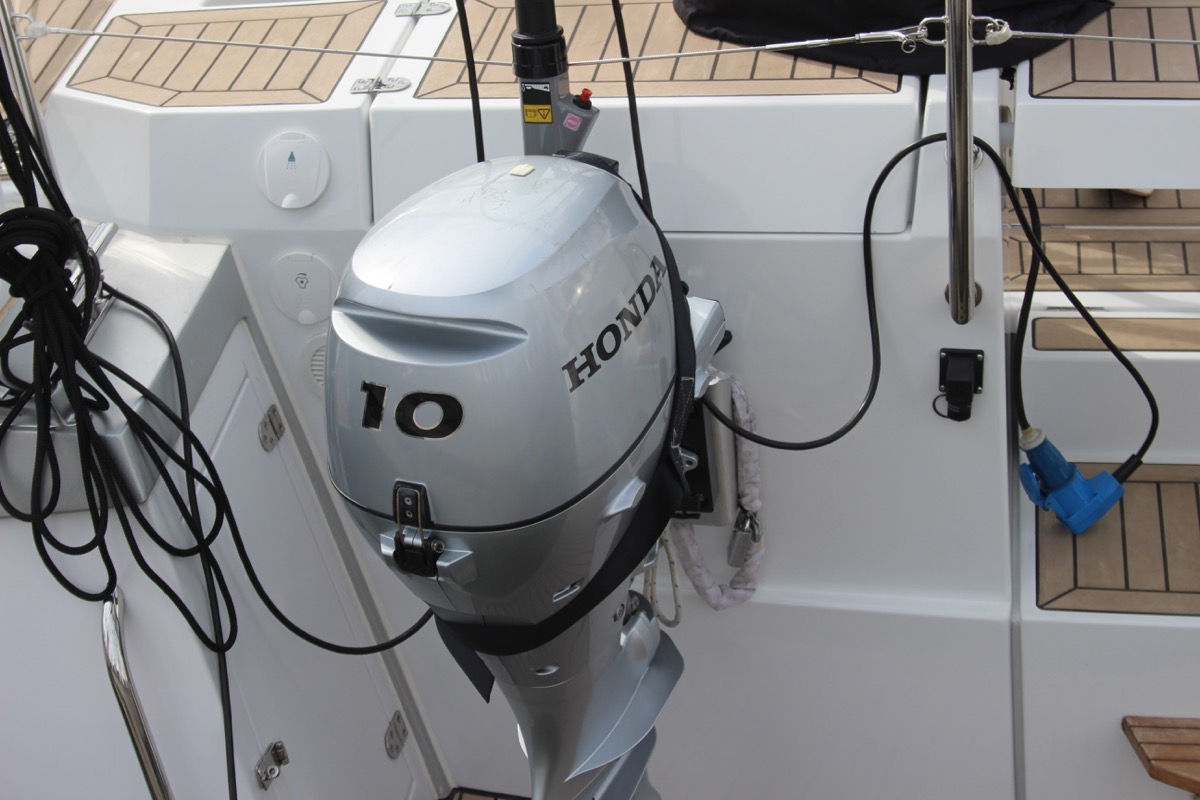
Auxilary power, accomodations, calculations.
The theoretical maximum speed that a displacement hull can move efficiently through the water is determined by it's waterline length and displacement. It may be unable to reach this speed if the boat is underpowered or heavily loaded, though it may exceed this speed given enough power. Read more.
Classic hull speed formula:
Hull Speed = 1.34 x √LWL
Max Speed/Length ratio = 8.26 ÷ Displacement/Length ratio .311 Hull Speed = Max Speed/Length ratio x √LWL
Sail Area / Displacement Ratio
A measure of the power of the sails relative to the weight of the boat. The higher the number, the higher the performance, but the harder the boat will be to handle. This ratio is a "non-dimensional" value that facilitates comparisons between boats of different types and sizes. Read more.
SA/D = SA ÷ (D ÷ 64) 2/3
- SA : Sail area in square feet, derived by adding the mainsail area to 100% of the foretriangle area (the lateral area above the deck between the mast and the forestay).
- D : Displacement in pounds.
Ballast / Displacement Ratio
A measure of the stability of a boat's hull that suggests how well a monohull will stand up to its sails. The ballast displacement ratio indicates how much of the weight of a boat is placed for maximum stability against capsizing and is an indicator of stiffness and resistance to capsize.
Ballast / Displacement * 100
Displacement / Length Ratio
A measure of the weight of the boat relative to it's length at the waterline. The higher a boat’s D/L ratio, the more easily it will carry a load and the more comfortable its motion will be. The lower a boat's ratio is, the less power it takes to drive the boat to its nominal hull speed or beyond. Read more.
D/L = (D ÷ 2240) ÷ (0.01 x LWL)³
- D: Displacement of the boat in pounds.
- LWL: Waterline length in feet
Comfort Ratio
This ratio assess how quickly and abruptly a boat’s hull reacts to waves in a significant seaway, these being the elements of a boat’s motion most likely to cause seasickness. Read more.
Comfort ratio = D ÷ (.65 x (.7 LWL + .3 LOA) x Beam 1.33 )
- D: Displacement of the boat in pounds
- LOA: Length overall in feet
- Beam: Width of boat at the widest point in feet
Capsize Screening Formula
This formula attempts to indicate whether a given boat might be too wide and light to readily right itself after being overturned in extreme conditions. Read more.
CSV = Beam ÷ ³√(D / 64)
Based on the Ian Proctor designed WAYFARER. CL = Croce & Lighthouse.
Embed this page on your own website by copying and pasting this code.
Discover Related Sailboats

- About Sailboat Guide
©2024 Sea Time Tech, LLC
This site is protected by reCAPTCHA and the Google Privacy Policy and Terms of Service apply.

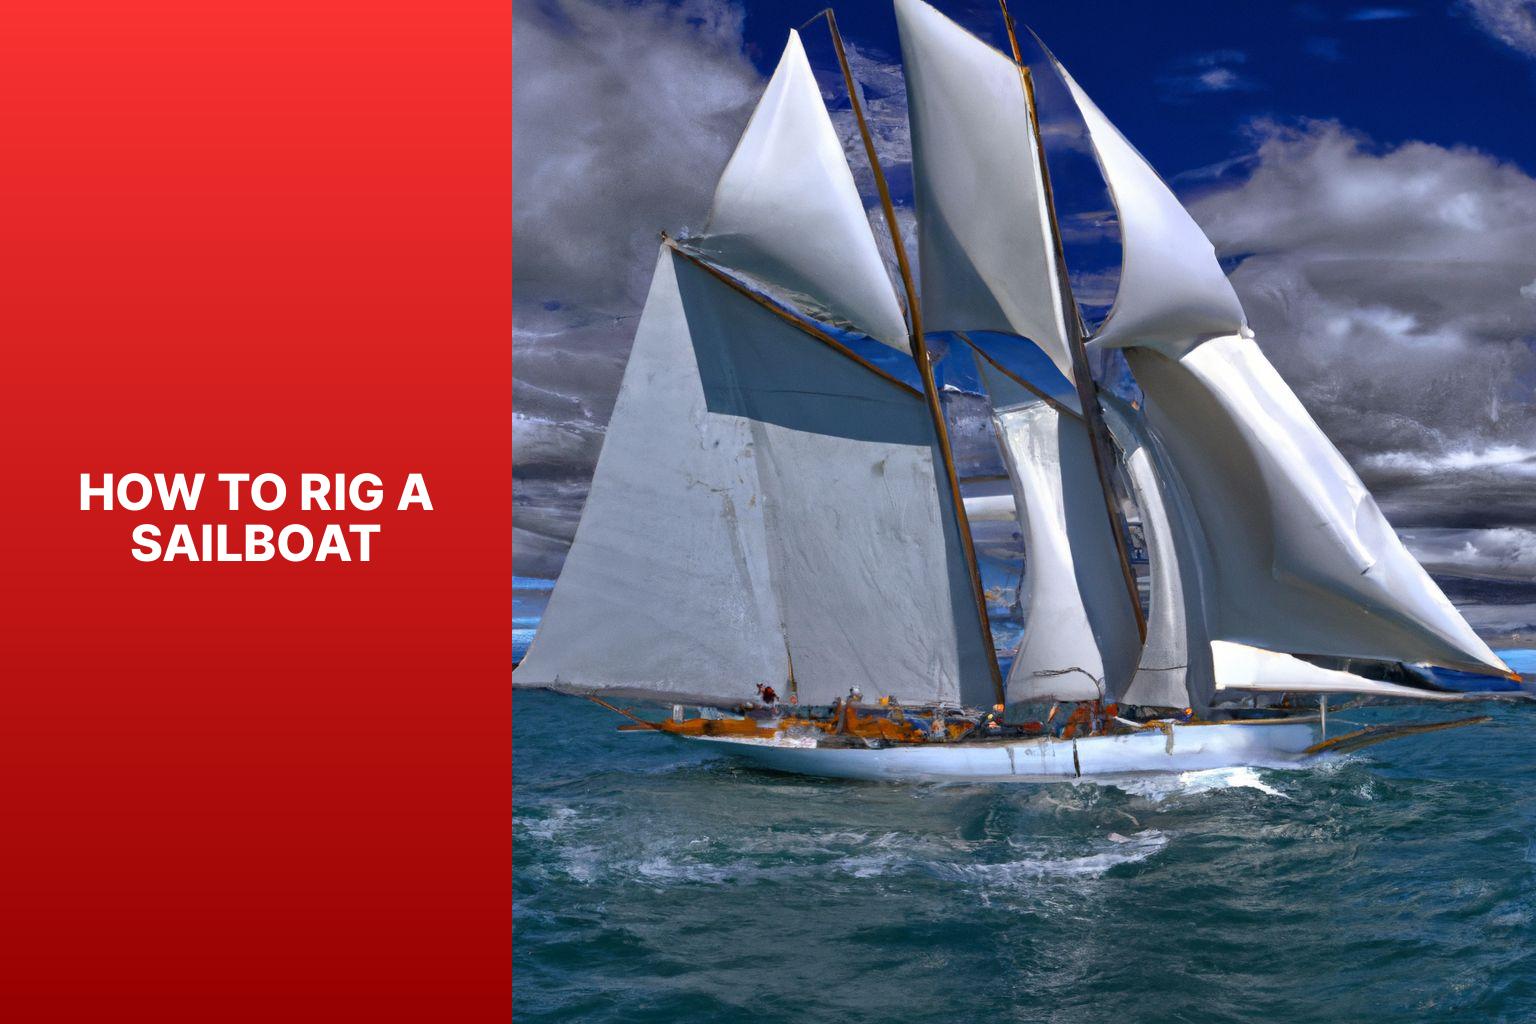
Beginner’s Guide: How To Rig A Sailboat – Step By Step Tutorial
Alex Morgan
Rigging a sailboat is a crucial process that ensures the proper setup and functioning of a sailboat’s various components. Understanding the process and components involved in rigging is essential for any sailor or boat enthusiast. In this article, we will provide a comprehensive guide on how to rig a sailboat.
Introduction to Rigging a Sailboat
Rigging a sailboat refers to the process of setting up the components that enable the sailboat to navigate through the water using wind power. This includes assembling and positioning various parts such as the mast, boom, standing rigging, running rigging, and sails.
Understanding the Components of a Sailboat Rigging
Before diving into the rigging process, it is important to have a good understanding of the key components involved. These components include:
The mast is the tall vertical spar that provides vertical support to the sails and holds them in place.
The boom is the horizontal spar that runs along the bottom edge of the sail and helps control the shape and position of the sail.
- Standing Rigging:
Standing rigging consists of the wires and cables that support and stabilize the mast, keeping it upright.
- Running Rigging:
Running rigging refers to the lines and ropes used to control the sails, such as halyards, sheets, and control lines.
Preparing to Rig a Sailboat
Before rigging a sailboat, there are a few important steps to take. These include:
- Checking the Weather Conditions:
It is crucial to assess the weather conditions before rigging a sailboat. Unfavorable weather, such as high winds or storms, can make rigging unsafe.
- Gathering the Necessary Tools and Equipment:
Make sure to have all the necessary tools and equipment readily available before starting the rigging process. This may include wrenches, hammers, tape, and other common tools.
- Inspecting the Rigging Components:
In the upcoming sections of this article, we will provide a step-by-step guide on how to rig a sailboat, as well as important safety considerations and tips to keep in mind. By following these guidelines, you will be able to rig your sailboat correctly and safely, allowing for a smooth and enjoyable sailing experience.
Key takeaway:
- Rigging a sailboat maximizes efficiency: Proper rigging allows for optimized sailing performance, ensuring the boat moves smoothly through the water.
- Understanding sailboat rigging components: Familiarity with the various parts of a sailboat rigging, such as the mast, boom, and standing and running riggings, is essential for effective rigging setup.
- Importance of safety in sailboat rigging: Ensuring safety is crucial during the rigging process, including wearing a personal flotation device, securing loose ends and lines, and being mindful of overhead power lines.
Get ready to set sail and dive into the fascinating world of sailboat rigging! We’ll embark on a journey to understand the various components that make up a sailboat’s rigging. From the majestic mast to the nimble boom , and the intricate standing rigging to the dynamic running rigging , we’ll explore the crucial elements that ensure smooth sailing. Not forgetting the magnificent sail, which catches the wind and propels us forward. So grab your sea legs and let’s uncover the secrets of sailboat rigging together.
Understanding the mast is crucial when rigging a sailboat. Here are the key components and steps to consider:
1. The mast supports the sails and rigging of the sailboat. It is made of aluminum or carbon fiber .
2. Before stepping the mast , ensure that the area is clear and the boat is stable. Have all necessary tools and equipment ready.
3. Inspect the mast for damage or wear. Check for corrosion , loose fittings , and cracks . Address any issues before proceeding.
4. To step the mast , carefully lift it into an upright position and insert the base into the mast step on the deck of the sailboat.
5. Secure the mast using the appropriate rigging and fasteners . Attach the standing rigging , such as shrouds and stays , to the mast and the boat’s hull .
Fact: The mast of a sailboat is designed to withstand wind resistance and the tension of the rigging for stability and safe sailing.
The boom is an essential part of sailboat rigging. It is a horizontal spar that stretches from the mast to the aft of the boat. Constructed with durable yet lightweight materials like aluminum or carbon fiber, the boom provides crucial support and has control over the shape and position of the sail. It is connected to the mast through a boom gooseneck , allowing it to pivot. One end of the boom is attached to the mainsail, while the other end is equipped with a boom vang or kicker, which manages the tension and angle of the boom. When the sail is raised, the boom is also lifted and positioned horizontally by using the topping lift or lazy jacks.
An incident serves as a warning that emphasizes the significance of properly securing the boom. In strong winds, an improperly fastened boom swung across the deck, resulting in damage to the boat and creating a safety hazard. This incident highlights the importance of correctly installing and securely fastening all rigging components, including the boom, to prevent accidents and damage.
3. Standing Rigging
When rigging a sailboat, the standing rigging plays a vital role in providing stability and support to the mast . It consists of several key components, including the mast itself, along with the shrouds , forestay , backstay , and intermediate shrouds .
The mast, a vertical pole , acts as the primary support structure for the sails and the standing rigging. Connected to the top of the mast are the shrouds , which are cables or wires that extend to the sides of the boat, providing essential lateral support .
The forestay is another vital piece of the standing rigging. It is a cable or wire that runs from the top of the mast to the bow of the boat, ensuring forward support . Similarly, the backstay , also a cable or wire, runs from the mast’s top to the stern of the boat, providing important backward support .
To further enhance the rig’s stability , intermediate shrouds are installed. These additional cables or wires are positioned between the main shrouds, as well as the forestay or backstay. They offer extra support , strengthening the standing rigging system.
Regular inspections of the standing rigging are essential to detect any signs of wear, such as fraying or corrosion . It is crucial to ensure that all connections within the rig are tight and secure, to uphold its integrity. Should any issues be identified, immediate attention must be given to prevent accidents or damage to the boat. Prioritizing safety is of utmost importance when rigging a sailboat, thereby necessitating proper maintenance of the standing rigging. This ensures a safe and enjoyable sailing experience.
Note: <p> tags have been kept intact.
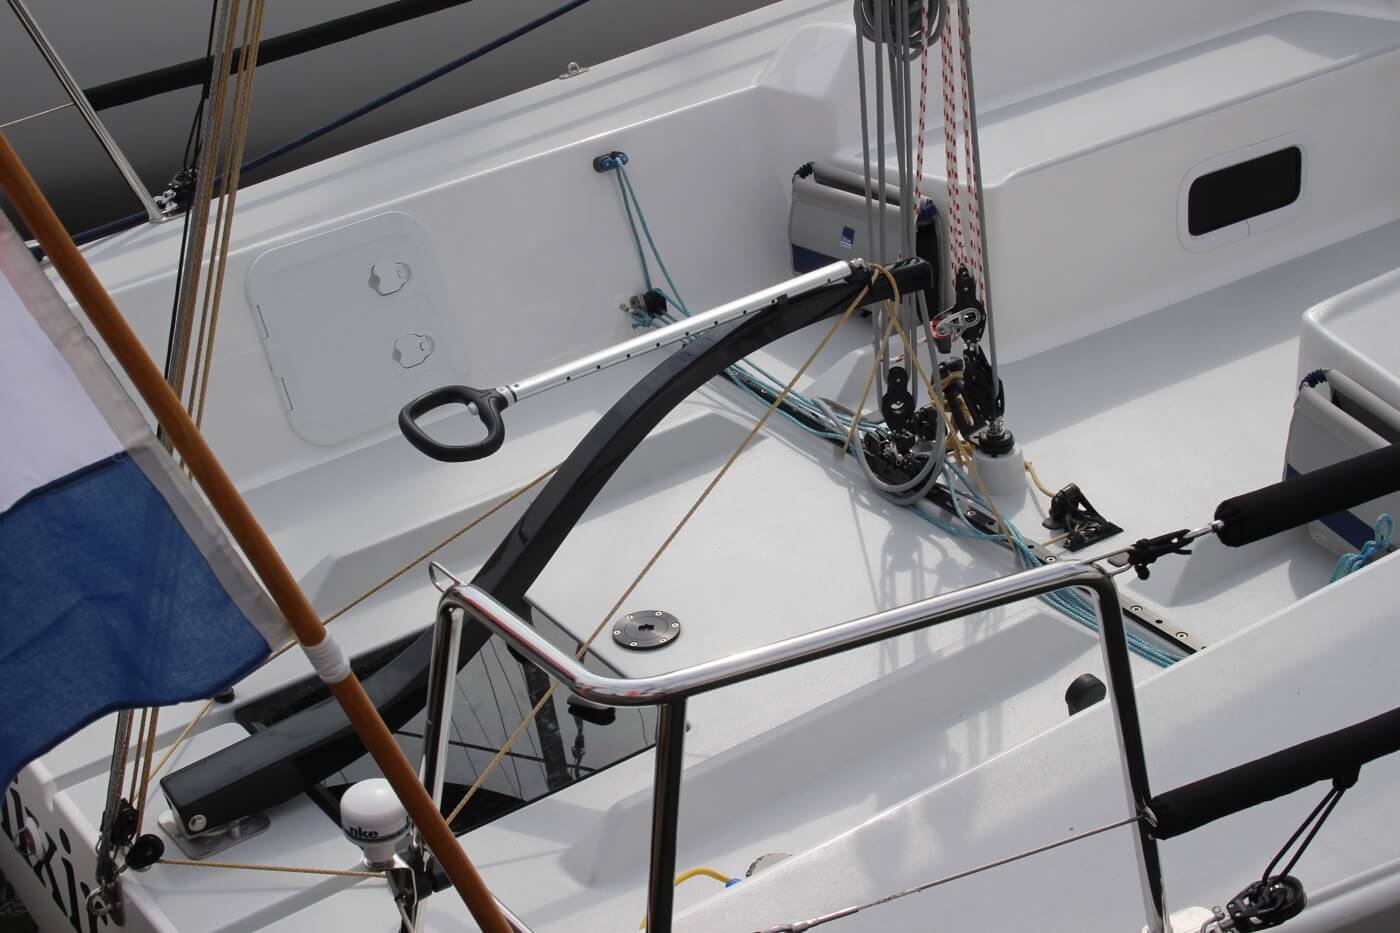
4. Running Rigging
Running Rigging
When rigging a sailboat, the running rigging is essential for controlling the sails and adjusting their position. It is important to consider several aspects when dealing with the running rigging.
1. Choose the right rope: The running rigging typically consists of ropes with varying properties such as strength, stretch, and durability. Weather conditions and sailboat size should be considered when selecting the appropriate rope.
2. Inspect and maintain the running rigging: Regularly check for signs of wear, fraying, or damage. To ensure safety and efficiency, replace worn-out ropes.
3. Learn essential knot tying techniques: Having knowledge of knots like the bowline, cleat hitch, and reef knot is crucial for securing the running rigging and adjusting sails.
4. Understand different controls: The running rigging includes controls such as halyards, sheets, and control lines. Familiarize yourself with their functions and proper usage to effectively control sail position and tension.
5. Practice proper sail trimming: Adjusting the tension of the running rigging significantly affects sailboat performance. Mastering sail trimming techniques will help optimize sail shape and maximize speed.
By considering these factors and mastering running rigging techniques, you can enhance your sailing experience and ensure the safe operation of your sailboat.
The sail is the central component of sailboat rigging as it effectively harnesses the power of the wind to propel the boat.
When considering the sail, there are several key aspects to keep in mind:
– Material: Sails are typically constructed from durable and lightweight materials such as Dacron or polyester. These materials provide strength and resistance to various weather conditions.
– Shape: The shape of the sail plays a critical role in its overall performance. A well-shaped sail should have a smooth and aerodynamic profile, which allows for maximum efficiency in capturing wind power.
– Size: The size of the sail is determined by its sail area, which is measured in square feet or square meters. Larger sails have the ability to generate more power, but they require greater skill and experience to handle effectively.
– Reefing: Reefing is the process of reducing the sail’s size to adapt to strong winds. Sails equipped with reefing points allow sailors to decrease the sail area, providing better control in challenging weather conditions.
– Types: There are various types of sails, each specifically designed for different purposes. Common sail types include mainsails, jibs, genoas, spinnakers, and storm sails. Each type possesses its own unique characteristics and is utilized under specific wind conditions.
Understanding the sail and its characteristics is vital for sailors, as it directly influences the boat’s speed, maneuverability, and overall safety on the water.
Getting ready to rig a sailboat requires careful preparation and attention to detail. In this section, we’ll dive into the essential steps you need to take before setting sail. From checking the weather conditions to gathering the necessary tools and equipment, and inspecting the rigging components, we’ll ensure that you’re fully equipped to navigate the open waters with confidence. So, let’s get started on our journey to successfully rigging a sailboat!
1. Checking the Weather Conditions
Checking the weather conditions is crucial before rigging a sailboat for a safe and enjoyable sailing experience. Monitoring the wind speed is important in order to assess the ideal sailing conditions . By checking the wind speed forecast , you can determine if the wind is strong or light . Strong winds can make sailboat control difficult, while very light winds can result in slow progress.
Another important factor to consider is the wind direction . Assessing the wind direction is crucial for route planning and sail adjustment. Favorable wind direction helps propel the sailboat efficiently, making your sailing experience more enjoyable.
In addition to wind speed and direction, it is also important to consider weather patterns . Keep an eye out for impending storms or heavy rain. It is best to avoid sailing in severe weather conditions that may pose a safety risk. Safety should always be a top priority when venturing out on a sailboat.
Another aspect to consider is visibility . Ensure good visibility by checking for fog, haze, or any other conditions that may hinder navigation. Clear visibility is important for being aware of other boats and potential obstacles that may come your way.
Be aware of the local conditions . Take into account factors such as sea breezes, coastal influences, or tidal currents. These local factors greatly affect sailboat performance and safety. By considering all of these elements, you can have a successful and enjoyable sailing experience.
Here’s a true story to emphasize the importance of checking the weather conditions. One sunny afternoon, a group of friends decided to go sailing. Before heading out, they took the time to check the weather conditions. They noticed that the wind speed was expected to be around 10 knots, which was perfect for their sailboat. The wind direction was coming from the northwest, allowing for a pleasant upwind journey. With clear visibility and no approaching storms, they set out confidently, enjoying a smooth and exhilarating sail. This positive experience was made possible by their careful attention to checking the weather conditions beforehand.
2. Gathering the Necessary Tools and Equipment
To efficiently gather all of the necessary tools and equipment for rigging a sailboat, follow these simple steps:
- First and foremost, carefully inspect your toolbox to ensure that you have all of the basic tools such as wrenches, screwdrivers, and pliers.
- Make sure to check if you have a tape measure or ruler available as they are essential for precise measurements of ropes or cables.
- Don’t forget to include a sharp knife or rope cutter in your arsenal as they will come in handy for cutting ropes or cables to the desired lengths.
- Gather all the required rigging hardware including shackles, pulleys, cleats, and turnbuckles.
- It is always prudent to check for spare ropes or cables in case replacements are needed during the rigging process.
- If needed, consider having a sailing knife or marlinspike tool for splicing ropes or cables.
- For rigging a larger sailboat, it is crucial to have a mast crane or hoist to assist with stepping the mast.
- Ensure that you have a ladder or some other means of reaching higher parts of the sailboat, such as the top of the mast.
Once, during the preparation of rigging my sailboat, I had a moment of realization when I discovered that I had forgotten to bring a screwdriver . This unfortunate predicament occurred while I was in a remote location with no nearby stores. Being resourceful, I improvised by utilizing a multipurpose tool with a small knife blade, which served as a makeshift screwdriver. Although it was not the ideal solution, it allowed me to accomplish the task. Since that incident, I have learned the importance of double-checking my toolbox before commencing any rigging endeavor. This practice ensures that I have all of the necessary tools and equipment, preventing any unexpected surprises along the way.
3. Inspecting the Rigging Components
Inspecting the rigging components is essential for rigging a sailboat safely. Here is a step-by-step guide on inspecting the rigging components:
1. Visually inspect the mast, boom, and standing rigging for damage, such as corrosion, cracks, or loose fittings.
2. Check the tension of the standing rigging using a tension gauge. It should be within the recommended range from the manufacturer.
3. Examine the turnbuckles, clevis pins, and shackles for wear or deformation. Replace any damaged or worn-out hardware.
4. Inspect the running rigging, including halyards and sheets, for fraying, signs of wear, or weak spots. Replace any worn-out lines.
5. Check the sail for tears, wear, or missing hardware such as grommets or luff tape.
6. Pay attention to the connections between the standing rigging and the mast. Ensure secure connections without any loose or missing cotter pins or rigging screws.
7. Inspect all fittings, such as mast steps, spreader brackets, and tangs, to ensure they are securely fastened and in good condition.
8. Conduct a sea trial to assess the rigging’s performance and make necessary adjustments.
Regularly inspecting the rigging components is crucial for maintaining the sailboat’s rigging system’s integrity, ensuring safe sailing conditions, and preventing accidents or failures at sea.
Once, I went sailing on a friend’s boat without inspecting the rigging components beforehand. While at sea, a sudden gust of wind caused one of the shrouds to snap. Fortunately, no one was hurt, but we had to cut the sail loose and carefully return to the marina. This incident taught me the importance of inspecting the rigging components before sailing to avoid unforeseen dangers.
Step-by-Step Guide on How to Rig a Sailboat
Get ready to set sail with our step-by-step guide on rigging a sailboat ! We’ll take you through the process from start to finish, covering everything from stepping the mast to setting up the running rigging . Learn the essential techniques and tips for each sub-section, including attaching the standing rigging and installing the boom and sails . Whether you’re a seasoned sailor or a beginner, this guide will have you ready to navigate the open waters with confidence .
1. Stepping the Mast
To step the mast of a sailboat, follow these steps:
1. Prepare the mast: Position the mast near the base of the boat.
2. Attach the base plate: Securely fasten the base plate to the designated area on the boat.
3. Insert the mast step: Lower the mast step into the base plate and align it with the holes or slots.
4. Secure the mast step: Use fastening screws or bolts to fix the mast step in place.
5. Raise the mast: Lift the mast upright with the help of one or more crew members.
6. Align the mast: Adjust the mast so that it is straight and aligned with the boat’s centerline.
7. Attach the shrouds: Connect the shrouds to the upper section of the mast, ensuring proper tension.
8. Secure the forestay: Attach the forestay to the bow of the boat, ensuring it is securely fastened.
9. Final adjustments: Check the tension of the shrouds and forestay, making any necessary rigging adjustments.
Following these steps ensures that the mast is properly stepped and securely in place, allowing for a safe and efficient rigging process. Always prioritize safety precautions and follow manufacturer guidelines for your specific sailboat model.
2. Attaching the Standing Rigging
To attach the standing rigging on a sailboat, commence by preparing the essential tools and equipment, including wire cutters, crimping tools, and turnbuckles.
Next, carefully inspect the standing rigging components for any indications of wear or damage.
After inspection, fasten the bottom ends of the shrouds and stays to the chainplates on the deck.
Then, securely affix the top ends of the shrouds and stays to the mast using adjustable turnbuckles .
To ensure proper tension, adjust the turnbuckles accordingly until the mast is upright and centered.
Utilize a tension gauge to measure the tension in the standing rigging, aiming for around 15-20% of the breaking strength of the rigging wire.
Double-check all connections and fittings to verify their security and proper tightness.
It is crucial to regularly inspect the standing rigging for any signs of wear or fatigue and make any necessary adjustments or replacements.
By diligently following these steps, you can effectively attach the standing rigging on your sailboat, ensuring its stability and safety while on the water.
3. Installing the Boom and Sails
To successfully complete the installation of the boom and sails on a sailboat, follow these steps:
1. Begin by securely attaching the boom to the mast. Slide it into the gooseneck fitting and ensure it is firmly fastened using a boom vang or another appropriate mechanism.
2. Next, attach the main sail to the boom. Slide the luff of the sail into the mast track and securely fix it in place using sail slides or cars.
3. Connect the mainsheet to the boom. One end should be attached to the boom while the other end is connected to a block or cleat on the boat.
4. Proceed to attach the jib or genoa. Make sure to securely attach the hanks or furler line to the forestay to ensure stability.
5. Connect the jib sheets. One end of each jib sheet should be attached to the clew of the jib or genoa, while the other end is connected to a block or winch on the boat.
6. Before setting sail, it is essential to thoroughly inspect all lines and connections. Ensure that they are properly tensioned and that all connections are securely fastened.
During my own experience of installing the boom and sails on my sailboat, I unexpectedly encountered a strong gust of wind. As a result, the boom began swinging uncontrollably, requiring me to quickly secure it to prevent any damage. This particular incident served as a vital reminder of the significance of properly attaching and securing the boom, as well as the importance of being prepared for unforeseen weather conditions while rigging a sailboat.
4. Setting Up the Running Rigging
Setting up the running rigging on a sailboat involves several important steps. First, attach the halyard securely to the head of the sail. Then, connect the sheets to the clew of the sail. If necessary, make sure to secure the reefing lines . Attach the outhaul line to the clew of the sail and connect the downhaul line to the tack of the sail. It is crucial to ensure that all lines are properly cleated and organized. Take a moment to double-check the tension and alignment of each line. If you are using a roller furling system, carefully wrap the line around the furling drum and securely fasten it. Perform a thorough visual inspection of the running rigging to check for any signs of wear or damage. Properly setting up the running rigging is essential for safe and efficient sailing. It allows for precise control of the sail’s position and shape, ultimately optimizing the boat’s performance on the water.
Safety Considerations and Tips
When it comes to rigging a sailboat, safety should always be our top priority. In this section, we’ll explore essential safety considerations and share some valuable tips to ensure smooth sailing. From the importance of wearing a personal flotation device to securing loose ends and lines, and being cautious around overhead power lines, we’ll equip you with the knowledge and awareness needed for a safe and enjoyable sailing experience. So, let’s set sail and dive into the world of safety on the water!
1. Always Wear a Personal Flotation Device
When rigging a sailboat, it is crucial to prioritize safety and always wear a personal flotation device ( PFD ). Follow these steps to properly use a PFD:
- Select the appropriate Coast Guard-approved PFD that fits your size and weight.
- Put on the PFD correctly by placing your arms through the armholes and securing all the straps for a snug fit .
- Adjust the PFD for comfort , ensuring it is neither too tight nor too loose, allowing freedom of movement and adequate buoyancy .
- Regularly inspect the PFD for any signs of wear or damage, such as tears or broken straps, and replace any damaged PFDs immediately .
- Always wear your PFD when on or near the water, even if you are a strong swimmer .
By always wearing a personal flotation device and following these steps, you will ensure your safety and reduce the risk of accidents while rigging a sailboat. Remember, prioritize safety when enjoying water activities.
2. Secure Loose Ends and Lines
Inspect lines and ropes for frayed or damaged areas. Secure loose ends and lines with knots or appropriate cleats or clamps. Ensure all lines are properly tensioned to prevent loosening during sailing. Double-check all connections and attachments for security. Use additional safety measures like extra knots or stopper knots to prevent line slippage.
To ensure a safe sailing experience , it is crucial to secure loose ends and lines properly . Neglecting this important step can lead to accidents or damage to the sailboat. By inspecting, securing, and tensioning lines , you can have peace of mind knowing that everything is in place. Replace or repair any compromised lines or ropes promptly. Securing loose ends and lines allows for worry-free sailing trips .
3. Be Mindful of Overhead Power Lines
When rigging a sailboat, it is crucial to be mindful of overhead power lines for safety. It is important to survey the area for power lines before rigging the sailboat. Maintain a safe distance of at least 10 feet from power lines. It is crucial to avoid hoisting tall masts or long antenna systems near power lines to prevent contact. Lower the mast and tall structures when passing under a power line to minimize the risk of contact. It is also essential to be cautious in areas where power lines run over the water and steer clear to prevent accidents.
A true story emphasizes the importance of being mindful of overhead power lines. In this case, a group of sailors disregarded safety precautions and their sailboat’s mast made contact with a low-hanging power line, resulting in a dangerous electrical shock. Fortunately, no serious injuries occurred, but it serves as a stark reminder of the need to be aware of power lines while rigging a sailboat.
Some Facts About How To Rig A Sailboat:
- ✅ Small sailboat rigging projects can improve sailing performance and save money. (Source: stingysailor.com)
- ✅ Rigging guides are available for small sailboats, providing instructions and tips for rigging. (Source: westcoastsailing.net)
- ✅ Running rigging includes lines used to control and trim the sails, such as halyards and sheets. (Source: sailingellidah.com)
- ✅ Hardware used in sailboat rigging includes winches, blocks, and furling systems. (Source: sailingellidah.com)
- ✅ A step-by-step guide can help beginners rig a small sailboat for sailing. (Source: tripsavvy.com)
Frequently Asked Questions
1. how do i rig a small sailboat.
To rig a small sailboat, follow these steps: – Install or check the rudder, ensuring it is firmly attached. – Attach or check the tiller, the long steering arm mounted to the rudder. – Attach the jib halyard by connecting the halyard shackle to the head of the sail and the grommet in the tack to the bottom of the forestay. – Hank on the jib by attaching the hanks of the sail to the forestay one at a time. – Run the jib sheets by tying or shackling them to the clew of the sail and running them back to the cockpit. – Attach the mainsail by spreading it out and attaching the halyard shackle to the head of the sail. – Secure the tack, clew, and foot of the mainsail to the boom using various lines and mechanisms. – Insert the mainsail slugs into the mast groove, gradually raising the mainsail as the slugs are inserted. – Cleat the main halyard and lower the centerboard into the water. – Raise the jib by pulling down on the jib halyard and cleating it on the other side of the mast. – Tighten the mainsheet and one jibsheet to adjust the sails and start moving forward.
2. What are the different types of sailboat rigs?
Sailboat rigs can be classified into three main types: – Sloop rig: This rig has a single mast with a mainsail and a headsail, typically a jib or genoa. – Cutter rig: This rig has two headsails, a smaller jib or staysail closer to the mast, and a larger headsail, usually a genoa, forward of it, alongside a mainsail. – Ketch rig: This rig has two masts, with the main mast taller than the mizzen mast. It usually has a mainsail, headsail, and a mizzen sail. Each rig has distinct characteristics and is suitable for different sailing conditions and preferences.
3. What are the essential parts of a sailboat?
The essential parts of a sailboat include: – Mast: The tall vertical spar that supports the sails. – Boom: The horizontal spar connected to the mast, which extends outward and supports the foot of the mainsail. – Rudder: The underwater appendage that steers the boat. – Centerboard or keel: A retractable or fixed fin-like structure that provides stability and prevents sideways drift. – Sails: The fabric structures that capture the wind’s energy to propel the boat. – Running rigging: The lines or ropes used to control the sails and sailing equipment. – Standing rigging: The wires and cables that support the mast and reinforce the spars. These are the basic components necessary for the functioning of a sailboat.
4. What is a spinnaker halyard?
A spinnaker halyard is a line used to hoist and control a spinnaker sail. The spinnaker is a large, lightweight sail that is used for downwind sailing or reaching in moderate to strong winds. The halyard attaches to the head of the spinnaker and is used to raise it to the top of the mast. Once hoisted, the spinnaker halyard can be adjusted to control the tension and shape of the sail.
5. Why is it important to maintain and replace worn running rigging?
It is important to maintain and replace worn running rigging for several reasons: – Safety: Worn or damaged rigging can compromise the integrity and stability of the boat, posing a safety risk to both crew and vessel. – Performance: Worn rigging can affect the efficiency and performance of the sails, diminishing the boat’s speed and maneuverability. – Reliability: Aging or worn rigging is more prone to failure, which can lead to unexpected problems and breakdowns. Regular inspection and replacement of worn running rigging is essential to ensure the safe and efficient operation of a sailboat.
6. Where can I find sailboat rigging books or guides?
There are several sources where you can find sailboat rigging books or guides: – Online: Websites such as West Coast Sailing and Stingy Sailor offer downloadable rigging guides for different sailboat models. – Bookstores: Many bookstores carry a wide selection of boating and sailing books, including those specifically focused on sailboat rigging. – Sailing schools and clubs: Local sailing schools or yacht clubs often have resources available for learning about sailboat rigging. – Manufacturers: Some sailboat manufacturers, like Hobie Cat and RS Sailing, provide rigging guides for their specific sailboat models. Consulting these resources can provide valuable information and instructions for rigging your sailboat properly.
About the author

Leave a Reply Cancel reply
Your email address will not be published. Required fields are marked *
Save my name, email, and website in this browser for the next time I comment.
Latest posts

The history of sailing – from ancient times to modern adventures
History of Sailing Sailing is a time-honored tradition that has evolved over millennia, from its humble beginnings as a means of transportation to a beloved modern-day recreational activity. The history of sailing is a fascinating journey that spans cultures and centuries, rich in innovation and adventure. In this article, we’ll explore the remarkable evolution of…

Sailing Solo: Adventures and Challenges of Single-Handed Sailing
Solo Sailing Sailing has always been a pursuit of freedom, adventure, and self-discovery. While sailing with a crew is a fantastic experience, there’s a unique allure to sailing solo – just you, the wind, and the open sea. Single-handed sailing, as it’s often called, is a journey of self-reliance, resilience, and the ultimate test of…

Sustainable Sailing: Eco-Friendly Practices on the boat
Eco Friendly Sailing Sailing is an exhilarating and timeless way to explore the beauty of the open water, but it’s important to remember that our oceans and environment need our protection. Sustainable sailing, which involves eco-friendly practices and mindful decision-making, allows sailors to enjoy their adventures while minimizing their impact on the environment. In this…
No products in the cart.
Sailing Ellidah is supported by our readers. Buying through our links may earn us an affiliate commission at no extra cost to you.
The Running Rigging On A Sailboat Explained
The running rigging on a sailboat consists of all the lines used to hoist, lower, and control the sails and sailing equipment. These lines usually have different colors and patterns to easily identify their function and location on the vessel.
Looking at the spaghetti of lines with different colors and patterns might get your head spinning. But don’t worry, it is actually pretty simple. Each line on a sailboat has a function, and you’ll often find labels describing them in the cockpit and on the mast.
In this guide, I’ll walk you through the functions of every component of the running rigging. We’ll also look at the hardware we use to operate it and get up to speed on some of the terminology.
The difference between standing rigging and running rigging
Sometimes things can get confusing as some of our nautical terms are used for multiple items depending on the context. Let me clarify just briefly:
The rig or rigging on a sailboat is a common term for two parts, the standing , and the running rigging.
- The standing rigging consists of wires supporting the mast on a sailboat and reinforcing the spars from the force of the sails when sailing. Check out my guide on standing rigging here!
- The running rigging consists of the halyards, sheets, and lines we use to hoist, lower, operate and control the sails on a sailboat which we will explore in this guide.
The components of the running rigging
Knowing the running rigging is an essential part of sailing, whether you are sailing a cruising boat or crewing on a large yacht. Different types of sailing vessels have different amounts of running rigging.
For example, a sloop rig has fewer lines than a ketch, which has multiple masts and requires a separate halyard, outhaul, and sheet for its mizzen sail. Similarly, a cutter rig needs another halyard and extra sheets for its additional headsail.
You can dive deeper and read more about Sloop rigs, Ketch Rigs, Cutter rigs, and many others here .
Take a look at this sailboat rigging diagram:
Lines are a type of rope with a smooth surface that works well on winches found on sailboats. They come in various styles and sizes and have different stretch capabilities.
Dyneema and other synthetic fibers have ultra-high tensile strength and low stretch. These high-performance lines last a long time, and I highly recommend them as a cruiser using them for my halyards.
A halyard is a line used to raise and lower the sail. It runs from the head of the sail to the masthead through a block and continues down to the deck. Running the halyard back to the cockpit is common, but many prefer to leave it on the mast.
Fun fact: Old traditional sailboats sometimes used a stainless steel wire attached to the head of the sail instead of a line!
Jib, Genoa, and Staysail Halyards
The halyard for the headsail is run through a block in front of the masthead. If your boat has a staysail, it needs a separate halyard. These lines are primarily untouched on vessels with a furling system except when you pack the sail away or back up. Commonly referred to as the jib halyard.
Spinnaker Halyard
A spinnaker halyard is basically the same as the main halyard but used to hoist and lower the spinnaker, gennaker, or parasailor.
The spinnaker halyard is also excellent for climbing up the front of the mast, hoisting the dinghy on deck, lifting the outboard, and many other things.
A sheet is a line you use to control and trim a sail to the angle of the wind . The mainsheet controls the angle of the mainsail and is attached between the boom and the mainsheet traveler . The two headsail sheets are connected to the sail’s clew (lower aft corner) and run back to each side of the cockpit.
These are control lines used to adjust the angle and tension of the sail. It is also the line used to unfurl a headsail on a furling system. Depending on what sail you are referring to, this can be the Genoa sheet , the Jib sheet , the Gennaker sheet , etc.
The outhaul is a line attached to the clew of the mainsail and used to adjust the foot tension. It works runs from the mainsail clew to the end of the boom and back to the mast. In many cases, back to the cockpit. On a boat with in-mast furling , this is the line you use to pull the sail out of the mast.
Topping lift
The topping lift is a line attached to the boom’s end and runs through the masthead and down to the deck or cockpit. It lifts and holds the boom and functions well as a spare main halyard. Some types of sailboat rigging don’t use a topping lift for their boom but a boom vang instead. Others have both!
Topping lifts can also be used to lift other spars.
A downhaul is a line used to lower with and typically used to haul the mainsail down when reefing and lowering the spinnaker and whisker poles. The downhaul can also control the tack of an asymmetrical spinnaker, gennaker, or parasailor.
Tweaker and Barber Haul
A tweaker is a line, often elastic, attached to the sheet of a headsail and used to fine-tune the tension on the sheet.
Barber haul
A barber haul is a line attached to a headsail’s sheet to adjust the sheeting angle to the wind. It is often used to pull the clew further toward the center or outboard than the cars allow.
Boom Preventer
A boom preventer is a line attached to the boom’s end when sailing off the wind. Its function is to hold the spar in place and prevent it from swinging wildly.
If the boat were to get an accidental gybe, it could cause serious damage to the rigging or even harm people on board. It is important for the rigger to be cautious when setting up the boom preventer.
Running Backstay
Running backstays is similar to a normal backstay but uses a line instead of a hydraulic tensioner. Some rigs have additional check stays or runners as well.
Bonus tip: Reefing
The term reefing is used when reducing the effective sailing area exposed to the wind of a given sail. Headsails are usually reefed by partially furling them in, and they often have marks for what we refer to as 1st, 2nd, and 3rd reefs.
The mainsail is reefed similarly with an in-mast furling or in-boom furling system.
On a traditional mast, we use a system called slab reefing. The system has reefing lines running through the boom to reinforced points on the luff and leech, allowing you to pull the sail down to the boom and effectively reduce the sail area.
Having at least two reefing points in the mainsail is normal, but most cruising sailboats have 3. The 3rd is used for the heaviest conditions, giving you only a tiny bit of sail area exposed to the wind.
You want to reef your sails before the wind increases to a point where your boat gets overpowered.
It is essential to practice your reefing technique . You will find yourself in situations with rapidly increasing winds where you need to reduce your sails quickly.
Rule of thumb: If you think setting a reef might be a good idea, do it.
Shaking a reef is the term used when we sail with a reefed sail and want to increase the sail area back to full.
Hardware used for sail handling and the running rigging
Furling system.
Most sailboats have their headsail on a furling system. A furling system is a tube that runs along the forestay from the bottom furler drum to the masthead swivel.
This system allows you to roll the headsail around the forestay, making furling the sail in and out accessible. It is also convenient when reefing the sail when the wind picks up, as you can easily do this from the safety of the cockpit. These furling systems come in manual versions and electric versions.
In-mast furling
In-mast furling is a system that rolls the mainsail in and out of the mast. To unfurl the mainsail, we use the outhaul .
In-boom furling
In-boom furling is a system that rolls the mainsail in and out of the boom. This system has been costly and has mostly been seen on big yachts earlier. They are becoming more affordable and common on smaller boats, though. To unfurl this setup, we use the main halyard.
A Stack pack is also called a Lazy Bag or Lazy Pack. It is a bag with a zip attached to the boom where the mainsail is stored when unused. It protects the mainsail from UV rays from the sun and weather elements. It is a very nice and tidy way to store the mainsail and reefing lines if you don’t have in-mast or in-boom furling.
Lazy Jacks is a system of lines running from the stack pack to the mast. The Lazy Jacks guide the mainsail up and down from the Stack Pack and prevent it from falling down on the deck. It is also possible to rig Lazy Jacks without a Stack Pack.
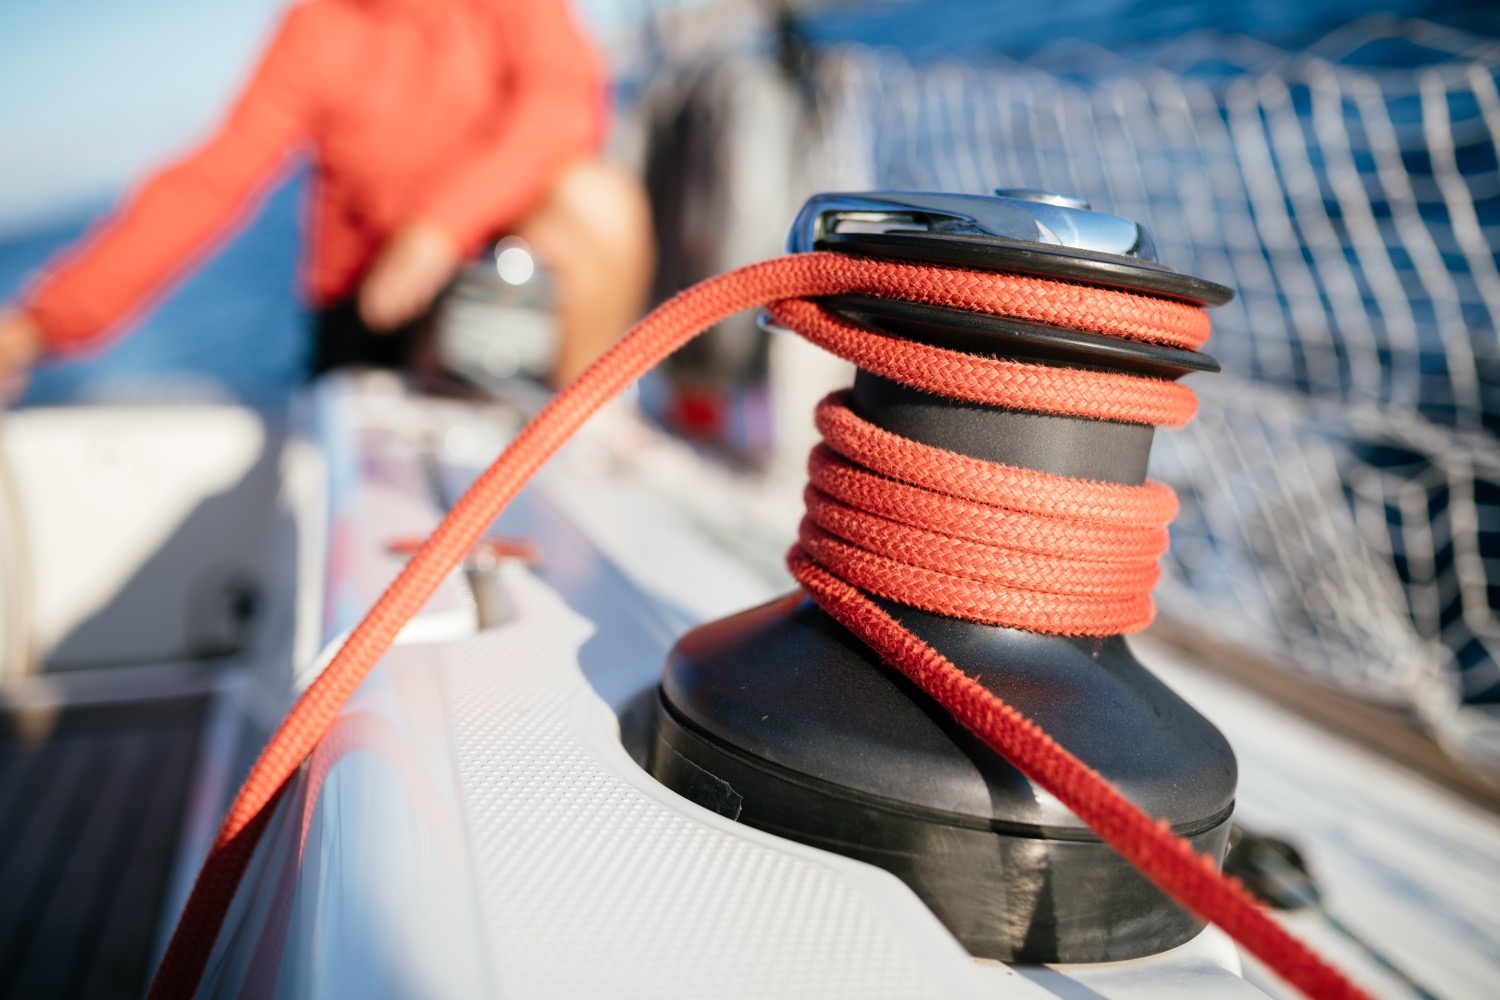
A block is a pulley with a sheave wheel. Blocks are used to change the direction of a pull on a line or rope and give a mechanical advantage. They have many uses, especially onboard sailboats.
A winch is a metal drum that gives you a mechanical advantage to control and tighten lines. These can be operated by turning a rope around it and pulling manually or by a winch handle to get more force. Most modern winches are self-tailing, which means they lock the line on so you can winch the line without holding on to it. Some boats even have electrical winches operated by a button.
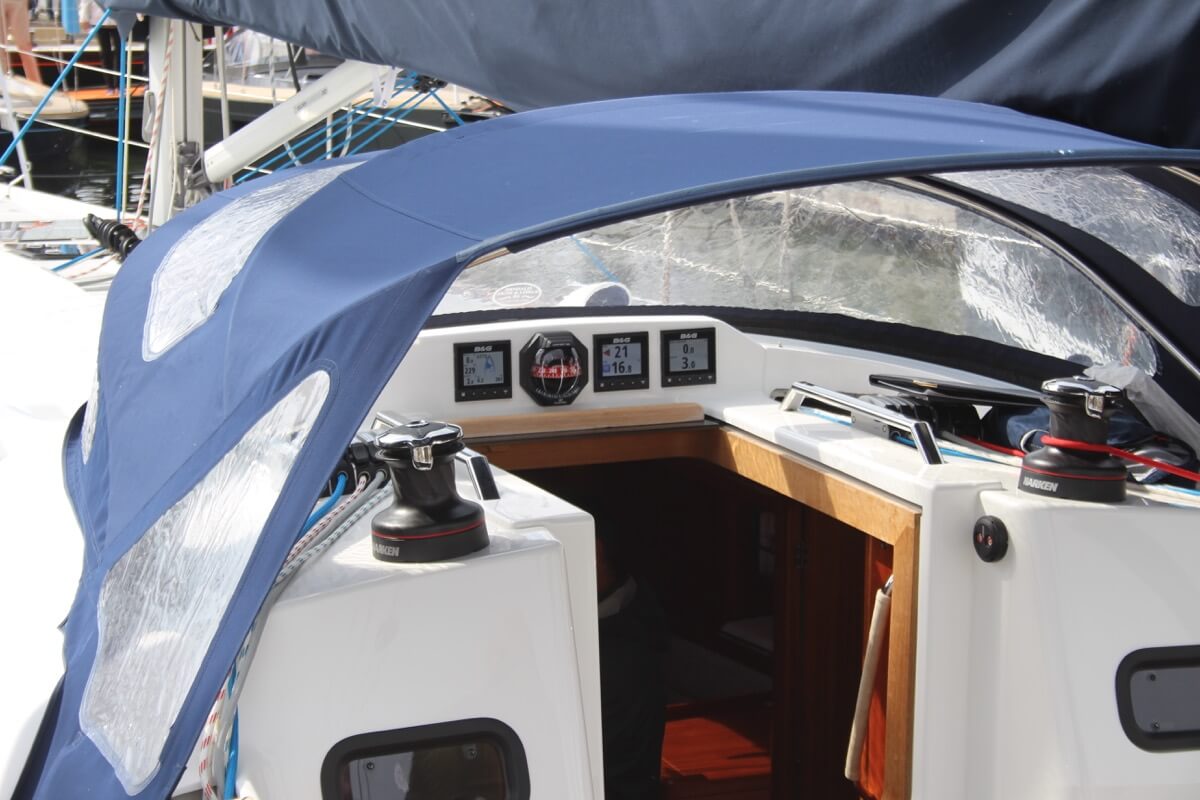
Mainsheet Traveler
The mainsheet traveler is a horizontal track that the mainsheet is attached to through a series of blocks. The traveler enables you to adjust and lock the boom at an angle and also plays a critical part in trimming the mainsail.
Most cruising sailboats have their traveler attached to the top of the coachroof in front of the spray hood. A racing boat typically has the traveler in the cockpit near the helm to give the helmsman better control over the mainsheet.
The cars are basically a pulley or block attached to a track on the port and starboard deck that your headsail sheets run through. Cars are used to control the angle of the sheet between the clew and the deck. The cars are handy when you trim the sail to set the right balance of tension between the foot and leech, depending on your point of sail.
The jammer is used to lock a line in place. Most sailboats use these for locking the halyards, mainsheet, outhaul, reef lines, traveler lines, boom vang lines, etc. You can pull or winch a line through a closed jammer, but it won’t run away if you let go of it unless you open the lock.
As I explained earlier, it is normal to have most or all of the lines led back to the cockpit, and they are usually run through a series of jammers.
The jammers are often labeled with the name of the line it locks, which makes it easier to remember which line goes where.
Spinnaker Pole
A spinnaker pole is a spar used to wing out a headsail when sailing off the wind, particularly the spinnaker. The spinnaker pole should have the same length as the distance between the mast and the forestay measured along the deck. We use a fore and aft guy and the pole’s topping lift to rig a pole correctly.
The rigging varies depending on the layout of the boat, but it usually looks like this:
- One line runs from the bow to the end of the pole.
- An aft line runs from near the stern to the end of the pole.
- A topping lift is used to raise and lower the pole.
Whisker Pole
A whisker pole is similar to the spinnaker pole and is rigged similarly. It is typically built lighter and attached to a track on the mast. These can be found in fixed lengths or adjustable lengths. Ideally, the length should be the same as the foot of the headsail you intend to pole out.
Boom Vang/Rod Kicker
The Boom Vang has a few different names. Rod-kicker, kicking strap, or kicker. It is used to tension the boom downwards. When you are sailing downwind and have the boom far out, the mainsheet won’t pull the boom down as much as inboard, and you can then use the vang to adjust the twist and shape of the mainsail.
Mooring line
A mooring line is a traditional rope lead through a fairlead to the vessel’s cleat and a mooring buoy, key, or pontoon.
Final words
Congratulations! By now, you should have a much better understanding of how the running rig on a sailboat functions. We’ve covered the different lines, their purpose, and the hardware used to operate them. I hope you’ve enjoyed this guide and learned something new.
Now it’s time to take what you’ve learned and put it into practice by getting out on the water, setting sail, and getting hands-on experience with the lines.
Or you can continue to my following guide and learn more about the different types of sails .
Sharing is caring!
Skipper, Electrician and ROV Pilot
Robin is the founder and owner of Sailing Ellidah and has been living on his sailboat since 2019. He is currently on a journey to sail around the world and is passionate about writing his story and helpful content to inspire others who share his interest in sailing.
Leave a Reply Cancel reply
Your email address will not be published. Required fields are marked *
- Club Finder

Wayfarer Rigging Guide
Go To: Sailing - Rigging Guides
Posted on 21 September 2009 15:59
The Wayfarer is a great boat for cruising, racing or training. Its' wide double chined hull gives' it great stability, and plenty of space gives it a lot of flexibility. They're easy to rig too, which you're about to find out!
Originally designed in 1957 by Ian Proctor, the Wayfarer is a large, nearly 16 foot long dinghy, suitable for learning, racing or cruising. Once a favourite boat of many sailing schools due to its size and stability, the Wayfarer has since lost out due to the more modern designs such as the Topper Magno, Topper Omega, Laser Stratos or RS Vision. As a glass fibre (GRP) constructed boat, they can be expensive for what they are, and don't take kindly to damage as well as the more modern rotomoulded one-design boats from Laser, Topper and RS.
Photo 1, A wayfarer hull with the mast up
Photo 2, The mast gate and support
Photo 3, Standard rudder pintles
Big enough to comfortably sit three adults (and at a stretch on short journeys up to six), the Wayfarer is capable of longer trips, having even been sailed from Scotland to Iceland. There have been several versions of the design, ranging from wood to GRP, the later versions named the Wayfarer World. They have several internal bouyancy tanks, and usually a back hatch which can be used for storage. Inside, most have floorboards to level the floor, and several different bailing/draining systems can be found underneath. There is also a smaller version of the Wayfarer called the Wanderer.
Photo 4, Mainsheet traveller
Photo 5, The mast with cleats
Photo 6, The mast and spreaders
A typical bermudan rig boat, the Wayfarer has a main and jib sail, and a symmetrical spinnaker (although the Wayfarer World is assymmetric). The boats typically used to be rigged aft-main, although newer models are centre-main, and they are relatively easy to convert. As a restricted design boat, the sail plan/size, hull shape/size and mast length etc are fairly limited, but lots of variations can be found in other aspects, such as booms, fittings, lines etc. The boats we are rigging are aft-main Mark 2 GRP boats. We used two boats to demonstrate some differences between booms and outhaul systems. We will not be rigging a spinnaker on this boat as the spinnaker halyard was unkindly removed.
Photo 7, The parts we need
Photo 8, The rudder with the kicker and mainsheet
What You Need
- Mast, Spreaders, Shroud, and Forestay (unless you've bought from new, these should all be together) - Photos 1, 2 and 6 - Main Sail, Jib Sail - Photo 7 - Battens - Main Sheet ( 10mm x 13 metres ) + Blocks + Traveller - Photos 4 and 8 - Jib Sheet ( 10mm x 10 metres ) - Kicking strap/boom vang assembly + lines - Photo 8 - Outhaul ( depends on arrangement ) - Downhaul ( 5mm x 2 metres ) - Boom - Tiller + Tiller Extension, Rudder - Painter ( 10mm x 3 metres ) - Hull (bit obvious this one) + Centreboard - Bungs (depending upon boat type).
Photo 9, The gooseneck
Photo 10, Attaching the mainsheet block to the traveller
Photo 11, Mainsheet block attached to traveller
As always, remember if you are buying a boat that it may not always come as class legal - we are kindly borrowing these boats from a sailing school and they may not fall to form on class regulations. If in doubt - get a copy of the Class Rules which can be found on the Wayfarer Class assocation website and measure for yourself. If in doubt on any items, contact us !
Lets Get Started
We're going to rig the boat from the front to the back, and we're doing it on dry land as it wasn't a windy day. You may find it easier with a boat this size to get it on the water before you rig it, especially if you have pontoons you can moor up to.
It's a little odd rigging the mainsheet first - but as we took it all off, it's easier to put this back on first before we have sails flapping around. First, attach the relevant block to the mainsheet traveller (here using a pin and split ring, Photos 10 and 11), and then attach the other block to the underside of the boom (shown here attached from the end of the boom, Photo 12). The main sheet on ours here is whipped onto the becket on the pulley block on the traveller (Photo 13).
Photo 12, Mainsheet block on boom
Photo 13, Mainsheet attached
Take the sheet up to the block on the underside of the boom, from front to back through the block, then back to the lower block, and back to front through this block (Photo 14); this is for an aft-main rig arrangement (Photo 15), yours' might be different if it's centremain. Also note the black band on the boom (Photo 16); you may find this on older booms, and it is the optimal point at which to pull the sail out to using the outhaul - pulling it any further past this point flattens and depowers it. You don't tend to see this on many modern boats!
Photo 14, Feeding the mainsheet through the blocks
Photo 15, Boom and mainsheet rigged
Photo 16, Black band on the boom
Photo 17, Attaching the jib to the front of the deck
First, we rig the jib, securing the tack (the front bottom corner) of the jib to the front of the boat, using the metal fixing point and a shackle (Photo 17). Next, we secure the rope stopper for the halyard to the top of the sail (see article) or use a shackle (Photo 18), and then hoist the jib. Secure it around the cleat (see article) as in Photo 19. Attach the jib sheets to the clew of the jib - this is best done by finding the middle of the rope, tying a stopper knot in it, feeding it through the jib clew and then tying another stopper knot the other side to hold the middle of the rope in place. Next, pass the jib sheets through the jib fairleads (Photos 20 and 21), and secure with a stopper or figure 8 knot (Photo 22).
Photo 18, Attaching the jib halyard with a rope stopper
Photo 19, Cleat and coil the halyard
Photo 20, Jibsheets through the fairleads
Photo 21, Feed the jibsheets through the jammers
Feed the main sail car along the bottom of the boom (Photo 23); the wayfarer does not have a loose footed sail, so the boom has to have the sails' bottom edge bolt rope (the thick edge that feeds up the mast or along the boom, again in Photo 23) fed through it, with the small plastic car first (if your sail has one). Feed it all the way along until the eyehole at the tack (the front corner) has reached the front end of the boom. Secure the tack eyehole to the boom using a split pin (Photo 24), then secure the outhaul at the other end.
Photo 22, Secure the jibsheet wiht a knot
Photo 23, Feed the mainsail car into the boom track
Photo 24, Secure the tack of the mainsail
Photo 25, Attaching the basic outhaul to the boom
We have two types of sail and boom shown here; the first type has an exterior boom outhaul, which can be rigged in one of two ways. We've rigged it up by first tying a bowline on the end of the boom (Photo 25), then taking this through the clew (back corner) eyehole of the sail, then back through the end of the boom (Photo 26); this creates a multi-purchase system without using pulley blocks. We've then tied this off and secured it with a series of hitches (Photos 27 and 28). This is for if you do not wish to use the outhaul, and just want a more simple system.
Photo 26, Securing the basic outhaul
Photo 27, Securing the basic outhaul
The exterior boom outhaul is designed for slightly smaller diameter rope than we have. The idea is to take it from the back of the boom as we did, without the half hitches (Photo 29), then take it along the length of the boom. At points along the boom are fairleads or eyeholes (Photo 30), and at the mast end of the boom is a jammer cleat which we have not shown (but are heading towards in Photo 31).
Photo 28, Securing the basic outhaul
Photo 29, Alternative to secure the basic outhaul
Photo 30, Alternative to secure the basic outhaul
For the second type of boom we have, there is an interior outhaul. The outhaul is hidden inside the boom (Photo 32), with the working end that you pull all the way at the front of the boom, coming through a sheave block through to a jammer (and onward to a pully block on this boat) as in Photo 34. The other end is taken around the sheave at the end of the boom (Photo 32), through the clew eyehole in the sail, and then secured to the end of the boom - there is a small notch in the back of the boom which when used with a knot in the rope can secure the outhaul (Photo 33). This may not look very secure - but when under tension, it will not come out. Many more modern high performance dinghies such as the RS200, RS400 and Laser 2000 use this method for securing not only the outhaul, but also the downhaul as well.
Photo 31, Alternative to secure the basic outhaul
Photo 32, The better outhaul
Photo 33, The better outhaul
Photo 34, The better outhaul fed to the cockpit
Raise the sail
Next, we raise the sail. Before you do this - you should put the battens in the sail. This is probably one of the most common things that is forgotten when rigging a boat, and how embarassing is it to pull the sail all the way to the top, and finish rigging to look around and spot the battens lying on the floor? Doubly so when you're doing a rigging guide! The Wayfarer has three battens, and they should all be inserted before hoisting the mainsail.
First, secure the main sail halyard to the head of the sail using a stopper knot like in Photo 35 (at this point, also secure any mast top bouyancy bags you may be using to stop the boat inverting if you capsize). Slot the bolt rope on the luff (front edge) of the sail into the mast groove (Photo 35). One person should feed the mast luff in as the other person hoists the sail by pulling on the halyard (Photo 36). Keep hauling until the sail is at the top of the mast - as the sail reaches the top you may find it easier if the other person lifts up the boom to take the weight off and make hoisting easier. Secure the end of the halyard around the cleat, ours is a figure 8 cleat. Next, pull the boom down onto the gooseneck; if you put it on the gooseneck before hauling it up to the top, you will struggle to pull the sail up with the boom resisting you (Photo 37).
Photo 35, Feed the main sail in to the mast
Photo 36, Hoist the main sail
Photo 37, Pull the boom down onto the gooseneck
We didn't rig a downhaul on this boat as it isn't usually rigged up with one, as it's a training boat. There are however plenty of spare cleats, so it's easy to add one if you wish. Usually, this will involve tying the end of a length of rope to a fitting (on the side of the boom if possible), through the eyehole of the sail, and then down to a cleat. If it's light winds, don't worry - downhauls are only really needed when it gets windy!
Photo 38, Assemble the kicking strap
Photo 39, Assemble the kicking strap
Kicking Strap
As with most kicking straps, there is a great deal of variation out there, particularly if you are ignoring class rules. The kicker on our Wayfarer is a 4:1 ratio. Assemble the kicker as shown (Photos 38 to 41 inclusive) or as necessary if yours is different (get in touch with us if you are stuck with yours). Attach the bottom end to a fitting on the bottom of the mast (usually a fairlead or metal D-Loop) with a shackle (Photo 42), and the top end to the boom fitting - this will be with either a key that fits in a slot, or a shackle fitting (Photo 43).
Photo 40, Assemble the kicking strap
Photo 41, Assemble the kicking strap
Don't tension the kicker too much while you're on land, if it's windy and you tighten it, the force going through the sail into the boom can only make it jump from side to side with a lot of force, but if you leave the kicking strap loose the boom can jump up and down with the wind also, so it will move around side to side less, effectively depowering it and lowering the chance of someone getting knocked out!
Photo 42, Attach the kicking strap to the mast
Next, it's time for the rudder. Drop the rudder onto it's pintles carefully (Photo 45), and then feed the tiller into the top of the rudder (Photo 46). You should have some method to secure the tiller into the rudder stock, as you can see on ours its a split or clevis pin, through a hole in each (Photo 47). This will stop the tiller coming out and the rudder floating off if you capsize. Note we've also put the bungs in at this point (Photo 44).
Photo 43, The finished kicking strap
Photo 44, Secure the bungs
Photo 45, Attach the rudder
Finally, all well setup Wayfarers should have two lines on the rudder, an uphaul and a downhaul. The uphaul can be just a length of rope, on ours going from the middle of the back of the blade (as can be seen in Photo 48) to the tiller (Photo 49), to hold the rudder blade up when you are out of the water. The downhaul is harder to see, but is a length of rope from the front of the underneath of the rudder blade (as can be seen in Photo 48), with a length of elastic attached, which is pulled and fits on a catch or hook on the tiller (we can't show this as you can only do it when sailing to hold the rudder down). When out sailing, pull this and hook it on to keep the rudder blade down - if the rudder hits the bottom, the elastic will come into play and allow the blade to move backwards.
Photo 46, Insert the tiller
Photo 47, Secure the tiller
Photo 48, Secure the rudder blade in the up position
Photo 49, Secure the rudder blade in the up position
Finally, ensure all self-bailers are up, and all bungs are secured. On this boat, the bungs have been tied together, through the rudder pintle with a short length of cord.
There you have it, a fully rigged Wayfarer (Photos 50 and 51) - for the size of the boat, it's astonishingly easy to rig. There are different variations, Mk 1, Mk2, Mk3 and Wayfarer Worlds, all with fairly similar rigging arrangements. However, you can also get centre-main versions which aren't much more difficult to rig, and you can now even get asymmetric versions with a bowsprit. Whatever Wayfarer you are rigging, get it right and you can have a great day cruising, racing or just playing around!
Photo 50, Ready to sail!
Photo 51, Ready to sail!

Fig 1. Get all the gear ready

Home - About Us - Sailing - Club Finder - Links - Link To Us - Join Us - Contact Us - Classes - Reviews - Photo Galleries - Glossary - Knots
Disclaimer - Privacy Policy
Sailboat Parts Explained: Illustrated Guide (with Diagrams)
When you first get into sailing, there are a lot of sailboat parts to learn. Scouting for a good guide to all the parts, I couldn't find any, so I wrote one myself.
Below, I'll go over each different sailboat part. And I mean each and every one of them. I'll walk you through them one by one, and explain each part's function. I've also made sure to add good illustrations and clear diagrams.
This article is a great reference for beginners and experienced sailors alike. It's a great starting point, but also a great reference manual. Let's kick off with a quick general overview of the different sailboat parts.
General Overview
The different segments
You can divide up a sailboat in four general segments. These segments are arbitrary (I made them up) but it will help us to understand the parts more quickly. Some are super straightforward and some have a bit more ninja names.
Something like that. You can see the different segments highlighted in this diagram below:

The hull is what most people would consider 'the boat'. It's the part that provides buoyancy and carries everything else: sails, masts, rigging, and so on. Without the hull, there would be no boat. The hull can be divided into different parts: deck, keel, cabin, waterline, bilge, bow, stern, rudder, and many more.
I'll show you those specific parts later on. First, let's move on to the mast.

Sailboats Explained
The mast is the long, standing pole holding the sails. It is typically placed just off-center of a sailboat (a little bit to the front) and gives the sailboat its characteristic shape. The mast is crucial for any sailboat: without a mast, any sailboat would become just a regular boat.
I think this segment speaks mostly for itself. Most modern sailboats you see will have two sails up, but they can carry a variety of other specialty sails. And there are all kinds of sail plans out there, which determine the amount and shape of sails that are used.
The Rigging
This is probably the most complex category of all of them.
Rigging is the means with which the sails are attached to the mast. The rigging consists of all kinds of lines, cables, spars, and hardware. It's the segment with the most different parts.
The most important parts
If you learn anything from this article, here are the most important parts of any sailboat. You will find all of these parts in some shape or form on almost any sailboat.

Okay, we now have a good starting point and a good basic understanding of the different sailboat parts. It's time for the good stuff. We're going to dive into each segment in detail.
Below, I'll go over them one by one, pointing out its different parts on a diagram, listing them with a brief explanation, and showing you examples as well.
After reading this article, you'll recognize every single sailboat part and know them by name. And if you forget one, you're free to look it up in this guide.

On this page:
The hull is the heart of the boat. It's what carries everything: the mast, the sails, the rigging, the passengers. The hull is what provides the sailboat with its buoyancy, allowing it to stay afloat.
Sailboats mostly use displacement hulls, which is a shape that displaces water when moving through it. They are generally very round and use buoyancy to support its own weight. These two characteristics make sure it is a smooth ride.
There are different hull shapes that work and handle differently. If you want to learn more about them, here's the Illustrated Guide to Boat Hull Types (with 11 Examples ). But for now, all we need to know is that the hull is the rounded, floating part of any sailboat.
Instead of simply calling the different sides of a hull front, back, left and right , we use different names in sailing. Let's take a look at them.

The bow is the front part of the hull. It's simply the nautical word for 'front'. It's the pointy bit that cuts through the water. The shape of the bow determines partially how the boat handles.
The stern is the back part of the hull. It's simply the nautical word for 'back'. The shape of the stern partially determines the stability and speed of the boat. With motorboats, the stern lies deep inside the water, and the hull is flatter aft. Aft also means back. This allows it to plane, increasing the hull speed. For sailboats, stability is much more important, so the hull is rounded throughout, increasing its buoyancy and hydrodynamic properties.
The transom is the backplate of the boat's hull. It's the most aft (rear) part of the boat.
Port is the left side of a sailboat.
Starboard is the right side of a sailboat
The bilges are the part where the bottom and the sides of the hull meet. On sailboats, these are typically very round, which helps with hydrodynamics. On powerboats, they tend to have an angle.
The waterline is the point where the boat's hull meets the water. Generally, boat owners paint the waterline and use antifouling paint below it, to protect it from marine growth.
The deck is the top part of the boat's hull. In a way, it's the cap of the boat, and it holds the deck hardware and rigging.
Displacement hulls are very round and smooth, which makes them very efficient and comfortable. But it also makes them very easy to capsize: think of a canoe, for example.
The keel is a large fin that offsets the tendency to capsize by providing counterbalance. Typically, the keel carries ballast in the tip, creating a counterweight to the wind's force on the sails.
The rudder is the horizontal plate at the back of the boat that is used to steer by setting a course and maintaining it. It is connected to the helm or tiller.
Tiller or Helm
- The helm is simply the nautical term for the wheel.
- The tiller is simply the nautical term for the steering stick.
The tiller or helm is attached to the rudder and is used to steer the boat. Most smaller sailboats (below 30') have a tiller, most larger sailboats use a helm. Large ocean-going vessels tend to have two helms.
The cockpit is the recessed part in the deck where the helmsman sits or stands. It tends to have some benches. It houses the outside navigation and systems interfaces, like the compass, chartplotter, and so on. It also houses the mainsheet traveler and winches for the jib. Most boats are set up so that the entire vessel can be operated from the cockpit (hence the name). More on those different parts later.
Most larger boats have some sort of roofed part, which is called the cabin. The cabin is used as a shelter, and on cruising sailboats you'll find the galley for cooking, a bed, bath room, and so on.
The mast is the pole on a sailboat that holds the sails. Sailboats can have one or multiple masts, depending on the mast configuration. Most sailboats have only one or two masts. Three masts or more is less common.
The boom is the horizontal pole on the mast, that holds the mainsail in place.
The sails seem simple, but actually consist of many moving parts. The parts I list below work for most modern sailboats - I mean 90% of them. However, there are all sorts of specialty sails that are not included here, to keep things concise.

The mainsail is the largest sail on the largest mast. Most sailboats use a sloop rigging (just one mast with one bermuda mainsail). In that case, the main is easy to recognize. With other rig types, it gets more difficult, since there can be multiple tall masts and large sails.
If you want to take a look at the different sail plans and rig types that are out there, I suggest reading my previous guide on how to recognize any sailboat here (opens in new tab).
Sail sides:
- Leech - Leech is the name for the back side of the sail, running from the top to the bottom.
- Luff - Luff is the name for the front side of the sail, running from the top to the bottom.
- Foot - Foot is the name for the lower side of the sail, where it meets the boom.
Sail corners:
- Clew - The clew is the lower aft (back) corner of the mainsail, where the leech is connected to the foot. The clew is attached to the boom.
- Tack - The tack is the lower front corner of the mainsail
- Head - The head is the top corner of the mainsail
Battens are horizontal sail reinforcers that flatten and stiffen the sail.
Telltales are small strings that show you whether your sail trim is correct. You'll find telltales on both your jib and mainsail.
The jib is the standard sized headsail on a Bermuda Sloop rig (which is the sail plan most modern sailboats use).
As I mentioned: there are all kinds, types, and shapes of sails. For an overview of the most common sail types, check out my Guide on Sail Types here (with photos).
The rigging is what is used to attach your sails and mast to your boat. Rigging, in other words, mostly consists of all kinds of lines. Lines are just another word for ropes. Come to think of it, sailors really find all kinds of ways to complicate the word rope ...
Two types of rigging
There are two types of rigging: running and standing rigging. The difference between the two is very simple.
- The running rigging is the rigging on a sailboat that's used to operate the sails. For example, the halyard, which is used to lower and heave the mainsail.
- The standing rigging is the rigging that is used to support the mast and sail plan.
Standing Rigging

Here are the different parts that belong to the standing rigging:
- Forestay or Headstay - Line or cable that supports the mast and is attached to the bow of the boat. This is often a steel cable.
- Backstay - Line or cable that supports the mast and is attached to the stern of the boat. This is often a steel cable.
- Sidestay or Shroud - Line or cable that supports the mast from the sides of the boat. Most sailboats use at least two sidestays (one on each side).
- Spreader - The sidestays are spaced to steer clear from the mast using spreaders.
Running Rigging: different words for rope
Ropes play a big part in sailing, and especially in control over the sails. In sailboat jargon, we call ropes 'lines'. But there are some lines with a specific function that have a different name. I think this makes it easier to communicate with your crew: you don't have to define which line you mean. Instead, you simply shout 'mainsheet!'. Yeah, that works.
Running rigging consists of the lines, sheets, and hardware that are used to control, raise, lower, shape and manipulate the sails on a sailboat. Rigging varies for different rig types, but since most sailboats are use a sloop rig, nearly all sailboats use the following running rigging:

- Halyards -'Halyard' is simply the nautical name for lines or ropes that are used to raise and lower the mainsail. The halyard is attached to the top of the mainsail sheet, or the gaffer, which is a top spar that attaches to the mainsail. You'll find halyards on both the mainsail and jib.
- Sheets - 'Sheet' is simply the nautical term for lines or ropes that are used to set the angle of the sail.
- Mainsheet - The line, or sheet, that is used to set the angle of the mainsail. The mainsheet is attached to the Mainsheet traveler. More on that under hardware.
- Jib Sheet - The jib mostly comes with two sheets: one on each side of the mast. This prevents you from having to loosen your sheet, throwing it around the other side of the mast, and tightening it. The jib sheets are often controlled using winches (more on that under hardware).
- Cleats are small on-deck hooks that can be used to tie down sheets and lines after trimming them.
- Reefing lines - Lines that run through the mainsail, used to put a reef in the main.
- The Boom Topping Lift is a line that is attached to the aft (back) end of the boom and runs to the top of the mast. It supports the boom whenever you take down the mainsail.
- The Boom Vang is a line that places downward tension on the boom.
There are some more tensioning lines, but I'll leave them for now. I could probably do an entire guide on the different sheets on a sailboat. Who knows, perhaps I'll write it.
This is a new segment, that I didn't mention before. It's a bit of an odd duck, so I threw all sorts of stuff into this category. But they are just as important as all the other parts. Your hardware consists of cleats, winches, traveler and so on. If you don't know what all of this means, no worries: neither did I. Below, you'll find a complete overview of the different parts.
Deck Hardware

Just a brief mention of the different deck hardware parts:
- Pulpits are fenced platforms on the sailboat's stern and bow, which is why they are called the bow pulpit and stern pulpit here. They typically have a solid steel framing for safety.
- Stanchons are the standing poles supporting the lifeline , which combined for a sort of fencing around the sailboat's deck. On most sailboats, steel and steel cables are used for the stanchons and lifelines.
Mainsheet Traveler
The mainsheet traveler is a rail in the cockpit that is used to control the mainsheet. It helps to lock the mainsheet in place, fixing the mainsails angle to the wind.
If you're interested in learning more about how to use the mainsheet traveler, Matej has written a great list of tips for using your mainsheet traveler the right way . It's a good starting point for beginners.
Winches are mechanical or electronic spools that are used to easily trim lines and sheets. Most sailboats use winches to control the jib sheets. Modern large sailing yachts use electronic winches for nearly all lines. This makes it incredibly easy to trim your lines.
You'll find the compass typically in the cockpit. It's the most old-skool navigation tool out there, but I'm convinced it's also one of the most reliable. In any way, it definitely is the most solid backup navigator you can get for the money.
Want to learn how to use a compass quickly and reliably? It's easy. Just read my step-by-step beginner guide on How To Use a Compass (opens in new tab .
Chartplotter
Most sailboats nowadays use, besides a compass and a map, a chartplotter. Chartplotters are GPS devices that show a map and a course. It's very similar to your normal car navigation.
Outboard motor
Most sailboats have some sort of motor to help out when there's just the slightest breeze. These engines aren't very big or powerful, and most sailboats up to 32' use an outboard motor. You'll find these at the back of the boat.
Most sailboats carry 1 - 3 anchors: one bow anchor (the main one) and two stern anchors. The last two are optional and are mostly used by bluewater cruisers.
I hope this was helpful, and that you've gained a good understanding of the different parts involved in sailing. I wanted to write a good walk-through instead of overwhelming you with lists and lists of nautical terms. I hope I've succeeded. If so, I appreciate any comments and tips below.
I've tried to be as comprehensive as possible, without getting into the real nitty gritty. That would make for a gigantic article. However, if you feel I've left something out that really should be in here, please let me know in the comments below, so I can update the article.
I own a small 20 foot yacht called a Red witch made locally back in the 70s here in Western Australia i found your article great and enjoyed reading it i know it will be a great help for me in my future leaning to sail regards John.
David Gardner
İ think this is a good explanation of the difference between a ”rope” and a ”line”:
Rope is unemployed cordage. In other words, when it is in a coil and has not been assigned a job, it is just a rope.
On the other hand, when you prepare a rope for a specific task, it becomes employed and is a line. The line is labeled by the job it performs; for example, anchor line, dock line, fender line, etc.
Hey Mr. Buckles
I am taking on new crew to race with me on my Flying Scot (19ft dingy). I find your Sailboat Parts Explained to be clear and concise. I believe it will help my new crew learn the language that we use on the boat quickly without being overwhelmed.
PS: my grandparents were from Friesland and emigrated to America.
Thank you Shawn for the well written, clear and easy to digest introductory article. Just after reading this first article I feel excited and ready to set sails and go!! LOL!! Cheers! Daniel.
steve Balog
well done, chap
Great intro. However, the overview diagram misidentifies the cockpit location. The cockpit is located aft of the helm. Your diagram points to a location to the fore of the helm.
William Thompson-Ambrose
An excellent introduction to the basic anatomy and function of the sailboat. Anyone who wants to start sailing should consider the above article before stepping aboard! Thank-you
James Huskisson
Thanks for you efforts mate. We’ve all got to start somewhere. Thanks for sharing. Hoping to my first yacht. 25ft Holland. Would love to cross the Bass Strait one day to Tasmania. 👌 Cheers mate
Alan Alexander Percy
thankyou ijust aquired my first sailboat at 66yrs of age its down at pelican point a beautifull place in virginia usa my sailboat is a redwing 30 if you are ever in the area i wouldnt mind your guidance and superior knowledge of how to sail but iam sure your fantastic article will help my sailboat is wings 30 ft
Thanks for quick refresher course. Having sailed in California for 20+ years I now live in Spain where I have to take a spanish exam for a sailboat license. Problem is, it’s only in spanish. So a lot to learn for an old guy like me.
Very comprehensive, thank you
Your article really brought all the pieces together for me today. I have been adventuring my first sailing voyage for 2 months from the Carolinas and am now in Eleuthera waiting on weather to make the Exumas!!! Great job and thanks
Helen Ballard
I’ve at last found something of an adventure to have in sailing, so I’m starting at the basics, I have done a little sailing but need more despite being over 60 life in the old dog etc, thanks for your information 😊
Barbara Scott
I don’t have a sailboat, neither do l plan to literally take to the waters. But for mental exercise, l have decided to take to sailing in my Bermuda sloop, learning what it takes to become a good sailor and run a tight ship, even if it’s just imaginary. Thank you for helping me on my journey to countless adventures and misadventures, just to keep it out of the doldrums! (I’m a 69 year old African American female who have rediscovered why l enjoyed reading The Adventures of Robert Louis Stevenson as well as his captivating description of sea, wind, sailboat,and sailor).
Great article and very good information source for a beginner like me. But I didn’t find out what I had hoped to, which is, what are all those noisy bits of kit on top of the mast? I know the one with the arrow is a weather vane, but the rest? Many thanks, Jay.
Louis Cohen
The main halyard is attached to the head of the mainsail, not the to the mainsheet. In the USA, we say gaff, not gaffer. The gaff often has its own halyard separate from the main halyard.
Other than that it’s a nice article with good diagrams.
A Girl Who Has an Open Sail Dream
Wow! That was a lot of great detail! Thank you, this is going to help me a lot on my project!
Hi, good info, do u know a book that explains all the systems on a candc 27,
Emma Delaney
As a hobbyist, I was hesitant to invest in expensive CAD software, but CADHOBBY IntelliCAD has proven to be a cost-effective alternative that delivers the same quality and performance.
https://www.cadhobby.com/
Leave a comment
You may also like, guide to understanding sail rig types (with pictures).
There are a lot of different sail rig types and it can be difficult to remember what's what. So I've come up with a system. Let me explain it in this article.

The Ultimate Guide to Sail Types and Rigs (with Pictures)

The Illustrated Guide To Boat Hull Types (11 Examples)

How To Live On a Boat For Free: How I'd Do It

How To Live on a Sailboat: Consider These 5 Things
Own your first boat within a year on any budget.
A sailboat doesn't have to be expensive if you know what you're doing. If you want to learn how to make your sailing dream reality within a year, leave your email and I'll send you free updates . I don't like spam - I will only send helpful content.
Ready to Own Your First Boat?
Just tell us the best email address to send your tips to:
RC Sailboat Rigging Setup- Briefed in 17 Easy Steps
Table of Contents
Introduction
To build a model sailboat, you’ll need a lot of time, patience, and talent. Remote control sailboat beginners should start by altering or fixing a pre-existing model. It is possible to create a quicker and more sophisticated sailboat by rigging an existing model.
What to do for the rc sailboat rigging setup ?
Tether the retaining bolt and wire mainsail luff. Insert the mast stub and slide the entire main boom assembly. Push the masthead and backstay crane. Adjust the sail to match the mast reinforcement ring. Attach the eye in the mainsail clew. Close the hooks. Set the backstay’s length to the right.
To get the overall understanding, read the entire article.
Things to Bring
- Stitching Device
- Sailboat Controlled via Remote
- Thread Made From Polyester
- Fisherman’s Spectra Line
- Dacron Sails
- Utility knife
Procedure for Rigging
Use these rigging guidelines to their full extent. This ensures that the boat will sail with the qualities and performance that its creators intended. You can also check the RC dirt oval setup guide to ease your work.
Step 1: Replace Old Sails
Remove and replace the old sails. Cut out the new main and headsails from Dacron. Measure the old ones from the model and add a half-inch on each side to the new measurements. Tether the retaining bolt.
Step 2: Wire Mainsail with Eyelets
All six eyelets on the mainsail luff should have wired mainsail luff rings attached to them.
Step 3: Place the Mast Stab
Be careful not to get the plastic collar’s bevelled edge. Insert the mast stub into the bottom of the mast.
Step 4: Slide Main Boom
From the bottom, slide the entire main boom assembly onto the mast stub.
Step 5: Slide Rings Under the Mast
Starting at the luff of the mainsail, slide all rings beneath the mast one at a time.
Step 6: Assemble Plug
Push the masthead and backstay crane. Assemble the plug into the mast. Cut a 250mm Dyneema length and tie the mainsail’s head to the backstay crane.
Step 7: Layout the Sail
Adjust the sail to match the mast reinforcement ring at its highest point. The sail’s head may readily swivel. Poles are sheeted out at an angle of 80 degrees when the boat’s sailing with the breeze.
Step 8: Attach the Cunningham
Attach the Cunningham (downhaul) as demonstrated by cutting a 300mm length of Dyneema. Tie a cord to the eye in the gooseneck fitting’s uppermost eye.
Step 9: Tie Bowsie’s Eye
Follow this path: First, tie one end to a Bowsie’s eye. Then, tie a second Bowsie’s eye; finally, tie a third Bowsie’s eye.
Step 10: Attach the Mainsail Clew
Attach the eye in the mainsail clew (bottom right corner) to the mainsail clew using a line.
Step 11: Close the Hook
Close the hook’s open end with thin-nosed pliers. Keep your sail from falling off while you’re out on the water.
Step 12: Replace the Sail If Needed
If you need to replace the sail, simply use a flat-bladed screwdriver to pry it open once again.
Step 13: Cut Dyneema
For the Backstay, cut a 900mm length of Dyneema. The Backstay Crane’s end hole has a loop where you can tie a piece of string.
It’s time to attach one of our 6mm stainless steel rings to its bottom end. Using a Mast Socket, insert the mast and the rigged Mainsail into the hull.
Step 14: Attach the Loop
Once you’ve cut a 500mm piece of Dyneema, tie a loop in one end. Weave the other end through the first small gaps in a Bowsie. Then throw the rim at the bottom of the Backstay.
Finish it back at the Bowsie. Using a metal hook in the Transom (rear edge of the hull), attach the loop to the backstay. Then put the Bowsie nearly halfway along the bottom rope and secure it.
Step 15: Tighten the Leech
To allow the leech (back edge) of the main to twist a little, lightly tighten the compression strut. Such that the leech (back edge) is under mild tension. Adjust the Cunnigham such that the luff of the sail is just slightly strained.
Step 16: Adjust the Position of the Rings
Set the backstay’s length to the right. A spacing of roughly 25 millimetres between the boom tube’s centre. Achieve the sail foot midway by adjusting the position of the silicon rings (SR5) and the mainsail clew hook.
Step 17: Connect the Foresail
Use the spectra fishing line to loop between the grommet and the eyebolt. Connect the foresail to the top of the mast before the mainsail.
To make use of the foresail, equip the boat’s bow with a second, shorter boom. Connect the sail’s grommets to the short boom’s front and back eye bolts with spectra lines.
You can check these suggested rigging tools. You need these tools for rigging setup-
Apply a few drops of thin CA adhesive into the Dyneema cord at the point of the cut. Then cut through it at an angle. The cut end will be firm and pointed, making it simple to weave through the Bowsies.
A dollop of thin CA adhesive applied to the knot can help keep it in place. Once you’ve tied it, trim any extra rope.
Don’t use hot gun glue as it doesn’t stick to this type of surface. If you take the time to secure all knots now, you’ll have a long-term reliable vessel.
Tips for Better Setup
A Dacron sleeve should be added where the lines come into contact with the hulls or plastic parts. Because Spectra is extremely powerful and can shred into the material.
Ask sailmakers for scraps or old, ripped sails that you may use to build the remote control boat sails. Only if they are willing to part with them.
There are a few things to keep in mind when it comes to rigging more sophisticated rigs. Like double mast designs or using spinnakers until you’ve gained some experience in the activity. Always clean your RC boat as you clean your RC car to avoid rusting.
How tight should the rigging on a sailboat be?
If you push or tug on them, they shouldn’t wiggle about too much. So make sure they’re snug. Tighten them up if they’re still slack or floppy.There is no need to tighten any of the other shrouds after the cap shrouds are in place. Because they follow in consecutive order.
What’s the simplest way to sail a boat?
The Lateen Rig is a great starting sailboat. It only requires 2 ropes in its basic form.The Lateen Rig is one of the most basic sailing rigs. A spar, boom, and mast are all part of this rig. As are a single jib sheet and mainsheet.
How much does it take to replace a sailboat’s rigging?
Re-rigging a sailboat can cost anything from $1,000 to $5,000. Re-rigging a 40-foot boat with wire is estimated to cost roughly $100 per foot. Which includes the round-trip costs of hauling, launching, and unstepping the rig (about $2,500).
Final Words
We’ve discussed here in detail on the rc sailboat rigging setup. This should help with the rigging setup, and we sincerely hope it does.
OK, so the above may look a little daunting. You’ll be able to recall this procedure with ease after completing it five or six times. Be familiar with and comfortable with your tools, settings, and methods.
The very best to you!
Travis Murray
Leave a Comment Cancel reply
Save my name, email, and website in this browser for the next time I comment.
Free Shipping Over $99* - 366 Day Returns - Dedicated Customer Support
- Call Us +1-503-285-5536
- Sign in & Register
- Recently Viewed
- General Parts
- Dollies, Trailers, & Racks
CL 16 Sailboat Dolly
Dynamic dollies & racks.
- Create New Wish List
Write a Review

Frequently Bought Together:

Description
Dynamic Type 5 dolly for the CL16. Proudly made in the USA by Dynamic Dollies and custom sized for your boat, offering a great fit ease of maneuvering. Shipped in an easy to assemble kit. Dynamic Type 5 Dolly
- This style is made for heavier or double handed boats, e.g., Club 420, Capri 14.2, Coronado 15, larger inflatables or aluminum boats with motors, and more.
- Boat-specific tube and sling lengths provide a custom fit for each boat, enabling a balanced handle load and easy maneuvering.
- All joint fittings are through-bolted and designed for increased torque stability.
- Strong, 3 inch non-stretch, polyester sling provides wrap-around boat support.
- Adjustable, flexible V-fittings on bow and tongue tubes provide boat support forward of the sling and prevent boat and aluminum contact.
- Eyelets on sling and handle fittings facilitate securing boat to dolly in storage, on trailers or in racks. Tie-down with the handle fitting eyelet helps prevent slippage on steep ramps.
- Easy dolly breakdown using the snap buttons on wheel shaft and tongue tube, as well as wing nuts on axle tube cross fitting.
- Pneumatic, non-corrosive, 16 inch x 4 inch wheels can be secured on wheel shaft with provided screws for added security. For soft sand conditions, tire pressure can be reduced to increase tire footprint.
- Ships in an easy to assemble kit.
- Proudly made in the USA by Dynamic Dollies and Racks.
Product Reviews
Shipping & returns.
Delivery Info: Enjoy Free Standard Shipping on most orders* to the Continental United States over $99. Our Standard Shipping method utilizes USPS, UPS, and FedEx to send packages near and far. Oversize/Freight shipping (where applicable), Expedited Shipping (where available), and rates to other destinations will be calculated at checkout.
See our Shipping Page for more information (and exceptions).
Returns Info: Your 100% satisfaction is our goal - we want you to love your sailing gear, but if something doesn't work out, we accept returns on most new, unused items*. Returns can be made within 366 days (1 year + 1 day) of your original order date. Exceptions include (and are not limited to) cut line, Rig Shop products, special order items, numbered sailors, and items used or worn sailing.
See our Returns Page for more information.
Related Products

CL 14 Sailboat Dolly

Capri 16 Sailboat Dolly

Tanzer 16 Sailboat Dolly

Precision 16 Sailboat Dolly

Topaz Sailboat Dolly
Subscribe to our newsletter.
Sign up for our newsletter to receive exclusive discounts, new product announcements, and upcoming sales.

- Forum Listing
- Marketplace
- Advanced Search
- All Topics Sailing
- General Sailing Discussions
- SailNet is a forum community dedicated to Sailing enthusiasts. Come join the discussion about sailing, modifications, classifieds, troubleshooting, repairs, reviews, maintenance, and more!
Does any one have a mistral 16'

- Add to quote
I am just wondering if any one else has the same boat as me. Just want to see what brakes most on these boats and stuff like that compare notes about the boat. i know it's a rare boat but let me know if you have a mistral 16' weather it's the model with the cabin or without the cabin.

If you wouldn't mind, please post a pic or two of your boat. My boat is extremely rare too, a Sundance 23.
i will soon my current computer doens't have the pics of it.
these are pics of my boat
Attachments

I have a Mistral 16 but the cabin version , similar but you guessed it with a cabin .. I bought it a couple of weeks ago and have not sailed it yet , cant wait !!! That being said my father has had everything from a sandpiper to hughes 48' and when he told me to just on a mistral because of epic reliability extremely forgiving and a boat load of fun , I went for it! I have not been to see my father to have him help me with rigging the sails , I have a main , jib and spinnaker(with a rod) and have no idea even on how to attach the boom , I raised the mast ( couldnt resist ) and attempted it but no luck, not enough experience in rigging .
@ Simon: I have the same Mistral16, cabrio version. I bought it without manual, but learned about rigging by looking for instructions for Wayfarer. There is a webpage with 20 or so photographs explaining in detail how to rig it, and in which order. I have URL on the other computer, let me know if you cannot find it, I can post it here (I hope). @ smallboatlover From the pics you put on looks as if your boat has spinnaker tunnel, right? Mine has just two round access panels in the bow, for access to the mast pivot pin and perhaps some limited storage.
On a second thought, why wait for a reply. Here's illustrated rigging guide for Wayfarer, it is identical for Mistral 16 or CL-16. Caution Water - Sailing - Wayfarer Rigging Guide Cheers all
Yes my boat does have a spinnaker shoot on the starbord bow and on the port side is a rectangle storage area all the way from foward of cockpit to bow lot od extra storage an i think the way i have it rigged workes good
Not being overly experienced with rigging variations, I am curious where your rigging differs from the one I put link to previously. I do mine pretty much as shown there, I believe manual shows something very similar, takes me about 30min to get her up and ready to launch from the road trailer (includes sails hoisting). Certainly would not mind to do it faster and maybe easier.
i'm not sure i i i can describe it good enough but theres two side stays and a foward on i hook the side ones up first then put the mast throught the pin then raise it and attach the foward stay i'm not sure how else to describe it it takes me about 5 mins to put the mast up 15 to put it in the water ready to sail any other questions ask ill try to describe better if you need
That was a good description. I hoist the mast the same way, and it looks to me to be the only way. Otherwise you need at least one other person to hold the mast upright. What takes me the most time is to unpack everything from the trailer and car just to start rigging - and same goes for taking the rig down. Hopefully with some more practice it will move much faster.
I'm going to look at at Mistral 16 on Tuesdauy morning 6/5. Looks like a decent boat, They are supposed to be modeled after the Wayfarer which I have always wanted. My only problem is this boat would only fill my desire for a day sailer not an overnighter. A Wayfarer is better at both tasks than the Mistral. But I want a boat and this one is for sale and close by, a Wayfarer would be more difficult to find (at leat I could be sailing and racing this summer) Here is a link to the craigslist add. http://nh.craigslist.org/boa/3039017552.html Can anyone who is familiar with these boats tell me anything I should be looking out for or offer any advise. As far as replacement parts and sails does the wayfarer and cl-15 parts and pieces fit onto this boat? I used to have a Newport 21 (which was also a rare boat) I loved it but it was a little to big to take in and out of the water all the time, I need something smaller and lighter then that was. Thanks for any info anyone can provide.
Yes look for loose fittings on my boat none of the fittings had backing plates my jib fairlead poped out while sailing last year. Also there really nice boat more of a racing boat then cruiseing kind. they like to heel a lot when sailing. no to good in heavy winds unless you have more then just 1 person. im always single handed so heavy weather sailing for me is dificult.
Thanks, thats good to know, I'll take a good look for loose fittings. Was that an easy fix or have you not yet fixed the problem. Seems likke it would be dificult to get backing plates onto the back of the fittings with no access into the hull. Here is a link you might be interested in. Its from the Canadian Wayfarer Association. http://www.wayfarer-canada.org/wayfarer_racing.pdf loads of info on Wayfarers which are almost the same boat.
Yes they were a easy fix and i couldnt put backing plates in but i could put insertes inthat grab more like backinf plate but these inserts you screw in and they flare out then yiu screw your staines screwes into them
Thanks for all of the info; I'm now a part of the proud Mistral 16 owners club. I think we should try to start an association or at least a face book page for Mistral 16 owners. There are at least 4 of us on Sailnet. So the boat didn't look as good in person as it did in the pictures (they never do though) Over all it wasn't bad, she will need some work to be sailable like reattaching the spreaders, some new lines, and a better inspection of all of the fittings/ heard wear. 16 ft Sail Boat & Trailer There are some hairline cracks in the decking Im not sure how to fix these but I don't think it's too bad) the haul is in good shape though, seemed solid throughout and the gel coat seemed in good condition. The main sail and jib are really the best part of the boat being almost new, some minor stains but the fabric is still crisp and new feeling, no tears or frays. The owner was asking $1200, I offered $500 and we settled on $800 after some negotiation. I'll have the boat home on Sunday to give a more thorough cleaning looking over.
Can anyone tell me or take a picture of what is under the mast on Mistral 16s. I have a pin that goes through the mast about a foot and a half from th bottom of the mast. then the mast pivots up and all the weight is on that pin. It seems like there should be something underneath the mast for it to sit on. Am I missing something or is this really how they work
@ dklein90 There is nothing below the mast - lower end actually hangs in the air. But do not worry, pivot pin can take both the rigging weight and tension in the stays. When you open round hatches on either side of the mast slot you can feel with your hand how walls are thickened around the pin holes - at least 1/2" of fiberglass there if not more. Also be careful with the cotter pins and washers that keep pivot pin in place - if you drop them it might be quite a job to collect them from the hollow hull. As for the mast, you should have some kind of removable soft sleeve that you put around the part that sits in the slot - it prevents mast from sliding sideways and prevents it from causing fretting damage to the mast slot. Worst comes to worst, a rug can do it - once you raise the mast you'll understand what am I referring to. Happy sailing! Bo
Hi, I am an owner of a Mistral 16 daysailor. We have had the boat in our family for several years. With the kids being very young, it was put aside in storage. Since the kids are now older, I have decided to put it back in the water this summer for every one to enjoy. Unfortunately I am unable to find the spreaders for the shrouds. After a few phone calls, no one seems to be able to help me. My only option seems to get them fabricated from a local weld shop, however I do not have any specs. Can any of you help me out? Thanks Matt
Hi Matt: I'd advise you to look at Sailboats Online , spreader for CL16 (twin to Mistral 16) is around 30CAD, bracket similarly priced - if you need one. If not sure, you can phone Chris Larocque and ask for photos of the parts to be mailed, but I would guess that those parts would be a pretty good fit for mistral. I bought lightweight motor bracket for my Mistral from them, and it was an excellent service - not to mention that their bracket is the best fit for a small boat that I was able to find. Happy sailing! Bo
Hi there, We bought a used Mistral 16 in May (2012) with the spi that had been barely used. We had some updates to do on it. We replaced all the halyards, removed the furling mechanism of the furling jib (otherwise the jib could not be tightened), replaced the jib sheet cleats by bigger ones, secured all the screws that were loose, fixed a punture hole, replaced the plug. We got the original manufacturer's brochure on another forum and realized that the cleat on the mast (starboard) and the corresponding cleat on the mast (port) are for the Cunningham. It now sails very well. In fact last week end, my girl friend used the trapeze by a stable 15 N. The boat did great but...unfortunately, we ended capsizing and we lost the rudder. Do you, or anybody you might know, happen to have a Mistral 16 rudder for sale ? Daniel
you should have had the ring in that stops it from coming up. I have no idea
Sorry to hear about your rudder. But how did it get loose? Tiller should keep it from coming off the pins, and tiller itself is held in place by a line that comes from the rudder and keeps the blade down tight - entire assembly is kind of secured in place. As for replacement, I have no idea about used ones. New one from CL is 190 (head) + 240 (blade) + 100 (tiller) which is quite a bit of money. Good luck with your search! Bo
Thanks Bo. Well this boat must be 30 y old at least so there were modifications by previous owners. Also, the St Lawrence River level is low and where we are, in Lake St Louis, many people have broken the centerboard well or the rudder. So I kept the line holding the rudder down rather loose (so if the rudder hit something, it would lift, not break). The crucial thing that was supposed to hold the whole thing in place is a metal clip. It was bent upwards instead of downwards when I inserted the rudder pintle into the gudgeon. THus the clip did not do its job because of that (holding the rudder in place) when the boat capsized. Anyway, thanks for the info; we will look for a CL. Too bad for that delay, trapeze was great. Daniel
So I guess you went out on Saturday, as it was quite windy. I went out on Sunday afternoon - was far less windy, and, since I mostly sail alone, makes it a bit easier to balance. As for the rudder downline, I tend to tighten it, despite shallows around. I have hit rocks few times, but always with centerboard - so far, at least. But you gave me the idea to replace the lines with bungy cords, just for that reason. Cheers, Bo
WE went out on saturday on lake St Louis, at Venture (very close and east to Pointe Claire yacht club). 15 to 17 kn. It was fantastic. 4 hours of impeccable sailing with my girsl friend on trapeze. Then she steered... Bungy cords: yes we tried that: very difficult to have the right tension. Too much, then there is no reason to put one. Not enough tension, then the rudder lifts with speed. Daniel
There is a very inexpensive jam cleat designed just for the job of holding down the rudder. The cleat is on a lever and when the rudder gets bumped it releases. I installed a new jam cleat on my tiller but now that I've heard these stories I'm going to replace it with one that releases. APS - Clamcleats - Auto Release Is there something that is supposed to hold the rudder onto the boat when upside down? My rudder just sits on the pintails and seems like it could eaisly come off. I've never liked the way it is set up. My old boat I had to keep a hammer in my truck just for getting the rudder off of the boat. I think I would try to make a new one myself before buying one at several hundred dollars. A sheet of marine grade plywood, west systems epoxy, a jig saw,and some sanding would probably turn out a decent product. The you only need a bracket and tiller. Best of luck to daniel12345.
- ?
- 173.9K members
Top Contributors this Month

IMAGES
VIDEO
COMMENTS
CL16 should work for you but I think there are better boats out there IMO. CL16 has a lot of sail area which means it can be hard to handle for 1 person when wind picks up. It's construction/design can also be a problem as it can easily get flooded if you bury the rail in a gusty condition. ... It is easy to rig and launch single handed ...
The original company was sold, and the new owners were charging people for parts and then never delivering them. I believe there is a Canadian company that can provide replacement parts for the CL16. CCI. 251 5th Ave. Amprior, Ontario. Canada. K7S 3M3. [email protected]. How could I get a copy of the manual.
Croce and Lofthouse were temporarily left without a business so they created a new 16 foot sailboat in fibreglass to replace the wooden Wayfarer; hence the CL16 was born in all fibreglass construction." There was a bit of controversy here as the CL 16 is identical in shape of wetted hull and sail plan to the Wayfarer, but has an altered cockpit ...
Tiller Cover Kit - Standard Sunbrella® Color. Foredeck Sail Bag Kit - Standard Sunbrella® Color (For Boats up to 20') Complete Sail Plan Data for the Cl 16 Sail Data. Sailrite offers free rig and sail dimensions with featured products and canvas kits that fit the boat.
The CL16 is a bigger boat for bigger waters. It carries more people in comfort with its teak benches and it has been the overall top-seller with almost 3,000 built - most still sailing. ... The C&L models are built the same way as in years past, but with modern materials and cutting-edge hardware and rigging, such as Harken bearing blocks and ...
When sailing it must be slack enough that the boom is held up by the sail, not the topping lift, so it may need a foot or two of extra line to slack it when sailing. Then, just before you drop the sail, tighten the topping lift to a preset position (mark the line with a marker) and drop the sail.
Racing. D-PN. 97. [ edit on Wikidata] The CL 16, or CL16, is a Canadian sailing dinghy that was designed by Ian Proctor, Graham Dodd and George Blanchard, as a cruiser and daysailer, and first built in 1968. [1] [2] [3] The CL 16 is a development of Proctor's 1957 Wayfarer design and is identical in dimensions and shape, with differences only ...
The higher a boat's D/L ratio, the more easily it will carry a load and the more comfortable its motion will be. The lower a boat's ratio is, the less power it takes to drive the boat to its nominal hull speed or beyond. Read more. Formula. D/L = (D ÷ 2240) ÷ (0.01 x LWL)³ D: Displacement of the boat in pounds. LWL: Waterline length in feet
PLEASE NOTE: THIS VIDEO HAS BEEN UPDATED WITH ENHANCED GRAPHICS AND IMPROVED SOUND. CHECK IT OUT HERE https://youtu.be/tRgWtPaCQQcA beginners guide to sailbo...
To step the mast of a sailboat, follow these steps: 1. Prepare the mast: Position the mast near the base of the boat. 2. Attach the base plate: Securely fasten the base plate to the designated area on the boat. 3. Insert the mast step: Lower the mast step into the base plate and align it with the holes or slots. 4.
A beginners guide to sailboat rigging, including standing rigging and running rigging. This animated tutorial is the first in a series and covers sails, line...
The difference between standing rigging and running rigging. Sometimes things can get confusing as some of our nautical terms are used for multiple items depending on the context. Let me clarify just briefly: The rig or rigging on a sailboat is a common term for two parts:. The standing rigging consists of wires supporting the mast on a sailboat and reinforcing the spars from the force of the ...
By Robin Iversen January 12, 2024. The running rigging on a sailboat consists of all the lines used to hoist, lower, and control the sails and sailing equipment. These lines usually have different colors and patterns to easily identify their function and location on the vessel. Looking at the spaghetti of lines with different colors and ...
Boat will be moored at "dock" at our condo, and want something that is easy to rig, able to sail single-handed, fun in a good breeze for my young adult kids to have fun, but can also fit a few people for a more casual sail if needed. ... 1980 CL16 (C&L Boatworks), which seems to be a version of the "Wayfarer" 1984 O'Day 17 Daysailer
Jib. First, we rig the jib, securing the tack (the front bottom corner) of the jib to the front of the boat, using the metal fixing point and a shackle (Photo 17). Next, we secure the rope stopper for the halyard to the top of the sail (see article) or use a shackle (Photo 18), and then hoist the jib.
The hull is what most people would consider 'the boat'. It's the part that provides buoyancy and carries everything else: sails, masts, rigging, and so on. Without the hull, there would be no boat. The hull can be divided into different parts: deck, keel, cabin, waterline, bilge, bow, stern, rudder, and many more.
The original plywood boat was available also, in kit form. (Small Craft Ltd.) Design updated by Phil Morrison in 2007. A modified version, identical in shape of wetted hull and sail plan, called the CL16 has been built in CANADA since 1968. At about this same time, Whitby Boat Works in Canada was granted a license to build Wayfarer boats in ...
Re-rigging a sailboat can cost anything from $1,000 to $5,000. Re-rigging a 40-foot boat with wire is estimated to cost roughly $100 per foot. Which includes the round-trip costs of hauling, launching, and unstepping the rig (about $2,500). Final Words. We've discussed here in detail on the rc sailboat rigging setup. This should help with the ...
Ed navigating his CL-16 sailboat out of the harbour into Lake Ontario.
You should be able to get generic spreader stock through a rigger and cut them to length. You could also make your own spreaders. I had a 20ft race boat years ago and I made spreaders out of wood, and then wrapped them with a couple of layers of carbon fiber just for fun. Sent from my SM-G960W using Tapatalk.
Dynamic Type 5 dolly for the CL16. Proudly made in the USA by Dynamic Dollies and custom sized for your boat, offering a great fit ease of maneuvering. Shipped in an easy to assemble kit. ... of your original order date. Exceptions include (and are not limited to) cut line, Rig Shop products, special order items, numbered sailors, and items ...
S.A.: Sail Area. The total combined area of the sails when sailing upwind. S.A. (reported) is the area reported by the builder. (Verses ** S.A. (100% Fore + Main Triangles) which is the area as defined by the rig measurements.) S.A. (reported) can differ depending on the size of the head sail used to calculate the S.A.
Baltimore's Francis Scott Key Bridge collapsed after it was struck by a large ship, according to video obtained by CNN. Hear the 911 dispatch the moment it happened. RFK Jr. supporters were asked ...
Hi Matt: I'd advise you to look at Sailboats Online, spreader for CL16 (twin to Mistral 16) is around 30CAD, bracket similarly priced - if you need one. If not sure, you can phone Chris Larocque and ask for photos of the parts to be mailed, but I would guess that those parts would be a pretty good fit for mistral.