- Vanquish 65
- Mini Maniac
- RG65 Appendages
- Maniac MK II
- IOM Appendages
- Marblehead Class
- Marblehead Appendages
- RT65 Ragnarok
- RT65R Armageddon
- RC65 Adrenaline
- ST65 Sowelu
- Mini40 / F48 Class
- Nightmare X
- Nightmare MK VIII
- MultiOne Class
- FireDragon 1000
- DIY Sail Winch
- Rig Building
Rig building

- Perfecting Your Model’s Sails: The Art of Rigging | Seacraftclassics
- Blog Seacraftclassics
- Boats and ships
- September 10, 2023

Mastering the Art of Rigging: Enhancing the Authenticity of Your Model’s Sails
When it comes to creating a realistic and authentic model of a sailboat, one of the most crucial aspects is perfecting the rigging, particularly the sails. The art of rigging involves setting up the sails in a way that accurately represents the real-life counterpart, capturing the essence and beauty of sailing. In this article, we will delve into the secrets and techniques of sail rigging that will elevate the realism of your model to new heights.
Unveiling the Secrets of Rigging: Techniques to Perfect Your Model’s Sail Setup
Rigging a sailboat model requires attention to detail and a deep understanding of the principles of sailing. Here are some techniques that will help you achieve impeccable sail rigging:
1. Research and Reference
Before starting the rigging process, it is essential to conduct thorough research on the specific sailboat model you are replicating. Study photographs, blueprints, and even real-life sailboats to understand the intricacies of the rigging. Pay close attention to the arrangement of the sails, the types of rigging lines used, and the tension applied to each line.
2. Use High-Quality Materials
Investing in high-quality rigging materials is crucial for achieving a realistic look and ensuring the longevity of your model. Opt for materials such as fine thread or fishing line for the rigging lines, and choose appropriate fabrics for the sails, such as cotton or silk. These materials will provide the necessary strength and flexibility to accurately represent the tension and shape of the sails.
3. Rigging Techniques
There are several rigging techniques that can enhance the authenticity of your model’s sails:
- Running Rigging: Use thin thread or fishing line to create the running rigging, such as halyards, sheets, and control lines. Ensure that the lines are properly tensioned and secured to the appropriate points on the mast, boom, and deck.
- Standing Rigging: The standing rigging, including shrouds and stays, provides the necessary support for the mast. Use fine thread or wire to create these lines, ensuring they are accurately positioned and tensioned to maintain the correct shape of the mast.
- Sail Attachment: Attach the sails to the mast and boom using small eyelets or hooks. Pay attention to the proper alignment and tension of the sails to achieve a realistic appearance.
Elevate Your Model’s Realism: Tips and Tricks for Achieving Impeccable Sail Rigging
Here are some additional tips and tricks that will take your sail rigging to the next level:
1. Weathering and Aging
To add a touch of realism to your model, consider weathering and aging the sails. Use diluted acrylic paints or fabric dyes to create subtle discolorations and stains that mimic the effects of sun, saltwater, and time. Be sure to apply these effects sparingly and strategically to maintain a natural appearance.
2. Scale Accuracy
Pay close attention to the scale accuracy of your model’s rigging. Ensure that the size and proportions of the rigging lines and hardware are appropriate for the scale of your model. This attention to detail will greatly enhance the overall realism of your sailboat replica.
3. Practice and Patience
Perfecting the art of rigging takes practice and patience. Don’t be discouraged if your first attempts are not flawless. Take the time to learn from your mistakes, refine your techniques, and experiment with different approaches. With each model you build, your skills will improve, and your sail rigging will become more refined.
Mastering the art of rigging is essential for creating a realistic and authentic model of a sailboat. By conducting thorough research, using high-quality materials, and employing the right techniques, you can achieve impeccable sail rigging. Additionally, incorporating weathering and aging effects, ensuring scale accuracy, and practicing patience will elevate the realism of your model’s sails even further. So, set sail on your next model-building adventure and let your rigging skills shine!
Sign up for speacial offers
Subscribe our newsletter.
[mc4wp_form id="806"]
Most Viewed Posts
- Talk about a venue with a view! This Quebec couple had the absolute wedding of …
- Everything You Need to Know About Trading in Your Boat
- Happy 4th of July! Wishing you all a happy holiday weekend on the water with you…
- Wishing all the IMOCA Globe Series teams and skippers competing in the Vendée-Ar…
- The training continues for Alex and the crew. In case you missed it, we won’t b…
Our latest custom models
- model 1329 1329 products
- Custom Sail boats 218 218 products
- Custom Power Boats 399 399 products
- Custom Half Models 532 532 products
- Custom Desk Models 92 92 products
- Fair American
- Tools and Techniques
- Kit Database
- Bluenose Canadian Schooner
Making Sails for Model Ships
December 3, 2017
On my Model Shipways Bluenose build , I debated whether or not to make the sails. Many (most?) ship models do not include full sails. The Model Shipways kit was designed with sails, and includes the sail cloth as part of the kit. The inclusion of sails was actually one of the factors that led me to select this kit for my second build.
With the booms and gaffs rigged and installed, I would basically be finished with the build if I omit the sails. The remaining rigging is all attached to sails, so I’d leave it off if I didn’t include sails. However, the sails really do add something to the model, especially for a schooner like this.
So, I decided to make sails. I’ve never made sails before, so this will be a learning experience. Here’s how I ended up doing it…
Choosing How Sails are Displayed
An important decision to make before you start is how you’ll be displaying sails. There are three different ways you can go:
- For Display
(I made those last two names up).
Furled sails are sails that are lowered. Many modelers choose to do furled sails on their ships. The advantage is that the sails don’t cover everything up and make a model look like a bunch of cloth. When doing furled sails, you typically don’t make the full sail, instead making smaller version. The sail is put in place, but is bunched up and tied to the appropriate boom or gaff.
Realistic sails try to show the sails rigged and set as they would be while the ship is actually at sea. Ships adjusted their sails depending on the situation. In most cases, some sails would be raised while others would be lowered. Some sails might be set off to one side. Realistic sails would try to show the ship in some kind of ‘real’ sailing state.
Making sails simply ‘for display’ is what I’m doing. I’m making all the sails, and installing them all in their raised state. I’m not going to set any sails off to the sides – everything is just going to be installed straight and even. You’d probably never see a ship at sea actually set like this, but I think it works well for a model.
When to Make Sails
From what I can tell, the general practice is to make the sails before rigging and installing the booms and gaffs. Several of the sails need to be laced onto the booms and gaffs, and that is nearly impossible to do directly on the ship.
The standard process seems to be:
- Build the booms and gaffs.
- Make the sails based on the plans.
- Attach sails to the booms and gaffs as appropriate.
- Install and rig the booms and gaffs.
- Add the additional rigging for each sail.
I’m not confident that all my booms and gaffs are 100% accurately sized, and I suspect that the dimensions of my sails might need to be adjusted to fit my particular ship. So, I intentionally put off making sails until I had installed all the booms and gaffs.
Once I had everything installed on the ship, I could make templates for the sails that take into account both the plans and the size/shape of my actual build.
Of course, this means that I had a bunch of rigging for the booms and gaffs that would need to be un-done so the booms and gaffs could be removed. That was fine with me, because I had avoided the use of glue when securing the rigging. Everything was either tied off (easy to un-tie), or attached with a hook or shackle (easy to remove).
So, my process is:
- Build the booms and gaffs .
- Install and rig the booms and gaffs .
- Make the sails based on the actual layout of my ship.
- De-rig the booms and gaffs, and remove them from the ship.
- Re-install the booms and gaffs, and their rigging.
For me, this approach (while more work) has several advantages:
- Initially, I’m able to focus on getting the booms and gaffs properly installed and rigged, without the sails getting in the way.
- I can start with sail templates based on the plans, and adjust as necessary to fit the exact size/shape of my ship.
- Once sails are ready to install, I can quickly get them rigged without spending any time on the other rigging for the booms and gaffs, since those runs are already done and just need to be re-tied/attached.
Paper Templates
Making the actual sails starts with making paper templates. Some of the sails were too big to use normal paper, so I picked up a roll of white craft paper.
For each sail, I took a piece of paper and laid it over the plans. I marked the corners of the sail, then used a ruler to draw lines between the marks, giving me the outline of the sail. Some sails have curves that I had to hand-draw.
Once the shape was laid out on the paper, I cut the paper to shape.

A paper template for the jib sail.
Next I positioned the paper template on the actual ship in the correct spot. I took note of anything that didn’t fit just right, and adjusted the template as necessary. Some sails needed to be made slightly smaller, while some had to be made slightly larger.
To help me visualize the sail, I also marked where the hems on the edges will go, along with any other key elements of the sail. For the edge hems, I’ll be folding the fabric over and sewing it. I’ll be shooting for a 1/16″ hem, so I used that size for the markings on the template.
The actual sails on the ship were made from strips of cloth, not one big piece. To simulate this, I’ll just be sewing lines onto the cloth. For some of the sails, I went ahead and marked these lines on the template since they need to be oriented correctly according to the plans.
The main and fore sails also have reef bands , which run horizontally along the lower portion of the sail. These were marked as well.
Preparing the Sail Cloth
Once I was satisfied with the template, I got out the sail cloth. Model Shipways includes sail cloth with the kit. This cloth is a medium weight cotton cloth in an off-white color. The kit includes enough to make all the sails, assuming you get everything right on the first try. I knew that wasn’t going to work, so I ordered two more packages of sail cloth from them. It was relatively inexpensive – about $7 for each package of cloth.
Sails on a ship were rarely bright white. I’ve seen that many modelers will dye their sail cloth to get a desired shade. There are many tricks for this, like dipping the material in coffee. I felt that the off-white color of the Model Shipways cloth was fine, so I didn’t dye my cloth.
If you’re wanting to use other sail cloth, look for something lightweight. Almost all fabric is going to be too thick and out of scale, so just do the best you can. I actually used some fabric from a local hobby store for a few ‘test runs’, and learned a few things. Look for fabric with a tight knit, so the fabric doesn’t start to come apart as you cut it. Also look for something without too much stretch, as stretchy fabric can distort the shape of the sails as you sew them.
Ideally, you want to wash, dry, and iron the sail cloth before you start. Most fabric will shrink a little during this process, so you want this out of the way before you start cutting things to size. Doing this will also release any wrinkles in the fabric. (I was too excited to get started, and didn’t do this.)
Once you’ve got your fabric ready and your template sized, you’re ready to cut some fabric.
I used a fabric marker to do all the markings on the fabric. I picked this up at a local hobby store in the sewing section for a couple dollars. This marker uses special ink that disappears as it evaporates. This means I can draw all over the fabric, and within a few hours the ink is gone. I found this to give much better results than using a pencil and trying to erase markings.

The paper template is used to mark up the fabric being used for the sail.
A note on marking fabric…since I’m going to be folding over the edges of the sail to create hems, one side of the sail is going to look better than the other. Often, you pick a ‘display side’ of the ship, and put ugly stuff (like the worse sail side) so it isn’t visible from the display side. I found that with the way I was marking, folding, and sewing the cloth, I wanted the markings on the display side. Making sure I marked the display side ensured that I as I worked I ended up with all the ugly stuff on the back.
First the outline of the sail is marked on the fabric. Be sure to leave extra space on all sides outside of the sail.
A second outline is made 1/16″ outside of the first outline. This is the hem that I want to end up with on the finished sail.
A third outline is made 1/2″ outside of the second outline. This one doesn’t have to be perfect…this is just a guide for cutting the fabric.
You can also mark the reef lines and strips at this point if desired. I typically didn’t mark the strips, since I was able to position those accurately using my sewing machine.

The fabric is trimmed, leaving excess material around the edges.
Once everything is marked, I cut the fabric along the outer-most outline. I used a rotary cutter (like a pizza cutter), which gave much better results than scissors.
To make sails you have to do a lot of sewing. I have no experience sewing. Doing all this by hand with a needle and thread was not practical, so I bought a cheap little ‘hobby’ sewing machine. That machine was junk, and broke within the first 20 minutes. Since I’m hoping to keep this hobby going for a few decades, I decided to go ahead and invest in a real sewing machine.
At my local hobby store, the staff helped me select a good quality machine. I got it for under $200. The advantages of a real machine include:
- It won’t jam.
- Variable speeds.
- Selectable stitch length and width (critical for trying to get the stitching remotely close to ‘scale’).
- Many different computer-controlled stitch types, so you can do more than just a simple straight stitch. This would end up making the reef bands much better.
It took me a few hours to get the hang of using the machine, but my skill level increased quickly. While I certainly couldn’t sew a shirt or a pair of pants, by the second or third sail I was flying along like a pro.
Since you’ll be sewing, you’ll need thread. There are three main considerations with the thread.
First is the color. This is a matter of personal preference. I’ve seen some models where the stitching on the sails was very high-contrast (dark brown thread on white cloth). I’ve also seen some where the thread was the same color as the cloth. I felt like the stitching shouldn’t stand out too much , and I wanted to rely on the texture of the thread to define the lines rather than the color. So, I went with a ‘natural’ color thread that ended up being really close to the color of the cloth.
The second consideration is the thread material. A hobby store will likely have hundreds of different kinds of thread. There are synthetic materials and natural materials. I went with a cotton thread. Why? No really good reason except that all my rigging lines are cotton and the sail cloth is cotton, so it seemed like a good idea.
The final consideration is quantity. I have no idea how to predict the amount of thread that will be needed (there may be some ‘trick’ to it that the pros know). Initially I bought one spool of the thread. That only made two sails. When I went back to by more, they were out of that exact thread, so I had to order more online. That caused a week delay in making sails. Obviously you wan the thread to be the same on all the sails, so buy a lot of the same thread up front. Thread is cheap, and it is better to have some leftover than to run out.
Sewing the Edges
On to sewing.
The first step is to sew the hems on the edges. I start with the longest edge first, then do the opposite edge, continuing on until all edges are sewn. The cloth is folded over at the first outline (the line that defines the actual edge of the sail) and pinned into place. The 1/16″ line that indicates the edge of the hem should be inside the sail. Since the cloth was cut 1/2″ past that line (on that third outline), there is some extra material here that makes pinning easier. I’ll cut that off later.

The edges are folded over to create a hem and pinned in place.

The hem is sewn on the edge.
The cloth then goes into the machine and gets stitched up. I used the machine’s reverse feature to double-stitch the first couple stitches to secure the thread, then just ran a straight stitch down the edge, staying between the edge of the sail and the 1/16″ hem marking. I used a small stitch length so things weren’t too out of scale.

My machine lets me set the position of the needle, allowing me to get really close to the edge.
Once the stitch was complete, the extra thread was clipped off. I used a pair of sharp scissors to carefully cut off the extra cloth along the 1/16″ hem line.

A completed edge hem, about 1/16″ wide.
This was repeated for each edge.

Two edges meet in a corner.
Adding ‘Strips’
To simulate the strips of material, some modelers simply draw lines on the cloth. I decided to run a stitch for each strip instead. It is more work, but it goes pretty fast

The ‘strips’ of sail sail cloth are simulated with stitches. Each sail has a unique strip layout shown on the plans.
The width of the strips is indicated on the plans, as well as the layout of the strips. It turned out that the width of the strips matched with space between the needle on my sewing machine and the edge of the ‘foot’. So I didn’t need to mark the strips on the fabric – I just positioned the fabric under the foot and ran the material through the machine.
Reef Bands and Points
The large lower sails (main sail and fore sail) have reef bands . These are horizontal bands across the sails. My sewing machine has a setting that creates a stitch that looks like a ladder (or railroad tracks?). I adjusted the stitch length and width to get the desired size, then ran this stitch across the sail to create the reef bands.
I ran this right over the strip lines. This is easier than doing the reef bands first and trying to start/stop the strip lines at the bands, and you can’t really tell the difference.

Reef bands were sewn in using a different stitch pattern on my machine.
At each point where a strip line crosses the reef band, there is a short rope that goes through the sail. These ropes were used to secure the sail when it was lowered and bundled up. I cut a bunch of 1″ long pieces of 0.008″ tan rigging line and punched them through at the appropriate spots. I used a small bit of fabric glue on each side to keep these ropes flat against the sail instead of sticking out.
Corner Attachment Points
The sails typically have rigging lines attached to the corners of the sails. This means you need something in each corner to attach a rigging line to. From my research, it looks like most sails had a rope that ran around the outside edge of the sail, and that rope would form an eye at the sail corners to create the attachment points.
I decided not to add this rope. I wasn’t confident I could make it look good, and I thought the tan line would stand out too much.
So, I simply sewed brass rings (made from wire) into each corner. This was done manually with a needle and thread.

Anchor points in the corners were made from brass wire and sewn in.
Finishing Up
Once everything is sewn and I’m happy with the results, there are a few final steps.
I do a final pass to trim anything that looks bad (edges of hems, loose threads, etc.).
After all my disappearing fabric markings have evaporated and disappeared, I iron the sail to flatten it out and remove any remaining wrinkles.
Finally, I use some fabric glue along any exposed fabric edges (like the hems) to keep them from fraying. I also use a little fabric glue on the ends of stitches to ensure they don’t come loose.
Then the sail is ready to install!

A few completed sails on the ship.
- Click to share on Twitter (Opens in new window)
- Click to share on Facebook (Opens in new window)
- Click to share on Reddit (Opens in new window)
- Click to share on Tumblr (Opens in new window)
- Click to share on Pinterest (Opens in new window)
- Phantom NY Pilot Boat
- Model Ship Kit Database
Copyright © 2018 SuburbanShipModeler.com The text, photos, and content are copyright of this site unless otherwise noted.
Photos were taken by the author unless otherwise noted. All brands and trademarks referenced are the property of their respective owners.
Discover more from The Suburban Ship Modeler
Subscribe now to keep reading and get access to the full archive.
Type your email…
Continue reading
RC Sailboat Rigging Setup- Briefed in 17 Easy Steps
Table of Contents
Introduction
To build a model sailboat, you’ll need a lot of time, patience, and talent. Remote control sailboat beginners should start by altering or fixing a pre-existing model. It is possible to create a quicker and more sophisticated sailboat by rigging an existing model.
What to do for the rc sailboat rigging setup ?
Tether the retaining bolt and wire mainsail luff. Insert the mast stub and slide the entire main boom assembly. Push the masthead and backstay crane. Adjust the sail to match the mast reinforcement ring. Attach the eye in the mainsail clew. Close the hooks. Set the backstay’s length to the right.
To get the overall understanding, read the entire article.
Things to Bring
- Stitching Device
- Sailboat Controlled via Remote
- Thread Made From Polyester
- Fisherman’s Spectra Line
- Dacron Sails
- Utility knife
Procedure for Rigging
Use these rigging guidelines to their full extent. This ensures that the boat will sail with the qualities and performance that its creators intended. You can also check the RC dirt oval setup guide to ease your work.
Step 1: Replace Old Sails
Remove and replace the old sails. Cut out the new main and headsails from Dacron. Measure the old ones from the model and add a half-inch on each side to the new measurements. Tether the retaining bolt.
Step 2: Wire Mainsail with Eyelets
All six eyelets on the mainsail luff should have wired mainsail luff rings attached to them.
Step 3: Place the Mast Stab
Be careful not to get the plastic collar’s bevelled edge. Insert the mast stub into the bottom of the mast.
Step 4: Slide Main Boom
From the bottom, slide the entire main boom assembly onto the mast stub.
Step 5: Slide Rings Under the Mast
Starting at the luff of the mainsail, slide all rings beneath the mast one at a time.
Step 6: Assemble Plug
Push the masthead and backstay crane. Assemble the plug into the mast. Cut a 250mm Dyneema length and tie the mainsail’s head to the backstay crane.
Step 7: Layout the Sail
Adjust the sail to match the mast reinforcement ring at its highest point. The sail’s head may readily swivel. Poles are sheeted out at an angle of 80 degrees when the boat’s sailing with the breeze.
Step 8: Attach the Cunningham
Attach the Cunningham (downhaul) as demonstrated by cutting a 300mm length of Dyneema. Tie a cord to the eye in the gooseneck fitting’s uppermost eye.
Step 9: Tie Bowsie’s Eye
Follow this path: First, tie one end to a Bowsie’s eye. Then, tie a second Bowsie’s eye; finally, tie a third Bowsie’s eye.
Step 10: Attach the Mainsail Clew
Attach the eye in the mainsail clew (bottom right corner) to the mainsail clew using a line.
Step 11: Close the Hook
Close the hook’s open end with thin-nosed pliers. Keep your sail from falling off while you’re out on the water.
Step 12: Replace the Sail If Needed
If you need to replace the sail, simply use a flat-bladed screwdriver to pry it open once again.
Step 13: Cut Dyneema
For the Backstay, cut a 900mm length of Dyneema. The Backstay Crane’s end hole has a loop where you can tie a piece of string.
It’s time to attach one of our 6mm stainless steel rings to its bottom end. Using a Mast Socket, insert the mast and the rigged Mainsail into the hull.
Step 14: Attach the Loop
Once you’ve cut a 500mm piece of Dyneema, tie a loop in one end. Weave the other end through the first small gaps in a Bowsie. Then throw the rim at the bottom of the Backstay.
Finish it back at the Bowsie. Using a metal hook in the Transom (rear edge of the hull), attach the loop to the backstay. Then put the Bowsie nearly halfway along the bottom rope and secure it.
Step 15: Tighten the Leech
To allow the leech (back edge) of the main to twist a little, lightly tighten the compression strut. Such that the leech (back edge) is under mild tension. Adjust the Cunnigham such that the luff of the sail is just slightly strained.
Step 16: Adjust the Position of the Rings
Set the backstay’s length to the right. A spacing of roughly 25 millimetres between the boom tube’s centre. Achieve the sail foot midway by adjusting the position of the silicon rings (SR5) and the mainsail clew hook.
Step 17: Connect the Foresail
Use the spectra fishing line to loop between the grommet and the eyebolt. Connect the foresail to the top of the mast before the mainsail.
To make use of the foresail, equip the boat’s bow with a second, shorter boom. Connect the sail’s grommets to the short boom’s front and back eye bolts with spectra lines.
You can check these suggested rigging tools. You need these tools for rigging setup-
Apply a few drops of thin CA adhesive into the Dyneema cord at the point of the cut. Then cut through it at an angle. The cut end will be firm and pointed, making it simple to weave through the Bowsies.
A dollop of thin CA adhesive applied to the knot can help keep it in place. Once you’ve tied it, trim any extra rope.
Don’t use hot gun glue as it doesn’t stick to this type of surface. If you take the time to secure all knots now, you’ll have a long-term reliable vessel.
Tips for Better Setup
A Dacron sleeve should be added where the lines come into contact with the hulls or plastic parts. Because Spectra is extremely powerful and can shred into the material.
Ask sailmakers for scraps or old, ripped sails that you may use to build the remote control boat sails. Only if they are willing to part with them.
There are a few things to keep in mind when it comes to rigging more sophisticated rigs. Like double mast designs or using spinnakers until you’ve gained some experience in the activity. Always clean your RC boat as you clean your RC car to avoid rusting.
How tight should the rigging on a sailboat be?
If you push or tug on them, they shouldn’t wiggle about too much. So make sure they’re snug. Tighten them up if they’re still slack or floppy.There is no need to tighten any of the other shrouds after the cap shrouds are in place. Because they follow in consecutive order.
What’s the simplest way to sail a boat?
The Lateen Rig is a great starting sailboat. It only requires 2 ropes in its basic form.The Lateen Rig is one of the most basic sailing rigs. A spar, boom, and mast are all part of this rig. As are a single jib sheet and mainsheet.
How much does it take to replace a sailboat’s rigging?
Re-rigging a sailboat can cost anything from $1,000 to $5,000. Re-rigging a 40-foot boat with wire is estimated to cost roughly $100 per foot. Which includes the round-trip costs of hauling, launching, and unstepping the rig (about $2,500).
Final Words
We’ve discussed here in detail on the rc sailboat rigging setup. This should help with the rigging setup, and we sincerely hope it does.
OK, so the above may look a little daunting. You’ll be able to recall this procedure with ease after completing it five or six times. Be familiar with and comfortable with your tools, settings, and methods.
The very best to you!
Travis Murray
Leave a Comment Cancel reply
Save my name, email, and website in this browser for the next time I comment.
- Masting, rigging and sails

- Remember me Not recommended on shared computers
Forgot your password?
Dummy's Guide to Rigging
By JRB9019 March 20, 2016 in Masting, rigging and sails
- Reply to this topic
- Start new topic
Recommended Posts
I have some fantastic books that tell me all about fixed and running rigging and give me lots of detailed information about every single rope. block, beley line that is needed.
What a pity that I almost don't understand a word!!!
Every book that I have seen is written in a technical manner and, although I have even tried to understand things through works such as The Elements and Practice of Rigging and Seamanship by the Historic Naval Ships Association, it's is really hard work.
Does anyone know if a simplified version that actually explains all the terms used in one go?
So, for example, if I wanted to know all about what 'ropes', blocks and beley points are used for each sail where could I look?
Before anyone suggests, I do have Lennarth Petersson's Rigging Period Ship Models which does show the lines and beley points, but it is still very difficult to understand what all the shown items are actually for - e.g. this is a line that is used to hoist / set / take down a sail.......
Any ideas anyone?
Many thanks.
- AON , Mario Pires , EricWilliamMarshall and 3 others

Current Build:
H.M. Pickle by JRB9019 - JoTiKa - Scale 1:64 - Kit Build Log in progress
Link to comment
Share on other sites.

There are at least two books, '18th century rigs & rigging' by Karl Heinz Marquardt, and 'The masting and rigging of English ships of war' by James Lees (which I can see that you have borrowed from the library [must be a good one, to hold such titles] but perhaps not yet read) which deal with the matter stage by stage. They start with the masts and associated rigging, then the yards and associated rigging, and then the sails and associated rigging. They finish with sections on different types of blocks, and belaying.
Neither of them has a glossary, unfortunately, which would be helpful for you; but you will read about shrouds and stays in association with the masts, and braces, lifts and halliards in association with the yards; then sheets, tacks and buntlines in association with the sails. By the time you have read Lees' book, you should have a thorough knowledge of the basics. Deeper knowledge can only come from re-reading, drawing rigging diagrams, and from rigging models.
Lennarth Peterson's book, by the way, despite its title, only deals with the rigging of one particular ship at one particular period. So whilst it is very good for a model of this type, for earlier or larger vessels, it is a somewhat limited source.
All the best,
- EricWilliamMarshall , EJ_L , AON and 4 others
Previously built models (long ago, aged 18-25ish) POB construction. 32 gun frigate, scratch-built sailing model, Underhill plans.
2 masted topsail schooner, Underhill plans.
Started at around that time, but unfinished: 74 gun ship 'Bellona' NMM plans. POB
On the drawing board: POF model of Royal Caroline 1749, part-planked with interior details. My own plans, based on Admiralty draughts and archival research.
Always on the go: Research into Royal Navy sailing warship design, construction and use, from Tudor times to 1790.
Member of NRG, SNR, NRS, SMS

I'm going to suggest zu Mondfeld's Historic Ship Models . There's a lot of good basic information in it including rigging. And it's usually very reasonably priced online.
- Ray1981 , tkay11 , Canute and 3 others
Mark "The shipwright is slow, but the wood is patient." - me Current Build: Past Builds: La Belle Poule 1765 - French Frigate from ANCRE plans - ON HOLD Tri ton Cross-Section
NRG Hallf Hull Planking Kit HMS Sphinx 1775 - Vanguard Models - 1:64
Non-Ship Model: On hold, maybe forever:
CH-53 Sikorsky - 1:48 - Revell - Completed Licorne - 1755 from Hahn Plans (Scratch) Version 2.0 (Abandoned)

From a complete landlubber to somebody who lives at least a lot nearer to a coastline: I understand you very well. But I'm afraid that you have to learn the ropes a bit.
However it's made easier by the fact that it's actually a kind of a matrix:
- you have the masts: fore, main mizzen
- you have the floors: ground floor, topmast, topgallant mast, royal
- you have sails: - square sails with top(head), sides(leach) and underside(foot)
- fore-and-aft sails with uppermost corner(peak), head, upper corner on mast(throat), mast side(luff), lower corner on mast(tack), foot, lower aft corner(clew) and aft side(leech)
- you have the yards: basically named as the sails
On each yard and each sail you have the same kind of lines.
- yards: lifts to hold them up, braces to turn them, truss and sling to fix them
- square sails: sheets to hold the lower corners(clews), clew lines to pull the clews up, bowlines to pull the sides of the sail forward, reef tackles to lift the sail towards the yard for reefing
- fore and aft sails: vangs to fix the gaff(replaces the yard), brails to pull the sail towards gaff and yard
Of course there are about a zillion more but those above should cover the most important. And if you know one rig, you know them all. I often find the books of the 'Anatomy of the Ship' series quite helpful. If you find one of a vessel which is close to the one you are building (perhaps Alert or Granado) it may help to see how those lines work together on a specific ship.
And if I'm completely desperate I find some solace in Patrick O'Brian's Stephen Maturin and his never ending struggle with the incomprehensible language of the sailors.
Yes, Wolfram zu Mondfelds book is a gem. But I have the German original and therefore the happiness to struggle with those expressions in two different languages!
- RichardG , tkay11 , EricWilliamMarshall and 5 others
current build:
The Naval Cutter Alert by flyer - Vanguard Models - scale 1:64
completed builds:
HMS Bellerophon by flyer - Victory Models - scale 1:72
Yacht America by flyer - Mamoli - scale 1:66 - with some alterations
Dolphyn Corel 1/50
Wasa Corel 1/75
La Gloire C.Mamoli 1/90
HM Bomb Vessel Granado JoTiKa HM Bomb Vessel Granado 1756 CC kit 1:64
Victory Models 1/64 HMS Pegasus by Flyer
HMS Pickle, my interpretation

I would love a book like that.
I am getting back to the rigging of my cutter after a long and somewhat unintended break.The problem is I read something, mostly understand it, but then can't remember it later. I'm using some home-grown software (a glorified notebook) to try and help me to be organized (see http://modelshipworld.com/index.php/topic/10451-first-time-rigging-being-organized/#entry313428 ).
I was never any good at foreign languages at school either.
- Ray1981 , Canute and mtaylor
Current Build: Early 19th Century US Revenue Cutter (Artesania Latina "Dallas" - messed about)
Completed Build: Yakatabune - Japanese - Woody Joe mini
Member: Nautical Research Guild & Midwest Model Shipwrights

There is one book that I know of that explains almost every part of the ship and rig. Falconer's New Universal Dictionary of the Marine. My copy is a reprint of the 1815 edition.
That being said, learning the ropes just takes time and practice. Soon enough you will no longer be a landsman and you can earn your keep as an able bodied or ordinary sailor. Diligence, attention to detail, and hard experience will merit an assignment as a tops man in no time. Maybe even a promotion to petty officer.
Aye lad, that be the life of a sailor!!
- Ray1981 , EJ_L , mtaylor and 1 other
Laissez le bon temps rouler !
Current Build: Le Soleil Royal
Completed Build : Amerigo Vespucci
Many thanks to all of you.
Some wonderful and very helpful comments.
Peter , your list is very useful. Yes, I have noted the Anatomy of the Ship - I believe there is one of the Granado which will come in handy for my next build anyway. It was going on my Chrismas list - perhaps I might add it on the 2015 Christmas List and get it now as "someone forgot"!!!
RichardG , maybe I should write such a book then - one I understand the subject myself!!
I also like your spreadsheet idea for future reference. As you will see below, I have created a document that lists the information which is a start! Here's an extract:
Belay Side Description Fixed?
b1 Bow Rack Outer Jib Stay
b2 Bow Rack Schooner Stay
b3 Main Mast Main Topgallant Stay
b4 Forebitts crosspiece Foregaff topping lift
b5 Port Foregaff Blocks
b5 Starboard
Jersey City Frankie - I agree with the idea of drawings - I've actually started to do that.
Firstly, I have made a drawing of the bowsprit so that I understand the three foresails on my ship (PIckle).

I have also taken copies of my plans showing the Belay points. These are only listed as e.g. B1, B12 etc. so I have researched my instruction book so that I have been able to label each point with the correct name - that has helped a great deal. As I suggested in my log, I think it would help of the manufacturer added a table to those belay and rigging plans that actually lists the Belay points, where the rope comes from and what it actually is. I have created a document that lists the above information which is a shown above!
I have just made a drawing of the main and topsail - which is where all the problems start!!
...... and the reason for it all? Because I am wishing to add sails to my Pickle and therefore need to understand all the figging so that I can work out what additional rigging and belay points I will need - so that I can add them while I can still access the deck BEFORE I clutter the deck with Deck furniture and masts etc.......
Thanks for your help.
- tkay11 , flyer , EricWilliamMarshall and 4 others

Great thread some nice recommendations here I just ordered 2 of them.
18th century rigs and rigging
historic ship models
I hope those will help me with my Le Glorieux when starting with rigging. Anyhow it is pretty fun stuff to read so i think i will going to enjoy them.

I have purchased a couple of books already to help better understand ship rigging, "The Art of Rigging" by George Biddlecombe and "The Rigging of Ships: in the Days of the Spritsail Topmast, 1600-1720" by R.C. Anderson which deal specifically with the time period of my build, la Couronne. I have found both books to be useful so far though I will also check out some of the other suggestions that have been posted. I have rarely found one book with everything in it I need and often times information has changed as the years have gone by.
- EricWilliamMarshall , Ray1981 , markjay and 3 others
"A Smooth Sea NEVER made a Skilled Sailor" - John George Hermanson
Current Builds - Royal Louis - Mamoli
Royal Caroline - Panart
Completed - Wood - Le Soleil Royal - Sergal - Build Log & Gallery
La Couronne - Corel - Build Log & Gallery
Rattlesnake - Model Shipways , HMS Bounty - Constructo
Plastic - USS Constitution - Revel (twice) , Cutty Sark .
Unfinished - Plastic - HMS Victory - Heller , Sea Witch .
Member : Nautical Research Guild

One of the best reference books I have come across is Young Sea Officer's Sheet Anchor by Darcy Lever. It is very complete...it is somewhat like the old Bluejackets Manual for new sailor in the US. Lever starts with the ropes, then the knots, then on to rigging and the like. If you stick with it long enough and build a ship big enough, you will even be able to learn how to sail your ship to the US. : - )
Seriously, it is very good and there is a very good dictionary of nautical terms at the very end. I recommend that you stay on board and continue building by going slowly, checking out every little piece of the puzzle (or model) as you go. As mentioned above, this is the place to be for encouragement and assistance. We were all where you are at one point or another.
- Ray1981 , markjay , JRB9019 and 2 others
PeteGee, I have actually used my Bluejackets Manual when I first started building ships. I also have pulled out my old Boy Scouts Handbook to remind myself how to tie a few knots. It is interesting to see what books that were not meant for model ship building can contain useful and relevant information.
- mtaylor and PeteGee
- 3 years later...

On 3/20/2016 at 3:12 PM, mtaylor said: I'm going to suggest zu Mondfeld's Historic Ship Models . There's a lot of good basic information in it including rigging. And it's usually very reasonably priced online.
Best book out there! It seems to be my go to.....
- mtaylor , thibaultron and BobG
Savannah, Georgia
Multi hobby nut.

Many of the historic works are also now available in digital format on the Internet. Some of the PDFs are searchable, which comes handy at times. Don't always trust Google, when they tell you that no digital version is available, keep searching. I noticed that Google often does not link digital versions, when someone offers reprints.
A very useful dictionary is Paasch's 'From Keel to Truck'. It was written at the end of the 19th century, but many of the basic terms and designs have not changed a lot over the past two hundred years: https://archive.org/details/bub_gb_pT4IAAAAQAAJ/page/n6/mode/2up
- EricWilliamMarshall , Robp1025 and mtaylor
panta rhei - Everything is in flux

14 hours ago, wefalck said: Many of the historic works are also now available in digital format on the Internet. Some of the PDFs are searchable, which comes handy at times. Don't always trust Google, when they tell you that no digital version is available, keep searching. I noticed that Google often does not link digital versions, when someone offers reprints.
When Google went on their mad scanning spree, usually the only PDF's you could get in a search was their's. Currently, I've had to dig down 3 or 4 pages or more in a search to find certain PDF's as the first pages are not what I wanted.
- Bob Cleek , tkay11 and EJ_L
Join the conversation
You can post now and register later. If you have an account, sign in now to post with your account.

× Pasted as rich text. Paste as plain text instead
Only 75 emoji are allowed.
× Your link has been automatically embedded. Display as a link instead
× Your previous content has been restored. Clear editor
× You cannot paste images directly. Upload or insert images from URL.
- Insert image from URL
- Submit Reply
Recently Browsing 0 members
- No registered users viewing this page.
Modelshipworld - Advancing Ship Modeling through Research
SSL Secured
Your security is important for us so this Website is SSL-Secured
NRG Mailing Address
Nautical Research Guild 237 South Lincoln Street Westmont IL, 60559-1917
Model Ship World ® and the MSW logo are Registered Trademarks, and belong to the Nautical Research Guild (United States Patent and Trademark Office: No. 6,929,264 & No. 6,929,274, registered Dec. 20, 2022)
Helpful links.
- Articles Database
- NRG Home Page
- NRG Online Store
- Important: Our Guidelines
- Terms of Use
- Buildlog Index
About the NRG
If you enjoy building ship models that are historically accurate as well as beautiful, then The Nautical Research Guild (NRG) is just right for you.
The Guild is a non-profit educational organization whose mission is to “Advance Ship Modeling Through Research”. We provide support to our members in their efforts to raise the quality of their model ships.
The Nautical Research Guild has published our world-renowned quarterly magazine, The Nautical Research Journal, since 1955. The pages of the Journal are full of articles by accomplished ship modelers who show you how they create those exquisite details on their models, and by maritime historians who show you the correct details to build. The Journal is available in both print and digital editions. Go to the NRG web site (www.thenrg.org) to download a complimentary digital copy of the Journal. The NRG also publishes plan sets, books and compilations of back issues of the Journal and the former Ships in Scale and Model Ship Builder magazines.
Our Emblem ®
Nautical Research Guild ® and the NRG logo are Registered Trademarks, and belong to the Nautical Research Guild (United States Patent and Trademark Office: No. 6,999,236 & No. 6,999,237, registered March 14, 2023)
- Existing user? Sign In
- Latest Posts
- All unread content since my last vist
- Unread topics I have posted in
- Create New...
POPULAR SEARCHES:
- Raspberry Pi
- Woodworking
- 3D Printing
- Maker Faire

- All Stories
- Magazine Projects
- Board Guide
- Magazine Issues
How to Rig a Model Ship

By Gareth Branwyn
Gareth branwyn.
Gareth Branwyn is a freelance writer and the former Editorial Director of Maker Media. He is the author or editor of over a dozen books on technology, DIY, and geek culture. He is currently a contributor to Boing Boing, Wink Books, and Wink Fun. His free weekly-ish maker tips newsletter can be found at garstipsandtools.com.

Ever since I was an avid model-maker as a kid, and now a game modeler as an adult, I have been fascinated by sailing ship models and ships in bottles. The fact that people take the time to meticulously model all of the rope and rigging on a ship model has always been so impressive to me.
Last year, I backed the historical pirate tabletop wargame, Blood & Plunder . The game uses the most incredible resin-cast ship models. They are supposed to simply be game components, mere playing pieces for a game, but they are incredibly detailed and come with all sorts of hardware and accessories (e.g. deck cannons) to make them look as realistic as possible. I haven’t built mine yet, but I can’t wait.

One of the things I have been intimidated by is the idea of doing all of the rope rigging. But this how to article on the gaming site, 1000 Foot General , breaks the process down and makes it look very approachable. I’m inspired.

ADVERTISEMENT
Related Articles from Make:
From the shed: new arrivals.

DIY Arcade Joystick Kit

Make: Arduino Electronics Starter Pack

Maker's Notebook - Hardcover 3rd Edition

Transistor Cat Kit

Our websites use cookies to improve your browsing experience. Some of these are essential for the basic functionalities of our websites. In addition, we use third-party cookies to help us analyze and understand usage. These will be stored in your browser only with your consent and you have the option to opt-out. Your choice here will be recorded for all Make.co Websites.

Escape to an island of imagination + innovation as Maker Faire Bay Area returns for its 15th iteration!
Buy tickets today save 15% and lock-in your preferred date(s)..
Pond Sailboat Rigging
by L. Novak (Houston, TX)
Click here to add your own comments
Return to Model Boats Q&A.
Would you prefer to share this page with others by linking to it?
- Click on the HTML link code below.
- Copy and paste it, adding a note of your own, into your blog, a Web page, forums, a blog comment, your Facebook account, or anywhere that someone would find this page valuable.
- Plans Store
- Model Boat Books
- Model Boats Intro
- Building Materials
- Make a Hull
- Plastic Kits
Radio Control
- US Battleships
- Torpedo Boats
- Model Boats Q&A
- Model Ship Gallery
- What's New?
- Privacy Policy

By Petter Blix
Copyright 2009-2018 Building-Model-Boats.com
Trademarks belong to their respective owners
All Rights Reserved

Beginner’s Guide: How To Rig A Sailboat – Step By Step Tutorial
Alex Morgan
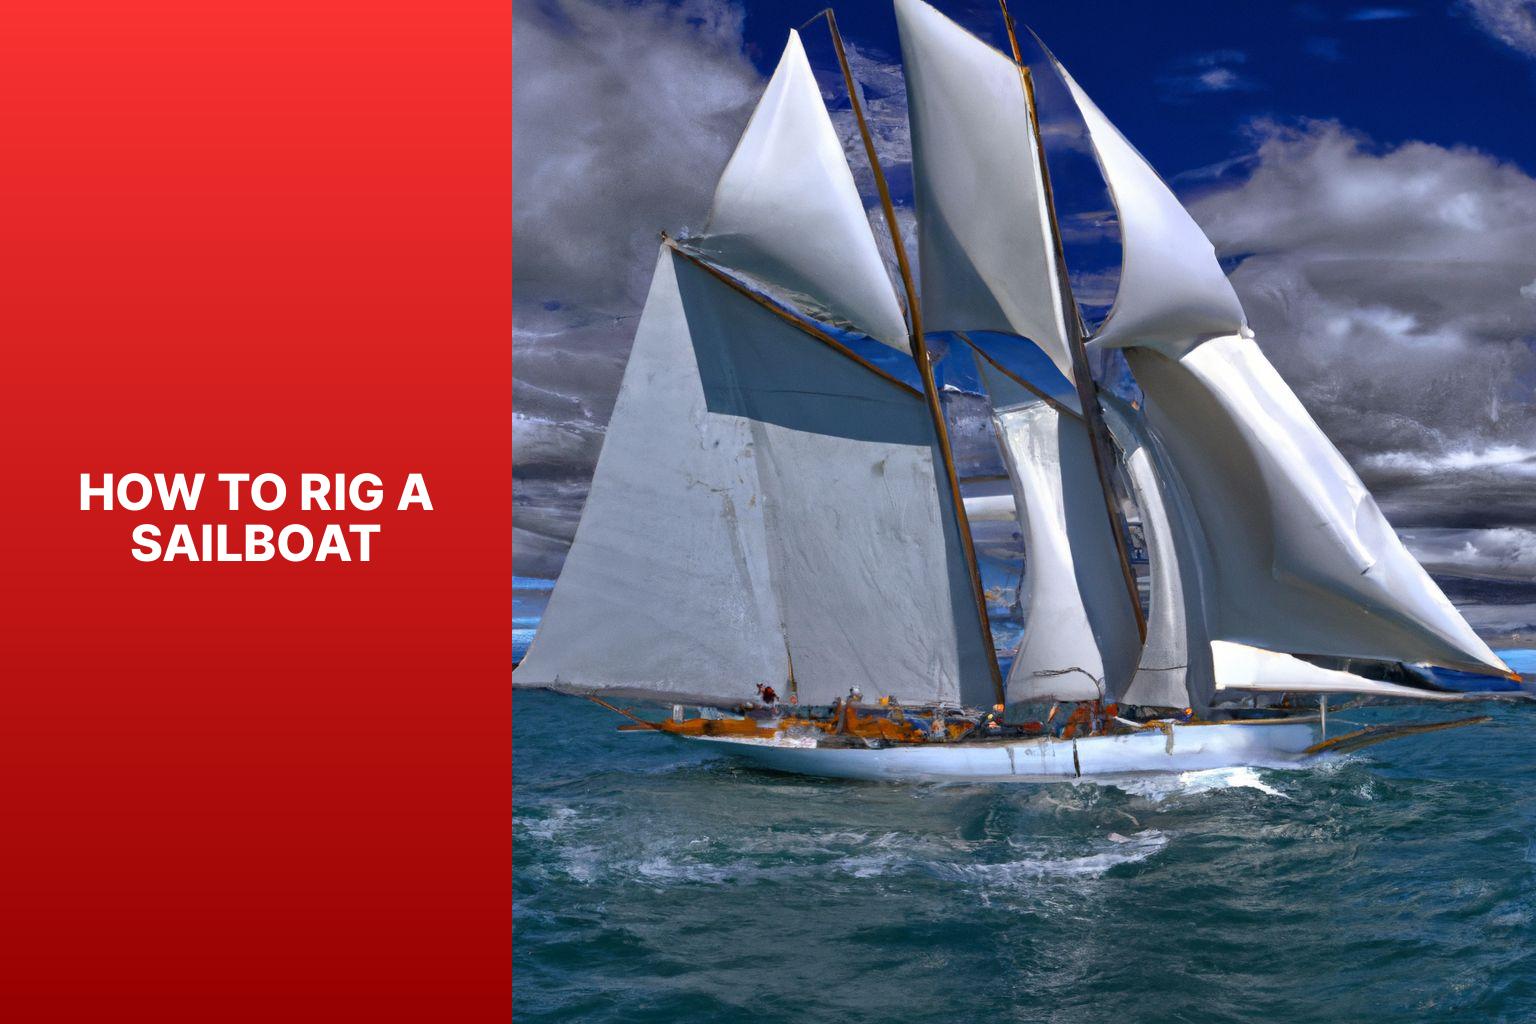
Rigging a sailboat is a crucial process that ensures the proper setup and functioning of a sailboat’s various components. Understanding the process and components involved in rigging is essential for any sailor or boat enthusiast. In this article, we will provide a comprehensive guide on how to rig a sailboat.
Introduction to Rigging a Sailboat
Rigging a sailboat refers to the process of setting up the components that enable the sailboat to navigate through the water using wind power. This includes assembling and positioning various parts such as the mast, boom, standing rigging, running rigging, and sails.
Understanding the Components of a Sailboat Rigging
Before diving into the rigging process, it is important to have a good understanding of the key components involved. These components include:
The mast is the tall vertical spar that provides vertical support to the sails and holds them in place.
The boom is the horizontal spar that runs along the bottom edge of the sail and helps control the shape and position of the sail.
- Standing Rigging:
Standing rigging consists of the wires and cables that support and stabilize the mast, keeping it upright.
- Running Rigging:
Running rigging refers to the lines and ropes used to control the sails, such as halyards, sheets, and control lines.
Preparing to Rig a Sailboat
Before rigging a sailboat, there are a few important steps to take. These include:
- Checking the Weather Conditions:
It is crucial to assess the weather conditions before rigging a sailboat. Unfavorable weather, such as high winds or storms, can make rigging unsafe.
- Gathering the Necessary Tools and Equipment:
Make sure to have all the necessary tools and equipment readily available before starting the rigging process. This may include wrenches, hammers, tape, and other common tools.
- Inspecting the Rigging Components:
In the upcoming sections of this article, we will provide a step-by-step guide on how to rig a sailboat, as well as important safety considerations and tips to keep in mind. By following these guidelines, you will be able to rig your sailboat correctly and safely, allowing for a smooth and enjoyable sailing experience.
Key takeaway:
- Rigging a sailboat maximizes efficiency: Proper rigging allows for optimized sailing performance, ensuring the boat moves smoothly through the water.
- Understanding sailboat rigging components: Familiarity with the various parts of a sailboat rigging, such as the mast, boom, and standing and running riggings, is essential for effective rigging setup.
- Importance of safety in sailboat rigging: Ensuring safety is crucial during the rigging process, including wearing a personal flotation device, securing loose ends and lines, and being mindful of overhead power lines.
Get ready to set sail and dive into the fascinating world of sailboat rigging! We’ll embark on a journey to understand the various components that make up a sailboat’s rigging. From the majestic mast to the nimble boom , and the intricate standing rigging to the dynamic running rigging , we’ll explore the crucial elements that ensure smooth sailing. Not forgetting the magnificent sail, which catches the wind and propels us forward. So grab your sea legs and let’s uncover the secrets of sailboat rigging together.
Understanding the mast is crucial when rigging a sailboat. Here are the key components and steps to consider:
1. The mast supports the sails and rigging of the sailboat. It is made of aluminum or carbon fiber .
2. Before stepping the mast , ensure that the area is clear and the boat is stable. Have all necessary tools and equipment ready.
3. Inspect the mast for damage or wear. Check for corrosion , loose fittings , and cracks . Address any issues before proceeding.
4. To step the mast , carefully lift it into an upright position and insert the base into the mast step on the deck of the sailboat.
5. Secure the mast using the appropriate rigging and fasteners . Attach the standing rigging , such as shrouds and stays , to the mast and the boat’s hull .
Fact: The mast of a sailboat is designed to withstand wind resistance and the tension of the rigging for stability and safe sailing.
The boom is an essential part of sailboat rigging. It is a horizontal spar that stretches from the mast to the aft of the boat. Constructed with durable yet lightweight materials like aluminum or carbon fiber, the boom provides crucial support and has control over the shape and position of the sail. It is connected to the mast through a boom gooseneck , allowing it to pivot. One end of the boom is attached to the mainsail, while the other end is equipped with a boom vang or kicker, which manages the tension and angle of the boom. When the sail is raised, the boom is also lifted and positioned horizontally by using the topping lift or lazy jacks.
An incident serves as a warning that emphasizes the significance of properly securing the boom. In strong winds, an improperly fastened boom swung across the deck, resulting in damage to the boat and creating a safety hazard. This incident highlights the importance of correctly installing and securely fastening all rigging components, including the boom, to prevent accidents and damage.
3. Standing Rigging
When rigging a sailboat, the standing rigging plays a vital role in providing stability and support to the mast . It consists of several key components, including the mast itself, along with the shrouds , forestay , backstay , and intermediate shrouds .
The mast, a vertical pole , acts as the primary support structure for the sails and the standing rigging. Connected to the top of the mast are the shrouds , which are cables or wires that extend to the sides of the boat, providing essential lateral support .
The forestay is another vital piece of the standing rigging. It is a cable or wire that runs from the top of the mast to the bow of the boat, ensuring forward support . Similarly, the backstay , also a cable or wire, runs from the mast’s top to the stern of the boat, providing important backward support .
To further enhance the rig’s stability , intermediate shrouds are installed. These additional cables or wires are positioned between the main shrouds, as well as the forestay or backstay. They offer extra support , strengthening the standing rigging system.
Regular inspections of the standing rigging are essential to detect any signs of wear, such as fraying or corrosion . It is crucial to ensure that all connections within the rig are tight and secure, to uphold its integrity. Should any issues be identified, immediate attention must be given to prevent accidents or damage to the boat. Prioritizing safety is of utmost importance when rigging a sailboat, thereby necessitating proper maintenance of the standing rigging. This ensures a safe and enjoyable sailing experience.
Note: <p> tags have been kept intact.
4. Running Rigging
Running Rigging
When rigging a sailboat, the running rigging is essential for controlling the sails and adjusting their position. It is important to consider several aspects when dealing with the running rigging.
1. Choose the right rope: The running rigging typically consists of ropes with varying properties such as strength, stretch, and durability. Weather conditions and sailboat size should be considered when selecting the appropriate rope.
2. Inspect and maintain the running rigging: Regularly check for signs of wear, fraying, or damage. To ensure safety and efficiency, replace worn-out ropes.
3. Learn essential knot tying techniques: Having knowledge of knots like the bowline, cleat hitch, and reef knot is crucial for securing the running rigging and adjusting sails.
4. Understand different controls: The running rigging includes controls such as halyards, sheets, and control lines. Familiarize yourself with their functions and proper usage to effectively control sail position and tension.
5. Practice proper sail trimming: Adjusting the tension of the running rigging significantly affects sailboat performance. Mastering sail trimming techniques will help optimize sail shape and maximize speed.
By considering these factors and mastering running rigging techniques, you can enhance your sailing experience and ensure the safe operation of your sailboat.
The sail is the central component of sailboat rigging as it effectively harnesses the power of the wind to propel the boat.
When considering the sail, there are several key aspects to keep in mind:
– Material: Sails are typically constructed from durable and lightweight materials such as Dacron or polyester. These materials provide strength and resistance to various weather conditions.
– Shape: The shape of the sail plays a critical role in its overall performance. A well-shaped sail should have a smooth and aerodynamic profile, which allows for maximum efficiency in capturing wind power.
– Size: The size of the sail is determined by its sail area, which is measured in square feet or square meters. Larger sails have the ability to generate more power, but they require greater skill and experience to handle effectively.
– Reefing: Reefing is the process of reducing the sail’s size to adapt to strong winds. Sails equipped with reefing points allow sailors to decrease the sail area, providing better control in challenging weather conditions.
– Types: There are various types of sails, each specifically designed for different purposes. Common sail types include mainsails, jibs, genoas, spinnakers, and storm sails. Each type possesses its own unique characteristics and is utilized under specific wind conditions.
Understanding the sail and its characteristics is vital for sailors, as it directly influences the boat’s speed, maneuverability, and overall safety on the water.
Getting ready to rig a sailboat requires careful preparation and attention to detail. In this section, we’ll dive into the essential steps you need to take before setting sail. From checking the weather conditions to gathering the necessary tools and equipment, and inspecting the rigging components, we’ll ensure that you’re fully equipped to navigate the open waters with confidence. So, let’s get started on our journey to successfully rigging a sailboat!
1. Checking the Weather Conditions
Checking the weather conditions is crucial before rigging a sailboat for a safe and enjoyable sailing experience. Monitoring the wind speed is important in order to assess the ideal sailing conditions . By checking the wind speed forecast , you can determine if the wind is strong or light . Strong winds can make sailboat control difficult, while very light winds can result in slow progress.
Another important factor to consider is the wind direction . Assessing the wind direction is crucial for route planning and sail adjustment. Favorable wind direction helps propel the sailboat efficiently, making your sailing experience more enjoyable.
In addition to wind speed and direction, it is also important to consider weather patterns . Keep an eye out for impending storms or heavy rain. It is best to avoid sailing in severe weather conditions that may pose a safety risk. Safety should always be a top priority when venturing out on a sailboat.
Another aspect to consider is visibility . Ensure good visibility by checking for fog, haze, or any other conditions that may hinder navigation. Clear visibility is important for being aware of other boats and potential obstacles that may come your way.
Be aware of the local conditions . Take into account factors such as sea breezes, coastal influences, or tidal currents. These local factors greatly affect sailboat performance and safety. By considering all of these elements, you can have a successful and enjoyable sailing experience.
Here’s a true story to emphasize the importance of checking the weather conditions. One sunny afternoon, a group of friends decided to go sailing. Before heading out, they took the time to check the weather conditions. They noticed that the wind speed was expected to be around 10 knots, which was perfect for their sailboat. The wind direction was coming from the northwest, allowing for a pleasant upwind journey. With clear visibility and no approaching storms, they set out confidently, enjoying a smooth and exhilarating sail. This positive experience was made possible by their careful attention to checking the weather conditions beforehand.
2. Gathering the Necessary Tools and Equipment
To efficiently gather all of the necessary tools and equipment for rigging a sailboat, follow these simple steps:
- First and foremost, carefully inspect your toolbox to ensure that you have all of the basic tools such as wrenches, screwdrivers, and pliers.
- Make sure to check if you have a tape measure or ruler available as they are essential for precise measurements of ropes or cables.
- Don’t forget to include a sharp knife or rope cutter in your arsenal as they will come in handy for cutting ropes or cables to the desired lengths.
- Gather all the required rigging hardware including shackles, pulleys, cleats, and turnbuckles.
- It is always prudent to check for spare ropes or cables in case replacements are needed during the rigging process.
- If needed, consider having a sailing knife or marlinspike tool for splicing ropes or cables.
- For rigging a larger sailboat, it is crucial to have a mast crane or hoist to assist with stepping the mast.
- Ensure that you have a ladder or some other means of reaching higher parts of the sailboat, such as the top of the mast.
Once, during the preparation of rigging my sailboat, I had a moment of realization when I discovered that I had forgotten to bring a screwdriver . This unfortunate predicament occurred while I was in a remote location with no nearby stores. Being resourceful, I improvised by utilizing a multipurpose tool with a small knife blade, which served as a makeshift screwdriver. Although it was not the ideal solution, it allowed me to accomplish the task. Since that incident, I have learned the importance of double-checking my toolbox before commencing any rigging endeavor. This practice ensures that I have all of the necessary tools and equipment, preventing any unexpected surprises along the way.
3. Inspecting the Rigging Components
Inspecting the rigging components is essential for rigging a sailboat safely. Here is a step-by-step guide on inspecting the rigging components:
1. Visually inspect the mast, boom, and standing rigging for damage, such as corrosion, cracks, or loose fittings.
2. Check the tension of the standing rigging using a tension gauge. It should be within the recommended range from the manufacturer.
3. Examine the turnbuckles, clevis pins, and shackles for wear or deformation. Replace any damaged or worn-out hardware.
4. Inspect the running rigging, including halyards and sheets, for fraying, signs of wear, or weak spots. Replace any worn-out lines.
5. Check the sail for tears, wear, or missing hardware such as grommets or luff tape.
6. Pay attention to the connections between the standing rigging and the mast. Ensure secure connections without any loose or missing cotter pins or rigging screws.
7. Inspect all fittings, such as mast steps, spreader brackets, and tangs, to ensure they are securely fastened and in good condition.
8. Conduct a sea trial to assess the rigging’s performance and make necessary adjustments.
Regularly inspecting the rigging components is crucial for maintaining the sailboat’s rigging system’s integrity, ensuring safe sailing conditions, and preventing accidents or failures at sea.
Once, I went sailing on a friend’s boat without inspecting the rigging components beforehand. While at sea, a sudden gust of wind caused one of the shrouds to snap. Fortunately, no one was hurt, but we had to cut the sail loose and carefully return to the marina. This incident taught me the importance of inspecting the rigging components before sailing to avoid unforeseen dangers.
Step-by-Step Guide on How to Rig a Sailboat
Get ready to set sail with our step-by-step guide on rigging a sailboat ! We’ll take you through the process from start to finish, covering everything from stepping the mast to setting up the running rigging . Learn the essential techniques and tips for each sub-section, including attaching the standing rigging and installing the boom and sails . Whether you’re a seasoned sailor or a beginner, this guide will have you ready to navigate the open waters with confidence .
1. Stepping the Mast
To step the mast of a sailboat, follow these steps:
1. Prepare the mast: Position the mast near the base of the boat.
2. Attach the base plate: Securely fasten the base plate to the designated area on the boat.
3. Insert the mast step: Lower the mast step into the base plate and align it with the holes or slots.
4. Secure the mast step: Use fastening screws or bolts to fix the mast step in place.
5. Raise the mast: Lift the mast upright with the help of one or more crew members.
6. Align the mast: Adjust the mast so that it is straight and aligned with the boat’s centerline.
7. Attach the shrouds: Connect the shrouds to the upper section of the mast, ensuring proper tension.
8. Secure the forestay: Attach the forestay to the bow of the boat, ensuring it is securely fastened.
9. Final adjustments: Check the tension of the shrouds and forestay, making any necessary rigging adjustments.
Following these steps ensures that the mast is properly stepped and securely in place, allowing for a safe and efficient rigging process. Always prioritize safety precautions and follow manufacturer guidelines for your specific sailboat model.
2. Attaching the Standing Rigging
To attach the standing rigging on a sailboat, commence by preparing the essential tools and equipment, including wire cutters, crimping tools, and turnbuckles.
Next, carefully inspect the standing rigging components for any indications of wear or damage.
After inspection, fasten the bottom ends of the shrouds and stays to the chainplates on the deck.
Then, securely affix the top ends of the shrouds and stays to the mast using adjustable turnbuckles .
To ensure proper tension, adjust the turnbuckles accordingly until the mast is upright and centered.
Utilize a tension gauge to measure the tension in the standing rigging, aiming for around 15-20% of the breaking strength of the rigging wire.
Double-check all connections and fittings to verify their security and proper tightness.
It is crucial to regularly inspect the standing rigging for any signs of wear or fatigue and make any necessary adjustments or replacements.
By diligently following these steps, you can effectively attach the standing rigging on your sailboat, ensuring its stability and safety while on the water.
3. Installing the Boom and Sails
To successfully complete the installation of the boom and sails on a sailboat, follow these steps:
1. Begin by securely attaching the boom to the mast. Slide it into the gooseneck fitting and ensure it is firmly fastened using a boom vang or another appropriate mechanism.
2. Next, attach the main sail to the boom. Slide the luff of the sail into the mast track and securely fix it in place using sail slides or cars.
3. Connect the mainsheet to the boom. One end should be attached to the boom while the other end is connected to a block or cleat on the boat.
4. Proceed to attach the jib or genoa. Make sure to securely attach the hanks or furler line to the forestay to ensure stability.
5. Connect the jib sheets. One end of each jib sheet should be attached to the clew of the jib or genoa, while the other end is connected to a block or winch on the boat.
6. Before setting sail, it is essential to thoroughly inspect all lines and connections. Ensure that they are properly tensioned and that all connections are securely fastened.
During my own experience of installing the boom and sails on my sailboat, I unexpectedly encountered a strong gust of wind. As a result, the boom began swinging uncontrollably, requiring me to quickly secure it to prevent any damage. This particular incident served as a vital reminder of the significance of properly attaching and securing the boom, as well as the importance of being prepared for unforeseen weather conditions while rigging a sailboat.
4. Setting Up the Running Rigging
Setting up the running rigging on a sailboat involves several important steps. First, attach the halyard securely to the head of the sail. Then, connect the sheets to the clew of the sail. If necessary, make sure to secure the reefing lines . Attach the outhaul line to the clew of the sail and connect the downhaul line to the tack of the sail. It is crucial to ensure that all lines are properly cleated and organized. Take a moment to double-check the tension and alignment of each line. If you are using a roller furling system, carefully wrap the line around the furling drum and securely fasten it. Perform a thorough visual inspection of the running rigging to check for any signs of wear or damage. Properly setting up the running rigging is essential for safe and efficient sailing. It allows for precise control of the sail’s position and shape, ultimately optimizing the boat’s performance on the water.
Safety Considerations and Tips
When it comes to rigging a sailboat, safety should always be our top priority. In this section, we’ll explore essential safety considerations and share some valuable tips to ensure smooth sailing. From the importance of wearing a personal flotation device to securing loose ends and lines, and being cautious around overhead power lines, we’ll equip you with the knowledge and awareness needed for a safe and enjoyable sailing experience. So, let’s set sail and dive into the world of safety on the water!
1. Always Wear a Personal Flotation Device
When rigging a sailboat, it is crucial to prioritize safety and always wear a personal flotation device ( PFD ). Follow these steps to properly use a PFD:
- Select the appropriate Coast Guard-approved PFD that fits your size and weight.
- Put on the PFD correctly by placing your arms through the armholes and securing all the straps for a snug fit .
- Adjust the PFD for comfort , ensuring it is neither too tight nor too loose, allowing freedom of movement and adequate buoyancy .
- Regularly inspect the PFD for any signs of wear or damage, such as tears or broken straps, and replace any damaged PFDs immediately .
- Always wear your PFD when on or near the water, even if you are a strong swimmer .
By always wearing a personal flotation device and following these steps, you will ensure your safety and reduce the risk of accidents while rigging a sailboat. Remember, prioritize safety when enjoying water activities.
2. Secure Loose Ends and Lines
Inspect lines and ropes for frayed or damaged areas. Secure loose ends and lines with knots or appropriate cleats or clamps. Ensure all lines are properly tensioned to prevent loosening during sailing. Double-check all connections and attachments for security. Use additional safety measures like extra knots or stopper knots to prevent line slippage.
To ensure a safe sailing experience , it is crucial to secure loose ends and lines properly . Neglecting this important step can lead to accidents or damage to the sailboat. By inspecting, securing, and tensioning lines , you can have peace of mind knowing that everything is in place. Replace or repair any compromised lines or ropes promptly. Securing loose ends and lines allows for worry-free sailing trips .
3. Be Mindful of Overhead Power Lines
When rigging a sailboat, it is crucial to be mindful of overhead power lines for safety. It is important to survey the area for power lines before rigging the sailboat. Maintain a safe distance of at least 10 feet from power lines. It is crucial to avoid hoisting tall masts or long antenna systems near power lines to prevent contact. Lower the mast and tall structures when passing under a power line to minimize the risk of contact. It is also essential to be cautious in areas where power lines run over the water and steer clear to prevent accidents.
A true story emphasizes the importance of being mindful of overhead power lines. In this case, a group of sailors disregarded safety precautions and their sailboat’s mast made contact with a low-hanging power line, resulting in a dangerous electrical shock. Fortunately, no serious injuries occurred, but it serves as a stark reminder of the need to be aware of power lines while rigging a sailboat.
Some Facts About How To Rig A Sailboat:
- ✅ Small sailboat rigging projects can improve sailing performance and save money. (Source: stingysailor.com)
- ✅ Rigging guides are available for small sailboats, providing instructions and tips for rigging. (Source: westcoastsailing.net)
- ✅ Running rigging includes lines used to control and trim the sails, such as halyards and sheets. (Source: sailingellidah.com)
- ✅ Hardware used in sailboat rigging includes winches, blocks, and furling systems. (Source: sailingellidah.com)
- ✅ A step-by-step guide can help beginners rig a small sailboat for sailing. (Source: tripsavvy.com)
Frequently Asked Questions
1. how do i rig a small sailboat.
To rig a small sailboat, follow these steps: – Install or check the rudder, ensuring it is firmly attached. – Attach or check the tiller, the long steering arm mounted to the rudder. – Attach the jib halyard by connecting the halyard shackle to the head of the sail and the grommet in the tack to the bottom of the forestay. – Hank on the jib by attaching the hanks of the sail to the forestay one at a time. – Run the jib sheets by tying or shackling them to the clew of the sail and running them back to the cockpit. – Attach the mainsail by spreading it out and attaching the halyard shackle to the head of the sail. – Secure the tack, clew, and foot of the mainsail to the boom using various lines and mechanisms. – Insert the mainsail slugs into the mast groove, gradually raising the mainsail as the slugs are inserted. – Cleat the main halyard and lower the centerboard into the water. – Raise the jib by pulling down on the jib halyard and cleating it on the other side of the mast. – Tighten the mainsheet and one jibsheet to adjust the sails and start moving forward.
2. What are the different types of sailboat rigs?
Sailboat rigs can be classified into three main types: – Sloop rig: This rig has a single mast with a mainsail and a headsail, typically a jib or genoa. – Cutter rig: This rig has two headsails, a smaller jib or staysail closer to the mast, and a larger headsail, usually a genoa, forward of it, alongside a mainsail. – Ketch rig: This rig has two masts, with the main mast taller than the mizzen mast. It usually has a mainsail, headsail, and a mizzen sail. Each rig has distinct characteristics and is suitable for different sailing conditions and preferences.
3. What are the essential parts of a sailboat?
The essential parts of a sailboat include: – Mast: The tall vertical spar that supports the sails. – Boom: The horizontal spar connected to the mast, which extends outward and supports the foot of the mainsail. – Rudder: The underwater appendage that steers the boat. – Centerboard or keel: A retractable or fixed fin-like structure that provides stability and prevents sideways drift. – Sails: The fabric structures that capture the wind’s energy to propel the boat. – Running rigging: The lines or ropes used to control the sails and sailing equipment. – Standing rigging: The wires and cables that support the mast and reinforce the spars. These are the basic components necessary for the functioning of a sailboat.
4. What is a spinnaker halyard?
A spinnaker halyard is a line used to hoist and control a spinnaker sail. The spinnaker is a large, lightweight sail that is used for downwind sailing or reaching in moderate to strong winds. The halyard attaches to the head of the spinnaker and is used to raise it to the top of the mast. Once hoisted, the spinnaker halyard can be adjusted to control the tension and shape of the sail.
5. Why is it important to maintain and replace worn running rigging?
It is important to maintain and replace worn running rigging for several reasons: – Safety: Worn or damaged rigging can compromise the integrity and stability of the boat, posing a safety risk to both crew and vessel. – Performance: Worn rigging can affect the efficiency and performance of the sails, diminishing the boat’s speed and maneuverability. – Reliability: Aging or worn rigging is more prone to failure, which can lead to unexpected problems and breakdowns. Regular inspection and replacement of worn running rigging is essential to ensure the safe and efficient operation of a sailboat.
6. Where can I find sailboat rigging books or guides?
There are several sources where you can find sailboat rigging books or guides: – Online: Websites such as West Coast Sailing and Stingy Sailor offer downloadable rigging guides for different sailboat models. – Bookstores: Many bookstores carry a wide selection of boating and sailing books, including those specifically focused on sailboat rigging. – Sailing schools and clubs: Local sailing schools or yacht clubs often have resources available for learning about sailboat rigging. – Manufacturers: Some sailboat manufacturers, like Hobie Cat and RS Sailing, provide rigging guides for their specific sailboat models. Consulting these resources can provide valuable information and instructions for rigging your sailboat properly.
About the author

Leave a Reply Cancel reply
Your email address will not be published. Required fields are marked *
Save my name, email, and website in this browser for the next time I comment.
Latest posts

The history of sailing – from ancient times to modern adventures
History of Sailing Sailing is a time-honored tradition that has evolved over millennia, from its humble beginnings as a means of transportation to a beloved modern-day recreational activity. The history of sailing is a fascinating journey that spans cultures and centuries, rich in innovation and adventure. In this article, we’ll explore the remarkable evolution of…

Sailing Solo: Adventures and Challenges of Single-Handed Sailing
Solo Sailing Sailing has always been a pursuit of freedom, adventure, and self-discovery. While sailing with a crew is a fantastic experience, there’s a unique allure to sailing solo – just you, the wind, and the open sea. Single-handed sailing, as it’s often called, is a journey of self-reliance, resilience, and the ultimate test of…

Sustainable Sailing: Eco-Friendly Practices on the boat
Eco Friendly Sailing Sailing is an exhilarating and timeless way to explore the beauty of the open water, but it’s important to remember that our oceans and environment need our protection. Sustainable sailing, which involves eco-friendly practices and mindful decision-making, allows sailors to enjoy their adventures while minimizing their impact on the environment. In this…
- New Sailors Guide
- SAILSetc DRAWINGS
- 3D PRINT A YACHT !
- MAST, BOOM & RIGGING PARTS
- RIGGING Wire/Spectra/Dyneema
- HULL & DECK FITTINGS
- VANGS - GOOSENECKS
- BOOM SECTIONS
- MASTS Alum & Carbon Fibre
- RIG KITS & RIG PLANS
- FINS AND BULBS
- BOATS - KITS & PLANS
- RG65 - MICRO MAGIC - Parts
- SAILS & SAILMAKING
- WINCHES & DRUMS
- RADIOS SERVOs BATTERIES etc
- POND YACHTS & PARTS
- ACCESSORIES, COVERS & MISC.
- FASTENERS Screws, Bolts, Nuts
- SPARE PARTS
- CLEARANCE ITEMS
- FREE Boat & Rigging Plan Links
- PARTS DRAWINGS
- Print your own CATALOGUE
- Shipping Info
- Privacy Policy
- Conditions of Use
- Newsletter Unsubscribe
- Create Account
- Shopping Cart
The global authority in superyachting
- NEWSLETTERS
- Yachts Home
- The Superyacht Directory
- Yacht Reports
- Brokerage News
- The largest yachts in the world
- The Register
- Yacht Advice
- Yacht Design
- 12m to 24m yachts
- Monaco Yacht Show
- Builder Directory
- Designer Directory
- Interior Design Directory
- Naval Architect Directory
- Yachts for sale home
- Motor yachts
- Sailing yachts
- Explorer yachts
- Classic yachts
- Sale Broker Directory
- Charter Home
- Yachts for Charter
- Charter Destinations
- Charter Broker Directory
- Destinations Home
- Mediterranean
- South Pacific
- Rest of the World
- Boat Life Home
- Owners' Experiences
- Interiors Suppliers
- Owners' Club
- Captains' Club
- BOAT Showcase
- Boat Presents
- Events Home
- World Superyacht Awards
- Superyacht Design Festival
- Design and Innovation Awards
- Young Designer of the Year Award
- Artistry and Craft Awards
- Explorer Yachts Summit
- Ocean Talks
- The Ocean Awards
- BOAT Connect
- Between the bays
- Golf Invitational
- Boat Pro Home
- Pricing Plan
- Superyacht Insight
- Product Features
- Premium Content
- Testimonials
- Global Order Book
- Tenders & Equipment
.jpg/r%5Bwidth%5D=320/c01b08f0-3198-11ec-b3da-5dc06521023f-Black%20Pearl%20-%20Tom%20Van%20Oossanen%20(3).webp "model sailboat rigging")
The definitive guide to sailing yacht rigging
Related articles, superyacht directory.
Do you know your Bermudan rig from your DynaRig or wingsails? And which is best? BOAT explains it all...
Take a look at a modern racing yacht from above, beating to windward and heeled to the breeze, and you can see at a glance why Bermudan rigs have stood the test of time. With its fore and aft sails bladed into efficient aerodynamic shapes, a modern yacht can slice close to the wind and be driven hard. Such a sight would have been outlandish a century ago. Then, a typical trading barquentine could set 18 sails to catch light airs, but it needed a large crew to battle with canvas far out on the yards. In a modern miracle as incredible in its way as flight, today’s racing yachts can sail faster than the speed of the wind – in some cases several times faster.
A mainsail set on a single spar is an age-old concept but only in the 19th century was it adapted as the Bermudan or Marconi rig. A one-piece mainsail set on a mast without a gaff, hoisted with one halyard and controlled by one sheet, was simpler and more efficient. This revolution became the power train of pleasure yachting and racing.
But perhaps the time is coming for a re-evaluation of simpler rigs requiring fewer crew – alternatives with lower loads operated by automated systems. In an era of reduced carbon consumption, could more radical sailplans even herald a revival in sail power?
The evergreen Bermudan rig
The Bermudan rig is the all-rounder, able to perform well at all angles of sail. It is efficient upwind, while downwind the sail area can be significantly boosted with a big gennaker or spinnaker. For good reasons, it is the first choice for nearly every modern sailing yacht up to around 60 to 65 metres for cruising and regatta racing alike. At larger sizes, however, things start to become trickier, and the trade-offs get interesting.
Over the last decade, sail handling technology has steadily advanced to allow sloop rigs to grow larger and larger. “But with that comes a highly loaded rig, many tonnes of compression from tension in the rigging, and you have to build structure in the boat to accept that,” explains Paul MacDonald, founder and superyacht sales manager of Southern Spars.
“You have to have a lot of deck gear and captive winches below decks and the machinery for that. But over the years, boom furling systems and MPS [Multi Purpose Sails for downwind angles] stored on a drum, for example, have made sail handling safer.
Bill Tripp is the designer behind the 86-metre Aquijo , which broke new ground in 2015 as the world’s largest Bermudan ketch. Tripp prefers to call the rig a "sketch", a portmanteau word for a rig that is neither a sloop nor a ketch “because the main and mizzen are identical”. Even though the sailplan is divided over two masts, each spar is still a towering 90 metres above the water. Aquijo perfectly illustrates the issues involved with a Bermudan rig when scaled up.
“The sloop is great but I prefer the ‘sketch’ for sailing around the world under full control due to the desirability of a two-masted rig for reaching ability, which dominates passages, and the safety of controllable loads when sailing in all kinds of conditions miles from nowhere,” he says.
Upwind, Aquijo sets a jib, staysail, mainsail and mizzen, all in North Sails 3Di, totalling 3,821 square metres. A furling Code sail for reaching and downwind angles increases that to a vast 5,051 square metres.
While Aquijo has a crew retinue of 17, it can be controlled under sail by six or seven people. With custom winches to handle halyards and sheets, the sails can be hoisted astonishingly quickly for such a large rig. “It takes five minutes to put the main up, on average, and the main and mizzen can go up at the same time,” Tripp says. Aquijo has now sailed 100,000 nautical miles around the world and the owner is planning another circumnavigation through the Northwest Passage.
Tripp is not convinced of the wisdom of a much larger single-masted sloop rig. “If you are day sailing in the Med, a sloop would be awesome, but I am not sure if you had fewer sails you would be able to [reduce canvas] well enough. Also the mast is a windage problem when the keel is up and you are beam-to. If you are on anchor, that’s no problem but you’d have to be able to cope with being on the docks in 70 knots. The windage at 120 metres is not only more but the centre of effort is so much higher, and so the heeling loads all go up.”
However, British designer Malcolm McKeon , the name behind the high-performance, sloop-rigged carbon composite superyachts Missy and Ribelle , is pushing the sloop rig to new heights. His 85-metre design concept Apex, developed with Royal Huisman , would be the largest sloop-rigged yacht in the world. “The loads are enormous,” he admits, “but it is all scalable.”
“The big disadvantage is sail handling. The downwind sails are pretty complicated once you start hoisting and retrieving, even with drum and reel systems. It is not straightforward.” But, he adds, “I think we know the advantages of a sloop: if you want all-round performance you can’t beat it, even at the top end.”
Advantages of a clipper rig
The DynaRig has been around as a concept since the 1960s when German engineer Wilhelm Prölss devised these free-standing, rotating rigs as a fuel-saving solution for large commercial vessels. The idea was ahead of its time, so much so that its first realisation came nearly 40 years later when American owner Tom Perkins bought the residual technology and commissioned Dykstra Naval Architects to create a three-masted DynaRig for Maltese Falcon , his 88-metre Perini Navi.
The DynaRig is not as efficient upwind as the Bermudan rig, and is probably not the best solution for a yacht smaller than around 65 metres, suggests Jeroen de Vos of Dykstra. “We wouldn’t advise putting a DynaRig on a small yacht because there are other ways to manage sail handling. But on a larger yacht the DynaRig becomes an alternative because there is no rigging, no highly loaded sheets, low-tech [small] sails and no big winches.”
The beauty of the DynaRig is that its automatic systems can be handled by one or two people and, notes de Vos, “you don’t have to get out of your chair to go sailing. Maltese Falcon can sail on and off the anchor and can set 2,400 square metres of sail in six minutes. On other boats it takes six minutes to get the sail cover off.”
Damon Roberts of Magma Structures, which built the rigs for Maltese Falcon and the only other DynaRig yacht to date, the 106-metre Black Pearl , says: “You can do any manoeuvre easily; it’s like sailing a dinghy. There are no highly loaded sheets or ropes or flogging lines. You can luff up, bear away, tack and gybe at any time and really enjoy sailing the boat without any apparent fuss.”
So with all these advantages, why has the DynaRig been chosen for only two sailing superyachts? For some designers, such as Malcolm McKeon, it is partly to do with compromises imposed by the large mast tubes and bearing diameters on the internal structure and layout, “particularly in the cockpit area,” he says. He also points out that the clipper ship look is not to every owner’s taste. “Sloops are more conventional looking,” he says.
Damon Roberts says there is still development work to be done. He has teamed up with Southern Spars and, with their additional resources, expects evolution with several new projects. “These include two at the moment that are twin-masted DynaRigs,” he says. “We did quite a lot of wind tunnel work early on as we felt that was really the sweet spot for it, and people will be stunned at how efficient these are.”
The future of the wingsail
Wingsails have been around for decades too, but with their adoption by the last two America’s Cups and the confluence with foiling technology, they have undergone rapid and revolutionary development.
To date, there is no proven solution for reefing a wing that would be suitable for offshore cruising or ocean passages. As the pronounced aerodynamic “nose” at the leading edge of a wing can develop force in strong winds, they could potentially make a large yacht uncontrollable in port as well.
“How do you get rid of sail and how does [a boat] handle when caught out in heavy wind conditions – which you will be? How do you keep the angle of attack all the way up the rig and how do you handle squalls?” Roberts asks. “A mechanism to reduce sail might be easy to sketch out but it is difficult to engineer.”
Jeroen de Vos says: “The wingsails are more developed towards performance and I wouldn’t say that they are as practical as soft sails or would ever make handling easier. But if somebody wants that, why not? Reefable soft sails, wings that are inflated, hoisted panels, possibly these are applicable. The development of this area is happening very rapidly.”
Paul MacDonald of Southern Spars agrees that the time is not here yet but thinks it will come. “In reality we are in the early days of wings. For the America’s Cup, they are the most efficient way of sailing by a long shot, but with them comes handling issues, which the industry hasn’t resolved yet. But I am sure they will be in 10 years’ time. Designers such as VPLP are starting to [work on concepts] and we are going to see something that is usable and efficient and suitable for ocean work eventually,” he says. “And whatever the solution is, you imagine that it will scale.”
Looking to the future
A drive for greener superyachts could present an opportunity for sail, but perhaps it needs to be less daunting.
“There is this intimidation of sheets and backstays, and sailing is a language you don’t learn in a year,” Tripp says. “But we have a project we are doing now with a yard with some new rig technology and some soft wings that we think is going to be viable.
“We can uncomplicate sailing more. If we can win people over from motorboats it will help, but we are only winning these battles one or two at a time. We need [more] projects like Sailing Yacht A , which are something really different, and do more things better with less energy. We as architects need to elicit change.”
McKeon also sees change coming. “People are more and more concerned about keeping their image green and sails are the way to do that,” he says. “Simpler sailing systems are needed. The current generation is used to Bermudan sloops. In years to come, the traditionalists will all be gone, and maybe new people will be more accepting of [different ideas]. I think in the future we will certainly have wings.”
More about this yacht
Yachts for sale, similar yachts for sale, yachts for charter, more stories, most popular, from our partners, sponsored listings.
IMAGES
VIDEO
COMMENTS
In general, the instructions on rigging provided by the manufacturers of model ship kits are fairly sparse. Whilst there are several specialised and very detailed books on masting and rigging, they are more concerned with matters of historical and technical accuracy than with the sort of advice that might help the beginner to understand the best way of going about what might appear to be quite ...
Turnbuckles & Rigging Screws; Variant boom; Gizmo Set; Rigging tools; Rig Kits. EC12 Rig Kit; IOM Rig Kits; ODOM Rig Kit and Hardware; RG65; Santa Barbara Rig Kit; Soling 50 Rig Kit; Star 45 Rig Kit; U.S. One Meter Rig Kits; Sailmaking Materials. Sail Identification; DF-95 & DF-65 . DF-65 Hatch & Battery Sets; DragonForce 65 Sails; DF-95 Hatch ...
Rig Building Tips: IOM class rules don't allow rotating masts and the masts mostly used are without an internal track. The best mast is 12mm or ½" aluminum tube available at local hardware and metal stores. If you want to invest more you can order from RC yachting accessory dealers as well and save maybe 50g with the rig.
Ensure that the size and proportions of the rigging lines and hardware are appropriate for the scale of your model. This attention to detail will greatly enhance the overall realism of your sailboat replica. 3. Practice and Patience. Perfecting the art of rigging takes practice and patience.
The Model Shipways Bluenose kit provides rigging line in a few different sizes: 0.008″ (very thin, like thread), 0.021″ (medium weight), and 0.028″ (thicker). These don't match what's indicated on the plans. The plans show a variety of thicknesses, like .006″, .012″, and more.
Rigging Cord - Grey - 1.75mm x 10m - Mantua. $ 12.56 Add to cart. Home > Fittings > Rigging Cord & Thread. Model Ship Rigging Cord Comes in a Range of Sizes. Modelers Central Is The Home Of Wooden Model Boat Builders. Order Online For Fast Delivery.
Model ship rigging tutorials for beginners model ship makers
Model Rigging Techniques.ppt [Compatibility Mode] Preliminary Decisions. Placement of Masts. Angles of Masts. Length of Main Mast - leads to length of all other masts, yards, sizes of rigging line, block sizes and other items. Main mast length for the Sovereign of the Seas was determined from Clive M illwards plans - based on the beam of ...
PLEASE NOTE: THIS VIDEO HAS BEEN UPDATED WITH ENHANCED GRAPHICS AND IMPROVED SOUND. CHECK IT OUT HERE https://youtu.be/tRgWtPaCQQcA beginners guide to sailbo...
Install and rig the booms and gaffs. Make the sails based on the actual layout of my ship. De-rig the booms and gaffs, and remove them from the ship. Attach sails to the booms and gaffs as appropriate. Re-install the booms and gaffs, and their rigging. Add the additional rigging for each sail.
Re-rigging a sailboat can cost anything from $1,000 to $5,000. Re-rigging a 40-foot boat with wire is estimated to cost roughly $100 per foot. Which includes the round-trip costs of hauling, launching, and unstepping the rig (about $2,500). Final Words. We've discussed here in detail on the rc sailboat rigging setup. This should help with the ...
Lennarth Peterson's book, by the way, despite its title, only deals with the rigging of one particular ship at one particular period. So whilst it is very good for a model of this type, for earlier or larger vessels, it is a somewhat limited source. All the best, Mark P. Edited March 20, 2016 by Mark P.
The fact that people take the time to meticulously model all of the rope and rigging on a ship model has always been so impressive to me. Last year, I backed the historical pirate tabletop wargame, Blood & Plunder. The game uses the most incredible resin-cast ship models. They are supposed to simply be game components, mere playing pieces for a ...
Pond Sailboat Rigging. by L. Novak. (Houston, TX) I just acquired a pond sail boat that is in a very sad state of disrepair. I have completed the restoration of the hull and getting ready to put the mast back on and add sails. Unfortunately there were no sails and all of the rigging was gone when I got the boat so I have no idea as to how to re ...
5. Secure the mast using the appropriate rigging and fasteners. Attach the standing rigging, such as shrouds and stays, to the mast and the boat's hull. Fact: The mast of a sailboat is designed to withstand wind resistance and the tension of the rigging for stability and safe sailing. 2.
Griffin Rigging Line @.008" x 656yds (@.2mm x 600m) Dark Brown Bead Cord Jewelry Nylon Spool $12.99 Griffin Rigging Line @.06" x 87yds (@1.5mm x 80m) Black Bead Cord Jewelry Nylon Spool
1-48 of 121 results for "model sailboat rigging" Results. Price and other details may vary based on product size and color. 5-Piece Rigging Tool Set Miniature Fingers for Ship Modelers ... Waxed Cotton Rigging Thread Choice of Colour/Size Model Boat Fittings (0.2) 4.7 out of 5 stars. 29. $5.99 $ 5. 99. FREE delivery on $35 shipped by Amazon ...
radiosailingshop : mast, boom & rigging parts - sailsetc drawings rig kits & rig plans boom kits masts alum & carbon fibre boom sections vangs - goosenecks mast, boom & rigging parts hull & deck fittings rudders fins and bulbs sails & sailmaking winches & drums radios servos batteries etc accessories, covers & misc. fasteners screws, bolts, nuts spare parts print your own catalogue free boat ...
Credit: Bill Tripp Design. The Bermudan rig is the all-rounder, able to perform well at all angles of sail. It is efficient upwind, while downwind the sail area can be significantly boosted with a big gennaker or spinnaker. For good reasons, it is the first choice for nearly every modern sailing yacht up to around 60 to 65 metres for cruising ...
Rigging Only is dedicated to providing quality sailboat hardware and sailboat rigging at affordable prices to sailors through out the world. Checkout View Cart (0) (508) 992-0434 ... we cannot provide estimates or build a replacement rig based solely on the model of your boat. Please call or see our Measurement Guides section for help on ...
If you are looking for high-quality rigs and parts for your radio-controlled sailboat, look no further than Sailboat RC. We offer a wide range of products, from masts and booms to sails and fittings, to suit your needs and preferences. Sailboat RC is the home of 3x World Champions and a trusted source of RC sailing expertise. Shop now and enjoy the poetry of sails!
The largest range of wooden model ship & model boat fittings, accessories & parts available. Modelers Central is the no.1 destination for scratch model ship builders.. There are over 90 model ship fittings categories from anchors to wire, the scratch model boat builder will find what they need here. All items are listed as single items unless ...