- Sign In or Register
- Boats for Sale
- Research Boats
- Sell a Boat
- Search Alerts
- My Listings
- Account Settings
- Dealer Advertising

Myacht Boats for sale
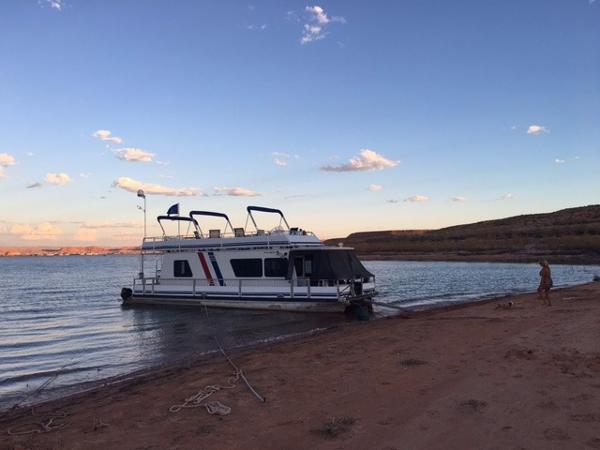
1998 Myacht 45X14
Page, Arizona
Make Myacht
Model 45X14
Category Houseboats
Posted Over 1 Month
1998 Myacht 45X14 Ski Hab 1998 Myacht 4314,1998 Myacht 43 x 14 This is a Customized single owner luxurious Houseboat. .This boat is turn key and ready to enjoy. Owners are upgrading. Complete renovation in 2013.New Dometic fridge with ice maker New custom Sea Furniture Salon couch that converts to King Size king Sleeper. upgraded Captain Chair. Dinette which sleeps 2. upgraded Mattress Master Bed. Upgraded faucets, Water purification system, upgraded water pumps.Furnace great. Engines overhauled 2012 with renovated and repainted covers.Upper Helm. Fully covered upper deck with "Custom Covers" Bimini s. New Onan Genset installed 9/15 with 22 hours. Roof top Air Conditioner cools great Solar Panel on roof. Enclosed Front Screen area.Exterior fully restored and is kept waxed and out of sun. Teak rear swim platform. Swim ladder This boat can go out on the lake for weeks . Completely self contained.In covered slip at Bullfrog that is transferable. Great fuel Mileage. $65000.00
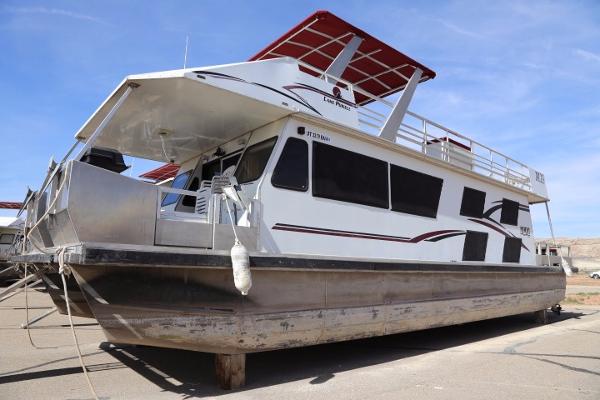
2000 Myacht Houseboat 53x15
Model Houseboat 53x15
2000 Myacht Houseboat 53x15 Myacht! 'M-28' is powered by twin Mercruiser Big Foot engines with 60 horsepower each. two staterooms with two queen beds the lower double berth with two beds two full bathrooms stove, oven, microwave and twin dometic refrigerators. The vessel also comes with a VHF radio, compass, stereo system, plenty of furniture, air conditioning, heating, a generator, battery charger, shore power and water heater. This ready to head out vessel is In dry dock Near Wahweap Boat Rentals ALL RETIRED ASSETS ARE sold "AS IS" "WHERE IS". there will be no concession or exceptions made. AS IS condition is set from the date a 10% deposit is made on the vessel. call today to set up a showing
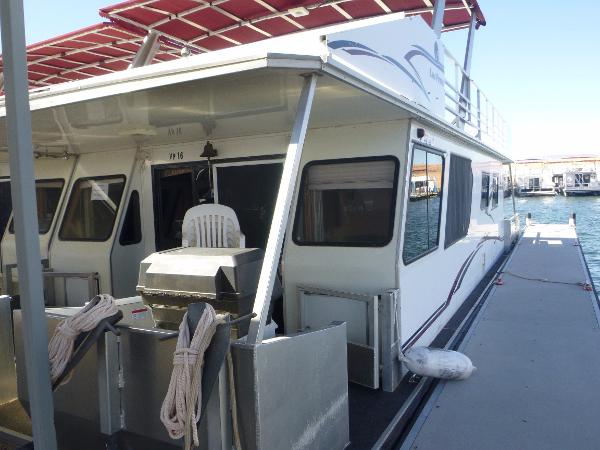
2005 Myacht Voyager XL Houseboat
Model Voyager XL Houseboat
2005 Myacht Voyager XL Houseboat Retired Bullfrog Rental Houseboat VP16 is a 46x16 Myacht Voyager XL with twin 60hp 4stroke mercruiser Outboards. an Onan Generator. two staterooms and one head with shower. ALL RETIRED ASSETS ARE sold "AS IS" "WHERE IS". there will be no concessions or exceptions made. AS IS condition is set from the date a 10% deposit is made on the vessel.
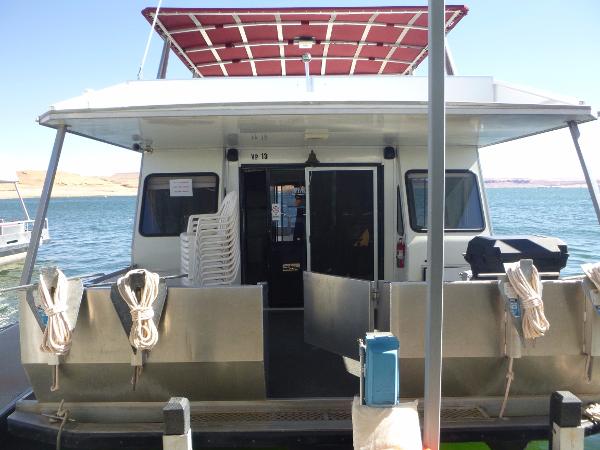
2006 Myacht Voyager XL Houseboat
2006 Myacht Voyager XL Houseboat Retired Bullfrog Rental Houseboat VP13 is a 46x16 Myacht Voyager XL with twin 60hp 4stroke mercruiser Outboards. Onan generator. two stateroom and one head with shower. ALL RETIRED ASSETS ARE sold "AS IS" "WHERE IS". there will be no concession or exceptions made. AS IS condition is set from the date a 10% deposit is made on the vessel.
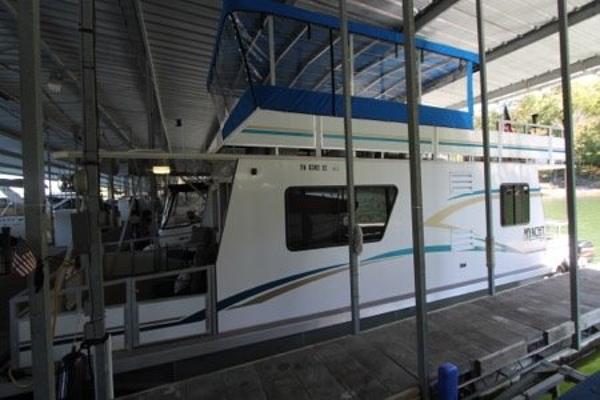
2003 Myacht 12' x 35'
Monticello, Kentucky
Model 12' X 35'
2003 Myacht 12' x 35' Twin 75 hp Mercury Outboards, 4Kw Onan Generator, Battery Charger, Remote Spotlight, VHF Radio, CO Detector, Depth Finder, DVD Player, BluRay Player, New Flat Panel TV, Roof-Top AC with Heat Strips, Insulated Walls and Ceiling, Full Size Sleeper Sofa, Queen Size Master Bed, Full Bathroom with Shower, 12 x 16 Canvas Party Top with Enclosure on Three Sides, Swim Platform, Spiral Stairs, 3 25 Gallon Fuel Tanks, 50 Gallon Fresh Water Tank, 6 Gallon Water Heater, 30 Amp Shore Power. Stays With Boat:All Interior Furniture, TV, DVD Player, Buoys, Tie-Up Ropes, Anchor, Life Jackets and Fire Extinguiser.
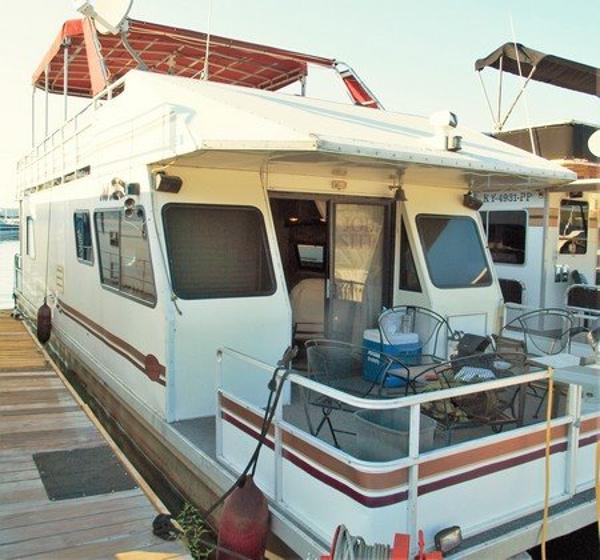
1997 Myacht 12' x 47'
Model 12' X 47'
1997 Myacht 12' x 47' Aluminum Pontoons Twin Mercrury 50 HP Outboards (Hrs Unknown, Great Fuel Economy and NO winterizing), Onan 7 KW Generator (Hrs Unknown), Battery Charger, Dual Controls, Radar Arch, Remote Spotlight, VHF Radio, CO2 Detectors, AM/FM Stereo, DVD Player, iPod Ready w/ Speakers on Top and Bottom, 2 TV's, 2 Roof Top AC/Heat Units, Separate Heat System, Working Flybridge, Party Top with 15' Canvas Top, Roof Top Bar, Roof Top Storage, Refrigerator is 110V OR Propane, Propane Stove, Microwave, 2 Bedrooms: Queen Size Master and Full Size Stateroom w/Sleeper Sofa in Salon, 1 Full Baths, 200 Gallon Holding Tanks, Water Slide, Swim Platform, Rope Lights Front and Roof, Hi Aluminum Rails Throughout for Safty, Spiral Rear Stairs, Rail Canvas, 1-50 Gallon Fresh Water Holding Tank, 2-50 Gallon Fuel Tanks, 2-30 Amp Shore Power. Roof is membrane type with no gelcoating. This boat is built on 2 huge heavy gauge aluminum pontoons for durability and stability. Great "Starter" boat or economical "Live aboard!" Easily moved to the lake of your choice! Stays With Boat:All Front & Back Deck Furniture, All Interior Furniture, All Top Deck Furniture, Assorted Small Kitchen Appliances, Assorted Dishes, Pots, Pans, Silverware, etc. All TV's, All Exterior and Interior Decorations, Linens, Towels, Custom Bedspreads, Buoys, Tie Up Ropes, Anchors and numerous other assorted items as they exist. Just too many to list! $50,000 w/out slip $58,000 w/slip
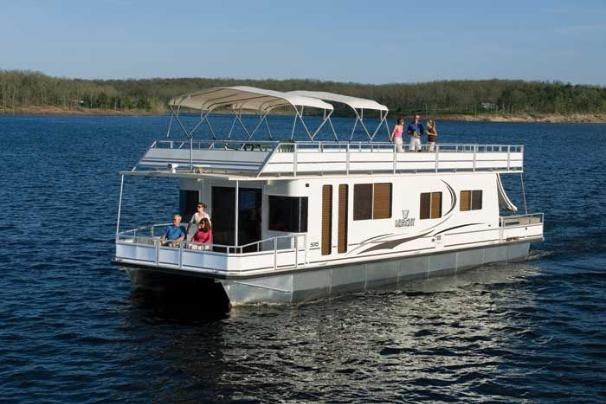
2008 Myacht 5015 Houseboat
Prescott Valley, Arizona
Model 5015 Houseboat
Category Pontoon Boats
2008 Myacht 5015 Houseboat The MYACHT Dual 5015 houseboat is your clubhouse on the water. Its standard floor plan includes two bedrooms, a full bath and oversized galley. The bath is highlighted by a maple-finish, full-width vanity with Corian countertop and beveled mirror with lightbar. Floor-to-ceiling windows in the main salon assure plenty of natural light. Myacht houseboats are amoung the most fully equipped with construction features and luxury amenities that come as standard equipment. Myacht houseboats make living on the water a reality.Options on this model include: Full function fly bridge with Mathers Micro Commander Electronic controls, dual air conditioners, rearroof extension with spiral stairs, water slide, radar arch with bimini top, fixed party top, boarding ramp, remote spotlight, VHF radio. custom gooseneck trailer and lots more!!

1998 Myacht Houseboat
Model Houseboat
1998 Myacht Houseboat A very nice Myacht! " Dream Maker" is powered by twin Mercruiser Big Foot engines with 60 horsepower each and sleeps ten using two staterooms and two lower berths with two queen beds and has two full bathrooms. The kitchen offers a full dinette, stove, oven, microwave and two refrigerators. The vessel also comes with a VHF radio, compass, stereo system, plenty of furniture, air conditioning, heating, a generator, battery charger, shore power and water heater. This ready to head out vessel is Currently in Dry Storage at Bullfrog
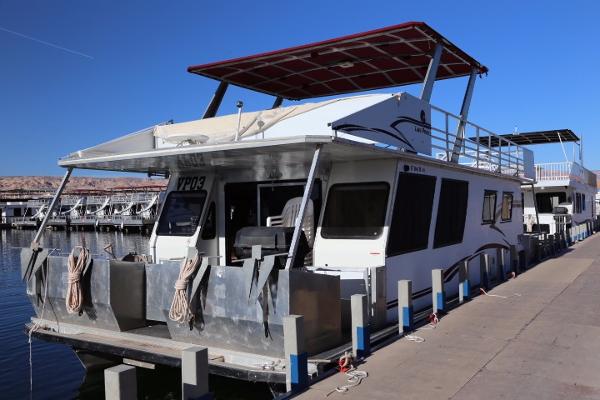
2004 Myacht Voyager XL Houseboat
2004 Myacht Voyager XL Houseboat Retired Bullfrog Rental Houseboat VP03 is a 46x16 Myacht Voyager XL with twin 60hp 4stroke mercruiser Outboards. two stateroom and one head with shower. ALL RETIRED ASSETS ARE sold "AS IS" "WHERE IS". there will be no concession or exceptions made. AS IS condition is set from the date a 10% deposit is made on the vessel.
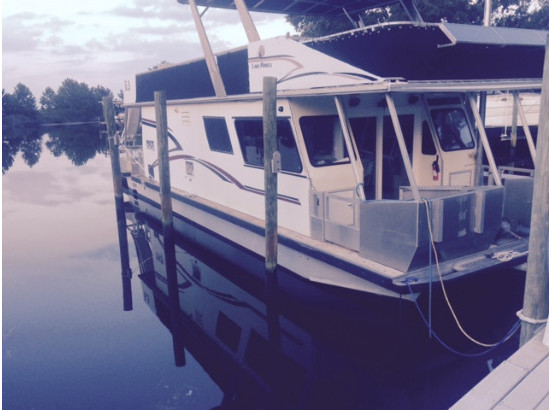
2000 Myacht R-3
Panama City Beach, Florida
2000 Myacht R-3,TRADE ---2000 Myacht House Boat for sale46'x15'Twin 2006 -60Horsepower HP Mercury 4 strokes ( only approx. 110 hrs on them)Inside has been started on remodel. New Cabinets AND New AppliancesTRADE let me know what you have or sale ($45000 OBO)located in Panama City Beach [email protected] $45000
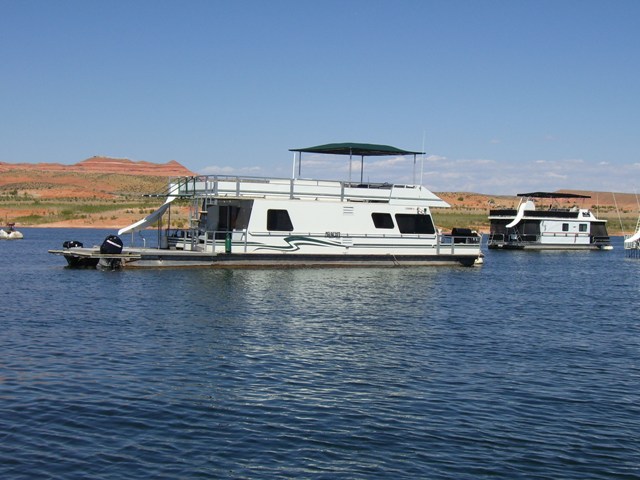
2001 Myacht Multi Owner Houseboat
Model Multi Owner Houseboat
2001 Myacht Multi Owner Houseboat Join Ownership on the Tanya II, powered with twin 90 hp engines, sleeps 8, full galley, air conditioning, generator, inverter, battery charger (solar), shore power, new slide in 2009. The week available is June 1,2014 for $3,500 , Aug 25 2014 for $3500 ; May 24 2014 for $2800 ; Sept 27, 2014 for $2800 . Buoyed at Bullfrog Marina.Call our office for details.
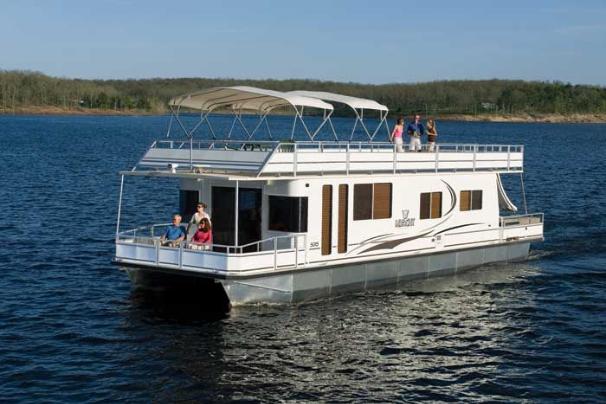
2007 Myacht 5015 Houseboat
Iuka, Mississippi
Category Powerboats
2007 Myacht 5015 Houseboat New listing...more pictures and specs coming soon! Our listing has a hardtop on the bridge!!
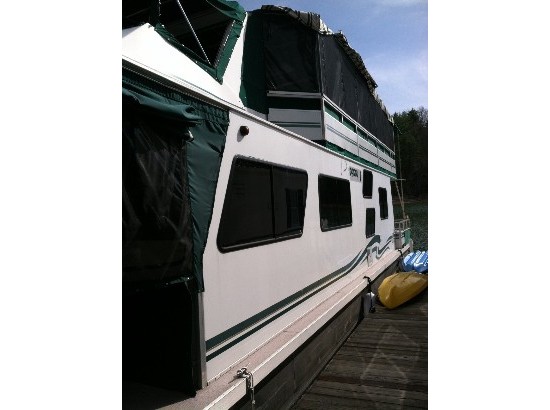
2006 Myacht 5015
Bristol, Tennessee
2006 Myacht 5015, 2006, 5015 Myacht with twin 60 HP Mercury outboard engines; with helm and fly bridge controls. Amenities include generator, air conditioner, gas heater, Electric refrigerator, Queen master bed, 2 full size beds (bunks), and full bath with shower. Upper deck enclosed on sides and back with screen and plastic role up rain covers. The Interior is completely refinished, new gas range, new counter top and sink, new laminant floors, and all walls and trim refinished.The boat is located on South Holston Lake in Bristol TN. Addintional contact numbers include 423-361-5815 ;276-591-7000 $82500, 2766695249
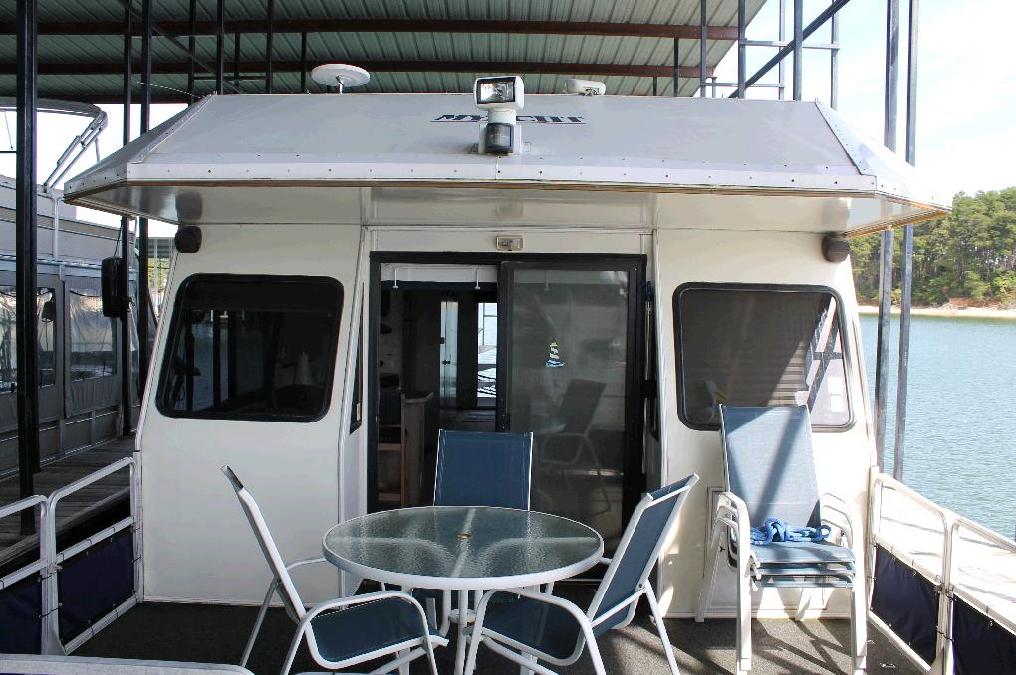
1997 Myacht 15x47
Buford, Georgia
Model 15x47
1997 Myacht 15x47,
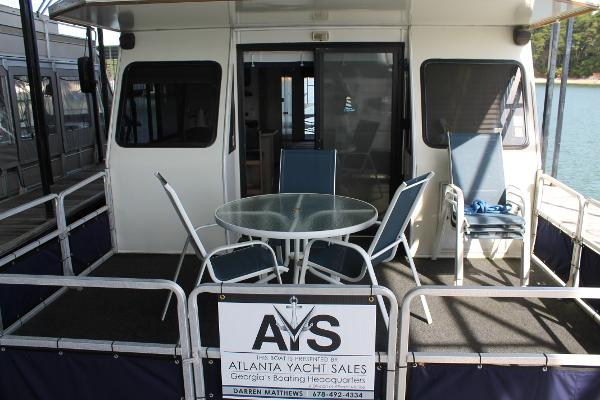
1999 Myacht 48
Flowery Branch, Georgia
1999 Myacht 48 Rare 50' find on fresh water. Motors replaced in 2005. Boat is loaded with generator, heat, A/C, and fly bridge. A rare opportunity to get on the water in a liveaboard houseboat for way under $100,000. All trades considered. Worth the trip to see it in person!
Narrow Results
Current search reset all.
- Keyword: myacht
- Myacht (20)
- Myacht Houseboats (4)
- CATAMARAN CRUISER (2)
- Myacht Houseboat (1)
- TRACKER BOATS (1)
- Houseboats (18)
- Powerboats (11)
- Pontoon Boats (1)
- Rib Boats (1)
- Arizona (13)
- Georgia (8)
- Florida (4)
- Kentucky (4)
- Tennessee (4)
- West Virginia (4)
- California (2)
- Oklahoma (2)
- Massachusetts (1)
- Mississippi (1)
- New York (1)
- Pennsylvania (1)
- Search Title Only
- Has Picture
- Include Sold Listings
Showcase Ads

2016 Craigcat Elite
Crawfordville, FL

2018 Phoenix 20 OHX
Murfreesboro, TN

2006 Correct Craft Air Nautique 226 TE
Big Lake, MN

2017 Yamaha 242 Limited S E-Series

1994 Myacht Houseboats Custom
Key West Naval Air Station, FL

2003 ProSports 2660 CC
Key Largo, FL
Create Alert
Please, name this search
Select Interval
Alert Successfully Created

Research Myacht
- Research New Boats
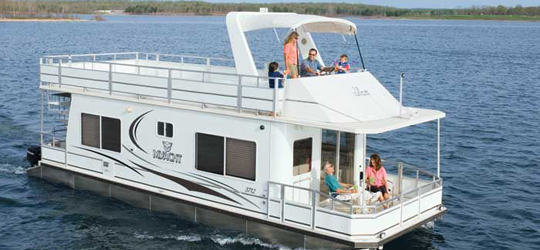
About Myacht
Myacht - 3712 2008
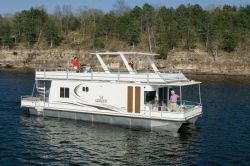
Myacht - 4515 2008
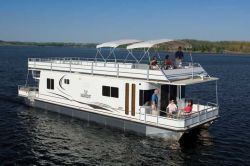
Myacht - 5015 2008
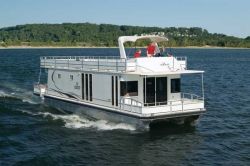
Myacht - 5515 2008
Refined results, refine results.
- House Boats (4)
Boat Years:
- Most Popular Categories
- Boat Covers
- Boat Propellers
- Bimini Tops
- Boat Motors & Parts
- Boat Motors
- Boat Seats & Pontoon Furniture
- All Categories »
- Boats for Sale
- Boating Forums

- 1-800-980-7206

- iboats Dealer Login
- Boat Financing
- Boat Insurance
- Boat Transportation
- Advertise Here
- Getting Started
- Account Login
- New Boat Information
- Buyers Guide by Boat Brand
- Buyers Guide by Boat Types
- All Boats For Sale
- Search by Boat Brand
- Find a Dealer
STAY CONNECTED
Sign up for our Newsletter to Receive the Latest Deals, News and More.

OUR COMPANY
Explore iboats, connect with us.

Welcome to Search-Boats The Ultimate Boating Marketplace
Welcome to our premier boats and yachts marketplace, where the seas of opportunity await! Whether you're a seasoned sailor, an avid fisherman, or a leisurely adventurer, our platform is designed to connect boat enthusiasts with their dream vessels. Explore our diverse selection of motorboats, sailboats, and fishing boats, each offering a unique experience on the water.
Back to Search Results
2003 Myacht Houseboat W/trailer
- Make: Myacht
- Model: 3508
- Condition: Used
Seller notes
35ft Myacht Houseboat w/trailer, 60hp Mercury outboard, 10,000lbs triple axle trailer w/new tires, Onan Generator, sleeps 6, flat screen tv. Fun trailerable houseboat! We have had it on Rainy Lake at Sha Sha resort for the last 4 years. Everything works perfect! We just don't use it enough. Very Fuel efficient!...
- Specifications
- Location: 564** , Hackensack, Minnesota
Contact us regarding this boat
Contact owner
When you click on links to various merchants on this site and make a purchase, this can result in this site earning a commission.

Who Makes Myacht Houseboats? (The Story Behind The Brand)

Are you looking for something more adventurous than a regular houseboat? If so, you may want to consider a Myacht Houseboat.
These beautiful vessels offer luxury and quality craftsmanship, all while providing a unique and exciting experience.
From their story of humble beginnings to the modern amenities they offer, this article will explore what makes Myacht Houseboats stand out from the competition.
You’ll learn all about their history, quality craftsmanship, wide selection of models, and the benefits of owning a Myacht Houseboat.
You’ll also hear from satisfied customers and Myacht Houseboat owners about their experiences.
So let’s dive in and discover what sets Myacht Houseboats apart from the rest!
Table of Contents
Short Answer
Myacht Houseboats is a company based in Grand Rapids, Michigan that specializes in custom-crafted houseboats.
They are renowned for their quality craftsmanship and use only the best materials available for their builds.
Myacht Houseboats also offers a wide range of services in addition to building custom houseboats, such as repairs, upgrades, and maintenance.
They have been in business since 1979 and have built over 2,000 boats since then.
History of Myacht Houseboats
Myacht Houseboats has been in the business of manufacturing high-quality, luxurious houseboats since 2001, and in that time, the company has established a reputation for providing customers with quality craftsmanship and stylish designs.
The companys commitment to excellence is reflected in its dedication to using only the finest materials and producing houseboats that are designed to combine practicality with comfort.
Myacht Houseboats began with a small team of experienced boat builders and designers who wanted to create houseboats that would stand out from the rest.
The companys founders had a passion for creating something unique and special, and this is reflected in their craftsmanship and designs.
From the beginning, Myacht Houseboats has focused on providing customers with the highest quality craftsmanship, the latest technology, and stylish designs that will last for years to come.
Over the years, Myacht Houseboats has expanded its product line to include a wide range of models, from smaller, more economical houseboats to large, luxurious ones.
All of the houseboats feature modern amenities such as comfortable sleeping quarters, full kitchens, generous storage space, and entertainment areas for family and friends.
Myacht Houseboats also offers a variety of customization options that allow customers to tailor their houseboat to their exact specifications.
Today, Myacht Houseboats remains committed to providing customers with the finest quality houseboats available.
The companys commitment to excellence has earned it a reputation as one of the leading manufacturers of houseboats in the industry.
With its wide selection of models and its dedication to quality craftsmanship, Myacht Houseboats is the perfect choice for anyone looking to enjoy the beauty of the open water.
Quality Craftsmanship

Myacht Houseboats is known for its commitment to quality craftsmanship.
From the moment you step aboard, you can tell that each houseboat is designed with attention to detail.
Every Myacht Houseboat is built using only the finest materials and the highest-grade components.
The company puts an emphasis on using environmentally-friendly and sustainable materials and practices, so you can rest assured that your houseboat will last for many years to come.
The boats are constructed with a lightweight aluminum hull that is both durable and easy to maintain.
The interior of each houseboat is designed with both comfort and convenience in mind, with comfortable seating areas, a full kitchen, generous storage space, and entertainment areas for family and friends.
All of the components are carefully chosen for their quality, such as stainless steel appliances and granite countertops, to ensure that your houseboat will look great and last for years.
Myacht Houseboats also makes sure to include all the latest features and technologies, such as Wi-Fi, so you can stay connected while out on the open water.
With their commitment to quality craftsmanship, you can trust that your Myacht Houseboat will provide the ultimate in comfort and luxury.
Modern Amenities
Myacht Houseboats offer modern amenities to make your houseboat experience comfortable and enjoyable.
All of their houseboats come with comfortable sleeping quarters that are designed for maximum comfort and convenience.
They also feature full kitchens, generous storage space, and entertainment areas for family and friends.
These amenities allow you to truly enjoy your time on the open water without having to worry about basic necessities.
The kitchens are fully equipped with the latest appliances and technology, allowing you to whip up delicious meals while out on the water.
The spacious storage areas provide plenty of room to store all of your items, while the entertainment areas allow you to have a great time with friends and family.
Myacht Houseboats also offer additional features such as outdoor seating areas, outdoor bars, and outdoor grills, so you can take advantage of the beautiful scenery while also enjoying a tasty meal.
These modern amenities not only make your experience more enjoyable, but they also make it easier to maintain your houseboat.
With the help of the latest technology, you can easily keep track of your houseboat’s maintenance needs, such as checking for signs of corrosion, inspecting the electrical system, and making sure your boat is up to code.
This ensures that your experience on the water is as safe and enjoyable as possible.
Myacht Houseboats is committed to providing the highest quality craftsmanship and stylish designs.
Their modern amenities make their houseboats the perfect choice for anyone looking to enjoy the beauty of the open water.
Whether you’re a seasoned veteran or a first-time houseboater, Myacht Houseboats has something for everyone.
Wide Selection of Models

At Myacht Houseboats, customers have a wide selection of models to choose from to ensure they get the perfect boat for their needs.
Whether youre looking for a boat to take out on the open water for a weekend of fishing, or youre looking for a vacation home on the lake, Myacht Houseboats has something for everyone.
The company offers a range of models and styles, including luxury houseboats, weekender boats, and fishing boats.
Each model features modern amenities such as comfortable sleeping quarters, full kitchens, generous storage space, and entertainment areas for family and friends.
The boats are designed to be both practical and comfortable, so youll never have to sacrifice one for the other.
Myacht Houseboats also offers customization options for customers who want to create a one-of-a-kind boat.
With the help of professional designers and builders, customers can customize the exterior, interior, and features of their boat to make it truly unique.
From custom-made furniture to unique paint jobs, Myacht Houseboats can make sure your boat is as unique as you are.
No matter what kind of boat youre looking for, Myacht Houseboats has something for everyone.
With a wide selection of models and customization options, youre sure to find the perfect boat to fit your needs.
Testimonials from Satisfied Customers
When it comes to choosing a houseboat, it is important to know that you are getting a high-quality product.
For this reason, Myacht Houseboats has earned a reputation for offering quality craftsmanship and stylish designs.
To back this up, the company has received numerous testimonials from satisfied customers.
Many of these customers have praised the comfort and practicality of the boats, as well as the modern amenities that are included.
From the comfortable sleeping quarters to the full kitchens and entertainment areas, Myacht Houseboats offers plenty of features that make them well-suited for family and friends.
In addition to the positive reviews, Myacht Houseboats has also earned awards for their craftsmanship and designs.
In 2017, the company won the prestigious Boating Industry Top Products Award.
This award is given to companies that demonstrate a commitment to excellence in the industry.
The testimonials and awards that Myacht Houseboats has earned demonstrate the commitment to quality and craftsmanship that the company has.
With a wide selection of models to choose from, Myacht Houseboats offers something for everyone looking to enjoy the beauty of the open water.
Benefits of Owning a Myacht Houseboat

When it comes to houseboats, Myacht Houseboats stands out from the rest.
They offer a wide selection of models that are designed for both practicality and comfort, and their craftsmanship is second to none.
Myacht takes pride in their attention to detail, and each houseboat is built with the highest quality materials and construction methods.
Owning a Myacht houseboat comes with a number of benefits.
For starters, the houseboats are designed with both luxury and practicality in mind.
With comfortable sleeping quarters, full kitchens, generous storage space, and entertainment areas, Myacht houseboats provide a luxurious and comfortable living space while still being able to navigate the open water.
In addition, Myacht houseboats are designed to be energy efficient, so you can enjoy your time on the water without worrying about expensive fuel costs.
The houseboats also come with a variety of safety features, including sturdy construction and extra-wide decks for easy maneuverability.
Finally, Myacht houseboats are designed to last for years to come.
With regular maintenance, the houseboats can provide years of enjoyment and reliability.
Myacht offers a variety of services and warranties to ensure that their houseboats are ready for any adventure.
When it comes to houseboats, Myacht Houseboats is the premier option.
With a wide selection of models to choose from, Myacht offers something for everyone looking to enjoy the beauty of the open water.
From luxury and comfort to energy efficiency and safety, Myacht houseboats provide all the benefits of living on the water.
Experiences of Myacht Houseboat Owners
Myacht Houseboats customers come from all walks of life, but they all share one thing in common: a passion for life on the open water. From avid boaters to first-time houseboat owners, Myacht Houseboats customers appreciate the convenience and luxury that comes with owning a houseboat. Many Myacht Houseboat owners have used their houseboats for weekend getaways, family vacations, and romantic retreats. With modern amenities such as comfortable sleeping quarters, full kitchens, generous storage space, and entertainment areas, Myacht Houseboats make it easy for owners to truly enjoy the beauty of the open water.
Myacht Houseboat owners have shared countless stories of the wonderful experiences theyve had while cruising in their houseboats.
From fishing trips to sightseeing adventures, Myacht Houseboat owners have experienced a plethora of different activities while out on the water.
People have even used their Myacht Houseboats to host special events like birthday parties, family reunions, and weddings.
No matter what type of experience Myacht Houseboat owners are seeking, they can be sure that their houseboats will provide a luxurious and comfortable ride.
From the spacious cabins to the modern amenities, Myacht Houseboats are designed to make life on the open water enjoyable for everyone.
So if youre in the market for a houseboat, consider a Myacht Houseboat and let your life on the water begin!
Final Thoughts
Myacht Houseboats has been providing high-quality, luxurious houseboats since 2001, and their quality craftsmanship, modern amenities, and wide selection of models have earned them a reputation of excellence.
The experiences and testimonials from satisfied customers show that Myacht Houseboats offers something for everyone looking to enjoy the open water.
If youre interested in owning a Myacht Houseboat, take a look at the selection of models available and explore the benefits of owning one today!
James Frami
At the age of 15, he and four other friends from his neighborhood constructed their first boat. He has been sailing for almost 30 years and has a wealth of knowledge that he wants to share with others.
Recent Posts
Does Your Boat License Expire? Here's What You Need to Know
Are you a boat owner looking to stay up-to-date on your license requirements? If so, youve come to the right place! In this article, well cover everything you need to know about boat license...
How to Put Skins on Your Boat in Sea of Thieves? (Complete Guide)
There is a unique sense of pride and accomplishment when you show off a boat you customized to your exact specifications. With Sea of Thieves, you can customize your boat to make it look like your...
- Boats for Sale
- United States of America
Houseboats for sale in United States of America
Receive new listings in your email
Manufacturer
For Sale By
41 New and Used Houseboats
Sumerset Houseboat
Chestertown, Maryland (United States of America)
OFFERED BY:
Yacht Sales International
Notice: Call today for a tour of this superbly equipped, top-of-the-line, fully self-contained floating home and excursion vessel. General This Sumerset 70x18 luxury houseboat is diesel power...
Hilburn Houseboat
Buford, Georgia (United States of America)
Beautiful home on the water! Come check it out today! Are you in search of the perfect vessel for your next adventure? Look no further than the Hilburn Houseboat! With its vers...
Trumpy Houseboat
Palm Beach, Florida (United States of America)
Luke Brown Yachts
DOVETAIL, John Trumpy and Sons contract #446 built in 1972 in Annapolis, Maryland as one of the last of the popular “Houseboat” models built.Originally named GERIFAY, she...
Sunline 44 Houseboat
Tonawanda, New York (United States of America)
Updated, and Upgraded 1969 Houseboat, re-plated in 1995 Check out this 1969 Sunliner Houseboat 44. Floating cottage! Waterfront views every day, with the luxury of being able t...
Sumerset 6414 Houseboat
Deland, Florida (United States of America)
United Yacht Sales
Introducing the Exquisite 1989 Sumerset 64' x 14' Yacht - A Masterpiece of Luxury and Refinement! Prepare to be captivated by this remarkable vessel, where every detail has been carefully cura...
Mastercraft House Boat
Truth Or Consequences, New Mexico (United States of America)
Mastercraft Houseboat in good condition. Perfect for a home away from home on the water! Located in Truth Or Consequences, NM this houseboat is currently in a slip which is tra...
Custom Built 50-Foot Houseboat
Fulton, Mississippi (United States of America)
Beautiful Homemade Custom Built Houseboat. Low Hours. Twin Outboard Mercury Engines. ********************** CERTIFIED SINGLE OWNER ********************** This Custom-built 50-f...
Bullhead City, Arizona (United States of America)
***SALE PENDING*** A well cared for Houseboat with new laminate flooring installed This well-cared-for houseboat has a sleeping capacity for four comfortably. There are two A/C...
THOROUGHBRED 6516
Introducing the Exquisite 2004 65' x 16' Thoroughbred Yacht ? Where Luxury and Modernity Converge! Prepare to be mesmerized by this exceptional vessel, meticulously crafted to offer the utmost ...
Godfrey Pontoon Custom Houseboat
Crandon, Wisconsin (United States of America)
' triple toon with 150 HP mercury motor, bunk trailer included. Curtains can be fully enclosed or screened or opened. 2000 watt Yamaha generator This 1998 Godfrey Pontoon boat,...
GLOBAL BOATWORKS 40 Floating Home
Boston, Massachusetts (United States of America)
MAJOR PRICE REDUCTION - Owner is off the boat and ready to sell. "La Regina" can be moved anywhere on East Coast US or go to a marina very near Boston with great downtown and sunset views - buy...
Twin Anchors 60
Searchlight, Nevada (United States of America)
A nice Double Decker Twin Anchors, Twin 4.3L Mercruisers, 3 Bedrooms, Fireplace, Central Vac, Hot Tub, and More! This 1996 Twin Anchor is perfect for any large family or friend...
Sunstar 5515
Investment Opportunity: 2014 SunStar 55′ Houseboat in Holly Bluff Marina. Discover a unique investment opportunity in the heart of the St. Johns River, Florida. Own a 2014 SunStar 55′ X 15′ Hou...
Gibson Boatel 36
Rio Vista, California (United States of America)
CLEAN LIVEABOARD OR WEEKENDER READY FOR YOU NOW. COME AND GET IT WHILE YOU CAN! Gibson makes a nice houseboat. Travel to any marina in the West and you will most likely see one...
Cincinnati, Ohio (United States of America)
***SALE PENDING*** 1967 Tucker Marine Cruiser 40. Great liveaboard or weekender, ready to make your own! This 1967 Tucker Marine Cruiser was launched this season after 2 plus y...
River Queen 44
Texarkana, Texas (United States of America)
RIVER QUEEN 44 HOUSEBOAT LOVINGLY RESTORED TO FULL GLORY GREAT LOOP This 1974 River Queen is a 44' houseboat located in Texarkana, Texas. Manufactured and designed near Lake Mi...
Horizon 4614
1997 Horizon Houseboat "EXETER" size is 46' X 14'. The main salon includes the helm and Captain's chair, futon and small flat screen TV, dining table and 4 chairs plus the galley and storage cl...
C E Ryder 30
Providence, Rhode Island (United States of America)
Custom-built Houseboat ready for occupancy, or use it as an in-city Air BnB. Offered for sale is this custom-built Houseboat that is currently moored in downtown Providence. Th...
Harbor Master 520 Wide Body
Homosassa, Florida (United States of America)
***SALE PENDING*** Houseboat loaded with options! What a great way to live on the water! This 2003 HARBOR MASTER 520 WIDE BODY has tremendous potential. It has not been used mu...
Gibson 44 Executive
Larose, Louisiana (United States of America)
Very Nice Condition! Spacious Top Deck! Great for Cruising and Relaxing and Entertaining! This 2001 Gibson Executive Houseboat is located in Larose, LA. The houseboat is perfec...
Aqua Chalet 4614
2000 Aqua Chalet houseboat Dolphin size is 46' X 14'. The main salon includes the helm and Captain's chair, futon and small flat screen TV, dining table and 4 chairs plus the galley and storage...
Sumerset 14x60
Broken Bow, Oklahoma (United States of America)
' 1988 Sumerset houseboat. Hot tub on top deck. Bunk beds and Queen bed! Good condition! Are you looking for a great houseboat? Look no further than this 1988 Somerset 14X60! H...
Three Buoys 42
Carefree, Arizona (United States of America)
Three Bouys 42' Houseboat, Updated Flooring, Loft, Bar, Large Upper Deck! 1985 Three Buoys houseboat 42' in the water. Buyers can contact the marina regarding transferability o...
Waterway 63
West Sacramento, California (United States of America)
Spacious Waterway! Beautiful, roomy interior with all the bells and whistles! Ready for your next adventure! If you are looking to live aboard an elegant and roomy houseboat in...
Master Fabricators 47
Oroville, California (United States of America)
houseboat -- can you imagine a better place to live or spend the summer? This MasterFab houseboat was built in 1982, soundly constructed of steel pontoons and solid steel found...
Pacific Boats 56
Stockton, California (United States of America)
Very Clean! Ready to be a floating oasis or A liveaboard! This houseboat was built in 1997, soundly constructed of steel pontoons and solid steel foundation, with the structure...
Holiday Mansion Coastal Barracuda
JACKSONVILLE, Florida (United States of America)
Worldwide Yacht Sales
This 38' Holiday Mansion Coastal Barracuda is as closeto "turn key" as possible for her new owners. This recently fully upgraded vessel has a complete electrical makeover, as well as, a r...
Custom Waterwoody 33
Salem, Oregon (United States of America)
W S Yacht Brokers LLC
Waterwoody - A Cozy Retreat on the Water Welcome aboard the Waterwoody, a charming 33-foot houseboat designed for those seeking a unique and adventurous living experience on the water. Crafted w...
* Price displayed is based on today's currency conversion rate of the listed sales price.
HOUSEBOATS BY STATE
- Houseboats in California (5)
- Houseboats in Florida (11)
RELATED SEARCHES TO HOUSEBOATS
- What's New / Blog
- Buying Guide
- Manufacturers
- New Houseboats
- Used Houseboats
- Small Houseboats
- Pontoon Houseboats
- Trailerable Houseboats
- Floating Home/Cottage
- Living on a Houseboat
- Building a Houseboat
- Parts & Accessories
- Solar Panels
- HB Gift Ideas
- "How To" Books
- "How To" Videos/DVD
- FAQ's Questions
- Free HB Magazine
- Houseboat Directory
- Advertise Here

Myacht Houseboats
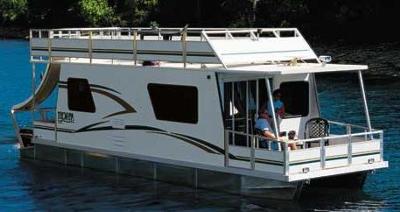
A typical Myacht Houseboat
Click here to add your own comments
Return to Review of Houseboat Manufacturers .
Continue Reading Our Popular Pages
Our collection of houseboat ebooks.

We just love houseboats, do you? Join our monthly HB Insider for free
Would you prefer to share this page with others by linking to it?
- Click on the HTML link code below.
- Copy and paste it, adding a note of your own, into your blog, a Web page, forums, a blog comment, your Facebook account, or anywhere that someone would find this page valuable.
Grab your Free Gift

Visit our Sponsors
HB Information
Hb services, hb products.
Questions? Contact Us - Email Inquiries . Visit our Site Sponsors . View our Privacy Policy , Disclaimer , Disclosure pages.
Copyright © 2006 - 2020 www.all-about-houseboats.com
The information or articles on this website are for educational purpose only. It is not intended to replace the advice of a professional.
To pay all the expenses, All-About-Houseboats may derive a small financial benefit from affiliate, third party links, and/or advertising.
This site does not take responsibility for the accuracy of comments, opinions, suggestions and any other messages posted by visitors.
We are a participant in the Amazon Services LLC Associates Program, an affiliate advertising program designed to provide a means for us to earn fees by linking to Amazon.com and affiliated sites.
head extreme tour 2022 review
- Skip to primary navigation
- Skip to main content
- Skip to primary sidebar

Tennis Tribe
Tennis Racquet & Gear Reviews, Doubles Lessons & News
Head Extreme Review: Compare the Tour, MP, & Other Extreme Tennis Racquets
Will Boucek · November 28, 2023
When you buy a product through our links below, we may earn money from our affiliate partners to help support the site. However, this does not affect our evaluation or recommendation of each product. See our list of partners & how we get paid here . You can also learn our process for reviewing tennis gear here .
The Head Extreme is one of the best tennis racquets for power on the market. Below, we’ll review the Head Extreme, including pros, cons, and different models of the racquet. Then, we’ll compare it to other tennis racquets to help you decide if the Extreme is right for you.
Review Summary & Ratings for the Head Extreme
The Head Extreme tennis racquet has grown in popularity over the last 5 years for its “extreme” power and spin. This powerful racquet is great for tennis players who like to hit big serves and heavy groundstrokes.
See our ratings, plus the pros and cons of the Head Extreme below for a quick glance at how it performs compared to other tennis racquets.
Our Ratings for the Head Extreme
- Groundstrokes: 9
- Great power on serves & groundstrokes
- Very spin-friendly
- Good stability
- Easy to swing
- Good for most skill levels
- Can feel a loss of control against pace
- Less comfort than other racquets
Different Versions of the Head Extreme Tennis Racquet
The Head Extreme tennis racquet comes in several different versions that vary in size, weight, and other specifications. Below is a list of the different Head Extreme tennis racquets available.
Head Extreme Tour
- Head Extreme MP
- Head Extreme Team
- Head Extreme Team L
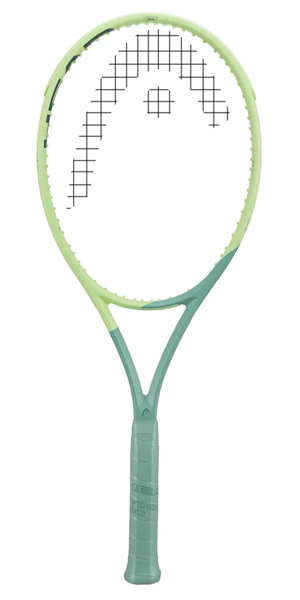
We’ll review each version in more detail below.
What did Head Update with the Extreme 2022?
With the newest version of the Extreme, Head made minor updates.
- The Extreme Tour and MP are slightly lighter and have a lower swing weight.
- The Extreme Team and Team L are new versions of the Extreme that are more beginner friendly.
You can still purchase the old versions of the Head Extreme for a discount.
3 Steps to Find the Perfect Tennis Racquet for Your Game
Free checklist with 27 racquet recommendations
Head Extreme Tour Review: A Blend of Power & Control
We’ll start with the standard version, the Head Extreme Tour. Below are the specifications and on-court performance you should expect from this racquet.
Head Extreme Tour Racquet Specifications
- Weight: 11.3 oz. strung
- Head Size: 98 square inches
- Length: 27 inches
- Balance: 324.9 mm
- String Pattern: 16×19
This racquet is fairly lightweight for an advanced tennis racquet, making it easy to generate racquet head speed. The open string pattern maximizes spin potential, so you can control the ball with heavy topspin groundstrokes.
The Head Extreme Tour Offers Controlled Power
The Head Extreme racquets are built for both power and spin. The Extreme Tour offers this combination in a controlled frame for advanced players.
The frame’s beam is wide for a 98-square-inch racquet, and the open string pattern will help you create more spin and power. The weight of the racquet makes it fairly easy to maneuver and swing if you’re a competitive tennis player.

Head’s Graphene 360+ technology gives this tennis racquet good feel around the net as well.
Advanced tennis players who swing fast and control the point with big serves and groundstrokes will get the most out of the Head Extreme Tour.
This racquet is not great for players who need more help with control. The Head Extreme Tour’s performance on returns and volleys hit slightly off-center is worse than many of the best advanced tennis racquets .

Overall, the Extreme Tour is great for advanced players who like to stay at the baseline and want to add power and spin to their shots.
Head Extreme MP Review: A Powerful Racquet
The Extreme MP tennis racquet has even more power and is great for a wider range of skill levels. It is one of the top 7 tennis racquets for power .
Head Extreme MP Racquet Specifications
- Weight: 11.2 oz. strung
- Head Size: 100 square inches
- Balance: 329.9 mm
This version of the Head Extreme is 0.1 ounces lighter and has a larger frame making it more powerful with a larger sweet spot. The beam is wider and this racquet is head heavy making it a very stable racquet as well.
The Head Extreme MP Helps with Power & Spin
One of the most powerful tennis racquets on the market, the Head Extreme MP is great for intermediate and advanced players who like to hit big.
This version of the Head Extreme is lighter and easier to swing, but has a thicker frame to increase its explosive power. The 100 square inch head size and open string pattern create unmatched spin potential. The Extreme MP is also one of the best tennis racquets for spin .
Because of the balance point being towards the head, this racquet has surprising stability as well. You won’t lose too much control when defending against pace.
Intermediate and advanced players who take an aggressive approach from the baseline will get the most out of this racquet. The Head Extreme MP will maximize your power and spin when attacking or hitting approach shots.
This racquet is stiffer than other advanced and intermediate tennis racquets. It is not great if you’ve had tennis elbow issues. It also sacrifices some control to prioritize its power and spin.
For a racquet with more control and comfort, read our Head Radical Review .
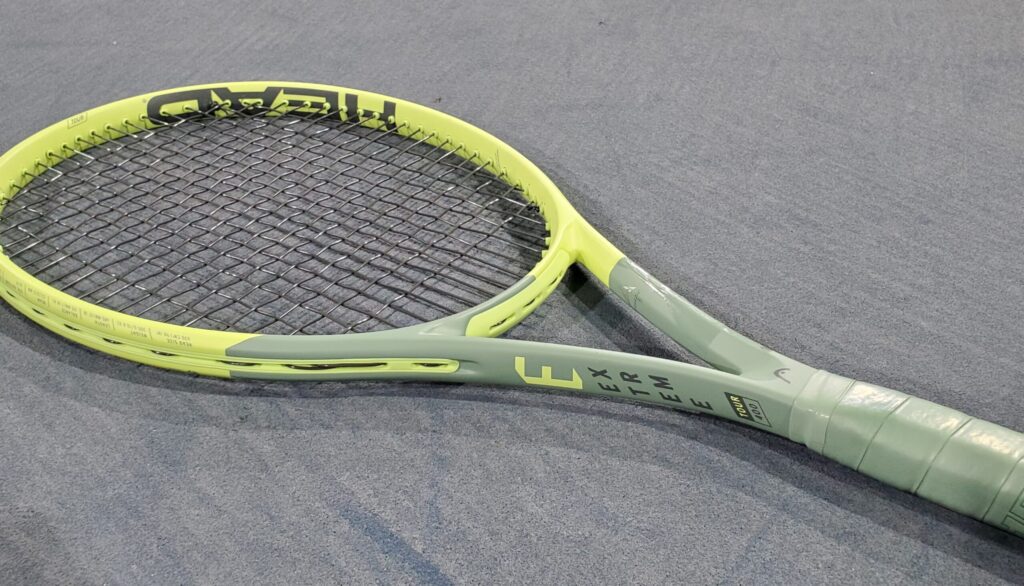
The Extreme Tour is Great for Serves & Groundstrokes
The Extreme Tour performs well on both groundstrokes and volleys.
- On groundstrokes, the Extreme is easy to swing, and explosive on contact. The Tour version offers good control and spin.
- On volleys, the maneuverability and feel of this racquet will help with touch volleys. It can feel unstable defending against fast paced groundstrokes.
- On returns, the Extreme Tour will generate good power to attack second serves. Defending against big servers will be a bit more difficult.
- On serves, this racquet performs best. It will maximize your power and spin so you can hit flat, slice, or kick serves with ease.
Reviewing Other Versions of the Head Extreme Tennis Racquet
There are several other versions of the Head Extreme that a beginner or intermediate player might consider.
The Best Alternatives to the Head Extreme
Below are 3 other tennis racquets similar to the Head Extreme that you may want to consider.
- Babolat Pure Aero – Rafael Nadal’s racquet offers tons of power and spin. Great for players who like to hit heavy groundstrokes from the baseline.
- Wilson Ultra – Another power-oriented racquet, the Ultra is a bit stiffer than the Extreme.
- Babolat Pure Drive – The Pure Drive is a great racquet for all skill levels. It has similar power to the Extreme with a bit better feel but doesn’t offer the same level of spin.
- Dunlop SX 300 – A stiffer racquet with similar power and greater spin potential but less comfort.
My Experience Playing with the Head Extreme
After playing several sets with the Head Extreme MP racquet, it is now one of my favorite power-focused racquets on the market.

The level of power and spin were similar to the Wilson Ultra , but with even better comfort and handling. I was easily able to hit with dept, power, and spin from the baseline. I also felt more in control of my shots with the Extreme than I do with other similar racquets.
At the net, this racquet was very easy to handle. While I didn’t have quite as much control on my volleys as I did with the Head Prestige , for example, the comfort and stability were still very solid.
The Head Extreme also helped my serve. I was able to generate plenty of spin and pop on first and second serves.
If I played more singles, I’d consider switching to the Head Extreme for its excellent power, spin, and feel from the baseline. However, since I play mostly doubles and like to get to the net, I prefer a more control-oriented racquet.
About Will Boucek
Will Boucek is the Founder & CEO of Tennis Tribe. With over two decades of experience playing & coaching tennis, Will now works as a doubles strategy analyst for ATP & WTA tour players and coaches. Will helps tennis players at every level play better doubles through smarter strategy. He also has expertise in tennis racquets & gear, testing the latest products from Wilson, Babolat, Head, Prince, and other tennis brands.
FREE 20-page guide - Learn 3 doubles tactics to force errors and get more easy volleys! Download
- Tennis Rackets
- Shop by Brand
- Junior Rackets
- Used Tennis Rackets
- Sale Rackets
- Racket Help
- Racket Reviews
- Junior Store
- Men's Apparel
- Le Coq Sportif
- NK Foundation
- Original Penguin
- Roland Garros
- Sergio Tacchini
- Tennis Warehouse Europe
- Under Armour
- New Arrivals
- Shop by Type
- Hoodies & Jackets
- Pants & Tights
- Baselayers & Compression
- Men's Socks
- Women's Apparel
- Lucky in Love
- Tanks & Tops
- Long Sleeve Tops
- Women's Socks
- Team Apparel
- Hats & Visors
- Head & Wristbands
- Men's Shoes
- Shop by Surface
- Flips & Slides
- Women's Shoes
- Running Shoes
- Shoe Reviews
- Tennis Balls
- Tennis Bags
- 3 Racket Bags
- 6 Racket Bags
- 8-12 Racket Bags
- Tennis Backpacks
- Strings Sets & Reels
- String Reels
- Multifilament
- Natural Gut
- Synthetic Gut
- WeissCannon
- Stringing Machines
- Tool & Supplies
- Grips & Accessories
- Replacement Grips
- Vibration Dampeners
- Racket accessories
- Other Items
- Recovery & Therapy
- Memorabilia
- Tennis Training
- Miscellaneous
- Clubs / Teams
- Pickleball Paddles
- Balls and Nets
- Reviews Reviews
- Learning Center Learning Center
- >Message Board Message Board
- Podcast Podcast
- Promos Promos
- Gift Cards Gift Cards
- Contact Us Contact Us
- Order Tracking Order Tracking
- Shipping Shipping
- Returns Info Returns Info
- Sizing Charts Sizing Charts
- Warranties Warranties
- Careers Careers
- Account Login
- Mailing List Mailing List
Head Extreme Tour 2022 Racket Review

Our TW playtesters raved about the first Head Extreme Tour, which gave this Extreme Tour 2022 update some big shoes to fill. Head's answer is to utilize Auxetic construction in the yoke of this racquet. According to Head, the Auxetic update optimizes the feel and response of the racquet according to how hard you are hitting the ball. Another goal with this update is an expanded sweetspot for a more consistent response on off-center hits. Spin grommets have been included in this generation to help generate more spin from greater string movement. The Extreme Tour 2022 stands out from other spin racquets by providing a plush 63 RA stiffness rating that offers players more comfort throughout long hitting sessions and matches. Aside from excellent spin, our team was pleasantly surprised by the amount of stability they found. For a 317 swingweight racquet, the Extreme Tour held its own against powerful hitters. Overall, Head improves on the Extreme Tour while maintaining the aspects that already made it shine. Our playtesters recommend this racquet for players who want controllable spin with maximum comfort and speed.
Maneuverability
- Effortless depth
- Low stiffness for spin racquet
- Love it or hate it cosmetic
Intermediate to advanced players

Groundstrokes - Score: 81
As our team expected, the Head Extreme Tour 2022 offers a massive amount of spin to players. With the spin grommets and ultra-fast swingweight, this racquet let our playtesters easily ramp up speed when necessary. With her background on clay courts, Zsofi loved how much spin she could generate when hitting with the Extreme Tour. She said, "I really enjoyed the easy depth I was getting with the new Extreme Tour on the baseline! It was one of the first things that stood out for me when I picked up the racquet. I was able to easily open up the court with more aggressive angles and move my opponents around. I grew up playing on the red clay courts of Europe, so I especially appreciate a racquet that is able to give me that extra spin I am looking for, and the new Extreme Tour did just that. It's a super spin-friendly racquet, so if that is something that you are looking for, give this one a go!"
Michelle found it simple to shape the ball to keep her opponents deep in the court. She said, "The first thing I realized about this racquet was how fast it played. It was explosive, but still stable for its weight. I tested this Extreme Tour after playtesting some extended-length racquets that were on the beefier side and a bit hefty to swing, and this racquet was quite the opposite, so it was a nice change of pace! I did note at times that I was missing some mass in the racquet's head and could have used that extra weight to push through the ball. I like to lead with the tip of my racquet through the ball and felt like the tip was struggling to come through when I went for bigger shots. For me, this was an easy sign that this racquet would perform well with a tiny bit of customization. The sweetspot, however, did feel forgiving, and it was easy to get some arch on the ball. I enjoyed working on shots with more topspin, pushing my opponents back with the ball jumping up rather than penetrating through the court."
Among a long list of positives, the standout feature for Andrew was how comfortable the racquet felt. He explained, "The Head Extreme Tour meshed well with my play style from the baseline. I found it easy to maneuver for my topspin forehands and stable enough for my slice and flatter backhands. The lower RA was noticeable and made my hitting experience comfortable compared to other spin racquets, which is a huge advantage. The response was not lacking even though the racquet offered more flexibility. As it does with other racquets, Auxetic technology seemed to make the sweetspot large and consistent — a huge bonus since it is pretty easy for me to hit outside the sweetspot when ramping up on spin. Lastly, the lower swingweight made it simple to get the racquet moving when I was on the run or in defensive scenarios."
Mark took note of how well the Extreme Tour handled slice and topspin backhands. He said, "I spend most of my tennis time playing from the baseline, so I look for racquets that are heavy enough to be stable, yet light enough to maneuver during long matches and groundstroke exchanges. Overall, my groundstrokes were sound; however, the new Head Extreme Tour errs slightly on the side of maneuverability and not stability, so I was feeling the weight of the ball on my stringbed more. After the second hour of play, the issue was cured with an increase in swing speed to get the shot depth I need. Lastly, its 16x19 pattern looks and feels tighter than the Extreme MP's, yet it still allows for easy generation of topspin and complements my backhand slice better than expected."

Volleys - Score: 80
At net, our playtesters found the Head Extreme Tour 2022 to offer quick maneuverability and sufficient stability against heavy hitters. Michelle and Zsofi both play high-level doubles, and the Extreme Tour easily handled their quick exchanges. Michelle said, "At net, I found this racquet fairly easy to use. However, I did find it more effective to really punch volleys to make sure they had some snap behind them. It was super maneuverable, and I didn't have any issues with stability even against the big hitters — no wobbles luckily!"
Zsofi added, "I play a lot of doubles nowadays, and I really appreciated the extreme stability of this racquet at net. Even if I only had time for a quick reflex volley, I still felt stable during the shot and could trust the Extreme Tour to do its job."
Mark had to put in some extra effort to find success on volleys with this racquet. He said, "As I mentioned with regards to play from the baseline, could feel the weight of the ball on the stringbed of the Extreme Tour 2022 a little more than I do with racquets that feature a higher swingweight. So, where I would typically just make contact with the volleyed shot, I had to punch forward with the Extreme Tour to keep my volleys from being pounced on by my opponent."
While he generally prefers to stay on the baseline, Andrew was able to utilize a wide variety of shots at net with the Extreme Tour. He said, "Although I don't prefer the net in most cases, the Extreme Tour offered quick speed and easy playability in situations when I had to move up. My biggest concern when initially hitting the Extreme was the speed-to-stability ratio. With a sub-320 swingweight, the Extreme Tour held up surprisingly well when blocking back powerful shots. I never felt the racquet twisting, unless I really messed up and hit near the edge of the frame. Otherwise, I was able to volley with a good amount of variety, from drop touch shots to deep, penetrating volleys."

Serves - Score: 82
Out of all the parts of this playtest, our team thought the Head Extreme Tour 2022 performed best on serves. The swing speed made it easy to generate racquet head speed, and the spin grommets boosted kicks and slices. Andrew favored serving with the Extreme Tour over other spin racquets due to its low RA and the comfort he found from the Auxetic technology. He said, "I have had some shoulder and wrist issues in the past, but the quickness and power potential made the Extreme Tour super easy to serve with. I found my favorite serve to be my slice serve. The racquet was fast, yet controllable enough to keep the ball in play when pushing serves out wide. Of course, with the spin grommets, I could also get the ball to kick up on topspin serves, which gave me some serving versatility. The serve I really had to focus on was my flat serve. With the Extreme Tour's depth generation, I had to pay attention to my contact to keep the ball from landing out."
Zsofi felt very confident with this racquet in her hands and was able to go for riskier serves with more success than usual. She said, "The new Head Extreme Tour was awesome on my serves! My serve is not normally a shot I lean on as a strong weapon, but with the new Extreme Tour I felt brave enough to pick riskier targets, and I was able to generate easy power."
Michelle and Mark both found serves to be their favorite shot of the playtest. Mark described, "As with every other shot I hit with Head's new Extreme Tour, I found myself having to use more tip speed to get an effective level of pace and spin on my serves. Where I maybe struggled a bit more at net and from the baseline with this racquet, the fast-swinging nature of the Extreme Tour catered to good action and pace on the ball, making the serve my best shot of the playtest."
"This was one of the bright spots of the playtest for me because the lower swingweight reacted really well to every serve," Michelle added. "The targeting felt very dialed in as well. I could flatten out serves easily, but I also really enjoyed hitting second serves with this racquet. It wasn't demanding at all, and I could really get momentum going through the ball. I loved hitting big flat 'T' serves on both sides!"
Returns - Score: 76
With its high swing speed, the Head Extreme Tour 2022 had our playtesters questioning if the stability would provide enough confidence to return against big servers. By the time testing was through, they were happy to find that the Extreme Tour performed extraordinarily well for its sub-320 swingweight. The Extreme Tour made it simple to get in front of the ball, allowing the user to be more spin-aggressive than with racquets with higher swingweights. Andrew usually hits a counter-punch return, but he was able to return more serves with topspin and angles with the Extreme Tour 2022. He described, "The Extreme Tour was great on returns. Typically, I like to return with a chip or flat counterpunch, but the Extreme Tour gave me so much confidence to hit with spin that I was slicing or adding topspin to most of my returns. Flat returns were still there when I wanted them, but I really enjoyed being able to comfortably use spin to angle my returns off the center of the court. As with other shots, the Tour held up well against big serves for how fast it was. Overall, this is one of the better racquets I've hit this year for serve returns."
The Extreme Tour was able to give Michelle the classic 'one-two' winner combo. She said, "It was fun to swing big on returns with this Extreme Tour. I felt pretty good about hitting my targets and loved going for a big ball down the line, but I also liked hitting angles off the outer wings to move my opponent off the court and create an opening for a one-two combo. The racquet was fairly forgiving, and even if I didn't always find the sweetspot, I felt like I was OK."
With the Extreme Tour's power potential, Zsofi was able to hone her tactics to get the most out of her returns with this racquet. She said, "Because of the great stability of the Extreme Tour 2022 and the easy depth I was able to generate, my returns felt great and very stable. The launch angle was a bit higher than I am used to, so I had to keep it in mind and dial my returns back a bit sometimes, but once I got used to that, it really wasn't a problem."
Mark had mixed results when it came to return of serve. He wrapped up the playtest, saying, "Other than the volley, the return of serve was the shot where I could really feel the weight of the ball on the racquet, basically demanding that I ditch my chip return and swing through contact of the ball. As a result, my return of serve was a little erratic."
Overall - Score: 81
Mark - "The Extreme Tour 2022 is very fast, comfortable and easy to swing from anywhere on the court. It is surprisingly stable for a racquet with an inertia number lower than 320. Specifically, the new Extreme Tour forces me to play more assertively off the first ball, instead of always relying on long point strategies. I also like the more subtle used-tennis-ball tone of yellow for the 2022 cosmetic over the brighter new-ball yellow of the prior iteration."
Zsofi - "The racquet not only looks great but performs amazingly as well! I really need something stable that gives me that 'extra' I'm looking for, and this racquet does just that. Easy depth, crazy spin and outstanding stability on all shots."
Andrew - "It's super fast and still has plenty of stability for my game. Spin is easily accessible, and the racquet is even more comfortable with Auxetic tech and a lower RA."
Michelle - "Super speedy and stable for its weight. Easy access to spin. Fun to serve with and target different spots in the box. A good platform racquet for customization."
Mark - "Ironically, the benefits the Extreme Tour affords me are the same traits that challenge me. I have a harder time playing defensively due to the sub-320 swingweight and the degree of head-light balance. This encourages me to play more of a first-strike style of tennis, which does not come naturally to me. I am certain adding a smidge of weight to the hoop would cure that and allow me to more easily play my counterpunch style of tennis."
Zsofi - "The only somewhat negative note I can think of is that I sometimes struggle with bringing the racquet head around fast enough on my backhands. Basically, maneuverability wasn't always that easy for me, but once I spent more time with the racquet and got more dialed in, this wasn't really an issue."
Andrew - "Nothing really stands out as a dislike; it does everything I want it to do."
Michelle - "It's a bit light for my personal tastes, and I crave a bit more mass behind the head."
Comparing the racquet to others they've tried, our testers said:
Mark - "The Yonex EZONE 98 exhibits a set of specs that are pretty comparable with this Extreme Tour 2022 , as does the Dunlop CX 200 and the Volkl C10 EVO. Although the swingweight of the Prince ATS Textreme Tour 98 is just over 320, it is similar otherwise."
Zsofi - "The new Head Extreme Tour feels a bit plusher than previous versions. Otherwise, it feels a bit similar to the Yonex VCORE 98 or maybe even the Tecnifibre TFight 305 16x19."
Andrew - "In comparison to previous models, this Extreme Tour has just a bit more flex and comfort. If you are into spin-friendly racquets like the Babolat Pure Aero VS, Pure Aero standard and Yonex VCORE 98, but want more comfort, this is the racquet for you."
Michelle - "I initially wanted to compare this Extreme Tour 2022 to the Prince ATS Textreme Tour 98, but I find that racquet to offer a bit more plow through and this one to be much whippier. It would be comparable to the Yonex VCORE 98, but again, the Extreme Tour is a bit faster through the ball, so it is ideal for players who like a faster swinging racquet, or for players who like to build their own spec."
Playtester Profiles
Zsofi: Open level all court player with a semi-western forehand and a one-handed backhand. She currently plays with a Tecnifibre TF40 305 16x19.
Andrew: 4.0 level all court player with a semi-western grip on the forehand and hits a two-handed backhand. Currently playing with the Head Speed MP 2022.
Michelle: Open level baseline player with a semi-western forehand and a two handed backhand. She currently plays with the Wilson Pro Staff RF 97 Autograph.
Mark: 5.0 lefty all-court player with a one-handed backhand. He currently plays with the Head Boom Pro 2022.

Review date: October 2022. If you found this review interesting or have further questions or comments please contact us. All content copyright 2022 Tennis Warehouse.
- Tennis Racquets
- Junior Racquets
- Recreational Racquets
- Racquet Help
- Demo Program
- Sale Racquets
- New Balance
- Tennis Only
- Team Orders
- Running Bare
- Sports Bras
- Boy's Apparel
- Girl's Apparel
- Lightweight
- Junior Shoes
- Tennis Ball Machines
- 3 Pack Bags
- 6 Pack Bags
- 8-12+ Pack Bags
- Duffle Bags
- Maggie Mather
- Strings & Stringing
- Shop All String
- String Specials
- Klip String
- Tools & Supplies
- Head & Lead Tape
- Tennis Accessories
- Fitness & Therapy
- Hydration & Nutrition
- Tennis Towels
- Novelty & Gift Ideas
- Clubs & Coaches
- Pro Players Gear
- Tennis Only Reviews
- Tennis Only Favourites
- Choose a Racquet
- Best Tennis Shoes
- Best Tennis Strings
- Selecting a Racquet
- Choose the Right Tennis String
- Wrap a Replacement Grip
- Court Drills
- Mental Strength
- Stroke Technique
- Fitness & Therapy
- Tennis Talk Forum
- Contact Contact
- Tracking Tracking
- Postage Postage
- Payment Payment Options
- Returns Returns
- International International
- Privacy Policy
Head Extreme Tour Racquet 2022 Review

- Vintage Racquets
- Used Racquets
- Padel Racquets
- Trade In Program
- Racquet Matching & Customization
- Articles And Reviews
- Racquet Finder
- Racquet Reviews
- Aceing Autism
- Ace the Moon
- Flow Society
- Tennis Warehouse
- Travis Mathew
- Short Sleeve
- Long Sleeve
- Compression
- UV Protection
- Alabama Girl Hats
- Ame & Lulu
- Bird & Vine
- BlueFish Sport
- Cross Court
- Denise Cronwall
- FP Movement
- Yaffa Sun Protection
- Bag Accessories
- Court Couture
- Alpha & RAB
- Tennis Books & DVDs
- Court Equipment
- Gifts & Novelty Items
- School Teams
- League Teams
- Pro Player Gear
- Mental Game
- Stroke Instruction
- How to String a Racquet
- Measuring Grip Size
- Best Tennis Racquets
- Tennis Warehouse University
- Message Board Message Board
- Specials Clearance
- Brands Brands
- Ordering Ordering
We will match or beat any posted overall price advertised in-store or online on in stock items.
Racquet Matching $20 per match. Get up to 3 racquets matched to the nearest specifications of each other. Learn More
Racquet Customization $30 per frame. You provide us with the exact specifications you would like for your racquets. Learn More
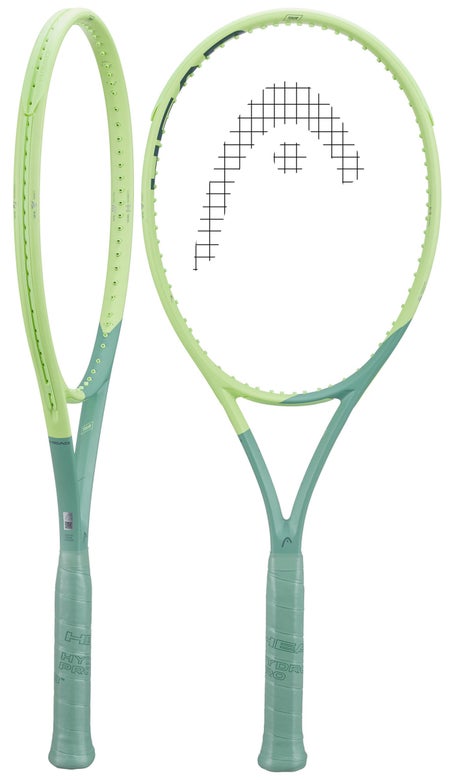
Surgical, spin-friendly and uniquely fast, the Extreme Tour gets updated with Auxetic technology for 2022
Introducing the Extreme Tour 2022! With this update, Head delivers a uniquely fast and spin-friendly weapon to intermediate and advanced players. Featuring the smallest head size in the Extreme family (98in²), this model packs a tad more control than the Extreme MP. Although too underpowered for those who require the mass-based pop of a traditional player's racquet the Tour is perfect for those who crave easy acceleration from the baseline and lightning quick reactions at net . For 2022 the product team at Head adds an Auxetic construction to the yoke which optimizes the feel and response according to impact force. Additional technologies include Spin Grommets which enable greater string movement for enhanced snapback. Like the previous generations, this racquet benefits from Graphene 360+ , giving it extra stability and power. Ultimately, this is a great option for aggressive players looking for a speedy and spin-friendly weapon.
Specifications
Similar racquets.

Other Items to Consider

- Customer Reviews

Head Extreme Tour tennis racquet review
The second version of the Head Extreme Tour, the most control oriented tennis racquet in the Head Extreme line.
As the previous model, this racquet provides a bit of control but also a nice amount of power, an easy access to top spin and it's very manoeuverable and comfortable.
BUY AT TENNIS WAREHOUSE USA BUY AT TENNIS WAREHOUSE EUROPE
Head Extreme Tour 2022 video review
Introducing the head extreme tour 2022 racquet.
The Head Extreme line is composed of powerful and topspin oriented tennis racquets.
This is the 2022 version of the Head Extreme Tour, the second version of this model that appeared later in the line, the least powerful racquet in the Head Extreme line.
Graphene 360+
The Head Extreme Tour still features Graphene 360+ technology, which is great for light weight, good energy return when hitting the ball, without sacrificing stability and comfort.
Spin grommets
This technology present on the previous model concerns the central grommets of the racquet, which have an elongated shape for cross strings and rounded but enlarged for main strings, facilitating the movements of the strings, therefore the access to topspin, it helps also for the power.
Auxetic technology
This is what's new with this version of the Extreme Tour.
Auxetic materials, that are used in other domains than tennis, have a surprising property: they get bigger when stretched lengthwise and when compressed they get thinner.
These materials are used for Head tennis racquets to improve feel and therefore player confidence.
This technology is also useful in absorbing shock and vibration to provide excellent comfort.
It's not a technology but it is interesting to note that the Head Extreme Tour manages to combine a fairly low stiffness (63 Ra), interesting for comfort, with a very good level of power.
The Power of the Head Extreme Tour 2022 racquet
The head size of the racquet is 98 in² / 632 cm², it reduces the power compared 100 in² / 645 cm² tennis racquets and larger, so the Head Extreme Tour is a slightly reduced power racquet but at the same time it is still very accessible.
In the 98 in² headsize category, this is one of the most powerful racquets.
The power level is identical to the previous version of the Head Extreme Tour.
I found the right amount of power for my game from the baseline as well as on the serve.
It's a sign that the racquet gives a decent amount of power because I tend to lack power on my serve.
Of course, for the power, pay attention to the tension of your strings ; the lower the tension, the more power you will get.
I had a better control with this one than with the Head Extreme Tour.
This racquet will be interesting for players looking for a slightly control oriented racquet with slightly reduced power that also offers a good level of power.
In terms of swing technique, I would recommend this racquet to players with medium to large swings.
Advanced players with rather short swings will also be able to generate some pace and power becuse the racquet is very maneuverable.
Here is a comparison in terms of power with some other racquets:
More power:
- Babolat Pure Drive
- Head Boom, Speed, Instinct MP
- Wilson Burn, Ultra
- Yonex Ezone 100
Similar power:
- Babolat Pure Aero 98
- Babolat Pure Drive VS
- Head Prestige MP L
- Wilson Shift 99 (300 g)
- Wilson Blade 98S
Less power :
- Head Prestige sauf MP L
- Head Gravity
- Babolat Pure Strike
- Wilson Blade 98 16x19, 18x20
- Wilson Pro Staff
- Yonex VCore 98, EZone 98
- Yonex VCore Pro
Access to spins with the Head Extreme Tour 2022 racquet
I liked the racquet on my slice backhand and the topspin access is excellent, despite the slightly smaller 98 in² headsize.
This is one of the 98 in² racquets that provides the best access to topspin, along with the Wilson Blade 98S and the Babolat Pure Aero 98.
Maneuverability is excellent as well, thanks to the 31.5 cm / 9 pts HL balance and 317 swingweight.
Overall I liked the manoeuverability of the racquet, for my one handed backhand but also for my forehand because it helped me for swing speed.
I found the racquet to be particularly head light, a bit too light for me, I had the feeling that the racquet was a bit "empty" on the head.
This had the advantage of giving me a very good swing speed, which is interesting when you have to make short swings or for topspin shots, but I would have preferred to feel more solidity and stability with a bit more weight in the head of the frame.
The fact that the racquet is head light is not good or bad, it will depend on every player.
Anyway, this balance gave me the impression that the racquet was lighter than 305g.
This feeling can be modified, for those who wish to do so, by customizing the racquet and adding a bit of weight at the height of the contact point.
In terms of maneuverability, I found the feel to be identical to the previous model.
Comfort of the Head Extreme MP 2022
As with the previous version, I found the comfort to be very good and it was nice to play with this racquet.
It's interesting to notice that the Head Extreme Tour has a fairly low stiffness of 63 Ra, which is good for comfort, but still has a decent amount of power.
I found the forgiveness to be quite decent, even if of course it's a bit less tolerant than a 100 in² head size.
Comparison with the Head Extreme MP
The Head Extreme MP will give more power than the Head Extreme Tour.
The Head Extreme Tour is for more powerful players who are looking for more control.
I found the Head Extreme Tour easier to swing than the Extreme MP even though it weighs 5 grams more but it is more head light with a balance of 31.5 cm instead of 32 cm for the Extreme MP.
Access to topspin is excellent with both racquets, slightly better with the Extreme MP that has a bigger head size.
Both racquets are very comfortable.
Who would I recommend the Head Extreme Tour 2022 racquet to?
I would recommend the Head Extreme Tour 2022 to players:
- with an intermediate or advanced level, not for beginners,
- for beginners, see the Head Extreme Team L (265g) or MP L (285g),
- with a modern game style ; power and topspin,
- or a game style with more touch, slice, even flat game without crazy power,
- who play with a two-handed or a one-handed backhand, the maneuverability will be interesting for the one-handed backhand,
- who want a medium power/slightly control oriented racquet that is not too hard to play with,
- who want a racquet with a 98 headsize with good power and access to topspin,
- a racquet with excellent maneuverability, a head light tennis racquet that overall does not feel heavy,
- a racquet with a good level power without being too stiff,
- with a very good level of comfort,
- who like the Head Extreme MP but lack a bit of control and manoeuverability
- the Head Extreme Tour is also a great choice for those who already enjoy the old version of the Head Extreme Tour and want to renew it while keeping the same feel.
Send a comment or a question
Comments / questions (1).
Peter Darce

Questions/Answers
Find a racquet by brand.

Tennis racquet reviews

Wilson Blade V9

Head Speed 2024

Babolat Pure Strike 2024

Yonex EZone Aqua Night

Asics Spring 2024

Adidas Barricade 13

Uniqlo Roger Federer Hats

Tennis fitness programs

Moteur de recherche de raquettes de tennis

Raquettes de tennis à prix réduit !!!

- Contact www.team-tennis.net
- Legal notices
- About team-tennis.net
- ATP Rankings
- WTA Rankings
- ATP World Tour
- Tennis Warehouse USA
- Running Warehouse Europe
- Advertising
Racquet review: head extreme mp 2022, holiday gear gift guide (part 3): must-have apparel, holiday gear gift guide (part 2): awesome accessories, holiday gear gift guide (part 1): top racquets from 2022, babolat expands popular evo line with two new racquet models, geau sport releases axiom series 2.0 bags, gear q&a: hardened competitors, swingvision delivers pro-level insights for recreational players, racquet review: wilson ultra 100 v4, hyperice introduces three new products to help athletes ready for competition, string pattern: 16x19, watch: the break—jannik sinner becomes gucci ambassador.
The power may not have been quite as robust, but the Extreme MP still hit a juicy ball from the back of the court. The improved handling encouraged big swings that applied ample pace and spin to shots.

Head Extreme MP (2022) Review
Head claims the extreme can overwhelm your opponent with hard-hitting spin, and it features a better feel, and stability than previous versions. how does it play.

As a tennis player, finding the right racket can make all the difference in your game, and it can be challenging to navigate the sea of options on the market, but one option gaining popularity is the Head Extreme MP (2022).
This last version was released in September 2022 and, together with the Extreme Tour, Extreme MP Light, Extreme Team and Extreme Team Light, is part of the latest Head Extreme Line endorsed by Matteo Berrettini and Richard Gasquet.
I recently had the opportunity to test out this racket and wanted to share my thoughts and experiences.
In this review, I will be taking a closer look at the Head Extreme MP and exploring its features, benefits, and drawbacks.
I will also compare it to other rackets on the market and provide recommendations for players considering purchasing it.
Head Extreme MP Cosmetics

However, the classic Head Extreme shape remained with a wide throat and oblong head.
The Head Extreme MP is designed to offer a balance of power, control, and spin. It has a 100-square-inch head displaying enlarged grommets, which provides a large sweet spot and helps players maintain accuracy even when they do not make perfect contact.
It also has an open string pattern designed to facilitate the generation of heavy spins.
Specification and Setup

For this playtest, I had the Extreme MP strung with a full bed of Dunlop Black Widow at 22kg (48.5 lbs).
Head Extreme MP Playtest and Review

The playtest with the Head Extreme MP 2022 was on outdoor hardcourts, and I used it for several hours over four days to get a good idea of how it played.
For reference and to understand some of my findings with the Extreme, I currently play with a Yonex VCORE 100 in competitive play.
First Impressions
One of the things I immediately appreciated about the Head Extreme MP was its sizeable sweet spot.

Especially at night, with artificial lights, I sometimes struggle to make perfect contact with the ball.
For this reason, having a racket that can still provide power and accuracy on off-centre hits made me feel more secure while hitting.
The open string pattern also lived up to its promise of helping me generate spin and control the trajectory of my shots.
The lightweight design of the Head Extreme MP 100 inch was also a plus for me. I like to generate plenty of racket head speed, and this racket made it easy to do so without feeling heavy or cumbersome.
The balance of power, control, and spin also worked well for my game, as I prioritise precision and accuracy over raw power.
However, it wasn’t all good news. While the Head Extreme MP worked well for me in many respects, I noticed some potential drawbacks.
For one, despite the Head’s attempt to create a reasonably powerful racket through enlarged grommets, the lack of power may concern some players.
While I appreciated the balance of power, control, and spin, I can see how it could create a sense of insecurity and limitation in players that like to rely on their power game,
Moreover, in my opinion, the stiffness of the Head Extreme MP is another cause for concern.
Even though it’s mid-range at 65RA and did not bother me too much during the first couple hours of play, I felt an uncomfortable tingle in both my wrist and elbow at the third-hour mark.
Finally, from my point of view, the price of the Head Extreme MP is a big drawback. While I appreciated some of the features and benefits of this racket, I would not identify it as a professional-level racket.
For this reason, I would not expect its price to be on the higher end of the market. I believe intermediate-level players could find similar options for a more affordable price.
Groundstrokes
During the first 30 minutes of play, I recognised that the Head Extreme MP would not match my expectations.
Even though the design allowed me to generate a good amount of spin, the ball appeared to die right after the bounce.
In both forehand and backhand, I could not transfer enough weight onto the ball, which resulted in overall “empty” spins.
I appreciated the manoeuvrability of this lightweight racket that allowed me to produce a significant amount of head speed and maintain good control of the trajectory of my groundstrokes.
However, this characteristic did not compensate for the lack of power a professional player would desire from the baseline.
As an all-court player, I trust my volleys to close a point. Therefore, I want to feel comfortable executing the shot without second-guessing the reliability of the racket.
While I felt the Head Extreme MP could provide good control from the baseline, I had different feelings about the net.
I felt the racket to be empty on impact, and I could not direct my shot with the precision I wanted.
Moreover, the lack of power significantly affected my overhead, often forcing me to hit two or more in a row to finish a point.
I think the serve is the shot that least benefits from the Head Extreme MP. Although I could consistently hit the ball safely in the court, my serve did not cause any trouble to the returner.
I found that my sliced serve would not gain enough speed, while my kick second serve did not bounce high enough to become difficult to attack.
While returning, I could finally enjoy the manoeuvrability of the Head Extreme MP fully. Especially when I tried to return against big serves, I utilised the enlarged sweet spot and light weight of the racket to move it into position quickly and hit my return on the rise.
In this way, I could compensate for the racket’s lack of power by taking in the power of the serve and using it as my own.
Who is this Racket For?

According to the manufacturer’s description, the Head Extreme MP is a tennis racket designed for intermediate to advanced-level players with a modern playing style who prefer a racket with power and spin.
However, I do not believe that any advanced-level players would genuinely benefit from using this racket.
All the marketing around the Extreme MP claims it is particularly suited for players who like to hit aggressive shots from the baseline and who generate a lot of topspin. Yet, I find that the weight and power transferred to the ball are not up to the standards of many other rackets I have used.
In conclusion, the Head Extreme MP would best suit low to intermediate-level players rather than advanced-level players.
I would suggest this racket to 3.0-4.0 NTRP players looking for control and consistency during points but not relying on their power or attacking abilities to win their matches.
Higher-level players should look elsewhere. Otherwise, the Extreme MP will need to be heavily customised.
Similar Spec Rackets
- Yonex VCORE Pro 100 (300)
- Dunlop CX 400 Tour
Tennis Racket Finder Tool
Are you looking for a new racket? Use our easy-to-use racket finder tool that lets you filter every racket on the market by specs, price, and playing style.
Final Thoughts

As an advanced-level player, I can say that my final impression of the Head Extreme MP is primarily negative.
It does not allow professional and higher-level players to fully express their potential through their shots.
On the other hand, I think it could help intermediate-level players feel secure that their shots, even if not too powerful, will consistently land on the court.
However, in my opinion, the price of the racket is too high for what the product offers: the quality-price ratio does not seem worth it (especially given Artengo’s offering ), and I would wait until it drops in price to consider purchasing.
- Nice cosmetics
- Manoeuvrable
- Spin-friendly string pattern
- Underpowered
- It Imparts spin, but shots lack weight
- Empty feeling on volleys
Have you tried the Head Extreme MP or any other rackets in the Extreme line? Let me know your feedback in the comments.
Head Extreme MP 2022 Review
Control - 7.5, manoeuvrability - 8, stability - 5, comfort - 3, touch/feel - 6, groundstrokes - 7, volleys - 5, returns - 8, underwhelming.
My experience with the Head Extreme MP is mostly negative. It does not allow higher-level players to express their potential through their shots. But it could help intermediate-level players feel secure that their shots, even if not too powerful, will consistently land on the court.

Join 12k Tennis Fans Who Get Our Updates
News, racket reviews, guides and more.
Mizuno Wave Exceed Tour 5 Review
Indian wells draw 2023, related articles.

Yonex Percept 100D Review

Andrey Rublev’s Racket

Yonex Percept 97D Review


Yonex Fusionrev 5 Review
What do they give you for being first?
What is Federer doing? Living private life without any contact with tennis world?
Leave a Reply Cancel reply
Your email address will not be published. Required fields are marked *
Save my name, email, and website in this browser for the next time I comment.
Head Extreme Tour 2022 Tennis Racquet
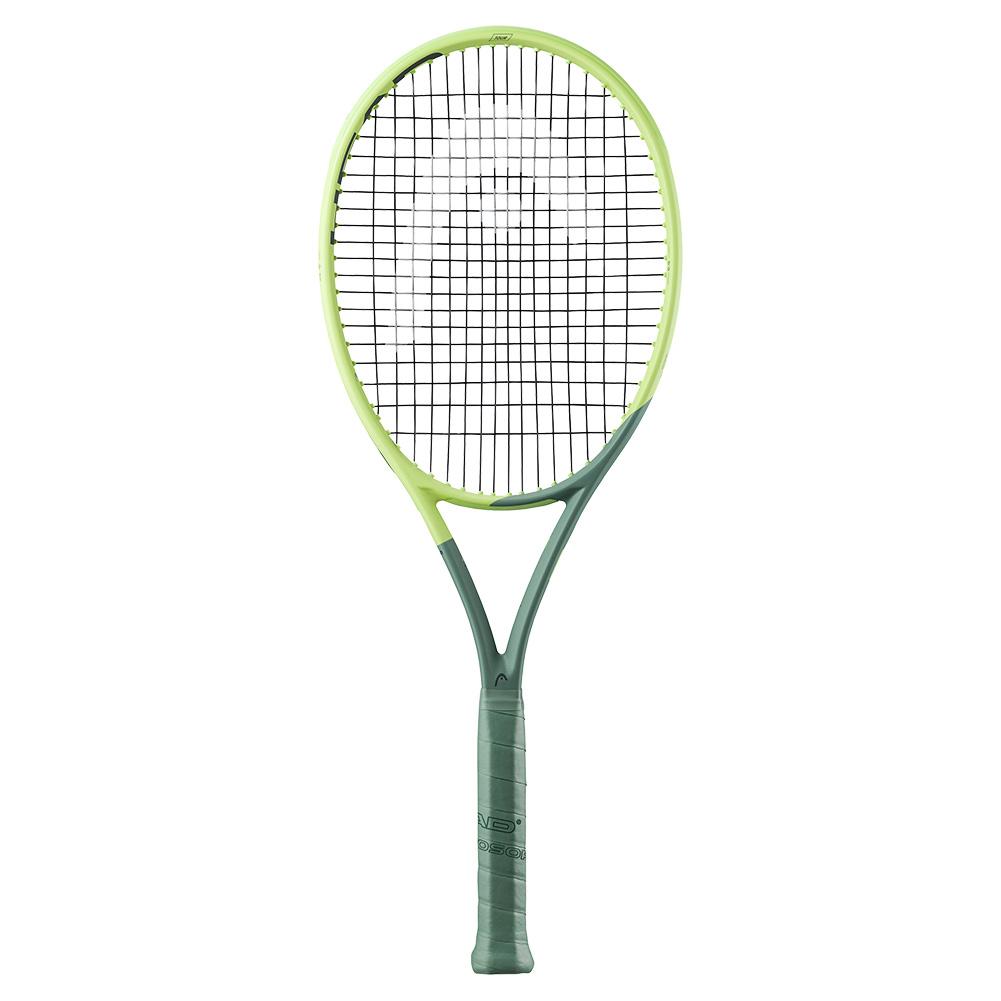
- Description
HEAD adds an Auxetic construction to their most control oriented Extreme frame, the HEAD 2022 Extreme Tour. The Tour is one of the fastest 10.8 ounce racquets around, and the 98 square inch head and more dense 16x19 string pattern should be perfect for advanced players who want to add some precision to a heavy spin game . The Auxetic construction within the racquet yoke maintains impressive stability at contact, and it provides ideal feel to help fine tune your game . The Extreme Tour is a perfect fit for an experienced competitior, who seeks something in between a classic thin-beamed control racquet, and a more forgiving and modern tweener.
-Exceedlingly fast, a very mobile 10.8 ounce (unstrung) racquet
-Auxetic construction refines the feel and will provide confidence to big hitters
-Better string durability than the Extreme MP, thanks to the smaller 98 head size
String Recommendation: Lynx Tour Grey at 52 pounds
Head over to our blog to learn more about HEAD gear:
Top Tennis Racquets Blog
Beginners Guide to Buying a Racquet
Free Bag with purchase.
Product Video
- Product Specs
Our staff has not reviewed this product yet.
Copyright 2024 . Tennis Express ©
Select adjustment
Coming soon.
HEAD Extreme Team Review
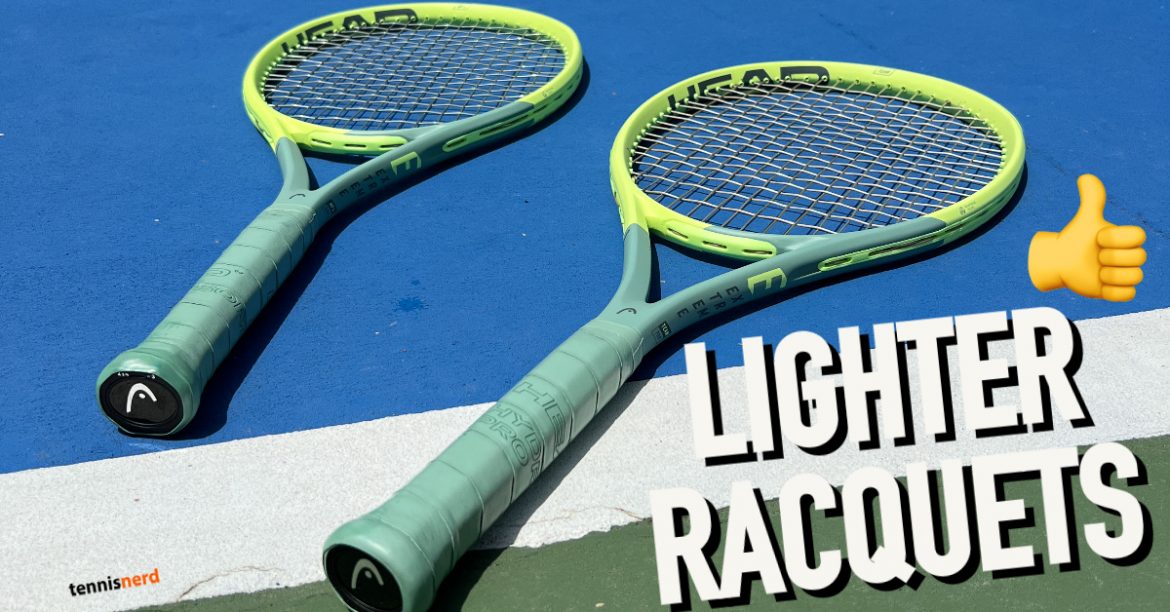
This is not only a HEAD Extreme Team review, but also deals with the Extreme MP L and Team L. These racquets are all lighter but surprisingly stable.
Sometimes there is a macho vibe around tennis racquets. It needs to be heavy and demanding. Otherwise, you’re not a “real” player. This cannot be more wrong. Like I keep repeating, over and over again, you need to play with what works for you. Tennis is a highly personal sport, which is part of its beauty. Go for whatever makes you play well and feel good on the court. Ultimately, it’s all about having fun while getting exercise (win-win!). And I think this is the vital part of this HEAD Extreme Team review. These racquets are all fun to use!
Head extreme mp l.
CPI: 600 WEIGHT (UNSTRUNG): 285 g / 10.1 oz STRING PATTERN:16/19 HEAD SIZE: 645 cm² / 100 in² BALANCE: 325 mm / 0.7 in HL LENGTH: 685 mm / 27.0 in BEAM: 23/26/21 mm
HEAD Extreme Team
CPI: 700 WEIGHT (UNSTRUNG): 275 g / 9.7 oz STRING PATTERN: 16/19 HEAD SIZE: 645 cm² / 100 in² BALANCE: 330 mm / 0.5 in HL LENGTH: 685 mm / 27.0 in BEAM: 23/26/21 mm
HEAD Extreme Team L
CPI: 900 WEIGHT (UNSTRUNG): 265 g / 9.3 oz STRING PATTERN: 16/19 HEAD SIZE: 680 cm² / 105 in² BALANCE: 345 mm / even LENGTH: 685 mm / 27.0 in BEAM: 23/26/22 mm
Who are they for?
The Extreme Team L is one of the most potent racquets in HEAD’s standard racquet line-up. The HEAD CPI scale goes from 100-1000, where 100 is the lowest power level, and 1000 is the highest. So this frame is suitable for beginners to lower-level intermediates. It’s pretty fun to spin the ball with this powerful racquet and it’s remarkably solid for such a light racquet. This is the most impressive part of the new Extremes. They feel extremely (pun intended) solid.
Both the Team and the MP Lite are incredibly similar in all respects. The swing weights were very similar, and I’m not sure if we need to have both options. I could play them side by side and switch between them without issues. I could play some competitive sets with these racquets against 4.5-5.5 players, and although I didn’t play my best and lacked some control at times, they were also fun to use and offered lots of power and spin. These racquets work well up until the medium intermediate level. I would say 3.5-4.0 NTRP even.
How do they play?
This was the most surprising part of this HEAD Auxetic Extreme racquets play-test. I usually prefer heavier racquets, but here I was taken by the power, spin and stability of these lighter frames. I think the Auxetic tech is most evident in these racquets with bigger head sizes like the new Speeds and these Extremes (click the link for my review of the MP model) when it comes to the Prestiges and the Extreme Tour, I did not feel like it made as much of an impact as it does here.
Serving was a joy with these frames, and baseline tennis felt relatively effortless. The stability at the net was also better than expected. The biggest issue, which was not tough to guess, was that you lacked some control sometimes, but players who can hit with plenty of top spin will surely enjoy these frames. If you’re curious about what a lighter frame could do to your game, look no further than these excellent Extremes.
If you’re curious about these or other tennis products, please consider our affiliates, Tennis Warehouse, Tennis Warehouse Europe, and Tennis Only.
Are you on Team Extreme?
Jonas has been known as "tennis nerd" mainly for his obsessing about racquets and gear. Plays this beautiful sport almost every day.
HEAD Auxetic Extreme Tour Review
Coric’s new racquet, you may also like, atp houston string tensions, tecnifibre tf-x1 v2, wilson blade 98 16/19 v9 review, the babolat pure drive celebrates 30 years, babolat pure strike 100 16/20 review, head boom pro 2024 review, head boom 2024, dunlop cx 200 review, dunlop cx 400 tour review, wilson blade 98 18/20 v9 review.
As always, good content on TennisNerd. I use a 300 gram Ezone 100 and really like. My hitting partner last year started using a 285 gram Pure Aero Team and he really loves it. I tried it but the string pattern is too open for me. In match play it becomes too unpredictable for me. I am actually a bit tempted to buy one lighter racquet to play around with, perhaps the Ezone 100L, or the new Extreme MP L. I am however curious about how the light frame will affect arm health. At the least the theory is that a lighter frame will be worse for the arm….right? Also curious about power level. Theory states that the 300 gram frame should be more powerful than the 285 gram frame, all other tings being equal? If you compare in this case the Extreme MP to the Extreme MP L, did you notice any difference in level of power? Impact on arm? Stability?
I don’t think a lighter frame is necessarily worse for the arm. 285g is not that light unless you play guys that hit very hard (Futures level). The swing weight decides the power level more than the static weight. And the string pattern. I noticed no impact on my arm in between MP or MP L. I actually like the Extreme Team a lot and it’s pretty cool because it has an RA of 61 strung.
Does the lime green frame throw off your focus on the ball to the center of the racquet. Just curtesy if this happens to anyone.
It doesn’t affect me
Hi there. Thanks for the review
I purchased Team extreme L for my 12 year old intermediate son. Within a week coaches and parents were telling him it was too light and naturally now he doesn’t want such a L version.
Appreciate any advice over internet is general but would still appreciate a view as you have used the racket thanks
Leave a Comment
- The Tennisnerd Guide to Gear
- Recommended Racquets
- Recommended Strings
- Recommended Bags
- Racquet Consultation
- The best tennis racquets for spin and control
- Racquets and strings for beginners and lower-level intermediates
- Arm Friendly Tennis Racquets
- The Best Spin Racquets
- The Best Racquets for Intermediate Players?
- The Best Advanced Player Racquets
- The Best Power Racquets
- Pro Stock Racquets
- Pro Player String Tensions
- String Reviews
- Stringing machines
- Arm-friendly Strings
- Top Ten Tennis Strings Right Now
- The lowest string tension on tour?
- What is the difference between multifilament and poly strings?
- My Top 3 Spin Strings
- My Top 3 Control Strings
- Tennis balls
- Tennis Tools
- Podcasts and Interviews
- Betting Blog
- Monte-Carlo Masters Betting
- Best Tennis Betting Sites
- How to Bet on Tennis
- Live Betting Tennis
- Tennis Betting Odds Explained
- Betting Tips and Strategies
- Promotions and Bonuses
- ATP Masters 1000
- Betting Predictions
- Travel Blog
- Buying Tennis Tickets
- Tennis Academies in Europe
- Tennis coaching with Intuitive Tennis
- Coaching app
- Pickleball Blog
- Accessories
- College Tennis
- Contributors
- What People Say
- Tennis Friends
- In the Press
Please wait while you are redirected to the right page...
JavaScript seems to be disabled in your browser. For the best experience on our site, be sure to turn on Javascript in your browser.

Choose your location
- Austria Deutsch
- Belgium Français
- Bulgaria English
- Croatia English
- Cyprus English
- Czech Republic Čeština
- Denmark English
- Estonia English
- Finland English
- France Français
- Germany Deutsch
- Greece English
- Hungary English
- Ireland English
- Italy Italiano
- Latvia English
- Liechtenstein Deutsch
- Lithuania English
- Luxembourg Français
- Malta English
- Monaco Français
- Netherlands Nederlands
- Norway English
- Poland Polski
- Portugal English
- Romania English
- Slovakia English
- Slovenia English
- Spain Spanish
- Sweden English
- Switzerland Deutsch | Français | Italiano
- United Kingdom English
North America
- Canada English | Français
- United States English
Rest of the world
- Australia English
- Japan Japanese
HEAD Extreme TOUR Tennis Racquet
Description.
The ultimate spin-machine for tournament players, the EXTREME TOUR has been upgraded with state-of-the-art Auxetic technology, helping you to spin big and create chaos.
Product Information
Stringing instructions.
Technologies

Auxetic Auxetic constructions show a unique deformation compared to non-Auxetic constructions. Due to their internal properties, Auxetic constructions widen when a “pull” force is applied and contract when squeezed. The bigger the applied force, the bigger the Auxetic reaction.

Spin Shaft The spin shaft provides optimized lateral stability, creating higher spin potential

Spin Pattern The open 16/19 string pattern maximizes string snap-back for greater spin generation

Sound Grommets Sound grommets provide enhanced power via greater string movement and optimize sound and vibrations

Spin Gromments Spin grommets allow for greater main string movement in all directions for maximizing power and spin.

Graphene Inside Strategically positioned in most of our racquets, Graphene strengthens the frame, provides greater stability and optimises energy transfer from racquet to ball. When you buy your next racquet, be sure it has GRAPHENE INSIDE.
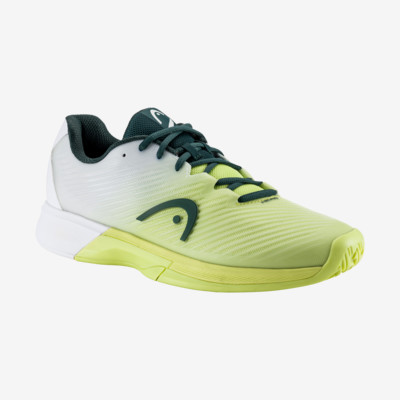
Volleys - Score: 80. At net, our playtesters found the Head Extreme Tour 2022 to offer quick maneuverability and sufficient stability against heavy hitters. Michelle and Zsofi both play high-level doubles, and the Extreme Tour easily handled their quick exchanges. Michelle said, "At net, I found this racquet fairly easy to use.
Surgical, spin-friendly and uniquely fast, the Head Extreme Tour tennis racquet gets updated with Auxetic technology for 2022! Head Extreme Tour 2022 Racquet...
Head Extreme Tour Review: A Blend of Power & Control. We'll start with the standard version, the Head Extreme Tour. Below are the specifications and on-court performance you should expect from this racquet. Head Extreme Tour Racquet Specifications. Weight: 11.3 oz. strung; Head Size: 98 square inches; Length: 27 inches; Balance: 324.9 mm ...
Reviews of the EXTREME MP. The reviewer for Tennisnerd had "more control and more confidence" to go for his shots. "It's still a powerful racquet and still spin-friendly. I like the design. This is the most improved of the EXTREME racquets, with much better control. It's spin-friendly, powerful and not too harsh on the arm, with a denser string ...
Head Extreme Tour 2022 Racket Review. Price: $186,90 MSRP: $260,00. Customer Reviews Video Reviews. Order Now. Demo. Overall: 81: Groundstrokes: 81: Volleys: 80: Serves: 82: Returns: 76: Power: 78: ... At net, our playtesters found the Head Extreme Tour 2022 to offer quick maneuverability and sufficient stability against heavy hitters. Michelle ...
The new HEAD Extreme Racquets for 2022 are revealed. The update comes with a fresh paint and Auxetic added to the layup. ... Looking forward to the review and also a comparison with the new pure aero 100 and 98. I currently use the extreme tour. ... I am using the head 360+ extreme tour and there is no point, I don't know if it is the low ...
The Extreme Tour 2022 stands out from other spin racquets by providing a plush 63 RA stiffness rating that offers players more comfort throughout long hitting sessions and matches. Aside from excellent spin, our team was pleasantly surprised by the amount of stability they found. For a 317 swingweight racquet, the Extreme Tour held its own ...
Introducing the Extreme Tour 2022! With this update, Head delivers a uniquely fast and spin-friendly weapon to intermediate and advanced players. Featuring the smallest head size in the Extreme family (98in²), this model packs a tad more control than the Extreme MP. ... Submit A Review. 5.0 out of 5. 12 Customer Reviews 5 Star. 4 Star. 3 Star ...
The Power of the Head Extreme Tour 2022 racquet. The head size of the racquet is 98 in² / 632 cm², it reduces the power compared 100 in² / 645 cm² tennis racquets and larger, so the Head Extreme Tour is a slightly reduced power racquet but at the same time it is still very accessible. In the 98 in² headsize category, this is one of the ...
ATP players George Houghton and Ewan Moore playtest the new Head Extreme Tour featuring Heads new Auxetic Technology. Use code: YOUTUBEEXTREMETOUR10 at check...
The HEAD Auxetic Extreme MP was a stronger update thanks to the denser string pattern that gives the player more control (similar to the 2023 Pure Aero ), while the Extreme Tour does feel a bit plusher on impact but overall plays the same. I did say in my video review (you can watch it below) that a few grams more in the hoop (a total of 310 ...
Crush it free download: https://dynamic.fuzzyyellowballs.com/ref/56789🤓Website: https://tennisnerd.net 🛑Patreon: https://www.patreon.com/tennisnerd 🙏Suppo...
About this Review: This review is my honest opinion of the racquet, which I purchased with my own money in June of 2022. My take. The Head Graphene 360+ Extreme Tour is an intermediate- to advanced-level topspin machine. With a lower swingweight and comfortable control oriented string pattern, I was able to generate a lot of racquet head speed while maintaining control and accuracy of my ...
Racquet Review: Head Extreme MP 2022. Improved control and a more solid feel highlight the update to the spin and power frame. By Jon Levey. Published Aug 17, 2022. copy_link. SPECS. Price: $259.
Along with a shaft that helps create extra spin, the EXTREME TOUR has unique spin grommets which allow more string movement and a powerful trampoline effect on impact with the ball. Extreme performance comes with a fresh, daring design. • New Auxetic technology for outstanding impact feel. • Extreme spin for tournament players.
This last version was released in September 2022 and, together with the Extreme Tour, Extreme MP Light, Extreme Team and Extreme Team Light, is part of the latest Head Extreme Line endorsed by Matteo Berrettini and Richard Gasquet. I recently had the opportunity to test out this racket and wanted to share my thoughts and experiences.
Beckett and Simon review the 2022 Head Auxetic Extreme Tour. They mention how it compares to the Graphene 360+ version, the 2022 Yonex EZONE 98 and the Babol...
HEAD adds an Auxetic construction to their most control oriented Extreme frame, the HEAD 2022 Extreme Tour. The Tour is one of the fastest 10.8 ounce racquets around, and the 98 square inch head and more dense 16x19 string pattern should be perfect for advanced players who want to add some precision to a heavy spin game. The Auxetic construction within the racquet yoke maintains impressive ...
This is not only a HEAD Extreme Team review, but also deals with the Extreme MP L and Team L. ... HEAD Auxetic Extreme Tour Review. next post. Coric's new racquet. You may also like. ATP Houston String Tensions April 3, 2024. Tecnifibre TF-X1 V2 April 3, 2024. Wilson Blade 98 16/19 V9 Review ... Patty December 19, 2022 - 22:52.
travel trailer electrical diagram
Written by Johnathan R. Smith • March 15, 2020 • 2:22 pm • Guides
RV Electrical Diagram (Wiring Schematic)

Understanding you campers electrical wiring can be very confusing. Use the RV electrical diagram we made below to get an understanding of what powers what and to learn how an RV electrical system works.

Understanding AC vs DC Power
RVs are powered by two electrical systems, AC and DC.
AC, also called alternating current, is what typically powers a regular brick-and-mortar home. We call it alternating current because the flow of the electricity isn’t unidirectional. The electrons rapidly flow back-and-forth. Light bulbs use AC power. Have you ever heard that lightbulbs aren’t a steady source of light? They look steady to the human eye, but in reality, light bulbs rapidly flash like a strobe light. This effect is directly caused by AC power changing directions. This behavior causes brief interruptions in power, which isn’t a problem for electronics with simple circuitry.
However, this type of flow isn’t naturally compatible with more complex electrical systems. For the most part, you can assume that it requires DC if it has a microchip. To make them compatible with AC, many of those systems, such as computers, come equipped with onboard AC to DC converters.
You might be wondering, “If DC is a more stable power source, why don’t we just use it for everything?” The answer is that DC is difficult to transmit over long distances, which is why AC powers the national grid. The specifics of the why aren’t pertinent to the subject of this article, but you can watch this video if you would like to know more.
Converters vs. Inverters
The AC can be transmitted, but it can not be stored in a battery. That’s one reason why we need both. We hook up the DC batteries to the more easily transmitted AC power source, and the AC is converted into DC power .
This conversion happens through the use of the aptly named converter . This is the same type of device that you will find on computers. It is just used on an RV-wide scale rather than a single device.
Many RVs also have inverters. They do the same thing as converters, but it is reversed. Inverters convert DC to AC. You can see examples of this by directing your attention to the RV electrical diagram at the top of the page.
Netflix Apk
As you know, some devices require AC and some require DC. Provided that there is a sufficient source of electricity, converters and inverters give an RV the flexibility to power all of its devices regardless of the power source, AC or DC.
Quick Recap
- Converter: Converts AC to DC
- Inverter: Converts DC to AC
DC is for Priorities – AC is for the Extras
The most observant among you might notice that RV appliances and plumbing are all powered via 12-Volt DC. RVs have house batteries, so DC is the most accessible source of power for an RV. The essential devices pull from those batteries: fridge, slides, water pump , built-in lighting, etc. Of course, there are exceptions to every rule, but this is a reliable guideline.
Anything plugged into an outlet will receive the standard 120 Volts of AC that any household outlet would supply. If the RV is connected to shoreline power or a generator is running, the wall outlets will pull the needed AC power from that source. Otherwise, assuming that the RV is equipped with an inverter, 12 Volts of DC power will be pulled from the house batteries. That power will run through the RV’s inverter, and the produced 120 Volts of AC power will run whatever you connected to the power outlets: microwave, phone charger, laptop, TV, etc.
Sources of RV Power

Shoreline (AC)
An RV primarily draws its power from AC sources at “120 Volts.” In reality, the 120 Volts is more of a rounded estimate, so you might see a bit of variation in the stated voltages of shoreline power pedestals. In the past, power companies sent 100 volts through the lines, but the amount has changed a couple of times over the last century. For all intents and purposes, consider 100 volts, 110 volts, and 120 volts to be the same thing.
When hooking up to a pedestal, you will find two basic configurations:
- 30-Amp Socket: Its three-prong receptacle visually defines this socket-type. Only one of the prongs supplies power, and it provides the expected 120 volts at 30 amps. Using the calculation of “Amps(30) x Volts(120) = Watts,” this calculates the total provided power to a rough 3,600 watts of electricity.
- 50-Amp Socket: Due to its four-prong receptacle, the 50-amp socket provides significantly more power. Two of the prongs supply 120 volts each, and both of them deliver 50 amps. Using the same formula, “Amps(50 + 50) x Volts(120),” these pedestals will supply 12,000 Watts.
Generators (AC)
Unless you purchased an aftermarket DC generator and made modifications to the electrical system, the generator is also going to be a source of AC power. If you plan on doing any boondocking, this is going to be your noisy best friend. It will provide you with the same 120 volts of AC power that you receive from a shoreline connection.
Solar Panels (DC)
Solar panels are a great supplemental and sometimes primary power source for many RVs. They are both economically-wise and environmentally-friendly, and they quietly generate 12 Volts of DC power that can be fed directly into your RV’s batteries. Of course, the one downside is that these systems rely on a sunny day.
Wind Generators
If a storm is brewing, those clouds are going to cut off your solar panels from the sun. Wind generators aren’t as popular as solar panels. However, they deserve more attention than they receive. They are a perfect addition to a boondocking setup. They are also cheaper than solar panels, but they are also a bit more challenging to implement.
Using the Engine’s Alternator
Many manuals advise using the generator instead of the alternator whenever possible. This advisement was written because running a high-powered alternator to charge house batteries can generate damaging levels of heat. While the heat can slowly damage the alternators, they are still very durable pieces of hardware. They should hold up for a long time.
Generators are more efficient at producing electricity, so they are an economical choice too. There really isn’t any benefit to using an alternator over a generator. Only rely on the alternator if you don’t have another option.
Energy Management Systems
You can think of these ingenious devices as a more intelligent circuit breaker. They do much more than that, but this works as a simple definition.
The power demands of an RV shift from moment to moment, and sometimes those needs exceed the power available from whatever campground pedestal is supplying the power. If that happens, it will trip the circuit breaker on the pedestal. You might make quite a few trips outside, which is an annoyance that nobody wants.
An energy management system can monitor the power being supplied and temporarily cut power to low-priority devices. When there is enough power available, those low-priority devices will receive that power. This will prevent those circuit breakers from tripping.
A more expensive EMS will measure how much power the pedestal is delivering and compare that to the RV’s electrical demand. If the pedestal doesn’t supply enough electricity, it will drain what it needs from the battery to make up the difference.
Conclusion On Camper Electrical Systems
We hope that the RV electrical diagram we included above is helpful to you and that it was able to answer many of the questions you had. We recommend that you always reach out to a trained RV electrician in order to make any modifications or to troubleshoot any part of your RV.

About the Author / Johnathan R. Smith
Comments are closed.
- Affiliate Disclosure
- Privacy Policy

- More Networks
RV Electrical System [with Schematics and PDF]
RV’s electrical system consists of a 120-volt AC circuit (that is powered by shore power or battery power through the inverter) and a 12-volt DC circuit, which is powered from the battery, or shore power through the converter. RVs are generally wired for two different types of services, 30-amp, and 50-amp.
Direct Current (DC), Alternating Current (AC), and chassis (or vehicle) power are the three main electrical systems in your RV. The chassis power system is connected to the RV electrical grid and controls all vehicle-related power gadgets, lamps, etc.
DC (or Direct Current) is an electrical charge that flows in only one direction and is commonly used in electronic devices. It’s the same type of energy that is stored in your RV’s batteries.
Applications of DC power include:
- Charging batteries
- Automotive applications
- Aircraft applications
- Solar cells
- Water pumps
- Propane leak detectors
- Carbon monoxide detectors
- Smoke detectors
- 12-volt refrigerators (two-way or three-way)
It is the same type of outlet that is known as a “cigarette lighter”. This type of power converter or battery dependent.
AC (or Alternating Current) is a current that periodically reverses or alternates directions. AC power is commonly used in our houses and it is also the same power supply that is coming from a pedestal in the RV park.
Even though everything (besides computers) in our houses is powered by AC, not many things in your RV use this type of power supply. 12-volt DC power is usually sufficient for many applications, including lights.
For larger things in your RV, you may want to utilize the GREAT POWER of the generator. Solar panels could also assist you in refilling your battery bank while out there on the road.
So how do you interconnect them all? An ALL MIGHTY Automatic Transfer Switch (or Changeover Switch) will help you out with this complicated task.
2-way Transfer Switches change the power output between inverter (with batteries behind it) or shoreline power, to supply your RV with electricity:
You can download here PDF version of this picture for greater detail.
3-way Transfer Switches change the power output between inverter (and battery bank), shoreline power, and a generator to give your RV all the power you need, any time you need it!
Here is the schematic PDF and this is the wiring PDF .
Now, you understand why the electrical system in RV is a multitude of power devices that are there to support you and your lifestyle. Here are some of those devices that any RV must-have:
- Battery. A good set of batteries is a must-have in RV if you ever want to get away from shore power.
- Inverter. You will need this device to converter 12-volt battery DC power into 120-volt AC power, that some of your appliances probably use (like residential refrigerator).
- Converter. If you are serious about camping, you need a device that will charge your batteries. Also, it can convert 120-volt shore power into a 12-volt DC power supply that is used for your lights and few other DC-powered devices that you probably have.
Now, let’s talks about “optional devices” that will really help you with having an exceptionally comfortable RVing experience:
- Inverter-Charger. That is in case you would like to save on space and instead of getting two devices (inverter and converter), you can have one that combines both. Higher-end inverter-chargers include transfer switches as well.
- Automatic Transfer Switch. This device will assist you in automatically transferring power from your 120-volt shore power, batteries, and a generator. Some models offer a “power-assist” option, where high surges could be directed to another source of power if the main one cannot handle it.
- Battery monitor. It is not really an option if you don’t want to damage your batteries!
- Generator. Using a generator will allow you to power larger appliances if you have a very limited power service.
- Solar panels. Well, there is some space on the roof, right???
Here is how the complete RV wiring looks like:
An this is a PDF file of the schematic diagram and a PDF file of the wiring diagram.
The wiring that runs your RV (and conveniently powers all the electrical gadgets that we love and need) is getting its energy from a huge electrical cord that is connected to a pedestal with outlets in the RV park. This plug is wired to a 120-volt breaker panel that powers your 120-volt devices and a converter charger.
The converter (or converter-charger) is connected to the 12V DC fuse box. This panel contains wires for your fans, lights, water pump, and other 12-volt outlets. There is also a link between battery and converter, and it charges it by converting 120-volt shore power into 12-volt DC.
The power inverter gets connected to the batteries as well, but its only function is to convert 12-volt DC battery power into 120-volt AC. Here is how the inverter is wired to the battery bank:
Feel free to download this PDF file for your reference.
Types of RV wiring services
Many RV parks and campgrounds provide electricity service for RVs and you want to plug it into a receptacle that corresponds to your specific wiring type. The most common RV wiring services are:
- 20 amp. Smaller campers and trailers.
- 30-amp. Medium size RVs.
- 50-amp. Larger size RVs with 2 A/C units.
20-amp RV Service
A 20-amp power receptacle resembles a regular household socket and provides 20-amp power at 120 volts:
It is the same type of outlet that you find in your house:
From 20-amp outlet you will get 2,400-watt service:
20 amps x 120 volts = 2,400 watts
If you are not lucky and they only have 15-amp service, you will get a whopping 1,800 watts of power! In this case, use your electrical devices wisely and one by one.
30-amp RV Service
The majority of small and mid-size RVs have 120-volt 30-amp electrical services. If you have a three-prong plug that looks like this:
…find an outlet on your shore power pedestal that looks like this:
This service will supply you with more power than 20-amp service, but it still is not powerful enough to accommodate surge levels of large appliances (like A/C) or many devices used at the same time. So, how much power do you exactly get?
30-amps x 120-volts = 3,600 watts
This means that surpassing the total 3,600 watt capacity in your RV at any time, will most certainly trip the 30-amp breaker! Watch your wattage use and make sure you don’t use the microwave, coffee maker, hairdryer, space heater, and your TV at EXACTLY the same time!
What happens if only a 20-amp service is available at your campsite? You can acquire this wonderful Camco adaptor (paid link):

And watch your power intake even MORE CAREFULLY…
50-amp RV Service
Many larger RV parks have a 50-amp power outlet at your service! If your plug looks like this (with 4 prongs):
… then you have a 50-amp electrical service and need an outlet that looks like this:
This service includes 12,000 watts of power which can be used to power quite large devices like an air conditioner. How did I get this number when there is only 50-amp of power?
This particular service provides two 120-volt hot wires and if you multiply them by 50, you will get the following number:
(50+50) x 120 volts = 12,000 watts
What if you have 50-amp electrical service and only a 30-amp outlet available? NO problem, dog-bone adaptors like this one sold on Amazon (paid link) can help you out here! Woof!

The only problem in this situation is that you will NOT get your normal 12,000 watts service, but only 3,600 watts that 30-amp power supply offers.
Battery bank
The last, but not least important element of your RV’s electrical system is a battery! It is commonly referred to as a “house battery” and it is typically 12 volts.
Lead-acid batteries are the most popular batteries that RVers use, but lithium-ion batteries are gaining more approval now in the RV world. Lithium-ion batteries outlast traditional lead-acid batteries, they are more durable and their life expectancy is a lot longer.
These batteries are initially more expensive, but when you consider how long they last and how much power they provide, they may be worth giving a shot! Lithium-ion deep cycle 200AH battery (paid link) is a perfect choice for any RVer:

How do batteries get charged? Here are some wiring schematics for you.
Generator and shore power
They can be charged from 120-volt shore power or a generator:
This is a PDF file of the above schematics and another one for wiring (PDF) .
Let’s add some solar panels!
You can also add a photovoltaic system (or solar panels) to the setup and you get an ultimate power machine in your RV!
Here is the schematic PFD diagram and wiring PDF diagram.
Legal Disclaimer
Leave a reply cancel reply.
Your email address will not be published. Required fields are marked *
Save my name, email, and website in this browser for the next time I comment.
Automated page speed optimizations for fast site performance

Where You Make It
Understanding Your RV Electrical System
Hey! This site is reader-supported and we earn commissions if you purchase products from retailers after clicking on a link from our site.
As a rule, your RV will have two separate electrical systems that draw different voltages as well as two different types of current. Just as a “sticks and bricks” home is based upon 110/120v power system, so is your RV.
However, because your mobile home away from home is also dependent upon using a 12v system and in this article, we’ll take a look at some of the components that make up your system and what they are meant to do.
We’ll look at:
- Different power sources you can use
- Each component of your electrical system
- Proper setup of wiring, breakers, and fuses
- Where you should include outlets
- Other pro tips and watch outs
What are my sources of electrical power when traveling in my RV?
Unless you’re special ordering a manufactured motorhome or towable RV, the two basic sources of electricity in a manufactured RV will be shore power and house batteries which I will explain below as well as some alternative sources for power such as solar power and generators.
What is shore power?
Although this term is commonly used when referencing boats or marine vessels when docked at a marina and plugging their electrical system into the main grid used by the marina, the term is also used when referring to RVs being plugged into a main power grid supplied by a campground or an electrical circuit at someone’s home or business.

Most manufactured motorhomes and campers will have an electrical system and long power cord that allows you to plug into shore power , although some older models may be missing this feature especially if your RV was built before 1970.
Should you be doing a custom build or restoration of an RV, installing a shore power can be very simple to more complicated depending upon how you want your power supply to operate and the number of items you wish to power.
For example, you may have a small van that you have converted to an RV and it is wired with 12v lights and RV refrigerator, but you want to add a 110v line because you want to power a laptop computer, charge your camera batteries or watch some television.
Adding one or two outlets like this can be done easily by simply installing a weather appropriate inlet on the side of your van that is wired directly to those indoor outlets on a single line. This works well for people that have a limited need of shore power and you only need a good outdoor 110v extension cord to run from the power box or outdoor outlet to your inlet.
However, the larger your RV, the greater your shore power needs will be too. Generally, class A motorhomes are equipped with a 50-amp power plug and class C may have either a 50-amp or 30-amp power plug. Class B motorhomes are usually 30-amp as are smaller campers. Remember, the more bells and whistles you have on your RV determines the amount of amperage you will need.
Another thing to keep in mind when RVing is that smaller and older campgrounds may not have the electrical outlets that your rig requires. It’s not unusual to find many campgrounds are only supplied with 30-amp outlets. To avoid this happening to you, I would recommend that you purchase an adapter that takes your 50-amp power supply down to a 30-amp supply.
The downside of this, however, is that you will need to be especially mindful of the amount of electricity you are drawing at any given time. When your system is designed to be running efficiently at 50-amps and you lower the intake to a 30-amp draw while still trying to run as many appliances, electronics, and air conditioning then it is likely you will blow a fuse or pop a breaker.
What are house batteries?
Most RVs will have at least one deep cycle trailer battery that is used to supply power to 12v outlets and appliances such as exhaust fans, carbon monoxide detectors , RV style refrigerators, and some lighting. Usually, the bigger the RV, the more batteries you are likely to have.

- UB121000 SLA is a 12V 100AH Group 30H Sealed Lead Acid (SLA) Maintenance Free Rechargeable...
- The spill-proof SLA/AGM battery features high discharge rate, wide operating temperatures, long life...
- Rechargeable battery that can be mounted in any position, resists shock and vibration. Long lasting...
Last update on 2024-04-07 / Affiliate links / Images from Amazon Product Advertising API
Keep in mind however, that things like an RV refrigerator can drain your battery or battery bank rather quickly so you need to keep an eye on that power consumption by checking your battery monitor often.
You should also be mindful of the type of battery needed for your house RV battery and that it’s best to use a deep cycle battery that can handle heavy draws of power as well as being constantly drained and charged which will take a toll over time with cheaper RV batteries not designed for that type of use.
House RV batteries can be charged by various sources but are most often charged when you are plugged into shore power, while you are driving down the road by your engine components or a solar system. You can also use a deep cycle battery charger to power it up.
What is a battery monitor?
Battery monitors are used to keep track of the amount of power coming into your RV and the amount you are drawing from your battery or battery banks at any given time. Generally, the larger your trailer or motorhome, the more advanced your monitor will be.
For example, you may have solar panels that are adding power during the day and you may want to periodically check the amount of power coming into your RV during these times. The same can be said about usage during the night when you are more likely to be drawing from your RV batteries instead of charging them.

- Test range: Voltage: DC 6.5~100V; Current: 0~100A; Power: 0~10kW; Energy: 0~9999kWh
- Store energy data when power off (can be reset to 0). The blue backlight can be turned on/off...
- With overload alarm function (If active power is larger than threshold, backlight and power value...
Depending upon how many functions you need your battery bank to perform and access to the data when it is working, you can decide on the type of monitor you will need. Manufactured RVs with house batteries will always have a battery monitor located inside and usually in the same proximity as your fuse boxes.
However, if you are upgrading or designing your own electrical system you may need to replace or determine the best monitor that works for you. As with most electronics these days, the complexities of these monitors vary any many of them can even be accessed online or via cell phone applications when you are away from your rig.
What are alternative methods for supplying my RV with power?
Many class A motorhomes and higher end campers such as 5 th wheels come with the option of including a generator when you order or purchase them. The advantages to having a generator that is installed on your RV from the manufacturer is that it is easily turned on by activating a switch inside your RV and that it is fueled by an onboard supply.
By this I mean that many class A motorhomes have their generator designed to burn the same fuel as the engine requires and this eliminates the need to refuel them separately as you travel.
Another advantage to having a factory installed generator for your RV is that it will be installed in a well-insulated yet well ventilated area of your rig. It’s also likely to be quieter and less disturbing to those camping near you.
However, factory installed generators can come with numerous disadvantages as well. Probably the major deterrent for most people is the added cost when they are initially exploring the idea of ordering and purchasing a new RV .
These type of systems are very expensive and come with numerous added components that through travel and frequent motion, are likely to fail more quickly than adding an aftermarket generator to one of your storage bays and setting it up for use outside and away from your RV as you boondock or visit dispersed camping sites with little or no power resources.

- This popular model can operate a wide variety of appliances, making it perfect for portable use at...
- So quiet, your neighbors will thank you. The EU2200i operates at 48 to 57 dBA, which is less noise...
- Add a second EU2200i for additional power. Two identical models can be paralleled with an optional...
While I’m not a huge fan of using gasoline or propane portable generators as a long-term source of electrical power, they do come in handy for short stays in an area where shore power is scarce or non-existent.
For short-term RVers and those looking to fish or hunt in remote areas, I would recommend having a good gasoline generator with you that will run continuously for longer periods of time on the fuel supplied to it.
Personally, I have always had a portable generator that uses propane and while more expensive to initially purchase, the safety I feel I gained by not carrying around filled gasoline cans was far worth the extra cost. I also don’t have any issues boarding a ferry boat.
Remember, when choosing a generator, always consider the fuel needed to operate your system where you are traveling. There are places in the most northern parts of the American continent where there is no gasoline and propane tanks are the main source of fuel.
On the other hand, there are several long stretches through Mexico and many Central American countries where you won’t find access to propane.
That said, generators are always a good option, but keep in mind that most of them are loud and gasoline or diesel fuel generators produce exhaust that smells bad. No one wants to be in a beautiful location and listen to the drone of a fossil fuel fired generator a few hundred feet away or worse yet, right next door.
In short, if you choose to use a generator, use it sparingly and respect the wildlife and those that may be camped near you.
Solar power
Frankly, my preferred method of alternative power is solar based, and I am amazed by the amount of technology and economic theory that has come with this source of power over the last few decades. I grew up in an era where solar power was just being developed. Its components were large, and it was cost prohibitive for most people that were interested in incorporating it into their lives.
Today, electronic components have become more advanced, solar cells are much smaller than when first developed and the prices have dropped considerably since they were first developed. I love my solar electrical system and it literally has allowed me to stay in comfort at places where I couldn’t have stayed just 10-20 years ago.
For a better understanding on how to install a solar electrical system on your RV, please take a look at my colleague Lindsey’s article where she give you an excellent tutorial about installing solar power on her RV. Also, take a look at our picks for the best RV solar panels .

- 【Efficient Performance】The 200W Solar Panel Starter Kit will produce an average of 1000Wh of...
- 【Solid Quality】Advanced encapsulation material with multi-layered sheet laminations protects...
- 【Smart Function】The Wanderer PWM Charge Controller is compatible with four different types of...
I have an inverter and a converter in my RV electrical system. AC vs DC
No, an rv power converter is used when you are hooked up to shore power at a campground and it converts your 110 volt AC power down to 12 volt DC power to keep your house batteries fully charged.
On the other hand, an inverter is used when you are not on shore power and want to use 110v for something like a coffee maker, microwave or television and this inverts your power from 12v DC power to 110v AC power. You can read my article on how to install an inverter for more info.
Proper setup for wiring, breakers, and fuses
As I said earlier, RV electrical systems can be simple or complicated depending upon how you want your system to perform. In this diagram you’ll see that this is the most common RV electrical set-up and the basic type most often installed by manufacturers.
Normally, when you plug your RV into shore power, the current flows to your 110v A/C breaker panel where it is then dispersed to your RV electrical outlets for plugging in small appliances, 110v lights or electronics. It also will send current for some appliances such as larger exhaust fans or water heaters that are hard wired directly.
The breaker panel will also send a 110v current into the charge converter that I explained earlier. Remember, the converter reduces that 110v to 12v where it is stored and recharges your house batteries, part of your electrical system.
Once here, the 12v current will then supply electricity to a fuse box that works exactly as the larger breaker box that your shore power flows into initially. Smaller 12v light fixtures, your water pump, and some electronic power or chargers can also utilize your 12v power supply as well as some outdoor lighting and even your furnace fan motor.
You should also take note that in this schematic, they included a box that represents power being supplied to your house battery/batteries. This is the electric current being supplied when you are not using shore power but are instead driving down the road or even idling your motorhome engine.
Almost every motorhome has their engine’s alternator designed to supply current to their house batteries, and many towable RVs are wired through their tow vehicle and camper connections that supply power to your camper’s electric brakes and lights when driving while also recharging your RV batteries.
Where should I put my power outlets?
Most often, this question will have no direct or specific answer. It’s really all about what you want the design of your RV to be. Simply put, where do you think the power supply outlets should be based upon your needs?
For example, if you have no reason to have an outlet next to your bathroom sink, then don’t design one into your plan. Personally, I recommend having two 110v outlets near your cooking and food storage area to supply 110v to a dual powered refrigerator as well as supplying power to a coffee maker, microwave, toaster or any other item you may want to use when connected to shore power.
I would also make sure that I had an outlet or two wired to my living area and/or bedroom, so I could access my computer, watch my TV or listen to some of my favorite music while traveling. That said, I would include 2-3 outdoor outlets on my RV to cover security lighting as well as lighting for safety.
Final thoughts
In an upcoming article, I’ll be sharing some thoughts on how to troubleshoot RV’s electrical system as well as making some repairs for common problems you may encounter with that system while you travel. One I published recently is a guide on what to do when RV battery won’t charge . Until then folks, thanks for reading and as always, I hope to see you out there someday.
For other electrical work, read these related articles.
- Best RV surge protectors
- Best battery for travel trailers
- Best trailer brake controller
- Best RV monitor panels
- How to start your generator
Related Articles:

Born and raised in Michigan, contributing writer Brian C. Noell is a retired hospitality industry professional that now works remotely as a visual artist, writer and photographer as he travels around the United States in an RV with his dog Lizzy, an eighty pound Appenzeller hound dog.

Interactive RV Wiring Diagram: Perfect For RVs, Campervan Conversions, Skoolies, Travel Trailers & Motorhomes
Everything you need for a fully customized rv wiring diagram & design.
Introducing the Interactive RV Wiring Diagram – the ultimate tool for designing electrical systems for RVs, campervan conversions, skoolies, travel trailers & motorhomes.
Designed to provide a comprehensive and efficient solution to the complexities of the wiring systems in campers.
Automatically Create Your Bespoke RV Wiring Diagram
Includes 110v & 240v, solar, B2B, batteries, inverters, 12v, 24v & 48v systems, wire gauges in AWG & mm² & much more!
All-In-One Interactive RV Wiring Diagram Features
- Interactive PDF : With our user-friendly PDF, you can easily navigate through the wiring system of your RV at your convenience.
- Detailed Schematics : Our product provides a detailed wiring schematic for each component, ensuring that you have all the information you need at your fingertips.
- Customizable : With our product, you can customize your wiring diagrams to fit your specific needs.
- Printable : The PDF wiring diagram is a full colour, high resolution image and can be printed up to 91 x 67 cm (34.9 x 26.56 in).
✅ Choose shore power hook up for 110-130v OR 220-240v mains supply.
✅ Calculates how much power your solar panels can produce wherever you are in the world, year-round!
✅ Tells you if you have enough solar to provide all your power needs and if not, exactly what the shortage is in amp hours, so you can compensate by charging while you drive, shore power or extra battery capacity.
✅ 12v, 24v AND 48v battery banks supported.
✅ Calculates battery bank size for Lithium, AGM AND Gel.
✅ Calculates the minimum size inverter needed, without limitations.
✅ Select a combined inverter charger or a separate inverter and battery charger (converter).
✅ Calculates alternator charging B2B size.
✅ Enter your circuit lengths in metres OR feet.
✅ Automatically calculates wire gauges in either AWG OR mm².
✅ Every component is customizable when you want to override the calculated minimum sizes.
✅ One size fits all! Use the Interactive RV Wiring Diagram regardless of what size system you have.
Calculate & Customize Your Camper’s Entire Electrical System
Designing the perfect RV electrical system for your camper just got easier with the Interactive RV Wiring Diagram.
Our powerful tool allows you to effortlessly calculate the ideal solar, battery, wire gauge, fuse, switch, and relay sizes needed for your unique needs – no more guessing required!
With just a few simple details, our built-in calculator will size your entire electrical system and generate a personalized wiring diagram, making your installation process faster and hassle-free.
Plus, our customizable options allow you to tailor each component to your specific needs, ensuring a perfect fit.
Say goodbye to confusing and complicated electrical systems, and say hello to the stress-free and efficient solution provided by the Interactive RV Wiring Diagram.
Start planning your perfect electrical system today!
Audit Your Existing System & Upgrade Your Design
If you’re experiencing trouble with your RV’s electrical setup, the Interactive RV Wiring Diagram is the perfect solution.
It’s designed to help you audit your RV’s electrical system easily.
Visualize your existing setup, identify issues and discprenecies with the existing system size versus the recommended set up , and find solutions to optimize your RV’s power and ensure the most reliable travel experience.
Whether you think your battery bank isn’t big enough, the solar panels are inefficient or your inverter is struggling with overloaded circuits, the interactive RV wiring diagram has got you covered.
Our diagram comes equipped with innovative tools that allow you to customize and visualize the best power setup for your RV.
It simplifies the entire audit process, providing you with a clear assessment of your RV’s electrical system.
From overloaded circuits to underpowered inverters and usage limits, everything you need to optimize your RV’s electrical system is at your fingertips.
The interactive RV wiring diagram is the perfect solution to any electrical woes that you may be experiencing with your RV.
Knowing exactly which components are compatible with your RV’s electrical system will help you avoid costly mistakes down the road.
With the Interactive RV Wiring Diagram, you can be sure you’re buying, installing, and operating the right components for your RV’s electrical system, ensuring maximum reliability and efficiency.
By taking control of your RV’s electrical system, you’re sure to save money while ensuring efficient and reliable travels.
Join the growing list of RV travelers who have taken control of their electrical systems with our innovative Interactive RV Wiring Diagram.
What You Will Get
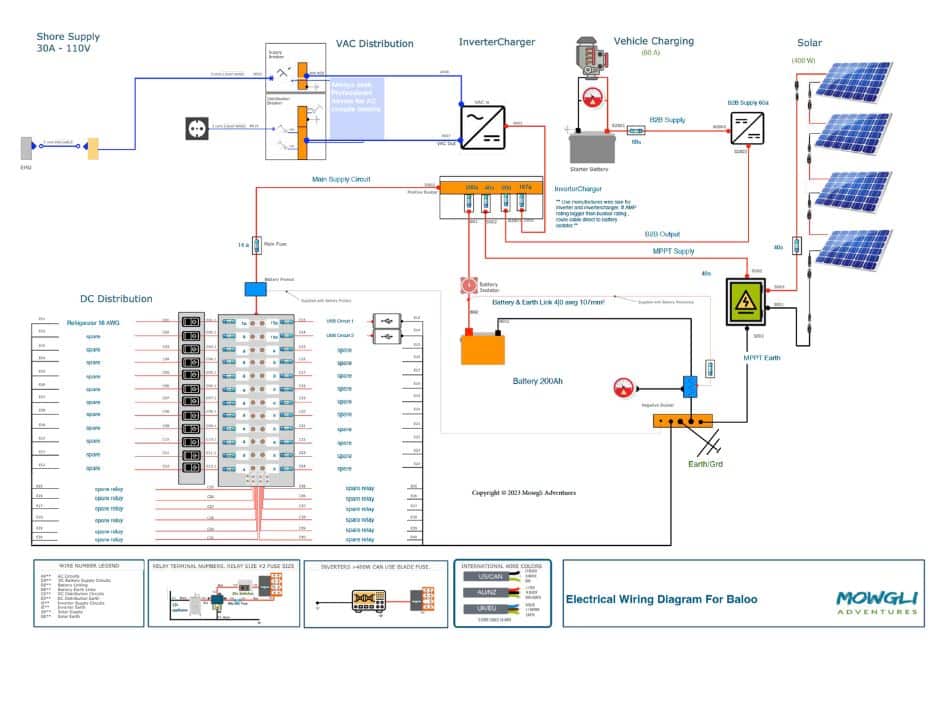
One electronic copy of the 27 page Interactive RV Wiring Diagram. This is an interactive pdf file.
You need Acrobat Reader on a laptop or desktop to fully utilise the interactive wiring diagram and in-built calculator.
The pdf won’t work with an internet browser or preview apps such as Apple Preview.
If you experience any difficulties, make sure that JavaScript is enabled in Acrobat Reader. You can set it by following these steps: Edit > Preferences > JavaScript > Enable Acrobat JavaScript.
Acrobat Reader will not request a password to open this PDF, unless you attempt to edit the source file. For hassle free access, make sure you use Acrobat Reader and not PDF editing software.
The download link is received immediately after the transaction is complete.
You can print copies of your wiring diagram in full colour, high resolution image and can be printed up to 91 x 67 cm (34.9 x 26.56 in).
Buy Your Interactive RV Wiring Diagram Now
Lots of educational material.
When designing your RV electrical system, we understand that knowledge is power. That’s why, in addition to our Interactive RV Wiring Diagram, we offer additional educational material through our Campervan Electrics Handbook , our website and YouTube channel .
Campervan Electrics Handbook
The Campervan Electrics Handbook provides a step-by-step guide to designing and setting up a functional electrical system.
It covers major components, circuits, battery technologies, charging methods, sizing components, conversion of AC to DC, installation, safety, and troubleshooting.
Readers will learn how to calculate their electrical usage and choose the best battery type, and will gain knowledge on wiring, fuses, busbars and breakers.
Everything you need to know about campervan electrics. Now available in ebook and paperback!
Learn how to design, size, install and troubleshoot your camper’s electrical system.
Mowgli Adventures Website
Our website is home to a wealth of informative articles, providing in-depth knowledge on all things related to electrical sytems for RVs, campervan conversions, skoolies, travel trailers & motorhomes.
From simple how-to guides to more advanced electrical principles, our site covers topics to suit camper enthusiasts of all skill levels.
Mowgli Adventures YouTube Channel
If you prefer a more visual learning experience, check out our YouTube channel.
We regularly upload informative videos that cover everything from product reviews to step-by-step guides for electrical installations.
Our videos are easy to follow and designed to help you feel confident tackling any electrical project on your camper.
We take pride in providing our community with the best possible resources for their camper electrics needs.
Community & Support
Need help & advice with your camper electrical setup?
Our book, website and YouTube channel are just some of the additional educational materials that we offer alongside our Interactive RV Wiring Diagram.
We don’t just provide top-notch resources for your camper electrical needs. We foster a community of like-minded individuals who share your passion for camper living.
Our page is more than just a resource hub – it’s a place where RV enthusiasts gather to share their experiences, knowledge, and expertise.
Whether you’re a seasoned pro or a novice in the world of RV camper electrics, you’ll find a welcoming and supportive community here.
From advice about common electrical issues to innovative DIY solutions, our page is the go-to place for all your RV electrical needs. With our friendly and knowledgeable members, no question goes unanswered.
Join us today and become part of a community that shares your love of RV living.
Together, let’s create a space where we can share our experiences, learn from each other, and build a genuine support group.
3 thoughts on “Interactive RV Wiring Diagram: Perfect For RVs, Campervan Conversions, Skoolies, Travel Trailers & Motorhomes”
I have a 1994 Coronado what are the wires and diagram to put it back together
I have a 1999 newn hitchhiker 5th wheel the shore power cord and wiring was removed, would like to hook it all back up. I need a little help with what wires go where. I have looked for a wiring/fuse box diragram but have had no luck.
I’m looking for a schematic for 2000 fleetwood bounder coach for the water pump system it has 3 switches

© 2024 mowgli adventures
Privacy Policy | Terms Of Service | Sitemap
Part of Mowgli Adventures Media Ltd. Registered in England and Wales. Company Number 13558893
What are you looking for?

DIY Camper Van Electrical System Example (Internal BMS Batteries)
Example diy camper van electrical system.
This post was originally published in September 2020 and is great for a system up to about 300-400 amp hours of battery storage. We update it occasionally. We highly recommend starting at this page to get a orientation on how to plan and design a mobile power system . You can also reach out to us at [email protected] or call us at 754-444-8704 x2.
This post includes a detailed wiring diagram and complete list of materials needed to put together a very reliable and robust electrical system for your camper van that is capable of extended off-grid adventures and powering just about anything you throw at it.
FREE Camper Van Power System Resources & Wiring Diagrams
If you're confused about your DIY camper van electrical or solar system, you've come to the right place. We have tons of resources including blog posts, videos and detailed example wiring diagrams (see below),If you're really stuck, we also offer consulting and design services . Our " choosing a system" page offers some additional advice and includes an example load calculation that you can use.
Below are some of our example power systems for camper vans/RVs. The Victron-based systems all have a corresponding blog post, free detailed PDF example wiring diagram, and a corresponding discounted product bundle . Ultimately, you'll probably customize your system to your particular needs and perhaps combine ideas from one or more of the example systems.
- A baseline camper van electrical system that uses lithium batteries with internal battery management systems (BMS) such as a Victron SuperPack, Battleborn, SOK, etc. This is our most affordable and simple system as well as the most DIY friendly.
- A more advanced camper van electrical system that uses Victron Smart lithium batteries with an external BMS and a Cerbo GX for monitoring. This system is a bit more complex and more costly, but adds features and allows for more battery storage in the same physical footprint. If you use the Victron Lynx Smart BMS you can upgrade to a dedicated secondary alternator with a Wakespeed regulator in the future.
- A super powerful (fast-charging) system that uses a dedicated secondary alternator . This system is the most expensive but also the most off-grid capable. We also have a 48-volt version of this system!
- We also have a power system accessories bundle that has all the circuit protection, shore power, distribution, and wiring you'll likely need.
Please consider purchasing your power system equipment from our store . Our bundles offer great pricing (yeah, better than Amazon), free shipping and you'll have access to expert support and you'll be supporting our ability to create more content!
Finally, there are a few things that we don't sell in our store (yet!) that you might need so we keep a list of these products in this Google Sheet of recommended camper van products .
- 400 amp hours of lithium battery storage with built-in BMS
- 400 watts of rooftop solar
- 2400 watt inverter (up to 6000 watts surge) with 120 amp shore power charging capacity
- Integrated 12 volt DC and 120 volt AC load center
- 60 amps of alternator charging when driving/engine is running
- Optional pre-inverter shore power outlets
- Battery monitoring with Bluetooth
It’s super important to realize that there are hundreds of ways of skinning this cat. How awful. We won’t be skinning cats and neither should you. Anyway, the point is that this information should be considered a guide not gospel. You certainly could build out this system exactly as detailed but I would recommend considering your particular needs and then adjusting accordingly.
Also, wire lengths matter. This electrical diagram assumes that there is about a 20′ run from the vehicle battery back to the driver side wheel well where the “primary” electrical system is installed. What I mean by “primary” is most of the stuff you see on the wiring diagram – all the main parts but not the “branch circuits” that power the actual loads in the van like lights and fans, etc. It also assumes all those components are close together – not more than 5 (ish) feet of cable run between them. If your actual setup is different than this you need to adjust the wire gauge (AWG) accordingly. The Blue Sea Circuit Wizard is a great tool for understanding what gauge wire you need. You put in the load in amps, the length of the cable run and how long it will be running in minutes and it will tell you the correct gauge. I favor “over gauging” in general. Wire is pretty inexpensive relative to the other parts. In this wiring diagram I have also over gauged to keep it a bit more simple so that you don’t need so many types/gauges of wires and lugs and so on.
Speaking of wiring … you’ll probably use wire loom to protect your wires when you run them in areas they might be damaged by rubbing against stuff. So, let me introduce you to this “ wire loom insertion tool “. It’s pretty much a game changer.
Why A 50 Amp Breaker?!
With most 2000 or 3000 watt inverters you would match the shore power’s 30 amp inlet on the output side. However, Victron Multiplus inverters have a unique feature -they will actually supplement the utility power coming in from the shore power plug with their inverted power – up to 3000 additional watts. So, if you manage to have enough stuff running in your van to exceed the 30 amp service from the shore power, the inverter would actually fill in the gap instead of tripping the shore power breaker. So, while this is not likely to happen unless you’re running some kind of crazy loads in your rig, it’s important to provide circuit protection and adequate wiring “just in case”. Therefore this wiring diagram calls for a 50 amp breaker downstream from the inverter with 6 AWG wire instead of a more “typical” 30 amp breaker with 10 AWG wire.
Inverter Wattage
If you look closely at the specs of the Victron Multiplus inverters they don’t actually support continuous 2000 or 3000 watts respectively. This isn’t important but it can be a bit confusing because of how they’re named.
The MultiPlus 12/3000/120 outputs 2400 watt continuous output at 77 degrees, 2200 watts at 104 degrees and surge up to 6000 watts.
The MultiPlus 12/2000/80 outputs 1600 watt continuous output at 77 degrees, 1450 watts at 104 degrees and surges up to 4000 watts.
Victron MultiPlus Inverter/Charger Configuation
Once you get your system all wired up you’ll need to configure/program the MultiPlus to, at minimum, work with the batteries you’ve chosen and maybe tweak a few of the other settings. We have another post on how to do that .
A Little Battery Update (June 2021) In addition to the complexity, the other pain point around electrical systems is how expensive they are. In particular, the leading brands of lithium batteries such as the Victron SuperPack batteries we show in our example and other popular brands like Battleborn) are very expensive – about $1,000 per 100 amp hours. It’s a classic sort of “pay for what you get” scenario and there are good reasons to purchase the highest quality components. For example, the are excellent quality, designed to last for many years with 10 year (!) warranties. But, the truth is that not every van build needs the very best batteries and there are well-made alternatives that are just about half the price! In some cases, having more capacity (amp hours of stored energy) may be better than more longevity . You can ask yourself, do I want to run the stuff in my van twice as long for a few years or half as long for a decade?
Anyway, Will Prowse made an excellent video testing out well-built but lower cost lithium batteries that is worth checking out. One example is the SOK 206 amp hour battery that is currently selling on Amazon for $1,029.
Wiring Diagrams
The image below is for quick reference but I recommending downloading the PDF file (below) for much more detail and the ability to print/zoom in.
If you have AC loads that should ONLY be powered by shore (utility) power , (not inverted AC power), you can use the “AC out 2” connections on the MultiPlus inverter/charger which is only “live” when shore power is available. One good example of this would be an AC/DC refrigerator. Many of those will “default” to AC power when it’s available. If you wired up an outlet near your refrigerator that was powered by the inverter, the fridge would switch to that source of power anytime the inverter was on (inverting) which is less energy efficient that it continuing to run off the 12 volt DC power. If, instead you wire up that AC outlet that feeds the refrigerator, it will only run off the AC power when you have shore/utility power.
If You’re Using a Renogy DC-DC Charger Instead of the Victron Orion Units
Unlike some other battery-to-battery charging products that sense voltage and trigger the charging based on that, the Renogy DC to DC charger (or battery-to-battery charger) that I used requires you to connect up a 12 volt positive “signal wire” from the vehicle’s ignition switch so that it only charges from the van (vehicle) battery when the ignition is turned on. Without this ignition trigger on this unit or the voltage sensing on others, the battery-to-battery charger could easily drain the van battery since the battery-to-battery charger would be pulling current without the alternator providing a charge.
After some research I discovered that some Promaster vans (2016 or newer I think) have a “Upfitter Connector” on the passenger side “pillar” which is that area just behind the passenger seat where the seat belt connects to the van wall. If you remove the black plastic trim at the bottom of this “pillar” you’ll see a white multi-pin connector (photo below). This is the “upfitter connection” that provides a variety of connection points for the Promaster in one spot. This PDF file ( Promaster Upfitter Connector Diagram PDF ) details this connector including what each pin on the connector is/does. Turns out that pin #13 is an “ignition feed” that has 12 volt positive when the ignition switch is on. So, I used this to be the “trigger” for the Renogy DC to DC charger.
In order to do this, I had to order the correct, “male” version of this connector (part number 1-480710-0) as well as the “pin” itself (part number 350218-1). The way this works is that you solder the correct wire to an empty pin and then insert that pin into the correct position on the connector thus allowing you to access and wire up a variety of things to this upfitter connector. These parts are pretty inexpensive so I bought a few with the expectation that I’d destroy a few figuring out how this all works. I’m glad I did because I did indeed destroy a few experimenting. Ultimately, it’s not difficult but finding the right parts and how they fit together took some time. So hopefully this saves you that time!

The wire coming out of pin #13 on the Upfitter Connector runs back to the rear passenger side wheel well where the primary electrical system is installed and is connected to the Renogy DC to DC charger on a terminal labeled “D+”. Below is a photo of this connection:
Next I had to configure the Renogy DC to DC charger to correctly charge the lithium batteries using the DIP switches pictured above. The manual for this Renogy DC to DC charger is really bad and the section on setting up the DIP switches is complete gibberish. I gave up on it pretty quickly and called into Renogy support. The correct DIP switch settings for charging lithium batteries with the Renogy DC to DC charger is:
- Switch #1: Off
- Switch #2: On
- Switch #3: On
- Switch #4: On
- Switch #5: Off
Turning On The LED Lights On The Lynx Distributor
There are LED lights on the Lynx Distributor that indicate if each of the circuits is live (the fuse isn’t blown). They light up green when it’s good and red when it’s not. These lights are normally powered when the Lynx Distributor is paired up with the Victron Lynx Shunt but you don’t need that if you use the “better-for-vanlife” (my opinion) BMV-712 battery monitor (listed above) which has it’s own shunt for monitoring.
So, if you don’t want to buy that hardware but do want the fancy lights, you can “hack” the lights with a 12 volt DC to 5 volt DC converter and an RJ11 “phone style” connector . This will provide the 5 volt power the LED lights need to fire up. Below is an illustration on how you’d do this – at your own risk, of course .
We Appreciate Your Support!

Sign Up For Our Monthly Newsletter
We strive to make the newsletter worthy of your inbox. It's full of relevant news, featured campsites, DIY build tips, events/meetups and more!
Travel Trailer Electrical System Schematic
When it comes to traveling in your RV, having a functioning electrical system is essential. But without the proper knowledge, it can be hard to understand how the wiring works. That's why having a good electrical schematic for your RV is so important. It will show you exactly which components are connected to what, so you can make sure everything is working properly. A travel trailer electrical system schematic shows you how the different components of your RV’s electrical system are wired together. This includes things like the batteries, the converter, and the various outlets. It will also show you the connections between the different components and the circuit board. Knowing how these components and circuits are wired together will help you diagnose issues and make repairs much easier. When looking at an RV electrical schematic, it's important to understand how the different symbols are used to represent the components. For example, a square box with a plus and minus sign inside it usually represents a 12-volt battery. An arrow pointing in one direction usually indicates the flow of electricity while two arrows pointing in opposite directions indicate an alternating current. A circuit board, on the other hand, may be represented by an oval with a line through it. Once you understand the symbols, you can begin to analyze the RV electrical schematic to see how each component is connected to the others. Start by looking for any points of failure or places where there might be a loose connection. Then, use a multimeter or test light to test the connections between the different components. For example, you can use the multimeter to measure the voltage between the battery and the converter. By analyzing the RV electrical schematic, you can quickly detect any problems such as loose connections, corroded wires, or overloaded circuits. You can then take steps to repair the problem or replace any faulty components. In addition to making repairs easier, understanding the RV electrical schematic will help you troubleshoot potential problems before they arise. Having a detailed RV electrical schematic is essential for anyone who wants to maintain their RV’s electrical system. This is especially true if you’re planning a trip far away from home. A thorough understanding of your RV’s electrical system can help you avoid costly repairs and keep you safe while on the road.

Airstream 7 Way Wiring Diagram Inland Rv
Micro Minnie Wiring Diagram Winnebago Owners Online Community

50a Oem Rv Solar Retrofit Wiring Diagram Explorist Life
Trailer Wiring Diagrams

Fleetwood Coleman Wiring Diagram

Battery Wiring Schematic Jayco Rv Owners Forum

Is This Wiring Diagram For A Lithium Camper Scheme Correct Victron Community

Airstream Converterore

Epic Guide To Van Life Electrical Solar For Diy Campervans

Rv Electrical System With Schematics And Pdf Electric Problems

Diy Solar Wiring Diagrams For Campers Vans Rvs Explorist Life
Wiring Diagram Forest River Forums

Fixing Tail Lights Not Working Rv Light Wiring Diagram

Dc Distribution Kit For Victron Lithium Battery Systems

Rv Inverter Install Four Diffe Diy Methods To Get Off The Grid
My Grand Rv Forum Design Owners
Rv Life Orv Electrical System Upgrade Evans Outdoor Adventures

Trailer Wiring Diagram Lights Brakes Routing Wires Connectors

Trailer Wiring Diagrams Etrailer Com
- United States - English
- United Kingdom - English
- Canada - English
- Australia - English
- Other Europe - English
- Germany - Deutsch

Typical RV Wiring Diagram Explained: Any Better Solution Available?
If you’re looking for a self-build RV wiring diagram that works in Canada, you’ve found it. This diagram represents one of the most common setups in Canada and it is designed for a 2kWh solar power system, which is sufficient for a couple’s or two friends’ journey.

Campervan wiring diagram from Renogy
It can be broken down into three categories: Sources, AC power, and DC power.
Note: You need to understand this diagram fully! You also need to know how electrical wiring is installed. If you’ve never done this sort of work before, you need to take electrical safety and wiring courses first.
RV Wiring Diagram - The Sources
There are four sources of power that you need to consider: Solar power, lithium batteries, the RV’s starter battery, and shore power.
This diagram is for people who want to go fully off grid. If that’s not your situation, you’re going to want to add a 30A Shore Power Inlet kit with a 50A adapter to the mix, or a 50A Shore Power Inlet with a 30A adapter. A 15A/20A home adapter is also something to consider.
To hook up Canadian shore power, replace the pictured inverter with an inverter-charger instead. The wiring diagram for it is in the manual . This will let you charge the batteries from an AC shore source, switching seamlessly from shore power to solar as required.
Why not just add shore power capability by default? Off grid systems are cheaper, simply put. And not everyone is interested in using campgrounds.
Notice that each connection runs through the bus bars. And every connection either has a fuse, a fuse box, or killswitch on the positive side. The bus bars are how you regulate and mix power flows, and everything flows through them. That’s a lot of power in a compact system. So fuses are simply best practice.
RV Wiring Diagram - The DC Power
The first source of DC power is your solar panels and your starter battery. Power flows into your 50 Amp battery charger . A full installation video for the charger can be found here . Make sure you set the correct battery type by pressing the battery type button until the right color is displayed. Then wire it up as shown above.
The positive output from your 50A DC-DC runs through the 60A fuse, and then to the positive bus bar.
The second source of your DC power is your solar batteries . The best battery type for a Canadian RV is lithium. Because you’re likely to have near-full or complete battery discharges, older battery types (which lose lifespan after being taken under 50% charge) are inefficient.
The smart lithium iron phosphate batteries are connected in series: Positive to nagative and negative to positive in a long chain. The red positive power lead coming from the battery’s kill switch should be connected to the negative terminal of the first battery in the series. The black negative power wire connecting back to the negative bar needs to be attached to the terminal terminal of the last battery in the series.
With your DC circuit prepared, you can hook up your DC fuse box. Positive and negative connections for the box itself go directly to the appropriate bus bars. Then each fuse is assigned to the appropriate DC function: DC Lighting, DC refrigerator, etc. Check the individual manuals for these products to see which fuses are appropriate.
Your remaining DC power needs to be converted to AC for the rest of your gadgets. A pure sine wave inverter is hooked up to the positive and negative bus bars, as appropriate. The massive 250A fuse is on the positive connection. One of the most common sources of RV electric fires is improper safety precautions (lack of fuses, inappropriate fuses, wrong gauge wires, etc.). Make sure you use fuses!
RV Wiring Diagram - The AC Power
AC can be drawn from the sockets on the back of your pure sine wave inverter. The rating on your inverter has to exceed all possible inputs from variable power sources - like your total solar panel output! And the output of all other DC sources needs to either be regulated and limited, or added to the total power figure that the inverter can handle.
After making that calculation, you can start hooking up your AC electric devices to the pure sine wave inverter. Don’t use more than one extension cord or power strip per outlet. And power strips must have working fuses!
Use a solar powered calculator to make sure that your power needs don’t exceed your limits. You can also use it to estimate how much power you can draw from the batteries between charges.
Make sure that each device has a working fuse or that it’s connected to a power strip with a working fuse. Conduct the appropriate portable appliance testing (PAT), since there are regulations that need to be followed in Canada
Miscellaneous Features
Two Bluetooth modules are used for monitoring battery status, battery charging, and solar panel output.
Download the correct battery status app to help you ‘budget’ your power consumption between charges.
The solar production app helps you optimize solar panel positioning, parking location, and estimate how much power you have left. During the summer, peak sun hours in Canada range between 3 and 4.5. During the winter, it is closer to 2 hours in most locations.
The battery killswitch is an important feature. It completely cuts off the battery from the positive bus bar. That means nothing can charge the solar batteries, and the batteries can’t contribute to your power needs. If anything goes wrong due to overheating, unexpected surges, or physical battery damage, the killswitch is there to protect you and other components in your RV’s electrical system.
There are other options available on Renogy store if you prefer rigid solar panels . A series of 200W rigid panels can be more efficient, as far as your RV’s roof space is concerned. But they’re heavier than flexible versions. Still, if you’re trying to generate the maximum amount of solar power per square meter, rigid panels are a consideration.
Any Simpler Camper Electrical Wiring Solution?
Typical RV electrical wiring operation involves safety risks and requires preparation for electrical knowledge beforehand. For people who are new to RV life and without any electrical knowledge, it is harder for them to set foot in the DIY wiring process. Even for a seasoned electrician , it can still take at least four hours to complete the work. But things will change with Renogy’s REGO system.
The newly launched REGO system can simplify four hours’ labor into 15 minutes. Isn’t it amazing? Before we show how they form the RV power system, let’s have an overview of what it is. The REGO is a collection of an MPPT charge controller, Renogy ONE monitor, DC-DC battery charger, 400Ah Lithium battery, system combiner, battery combiner, and inverter charger.
REGO collections
The system has all the key components needed in an RV electrical system covered, so you don’t have to purchase each component separately. If you have no relevant knowledge of how to turn your van off-grid with a solar power system, you’ll need to spend a large amount of time doing the research and make purchases. That’s only one of the advantages of using the REGO system.
There are more reasons you will fall in love with the system:
*Easy installation with Anderson adapters and cable collectors
*High battery storage capacity
*Smart monitoring system with built-in Bluetooth modules and RV-C communication protocol.
*Anti-reverse connections
*Support three battery charging methods: solar/shore power/vehicles
*Fast charging technology
*Compatible with products from other brands
*Five-year warranty
What are Anderson adapters: They are physically and electrically hermaphroditic, which means no worries about mixing the plug end and the socket end as they work the same.
RV Wiring Diagram with the REGO system
You can replace most of the key components including the monitoring gadgets and most wires in a typical RV wiring diagram with the REGO system. That will save you a lot of effort as well as wiring problems. Smaller parts like battery switches, bus bars, fuses, cable entry housings, solar connectors, and fuse blocks are not included in the REGO system, but you can still buy most of them on the Renogy store.
- Solar Connector Waterproof in-line Fuse Holder w/Fuse
- Solar Y Branch Connectors MMF+FFM Pair
- Solar Panel to Charge Controller Adaptor Kit
The REGO system is the best option for new RVers or RV campers who would like to have their old wiring system replaced. With the system, you don’t need to purchase key accessories like charge controllers, inverters, and batteries separately through calculation and comparisons. Moreover, you don’t have to worry about compatibility issues and buy extra conjunction accessories.
Best of all, if you don’t want to invest in a complete system, they can be sold separately. Each of them is compatible with components from different manufacturers. Currently, only the MPPT charge controller, lithium battery, and battery charger are available in the Canadian market.
- REGO 12V 400Ah Lithium Iron Phosphate Battery
- REGO 12V 60A MPPT Solar Charge Controller
- REGO 12V 60A DC-DC Battery Charger
Keep tuned with any information of other components of the REGO system in Canada by following Renogy on social media , or contact us for more.
Related articles:
Exploring The Advent Of Solar Panels In Ontario
Are Solar Panels For Home Worth It In Canada?
What Is An Inverter And How Does It Work In An RV?
How Do Solar Panels Work: Things You Should Know
What Is A Deep Cycle Battery?
Sign up for exclusive offers, original stories, events and more.
- Portable Gear
- Solar Panels
- Off Grid Solar Kits
- Charge Controllers
- Deep Cycle Battery
- Battery Chargers
- IOT Monitoring
- Accessories & Wiring
- Learning Center
- Super Solar Calculator
- Renogy Power Plus
- Shipping & Returns
- Warranty Registration

FREE SHIPPING ON $150+ ORDERS
RV Trailer Wire Diagrams: How to Wire Your Trailer the Right Way
Learn how to wire your trailer so you can seamlessly use all electric appliances in your trailer as well as tow the trailer effectively.

Embarking on a road trip adventure in your RV is exciting, but don’t forget to make sure your RV’s systems are in order before hitting the road! One critical aspect often overlooked is the correct wiring of your recreational vehicle. A well-wired trailer not only promotes safety on the road but also ensures that your lights, brakes, and signals function seamlessly.
From powering appliances to maintaining essential safety systems, understanding the ins and outs of RV wiring is a must for any enthusiast. Whether you're a seasoned traveler or a novice hitting the open road, your RV’s electrical system is complex and requires attention. Lucky for you, we have covered everything you need to know and get in order before you set out. Take a read below so that you can navigate the process with confidence and enjoy a stress-free journey ahead!
The Importance of Proper RV Wiring
Proper RV wiring is more than just a technicality; it's the backbone of a safe and functional road trip experience. Without accurate and well-maintained wiring, you risk a host of problems that can quickly turn your adventure into a nightmare. Safety comes first, and correctly wired systems ensure that crucial functions like lights, brakes, and electrical appliances work seamlessly. This not only safeguards you and your fellow travel companions but also other motorists on the road. Other than that, efficient wiring maximizes energy usage, saving power and ultimately extending the lifespan of your RV's components.
Different Types of RV Trailers and Wiring Needs
The diverse world of RV trailers encompasses a wide range of options, each with unique wiring needs. When it comes to wiring requirements, travel trailers are a popular choice for those who prefer versatility and mobility. A typical travel trailer often utilizes a 30-amp RV 7-way trailer wiring diagram to handle essential systems like lighting, brakes , and appliances while smaller trailers operate with a 5-wire trailer connector and even a 2-wire trailer connector. These trailers are designed to be compact and lightweight, making them suitable for a 30-amp electrical supply.
On the other hand, fifth-wheel trailers cater to a more luxurious camping experience , requiring a robust 50-amp RV trailer plug wiring diagram to accommodate larger appliances, air conditioning units , and advanced entertainment systems. The substantial power requirements of these trailers make the 50-amp RV plug a vital component in ensuring all amenities function smoothly.
Additionally, the specific wiring requirements can vary based on the age and make of the RV trailer. Older models may require updates and renovations to bring their wiring systems up to modern safety and technology standards. Vintage Airstream trailers, for example, often need comprehensive overhauls to support modern conveniences. In contrast, newer RV trailers are typically equipped with advanced RV trailer wiring harnesses and the usual 2 trailer hitch ball mount, designed to handle high-tech devices and provide enhanced convenience.
Whether you're towing an older model or a brand-new luxury RV trailer, understanding the distinct wiring needs is crucial to ensure your trailer is not only functional but also optimized for the level of comfort and convenience you desire during your travels. So, considering the type of RV trailer and its age is vital in determining the wiring requirements, whether it's a 7 pin RV trailer wiring diagram, 4 wire trailer connector, or a 5 wire trailer wiring to 7 pin setup.
Basic Components of RV Trailer Wiring Systems
Before diving in, it is important to know just what you are dealing with. These components collectively form the backbone of an RV trailer's wiring system, whether you're dealing with a 30 amp RV wiring diagram or a 50 amp RV plug wiring diagram. Understanding these elements is essential for maintaining, troubleshooting, and ensuring the safe operation of your RV trailer during your travels. Give a quick read below to get a gist of the components in the system!
7-Way Connector:
The 7-way connector is a pivotal component that links the trailer's wiring to the tow vehicle. It consists of seven pins, each serving a specific purpose. These pins are numbered and color-coded for easy identification, ensuring the proper connection of power and signals between the RV trailer and the towing vehicle. One essential function of a 7-pin trailer plug is to charge the RV’s battery as it's being towed, ensuring that the trailer's electrical system remains operational.
Wiring Harness:
An RV trailer wiring harness is a network of cables and wires that extends throughout the RV trailer. It includes various wires for lighting, brakes, battery charging, and auxiliary power. This harness ensures a systematic and organized distribution of electricity from the 7-way connector to the trailer's components.
Trailer Wire Adaptor Connector:
A trailer wire adapter connector is a necessary component for the RV trailer wiring system as it helps to bridge the gap between different towing vehicles and trailers. This device ensures compatibility between various 2-wire trailer connectors and the towing vehicle's wiring.
Hitch Ball:
The hitch ball is crucial because it's the direct point of connection between the tow vehicle and the RV trailer. It ensures a secure link, allowing the trailer to be towed safely and effectively. Selecting the correct ball size for trailers is imperative, even for gooseneck trailers for safe towing as an incorrect size can lead to an unstable connection and potential accidents on the road.
Ball Mount:
A 2-trailer hitch ball mount plays a vital role in maintaining the level of the trailer when attached to the tow vehicle. Proper leveling is essential for safe towing because it ensures that the trailer's weight is distributed evenly, preventing issues like swaying or excessive strain on the tow vehicle's suspension.
Auxiliary Power Circuit:
The auxiliary power circuit in the 7-way connector is a versatile feature. It allows the trailer to draw power from the tow vehicle for various purposes, such as running interior appliances or charging auxiliary batteries. This added flexibility ensures that the trailer can meet a range of power requirements.
Ground Wire:
A ground wire is a fundamental part of the RV trailer wiring system. It connects to the metal frame of the trailer, creating a secure ground path for the electrical system. Proper grounding minimizes the risk of electrical issues, ensuring that the various components and systems function reliably and safely.
A Guide to Wiring Your Trailer the Right Way
With so many components and wires to keep track of, you won’t be the only person who gets confused. Follow our step-by-step guide below to make better sense of the process. By understanding the specific wiring needs of your trailer, you can wire your trailer correctly, whether it's a 5-wire trailer wiring to 7-pin setup or any other configuration. Here's a 10-step guide you on how to wire a 7-pin trailer plug the right way:
Step 1: Gather Tools and Materials
Ensure you have all the necessary tools, including wire cutters, crimping tools, heat shrink tubing, and materials like the appropriate gauge wire, a 5-pin trailer plug or a 5-pin to 7-pin trailer plug, and other trailer hitch ball accessories.
Step 2: Determine Wiring Needs
Understand your trailer's wiring needs based on its type and size. This could involve a travel trailer with a 30 amp RV wiring diagram or a travel trailer with a 50 amp RV plug wiring diagram, depending on the trailer's electrical demands.
Step 3: Locate the 7-Way Connector
Identify the ideal location on your trailer for mounting the 7-way connector. This should be easily accessible and near the rear for connection to the tow vehicle.
Step 4: Prepare the Wires
Trim and strip the wire ends for clean connections. Ensure you use the correct wire colors based on standard coding: red (12V power), green (right turn/brake), yellow (left turn/brake), white (ground), and so on.
Step 5: Connect the Wires
Connect the stripped wires to their respective pins on the 7-pin trailer plug. Use crimp connectors for a secure connection, ensuring a snug fit and good conductivity.
Step 6: Protect the Connections
Slide heat shrink tubing over the crimped connections and apply heat to seal and protect the wires from moisture and corrosion. Ensure a watertight seal.
Step 7: Secure the Wiring
Use zip ties or clamps to secure the wiring along the trailer frame. Prevent loose wires that could be damaged or drag on the road.
Step 8: Ground Wire Installation
Attach the white wire, which is the ground wire, securely to the trailer frame. Ensure a clean and rust-free connection point.
Step 9: Test the Wiring
Before hitting the road, test all the connections. Verify that all lights, turn signals, brakes, and other electrical components work correctly. A trailer wire adapter connector can be helpful for compatibility with your tow vehicle's wiring.
Step 10: Secure the 7-Way Connector
Mount the 7-way connector securely in its designated location on the trailer. Ensure it is protected from the elements and won't become disconnected during travel.
RV Trailer Wiring Diagrams
Here are some common trailer wiring diagrams for your reference.
RV 7 Way Trailer Wiring Diagram

4 Wire Trailer Connector Diagram

RV 7 to 6 Trailer Wiring Diagram

RV 7 to 5 Trailer Wiring Diagram

RV 7 to 4 Trailer Wiring Diagram

RV 4 to 4 Trailer Wiring Diagram

Common Mistakes to Avoid in Trailer Wiring
If you are new to understanding the wiring system of your RV, you are bound to make some mistakes. Ensuring proper trailer wiring is essential for safe and trouble-free towing. To help you avoid common mistakes, here are five pitfalls to steer clear of when working on your trailer's electrical system:
Inadequate Grounding:
A frequent mistake in trailer wiring is neglecting the importance of proper grounding. Failing to establish a solid ground connection between the trailer's wiring and the frame can lead to erratic electrical behavior. Ensure that the white wire (ground) is securely attached to a clean, rust-free part of the trailer frame, providing a reliable path for the current to return to the battery.
Incorrect Wire Sizing:
Using the wrong gauge of wire is another common error. The wire size should match the electrical load and distance it needs to travel as an inadequate wire gauge can lead to voltage drop and insufficient power to your trailer's components. To know what size wire you need for the trailer wiring systems, check the manufacturer's recommendations or refer to the RV wiring diagram.
Neglecting Weatherproofing:
Failing to protect your connections and wiring from the elements is a recipe for trouble. Exposed wires and connections can quickly corrode or short-circuit when exposed to moisture. Use heat shrink tubing or electrical tape to seal and protect your connections, ensuring they remain dry and corrosion-free.
Poor Cable Management:
Untidy and loosely secured wiring is not just unsightly; it can also be dangerous. Wires that dangle or drag on the road can get damaged or pose a safety hazard. Use zip ties or cable clamps to secure the wiring along the trailer frame, keeping it away from moving parts and road debris.
Incorrect Wiring Order:
Reversing the wiring order or improperly connecting the wires to the trailer plug is a common mistake. This can result in erratic lighting, non-functional brakes, or even electrical damage to your tow vehicle. Always consult a 7-pin RV trailer wiring diagram or the manufacturer's guidelines to ensure the proper connection of wires to the trailer plug.
Safety Tips to Keep in Mind When Wiring Your Trailer
Remember, at the end of the day, you are dealing with electrical wires and a complicated system. It is prone to accidents, sparks, unseen issues, and a multitude of other problems. By following these 5 safety tips when wiring a trailer, you can significantly reduce the risk of accidents.
Disconnect Power Sources:
Before starting any wiring work, ensure that all power sources are disconnected. This includes unplugging the tow vehicle, disconnecting the trailer from the vehicle, and disconnecting any batteries that may be part of the trailer's electrical system. This precaution eliminates the risk of electrical shock or short circuits during the installation or repair process.
Eye Protection and Gloves:
Wearing appropriate personal protective equipment is crucial. Safety glasses or goggles can protect your eyes from potential debris and wire ends. Additionally, insulated gloves are essential to minimize the risk of electrical shock while working with wires and connections.
Work in a Dry Environment:
Wiring tasks should be performed in a dry environment. Moisture and wet conditions can lead to electrical hazards, so it's essential to avoid working on your trailer's wiring during rainy weather. If you must work in damp conditions, take extra precautions to keep all connections dry and use waterproof sealants.
Use the Right Tools and Materials:
Using the proper tools and materials is essential for safety. Make sure your wire cutters, crimping tools, and connectors are in good condition and appropriate for the job. When making connections, use heat shrink tubing or electrical tape to insulate and protect the wires, and choose high-quality components and materials to ensure a reliable and safe trailer wiring system. Also make sure to learn beforehand what size wire you need for the trailer wiring and what size ball you need for your trailer, especially for a gooseneck trailer, so that you don’t encounter these issues after you start wiring your trailer.
Double-Check Your Work:
After completing the wiring, it's crucial to double-check your work for any loose connections, exposed wires, or potential issues. Test all the trailer's lights, brakes, and signals to ensure they function correctly. It's better to identify and rectify any issues before hitting the road, reducing the risk of accidents or breakdowns during your journey.
In the world of RV traveling, trailer wiring and safety are paramount. Your guide to a comfortable journey begins with ensuring a solid, secure electrical foundation. With proper grounding, the right tools, and a vigilant eye for detail, you're on your way to a world of comfort and adventures.
- How To's
Recent Posts
10 Travel Trailer Renovation Tips on a Budget
Backing Up a Trailer: A Guide
Mounting a TV in an RV: All You Need to Know
Commentaires
- The Mountains
Outdoor Gear Reviews, Tips & Adventure Stories to Inspire an Outdoor Life
The outward overland trailer: electrical system design & diagram.
We purchased a custom off-road trailer to use as a platform to build the perfect overland trailer. We’ve spent the past few years adding an electrical system, a water system, a pull-out kitchen, and a roof rack system to complete the build. In this post, we’ll share the design decisions and wiring diagram of our overland trailer electrical system. To learn more about our overland trailer build, visit the first post in our Outward Overland trailer Series .
Getting Started
We started by calculating our power needs by conducting an energy audit based on our projected electrical needs. To conduct an energy audit, you determine the power draw (in amps) of each electric component in your system and multiply the amount of power of each device by the time per day (in hours) you plan to use it. This gives you a list of projected amp hours (Ah) you’ll use each device per day. Add them together and you have your projected daily Ah usage.
Our list of desired electrical systems included a pressurized water system with hot water, a 12v refrigerator, and lighting throughout the various trailer compartments. Conducting our energy audit on our planned usage, we determined we would use about 20 amp hours of power per day. Our experiences with an airstream trailer in the past confirmed that 20Ah per day was a good target to shoot for.
Planning our 12V Electrical System
Once we had our target daily usage of 20Ah, we could then begin to size our power storage and recharging systems. We determined that an average trip using our overland trailer would be about 3 days – mostly long weekends. 3 days of 20Ah of power usage meant that we needed at least 60Ah of battery storage. When it comes to batteries, more is always better providing the budget and space allow. With that in mind, we upped our desired battery bank size to 100Ah – giving us the potential to spend 5 days out in the wild without needing to recharge.
In terms of recharging our batteries, we first needed a way to recharge them when we returned home to the power grid. We landed on a 10-amp 120V battery charger for recharging the batteries at home. We also wanted the ability to recharge the batteries with solar panels. We calculated that adding around 200 watts of solar would give us between 20Ah to 50Ah of charging capability per day, depending on conditions.
With these numbers, we began purchasing the best components to fit our build.
Main Electrical System Components
Batteries are typically the single largest purchase in your electrical system. On a budget, we purchased two 6V 210Ah “golf cart” batteries from Costco . Needing to get these 6V batteries to output 12V, we wired them in series to double the voltage to 12V and keep the amp hours at 210Ah. These golf cart batteries are traditional wet cell deep cycle batteries (not AGM or Lithium Ion) which shouldn’t be discharged to less than 50% of capacity to maintain the health of the battery. So 210Ah at 50% depth of discharge would give us 105Ah of usable power.
To fit the batteries into the front “electrical” compartment in our trailer, we fabricated a battery box out of angle iron and installed tie-down straps to keep them in place.
Battery Monitor
To manage our electrical system and to closely monitor our battery capacity while on adventures, it was important for us to install a good battery monitor. We choose Renogy’s 500A Battery Charger with Shunt . It’s inexpensive, monitors power going both in and out of your batteries, and keeps track of your net usage compared to your battery capacity.
To monitor your system’s power usage, the Renogy battery monitor uses a shunt which wires as the first component on the negative side of your battery. To ensure you measure ALL power usage, all charging and discharging devices must be wired behind this shunt.
The shunt then connects to the monitor display via a thin communication cable, which we installed later in the build.
Read our full review of the Renogy 500A Battery Monitor
Battery Disconnect Switch
To have control to shut down our electrical system to work on it or when the trailer is stored for long periods of time, we installed a battery disconnect switch in our system.
Like the battery monitor shunt, the disconnect switch must be wired early in the circuit with all other devices wired behind to ensure all devices can be disconnected from the battery. As you can see on our wiring diagram below, we wired our disconnect switch on the positive side of the battery.
250A System Fuse
Between the battery and the disconnect switch, we added a 250A system fuse on the positive battery terminal. In an event of a short circuit or component malfunction, this fuse will blow protecting the rest of our system. We sized this quite large to allow normal operation to occur without incident.
Bus Bars , or power distribution blocks, aren’t always necessary but are a convenient way to keep your electrical system installation clean and organized. Bus bars provide multiple mounting posts for components to be wired together and make the installation of larger wires much simpler.
The biggest reason we choose to use both positive and negative bus bars in our build was to create single sources of contact to our disconnect switch on the positive side and our shunt on the negative side. The bus bars allowed to easily wire all other components behind the disconnect and shunt with a single wire between them and the busbar.
Shore Power Charging Components
120v battery charging.
The term “shore power” comes from the marine industry, referring to a boat or ship being able to plug into the power grid when in port. For camping trailers or RVs, shore power is a 120V power source used for system charging when a connection to the power grid is possible.
For our shore power system, we chose NOCO’s Genius 10 – a simple 10A 120V car battery charger. We installed the NOCO charger into our electrical compartment and wired both positive and negative wires to their respective bus bars.
Plugging In
Because we installed the shore charger inside our electrical compartment, we needed a way to easily plug in a 120V power cord to charge the system. We installed NOCO’s waterproof 120V plug into the exterior of our electrical compartment and plugged the interior side into the charger. With this setup, we can plug in using a household extension cord in seconds.
With various and automatic charging phases, we can leave the NOCO battery charger plugged in for long periods of time without concern of overcharging or damaging our batteries
System Display/Control Components
12v switch panel.
To add 12V circuits to separate and protect our various electrical components, we installed a Nilight 5-switch panel with 2 USB charging ports and a 12V “cigarette lighter” port. Protected with a 15A fuse, this panel also includes a voltmeter to verify our system voltage with the Renogy battery monitor.
To wire the panel into the system, we wired its source wires to the busbars, cut a hole into our control panel box and attached the panel via the corner screws.
We currently only use 3 of the switches, leaving 2 additional switches to expand our electrical components in the future. We have switches for our trailer’s led lighting, 12V water pump, and 12V refrigerator. Each of these components can be switched on and off as we need them. Being able to turn individual systems helps to reduce parasitic power waste in each of these systems when they are not in use.
The USB ports also come in handy for charging phones and other small devices while we are at the campsite. We use the 12V “cigarette lighter” port for our air compressor when needed.
Battery Monitor Display
We have the display for our Renogy Battery Monitor installed next to our switch panel and inverter switch in the middle of our electronics compartment. The battery monitor has a large display with adjustable backlighting, allowing easy viewing without having to turn on the lights.
We love that the battery monitor display shows us the net power usage in real-time. It also displays our current battery capacity in both percentage and icon. With the data, we can monitor our power usage closely ensuring we have enough power for the duration of our trip.
Inverter On/Off Switch
Our 1000w inverter has a separate switch installed in our control panel. While this switch we can quickly switch the inverter on when we need it and off when we don’t. Being able to turn the inverter off when we don’t need it avoids a small amount of parasitic power draw that it pulls when switched on. The switch also includes a power led as well as an error led to indicate problems with our inverter.
120V AC Components
1000w pure sine wave inverter.
When designing our overland trailer electrical system, we chose to add a power inverter to the system. Inverters convert 12V DC power from the batteries to 120V AC power to use with most household devices. Pure sine wave inverters create clean and safe power that can be used for sensitive electronics like computers.
For our trailer, we purchased Renogy’s 1000W Pure Sine Wave Inverter . 1000W gives us enough wattage to use most electronics, but not quite enough to run high-power electronics such as hair dryers, electric kettles, or most heaters. These types of devices use a lot of power and with our desired 20A/day budget, we decided that we didn’t even want the temptation on this trailer. Besides, we planned a propane system on our trailer for cooking and heating.
125A Inverter Fuse
To install our inverter, we wired the inverter’s DC inputs into both busbars and added a 125A fuse inline for added protection. We then ran the small communication cable to the on/off switch on the control panel.
Getting 120V power out
Our inverter has two 120V AC outlets built into its side. Since the inverter is mounted inside our electrical compartment, we installed a waterproof AC outlet to the exterior of our trailer and plugged it into one of the inverter outlets.
Once the inverter is switched on, we can simply plug our AC devices into this plug on the outside of our trailer to get power. The inverter’s second outlet allows us to plug in additional devices to utilize the inverter’s power as needed.
Solar System Components
Solar panels.
To recharge our batteries while we’re away from the grid, we looked for the best way to add around 200w of solar panels to our trailer. While the top of our trailer is large and flat, we avoided placing panels on the trailer “lid” due to extra weight and the shadows that our roof rack accessories would cast on the panels. The best placement for a rigid was on the top of our electrical compartment at the front of our trailer. But being only 13 inches deep, typically sized 100w rigid solar panels wouldn’t fit. After a long search, we found an 80w slim rigid solar panel from NAZ Solar Electric .
We installed the 80w slim solar panel using an adjustable mounting system which allows us to adjust the angle of the panel to catch the most amount of sunlight. The cables pass through the roof of our electric compartment using a solar gland to keep water out.
As we didn’t have room to permanently mount all of our solar panels on the roof of our trailer, we purchased a 100w foldable solar suitcase from Renogy to add to our system. This portable solar panel gives us the flexibility of adding more power when we need it and allows us to move and point the 100w panel throughout the day to produce more power.
Now with 180w of solar panels, we purchased a solar parallel adapter cable giving us the ability to connect both panels in parallel with one output to the charge controller. We wired the rigid 80W panel to one end of this cable and connected the other end to a waterproof SAE-style solar input socket mounted to the side of the trailer. The solar input plug adds an easy way to plug in the solar cables from our 100w portable panel when needed.
Solar Charge Controller
To control the battery charging ability of our solar generation, we chose Renogy’s Rover 20A MPPT Solar Charge Controller . The MPPT controller converts the higher voltage from the parallel wiring of our panels to the best voltage to charge our batteries.
The charge controller is wired to the battery via the positive and negative busbars and also provides multi-phase charging to protect our batteries. We’ve added Renogy’s optional BT-1 Bluetooth adapter which provides the ability to monitor the status of your solar system via a smartphone.
Our controller is mounted just above our batteries in our electrical compartment, which is convenient for the placement of the included battery temperature sensor.
While we’ll surely add and expand our trailer’s electrical system in the future, planning our system by starting with an energy audit ensured we started on the right track. Our electrical system allows us to spend 5 days in the wild and more if the sun is readily available. It powers our lighting, water system, refrigeration, and device charging while camping without trouble. And when we return, it can be recharged easily and quickly from the grid.
If you are interested in diving deeper into the specific components we used on our build or would like to use our build as inspiration for your own RV, van, or trailer electrical system build, please view our interactive wiring diagram below. You can also download the diagram in pdf format which also includes clickable links for each component.
Interactive Wiring Diagram
Hover/click on the components for more info.
Share this post:
About the author.
Zack Newsome
You may also like.

The Cocktail Box Co.’s Old Fashioned Cocktail Kit Review

15 Camping Activities to Keep the Whole Family Entertained

Unforgettable Camping for Couples: A Guide

Hands-On Review: Trelino® Evo S Composting Toilet
Post Comment
Popular Articles
Hands-On Review: Tobin Sports Inflatable Boat
Hands-On Review: Renogy 200Ah Lithium Iron Phosphate Battery

The Ultimate Guide to Solo Camping

Sailing to Avalon – Catalina Island

A Base Layer that Doesn’t Stink: A Review of the Alpine Fit Long Sleeve
Recent articles, nomadix original towel review, from backpacks to pockets: a review of the vapur flexible water bottle, on top of the world: 6 mountain climbing movies that will leave you breathless, paddling paradise: kayaking the colorado river.

- You are here:
- Home »
- Blog »
- » Wiring Fleetwood RV Electrical Schematic (Diagram Download)
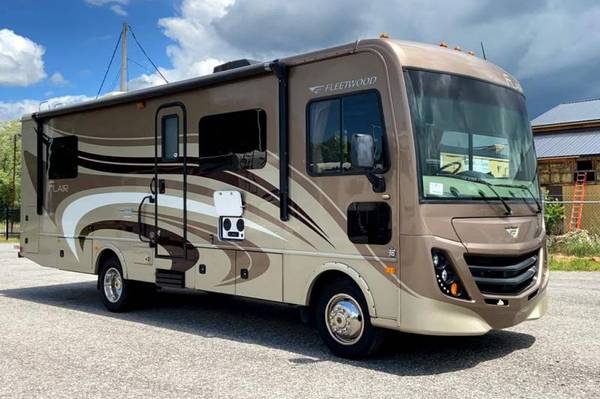
Wiring Fleetwood RV Electrical Schematic (Diagram Download)
- May 16, 2022 /
- RVing 101 /
- By James V. /
Wiring is safe to work on if you take the right precautionary steps. As long as you have a wiring diagram, you should not have a problem fixing or replacing any wires on your RV or its appliances, etc. However, risks do remain and this task is best left up to the pros.
There are many websites to download a wiring or electrical schematic for this brand of RV. Keep in mind that there are different floor plans, and different models, and the wiring routes may vary in some cases. This may not be a one-size-fits-all setup.
To learn more about this topic and where to download your schematic, just continue to read our article. We cannot link to all of the diagrams for every model but our article will get you on the right track. Take a few minutes to get on the right path.
What is a Wiring Schematic?
It can also be called a wiring diagram and those words are interchangeable. A wiring diagram or schematic is an abstract drawing of how the wires look inside your RV. All brands, including Fleetwood, create these diagrams to help electricians know where to look and what wires connect where.
To the untrained eye, these diagrams may look more like a maze or a jigsaw puzzle and can be hard to read. If you are not trained in electrical work then it is best to hire someone who is.
Getting the wires wrong can cause a lot of other problems that will be more expensive to repair or replace. While you have access to a wiring diagram, know your limitations and let the experts handle it if you are having electrical problems.
You can help the pros by downloading and printing the correct wiring diagram for your model of Fleetwood RV or travel trailer. Keep in mind that the diagrams posted here as an image or as a download will not cover all Fleetwood models.
You may have to search a little more for your size and model of Fleetwood RV or travel trailer.
Wiring Fleetwood RV Electrical Schematic
In this section, we will place two simple wiring schematics. They come from this web page . On that website, you will find some more schematics which will be a lot more complicated. They deal with different parts of a generic Fleetwood model.
All of those diagrams on that web page seem to be download possible. They do have instructions for downloading under each one as well as the source for the diagrams.
This schematic seems to be for a 1995 Fleetwood Southwind RV
2. Van conversion
Click on that link to get the download instructions and while these are older models there are still many on the road today. Some may need this diagram for restoration purposes. In the next section, we will provide some links to more up-to-date models.
Don’t forget, you can always contact Fleetwood to see if they have diagrams for your particular model of RV they can send you.
Downloading Fleetwood Motorhome Wiring Diagram
This first link will take you to a 2020 Fleetwood model and it seems to be for the chassis only. We have tried to search for more modern models but that does not seem to eliminate the older wiring diagrams from coming up in our search efforts. Here are a couple of links to older models of Fleetwood RVs that may be of some help to some owners. Click here and here .
When you do the search, check the image results to see if the one you need is among the many shown in that search result. We saw quite a few but the images were not large enough to place here.
We like the last link in this section as it places a drawing of one RV model showing where the wires go in relation to the location of the features and appliances built into that RV model.
This last link gives you a string of drawings and photos to show you different aspects of the wiring system on one particular Fleetwood model. Fortunately, all these wiring diagrams are free to look at and possibly free to download.
Wiring Diagram Tips

1. When looking at the diagram keep in mind that RVs and travel trailers have two electrical systems. One is AC and the other is DC. Do not confuse the wiring systems like that can cause you a lot of trouble as well.
2. DC wiring is for the priorities installed in your RV or travel trailer. Those priorities will be stove, oven, water heater and even fridge, water pump and more.
AC power is for the features and extras like t.v.s, stereos, lights, and anything needing 120 volts.
3. You will have converters and inverters to deal with. Both devices have their purpose and you should not confuse those purposes with each other. Converters change AC to DC and the inverter does the reverse.
4. There are different sources of power. Shore power is usually only AC current. Battery and solar are usually DC current. Generators are AC only for the most part but some maybe both.
5. Know the different plug designs so you do not plug the power source into the wrong socket. 50-amp has 4 prongs while 30-amp plugs have only 3 prongs
Some Final Words
Getting a wiring diagram is not enough to do repairs. While they help, you do need experience in reading those diagrams as well as connecting and running wires. If you do not have the experience then you should defer to a professional who does.
Or take the time to learn to read these diagrams so you can do it yourself. Wiring is easy if you know what you are doing. Just make sure the power is turned off before you start working on any wire.
Related Posts
Does CarMax Buy RVs? (CarMax RV Trade-In Guide)
300 Lbs Over Payload: What Happens If I Exceed My Payload?
Thor Vegas Problems (Windshield, Battery, Fridge, Swivel Chair)
Leave a Comment:

Working on wiring is secure as long as the proper safety measures are taken.
You shouldn’t have any trouble changing any wires on your RV or its appliances, etc., as long as you have a wiring schematic.
However, there are still hazards, therefore it is better to leave this duty to the experts.
For this model of RV, there are several places where you may acquire wiring or electrical schematics.
Remember that there are many models, floor designs, and electrical layouts to take into consideration.
This may not be a set-up that works for everyone.
Continue reading our post to find out more about this subject and how to get your schematic.
Although we are unable to connect to every model’s schematic, this article will point you in the correct direction.
Spend some time finding the appropriate way.
What Exactly Is A Wiring Diagram?
It is sometimes referred to as a wiring diagram, and both terms are equally accurate.
A schematic or wiring diagram is an abstract representation of how the cables appear inside your RV.
These schematics are produced by all manufacturers, including Fleetwood, to aid electricians in knowing where to look and what cables link to what.
These designs may be challenging to understand and may resemble a labyrinth or jigsaw puzzle to the inexperienced eye.
It is preferable to employ an electrician if you lack the necessary training.
The improper cables may lead to several additional issues that will cost more to fix or replace.
Even if you have access to a wiring diagram, be aware of your limits and leave any electrical issues in the hands of the professionals.
By downloading and printing the appropriate wiring schematic for your Fleetwood RV or travel trailer type, you can assist the experts.
Remember that not all Fleetwood models are covered by the schematics that are available here as a picture or for download.
For your specific size and type of Fleetwood RV or travel trailer, you may need to look a bit harder.
Fleetwood RV Electrical Wiring Diagram
Two straightforward wiring diagrams will be included in this section.
They originate from this website.
You may find some other, far more sophisticated schematics on that page.
They address several elements of a basic Fleetwood model.
All of the diagrams on that website seem to be available for download.
Each one includes the source for the diagrams as well as download instructions.
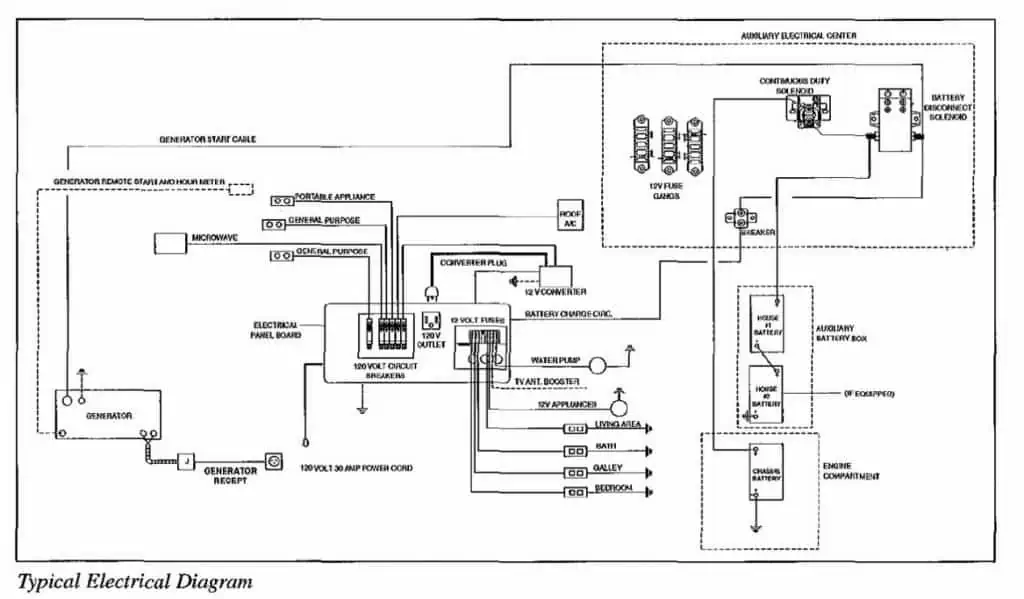
It seems that this schematic is for a 1995 Fleetwood Southwind RV.
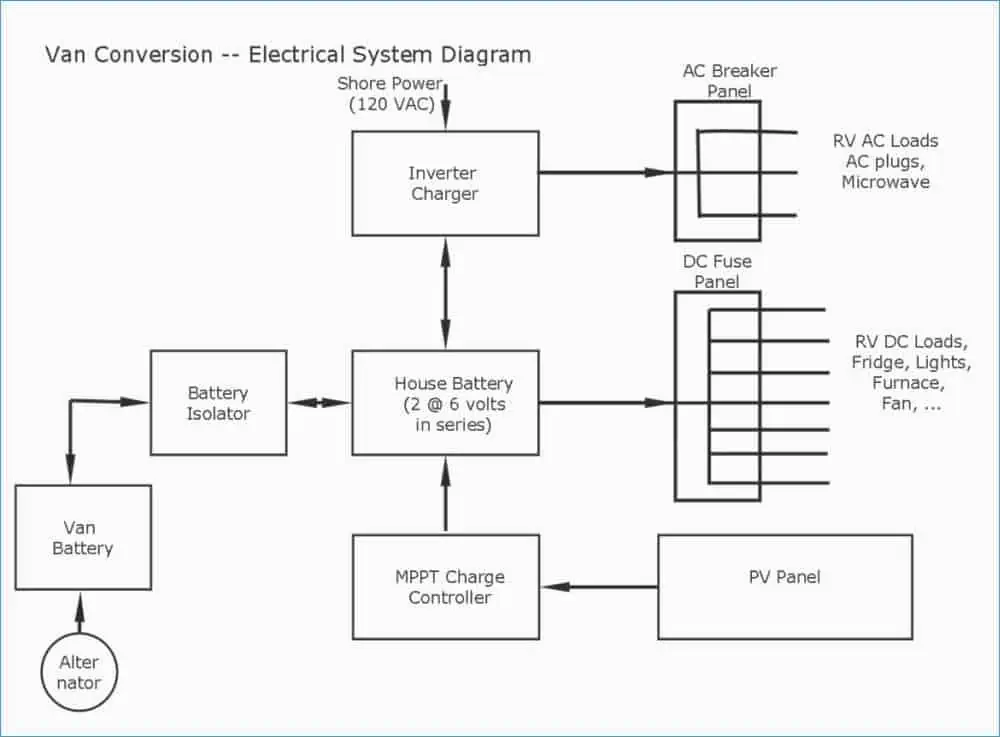
Although they are older models, there are still a lot of them on the road today.
Click on that link to obtain the download instructions.
Those looking to restore their homes may need this diagram.
We will provide some links to more recent models in the section that follows.
Remember that you can always get in touch with Fleetwood to see if they have schematics for the specific type of RV you have and can send them to you.
Fleetwood Motorhome Wiring Diagram Download
You may access a 2020 Fleetwood model at the first link, which seems to be for the chassis alone.
Even though we have made an attempt to look for more recent models, the older wiring schematics still appear in our search results.
Here are a few links to vintage Fleetwood RV models that could be useful to certain owners.
Check the picture results after doing the search to determine whether the image you need is among the many that are shown.
We spotted quite a few, but the pictures were too little to include on this page.
We particularly appreciate the final link in this list since it includes a graphic of a particular RV model and shows where the cables connect to the amenities and appliances that are incorporated into that kind of RV.
This last link provides a collection of illustrations and images that highlight various features of a certain Fleetwood model’s electrical system.
Fortunately, you can see and even download all of these wiring schematics for free.
Tip for Wiring Diagrams
- Keep in mind that travel trailers and RVs have two different electrical systems when you look at the diagram. One is an AC unit, the other a DC unit. Avoid confusing the wiring systems since doing so might get you into a lot of difficulty.
- Your RV or travel trailer’s DC wiring is for the installed priorities. The stove, oven, water heater, refrigerator, water pump, and other appliances will be prioritized. The features and accessories, such as televisions, stereos, lights, and anything else requiring 120 volts, run on AC power.
- You will need to deal with converters and inverters. You should not conflate the goals of the two gadgets since each has a different function. Inverters turn DC to AC, whereas converters do the opposite.
- There are several power sources. Typically, shore electricity is solely AC current. Solar and batteries often use DC current. Most generators solely produce AC power, but others may do both.
- Be familiar with the various plug types to avoid inserting the power source into the incorrect socket. While 30-amp plugs only have three prongs, 50-amp plugs have four.
Final Thoughts
Having a wiring diagram is not sufficient for doing repairs. Even if they’re useful, you still need practice interpreting those schematics and running and connecting wires. You should give the job to a professional if you lack the necessary expertise.
Alternately, spend the time learning to interpret these schematics so you can do the task yourself. If you know what you’re doing, wiring is simple. Just make sure the power is off before doing any wire-related work.
Fleetwood RV Battery Wiring Videos Suggestions From Youtube
Published on September 21, 2022
Meet Bob & Sarah

We're Bob & Sarah, the RVers behind RVing Beginner. We love RV travel, useful gear, and all things nature. Read more…
About Us - Contact Us - Privacy Policy - Terms Of Service - Affiliate Disclosure - Sitemap
Copyright © RVing Beginner 2022

DC is for Priorities - AC is for the Extras. The most observant among you might notice that RV appliances and plumbing are all powered via 12-Volt DC. RVs have house batteries, so DC is the most accessible source of power for an RV. The essential devices pull from those batteries: fridge, slides, water pump, built-in lighting, etc.
When I first bought my travel trailer, I had no idea how it worked and I spent many long hours figuring everything out on my own. This video demonstrates how...
An this is a PDF file of the schematic diagram and a PDF file of the wiring diagram. The wiring that runs your RV (and conveniently powers all the electrical gadgets that we love and need) is getting its energy from a huge electrical cord that is connected to a pedestal with outlets in the RV park. This plug is wired to a 120-volt breaker panel ...
As a rule, your RV will have two separate electrical systems that draw different voltages as well as two different types of current. Just as a "sticks and bricks" home is based upon 110/120v power system, so is your RV. However, because your mobile home away from home is also dependent upon using a 12v system and in this article, we'll ...
We'll unravel the details of an RV's electrical system, review its components and their functions, and how it all comes together to power your home on wheels. Table of Contents hide. 1) RV Wiring for Dummies. 2) AC vs DC Power in an RV. 2.1) Alternating Current (AC Power) 2.1.1) AC Voltage. 2.1.2) AC Power Sources.
Almost all RVs come with a power cord to plug into the electrical pedestal at a campground with hookups. This is also known as a "shore power" connection. These power cords come in two amperages: 30-amp and 50-amp. A 30-amp cord has three prongs, and a 50-amp has four.
The majority of small and mid-sized RVs are rated for 120V 30-amp electrical. If the plug on your RV is a large plug with three straight prongs, you've got a 120V 30-amp plug. Most campgrounds and RV parks will provide you with a 30-amp outlet for direct power. A 120V 30-amp outlet gives you around 3,600 watts of power.
RV Electrical 101 explains the basics of how RV electrical systems work. How does an RV electrical system work? There are two electrical systems in an RV: Th...
Tim gives you a basic understanding of the electrical system in your RV. He walks you through the basics of AC and DC power, shore power, battery hookups, GF...
The RV Beginner's Guide to Powering an RV Electrical System (With Diagrams) You probably chose your RV at least in part for its touches of comfort and luxury—there's a reason you chose a trailer or motorhome over camping in a tent, after all! But enjoying amenities like television, microwaves, etc. isn't quite as straightforward in an RV as ...
Designing the perfect RV electrical system for your camper just got easier with the Interactive RV Wiring Diagram. Our powerful tool allows you to effortlessly calculate the ideal solar, battery, wire gauge, fuse, switch, and relay sizes needed for your unique needs - no more guessing required! With just a few simple details, our built-in ...
An RV plug wire diagram is a visual representation of the electrical connections and wiring configuration needed for a recreational vehicle (RV). It outlines the specific wire colors, pin placements, and functions for each individual plug or connector within the RV's electrical system. The diagram serves as a guide for anyone trying to ...
You can also reach out to us at [email protected] or call us at 754-444-8704 x2. This post includes a detailed wiring diagram and complete list of materials needed to put together a very reliable and robust electrical system for your camper van that is capable of extended off-grid adventures and powering just about anything you ...
When it comes to traveling in your RV, having a functioning electrical system is essential. But without the proper knowledge, it can be hard to understand how the wiring works. That's why having a good electrical schematic for your RV is so important. It will show you exactly which components are connected to what, so you can make ... <a title="Travel Trailer Electrical System Schematic" class ...
In case you want to learn about RV Wiring Diagrams and everything else that a common person would, then here we have a guide for you. Understanding AC and DC Power in RV. RV electronics work on two types of electrical systems that include Alternating Current (AC) and Direct Current (DC). AC controls a normal control phase of current like a home.
Most RVs have two different types of electrical systems: 12 volt and 120 volt. Except for things like the external lights supplied by juice from the umbilical cord), all other 12v systems are supplied by the battery(s) contained in the rig itself. 120v are supplied by so-called "land line" or "shore" hookups, the type you find at any full service campground.
RV Wiring Diagram - The Sources. There are four sources of power that you need to consider: Solar power, lithium batteries, the RV's starter battery, and shore power. This diagram is for people who want to go fully off grid. If that's not your situation, you're going to want to add a 30A Shore Power Inlet kit with a 50A adapter to the mix ...
A typical travel trailer often utilizes a 30-amp RV 7-way trailer wiring diagram to handle essential systems like lighting, brakes, and appliances while smaller trailers operate with a 5-wire trailer connector and even a 2-wire trailer connector. These trailers are designed to be compact and lightweight, making them suitable for a 30-amp ...
The RV industry is more like the old wild west where every town, city, and county did its own thing. It is a strange world to be involved with. When it comes to electrical schematics and other diagrams, a Forest River representative said all those drawings are kept at the engineering level and not released to the public.
1. When looking at the diagram keep in mind that RVs and travel trailers have two electrical systems. One is AC and the other is DC. Do not confuse the wiring systems like that can cause you a lot of trouble as well. 2. DC wiring is for the priorities installed in your RV or travel trailer.
Each one includes the source for the diagrams as well as download instructions. 1. Battery. It seems that this schematic is for a 1995 Fleetwood Southwind RV. 2. Van conversion. Although they are older models, there are still a lot of them on the road today. Click on that link to obtain the download instructions.
Chapter 8: Electrical System 49 12 Volt System - DC 49 RV Battery 49 120 Volt System - AC 49 Shore Line Cord / Power Cord 49 30 Amp Service 50 50 Amp Service ... Manufacturing is a division of Keystone RV Company, which is the #1 selling Travel Trailer & Fifth Wheel brand in North America. This is not a position we take for granted and we want ...

IMAGES
VIDEO
COMMENTS
The oldest boat was built in 2006 and the newest model is 2006. The starting price is $149,000, the most expensive is $149,000, and the average price of $149,000. Find 28 Myacht Houseboat boats for sale near you, including boat prices, photos, and more. For sale by owner, boat dealers and manufacturers - find your boat at Boat Trader!
2000 Myacht R-3,TRADE ---2000 Myacht House Boat for sale46'x15'Twin 2006 -60Horsepower HP Mercury 4 strokes ( only approx. 110 hrs on them)Inside has been started on remodel. New Cabinets AND New AppliancesTRADE let me know what you have or sale ($45000 OBO)located in Panama City Beach [email protected] $45000.
2004 Myacht 12 x 35 NLWS is a 35' (10.67m) Houseboat Boat built by MYACHT/TRACKER MARINE and delivered in 2003. Photos and specifications available below. Find yachts and boats listed for sale and ones off the market in our YATCO Yacht & Boat Directory. This web page provides historical yacht information for reference purposes only.
2000 Myacht R-3,TRADE ---2000 Myacht House Boat for sale46'x15'Twin 2006 -60Horsepower HP Mercury 4 strokes ( only approx. 110 hrs on them)Inside has been started on remodel. New Cabinets AND New AppliancesTRADE let me know what you have or sale ($45000 OBO)located in Panama City Beach [email protected] $45000.
Houseboat Outlet: Boats For Sale. 2003 Myacht Houseboat 8.5-ft x 35-ft $32,000 SPECS: 8.5' x 35' houseboat 125 Mercury Outboard Tri-Axle Trailer 3 Burner Stove Front Covered Porch Microwave Back Porch Shower ...
Myacht 4815 Houseboat for sale in Henderson Nevada. View pictures and details of this boat or search for more Myacht boats for sale on boats.com. ... This 2006 48X15 Myacht Houseboat has a very roomy floor plan with new vinyl plank hardwood flooring throughout, and includes two large staterooms with queen beds, the master bed is a walk around ...
Myacht Houseboat for sale 1 Boats Available. Currency $ - USD - US Dollar Sort Sort Order List View Gallery View Submit. Advertisement. Save This Boat. Myacht 4815 Houseboat . Henderson, Nevada. 2006. $149,000 Seller Image Boats 25. Contact. 702-357-4670. ×. Advertisement. Request Information. Contact Seller X * We weren't able to post your ...
About Myacht Houseboats. Myacht is a houseboat manufacturer popular and infamous for its older models. Bought and owned by Tracker Marine, the company currently does not produce any more models. Nevertheless, when searching for Mycaht boats for sale you will be able to find quite a few secondhand boats available for sale from owners.
The entire MYACHT Houseboat line is constructed with practicality, luxury and longevity in mind. · For structural strength and rigidity: extra-thick 1/4" aluminum Z-channel floor joists on 12" centers are through-bolted to the frame. · All-aluminum 1/8" thick marine-grade (50 52 alloy) floor deck.
House boats pricing. House boats for sale on YachtWorld are available for a variety of prices from $18,324 on the lower-cost segment of yachts up to $3,201,880 for the most advanced boats. It is important to take into consideration the expenses associated with ownership when evaluating your budget and the listed price of a yacht available for sale.
2024 Reina L44 DR. Find 28 Myacht 4515 Houseboat boats for sale near you, including boat prices, photos, and more. For sale by owner, boat dealers and manufacturers - find your boat at Boat Trader!
35ft Myacht Houseboat w/trailer, 60hp Mercury outboard, 10,000lbs triple axle trailer w/new tires, Onan Generator, sleeps 6, flat screen tv. ... Search-Boats is a Boats & Yachts classifieds search engine to find different boat types for sale New and Used. Browse Boats by category or use the powered boat type search features. Read more. Popular ...
Boat Trader currently has 5 Myacht for sale, including 1 new vessels and 4 used boats listed by both individuals and professional dealerships mainly in United States. The oldest model listed is a contemporary boat built in 1998 and the newest model year of 2006.
Many Myacht Houseboat owners have used their houseboats for weekend getaways, family vacations, and romantic retreats. With modern amenities such as comfortable sleeping quarters, full kitchens, generous storage space, and entertainment areas, Myacht Houseboats make it easy for owners to truly enjoy the beauty of the open water.
Houseboats in Florida (11) View a wide selection of over 1000s of new or used boats and yachts for sale available across the US, the UK, Europe and rest of the world. Book, Buy or Sell a boat, yacht online.
This boat will sell for about $145,000.00. The owner of Destination Yachts was the founder of Myacht..... They also have most parts available for the Myachts. Myacht houseboats are great. by: tom. I have had a 1997, 4313 Myacht houseboat which was a great starter boat..
Houseboat is a yacht brand that currently has 14 yachts for sale on YachtWorld, including 3 new vessels and 11 used yachts, listed by experienced boat and yacht brokers mainly in the following countries: United Kingdom, United States, Germany, France and Lithuania. Models currently listed on YachtWorld differ in size and length from 24 feet to ...
Search All Yacht Types. Browse all new and used boats and yachts for sale in YATCO, The Official MLS of Yachting with the most comprehensive yacht and boat listings.
The Stunning Ritz Carlton EVRIMA Yacht. Gliding Across Tokyo's Sumida River: The Mesmerizing Zipper Boat. CROCUS Yacht: An 48 Meter Beauty by Admiral. PHI Yacht - Royal Huisma
Find Pershing 115 for sale on YachtWorld Europe's largest marketplace for boats & yachts. We connect over 10 million boat buyers and sellers each year!... Pershing Yachts Surface. Surface. Pershing news & events Pershing news & events . 21 - 24.03.2024. 21 - 24.03.2024. Palm Beach International Boat Show 2024. Palm Beach International Boat Show ...
Impressions; At 91 meters in length, Lady Lara is an ultramodern superyacht with sweeping curves and an elegantly balanced profile. Dynamic, sculpted features carry through her ex
40' MTI. ( (SOLD)) Luxury 2009 40 MTI with the Tilt Trailer.$399K This boat is a one-owner powerboat used only in freshwater. Powered with two Mercury 700s stage 3 motors with original 150 HR this boat is nice. "Don't miss out" For viewing please make an appointment with us @ Rockstarboats.com (928)208-8460..... These powerboats use the following propulsion options: outboard engine.