- Perfecting Your Model’s Sails: The Art of Rigging | Seacraftclassics
- Blog Seacraftclassics
- Boats and ships
- September 10, 2023

Mastering the Art of Rigging: Enhancing the Authenticity of Your Model’s Sails
When it comes to creating a realistic and authentic model of a sailboat, one of the most crucial aspects is perfecting the rigging, particularly the sails. The art of rigging involves setting up the sails in a way that accurately represents the real-life counterpart, capturing the essence and beauty of sailing. In this article, we will delve into the secrets and techniques of sail rigging that will elevate the realism of your model to new heights.
Unveiling the Secrets of Rigging: Techniques to Perfect Your Model’s Sail Setup
Rigging a sailboat model requires attention to detail and a deep understanding of the principles of sailing. Here are some techniques that will help you achieve impeccable sail rigging:
1. Research and Reference
Before starting the rigging process, it is essential to conduct thorough research on the specific sailboat model you are replicating. Study photographs, blueprints, and even real-life sailboats to understand the intricacies of the rigging. Pay close attention to the arrangement of the sails, the types of rigging lines used, and the tension applied to each line.
2. Use High-Quality Materials
Investing in high-quality rigging materials is crucial for achieving a realistic look and ensuring the longevity of your model. Opt for materials such as fine thread or fishing line for the rigging lines, and choose appropriate fabrics for the sails, such as cotton or silk. These materials will provide the necessary strength and flexibility to accurately represent the tension and shape of the sails.
3. Rigging Techniques
There are several rigging techniques that can enhance the authenticity of your model’s sails:
- Running Rigging: Use thin thread or fishing line to create the running rigging, such as halyards, sheets, and control lines. Ensure that the lines are properly tensioned and secured to the appropriate points on the mast, boom, and deck.
- Standing Rigging: The standing rigging, including shrouds and stays, provides the necessary support for the mast. Use fine thread or wire to create these lines, ensuring they are accurately positioned and tensioned to maintain the correct shape of the mast.
- Sail Attachment: Attach the sails to the mast and boom using small eyelets or hooks. Pay attention to the proper alignment and tension of the sails to achieve a realistic appearance.
Elevate Your Model’s Realism: Tips and Tricks for Achieving Impeccable Sail Rigging
Here are some additional tips and tricks that will take your sail rigging to the next level:
1. Weathering and Aging
To add a touch of realism to your model, consider weathering and aging the sails. Use diluted acrylic paints or fabric dyes to create subtle discolorations and stains that mimic the effects of sun, saltwater, and time. Be sure to apply these effects sparingly and strategically to maintain a natural appearance.
2. Scale Accuracy
Pay close attention to the scale accuracy of your model’s rigging. Ensure that the size and proportions of the rigging lines and hardware are appropriate for the scale of your model. This attention to detail will greatly enhance the overall realism of your sailboat replica.
3. Practice and Patience
Perfecting the art of rigging takes practice and patience. Don’t be discouraged if your first attempts are not flawless. Take the time to learn from your mistakes, refine your techniques, and experiment with different approaches. With each model you build, your skills will improve, and your sail rigging will become more refined.
Mastering the art of rigging is essential for creating a realistic and authentic model of a sailboat. By conducting thorough research, using high-quality materials, and employing the right techniques, you can achieve impeccable sail rigging. Additionally, incorporating weathering and aging effects, ensuring scale accuracy, and practicing patience will elevate the realism of your model’s sails even further. So, set sail on your next model-building adventure and let your rigging skills shine!
Sign up for speacial offers
Subscribe our newsletter.
[mc4wp_form id="806"]
Most Viewed Posts
- Talk about a venue with a view! This Quebec couple had the absolute wedding of …
- Everything You Need to Know About Trading in Your Boat
- Happy 4th of July! Wishing you all a happy holiday weekend on the water with you…
- Wishing all the IMOCA Globe Series teams and skippers competing in the Vendée-Ar…
- The training continues for Alex and the crew. In case you missed it, we won’t b…
Our latest custom models
- model 1329 1329 products
- Custom Sail boats 218 218 products
- Custom Power Boats 399 399 products
- Custom Half Models 532 532 products
- Custom Desk Models 92 92 products
Fast Shipping or local PickUp
Potter solutions, the one stop model yacht shop.
Sails, rigs, boat stands, accessories and fittings, including the new range of DF65 and DF95 complete packages.
Email Address
the history of the future
At the age of fifteen David Potter started sailing model boats at the world famous Birkenhead Model Yacht Club.
In 2012 he decided to turn his passionate hobby into a business and launched Potter Solutions.
As a qualified engineer, with a good eye for detail, he produces a range of equipment for the majority of radio controlled model yacht classes.
David has competed in this thrilling sport for over Thirty years at both national and international events and is fully aware of the need for products that can deliver in the field at a competitive price.
Whatever your requirements, including information and advice, David is always available for a chat.
featured products

Complete DF95 Package

Complete DF65 Package

DF95 Alloy Boat Stand

Pierre Gonnet Mast 11.1mm
Everything in one place.
30 Years of experience in radio sailing means we know what’s required to produce competitive and reliable parts .
Order before 3pm for UK next day delivery *
Most products can be shipped same day. Some products like sails * are made to order unless they are from our standard range. Products that can be dispatched same day will be indicated on the product description.
Secure Ordering online
You can place an order online. Once we receive the order we calculate the shipping cost and send you information on how to make payment. Your personal information is protected and encrypted by Secure Socket Layer (SSL) technology. Our website is ecommerce PCI Compliant .
Customer Service
Excellent customer service is one of the key areas where we can truly make a difference, which is why we work hard to keep our customers happy and make it easy to do business with us. A quick response matters and we aim to reply promptly and professionally.
some of our reviews
A history of trust and service.
“Fast shipping and exactly the parts I needed to complete my new IOM. Highly recommended”
“Bought a boat stand for my Marblehead. Arrived in a couple of days and very happy with the quality.”
“Bought some new sails for my DF95. Potter’s service is excellent. The sails are top quality.”
- Fair American
- Tools and Techniques
- Kit Database
- Bluenose Canadian Schooner
Rigging Begins
June 23, 2017
Fact check…I’m not great at rigging. Rigging is a pretty specific skill, unique to model ship building, and this is only my second build. On my Phantom build , I kinda rushed through rigging and just tied a bunch of knots. I’m determined to do better this time.
The Plan for Rigging
In looking at other build logs, it seems that many modelers prefer to prepare as much rigging as possible before the masts are mounted on the ship. This has some pros and cons…
- You can move the mast around to get a better angle to work.
- You don’t have to reach around existing rigging lines to attach things.
- You will likely use more rigging line, since you can’t precisely size each line. You have to leave extra length on each run to ensure it is long enough.
- You have a mess of rigging lines that you need to keep organized.
- You have to do a bunch of work before you see any results.
On my Phantom build, I did all the rigging in place, after the masts were installed. This time, I’m going to pre-rig what I can.
The general plan:
- Attach all the blocks, shackles, etc. to the masts, booms, and gaffs.
- Attach as many of the rigging lines as possible to the masts, booms, and gaffs.
- Leave each line with extra length, and coil the lines up.
- Tag each line with a sticker noting which line it is.
- Mount the masts.
- Run the shrouds and attach them to the deadeyes on the hull.
- Run the remaining standing rigging.
Over the last few months, I’ve spent a lot of time reviewing the plans and attempting to identify each rigging line. There are some details that are not very clear on the plans, so I’ve had to research a few items. I’m sure that I’ve got some things wrong, but I think my rigging notes are good enough to get me started.

In preparation, I’ve made the following documents:
- A diagram of all the rigging, prepared in Adobe Photoshop, that shows each rigging line using a color-coded line. The different types of lines are on different layers, allowing me to turn them on and off to isolate lines by type.
- Diagrams of each line, showing how each line is attached, including what kind of splice, seizing, hook, shackle, etc. is used, as well as any blocks.
- A spreadsheet of all the lines, indicating the starting point, ending point, color, line size on the model, and where it is shown on the plans.
The spreadsheet assigns a unique number to each line so I can keep track of things as I’m working. I’ve identified 89 different lines.
Types of Rigging Lines
There are two main ‘categories’ of rigging: standing and running. I’ve never been on a boat, much less a sailing ship, so my knowledge is limited to what I’ve learned over the last couple of years.
From what I’ve seen, standing rigging includes all the lines that hold the masts up. These are typically fairly heavy, and are relatively ‘fixed’. (They can be adjusted through lanyards and such, but they typically do not involve blocks or pulleys.). Running rigging includes all the lines that hold up the sails and adjust how the sails are angled against the wind.
Standing Rigging
On model ships, standing rigging is often done with black rigging line.
The shrouds are rigging lines that hold the masts up by their sides. There are normally several shrouds for each mast. The Bluenose has 4 shrouds for the each lower mast , on each side, for a total of 16. It also has a shroud running down from the top mast , adding another 4. These 20 shrouds are run down to the main rail, where they are secured to the deadeyes on the chain plates .
Finally, there are two top mast shrouds on the main mast, that run from the top of top mast to the trestle tree .

Stays hold the masts on the fore and aft sides. There are a number of different stays on the Bluenose. A few run between the main and fore masts, while several others run down to the deck or bowsprit .

Running Rigging
Most (all?) of the running rigging on a model ship is done with tan rigging line.
The term halliard comes from ‘haul yard’, and refers to lines that raise things. The halliards tend to be some of the more complex rigging lines. They typically have a number of blocks, and often weave back and forth.

The lifts hold tings up, like booms. The Bluenose has lifts for the main boom, the fore boom, and the jumbo jib boom. A couple short spreader lifts hold up the spreaders on the fore mast.

The term tackle seems to refer more the actual pieces that form the pulleys. However, there are a few lines on the Bluenose that the plans refer to as tackles , so I’m using that term here.
The Bluenose has a tackle on the bottom of the main boom and fore boom. It also has tackles for lifting the dories on both the port and starboard sides.

The sheets are lines that control the corner of a sail. They can keep tension, as well as control the movement of the sail. Many of these seem to be capable of running on either the port or starboard side.

The tacks are fairly simply lines that hold down the bottom corner of sails.

The downhauls run from the top of the sail down, and are used to pull the sail down when it is being stowed.

Miscellaneous Rigging
These might better fit under one of the other categories, but I’m separating them out into a miscellaneous category because they a little different than the other lines.
Ratlines and Footropes
Ratlines are ropes that form ‘ladders’ on the shrouds. These can be used to climb up to the upper portions of the masts.
Footropes are lines that are secured to things like the main boom and the bowsprit (not shown) where they extend outside the ship. Sailors could stand on the footropes when they need to get out to these areas.

Flag Halliards
The flag halliards are technically halliards (they lift something), but they are just used for flags so they tend to be pretty light/simple. The Bluenose has three – one on the main mast, one on the fore mast, and one on the main gaff.

I didn’t bother to draw up the clews , but these are noted on the plans so I’m including them here. The clew lines seem to run along the edges of sails, and are used to pull up the corners of the sails.
There is a LOT of discussion online about what size rigging line should be used for the various lines. Hardcore modelers use all kinds of resources to determine the precise size of rope that would have been used. I’m not that fancy.
The Model Shipways Bluenose kit provides rigging line in a few different sizes: 0.008″ (very thin, like thread), 0.021″ (medium weight), and 0.028″ (thicker). These don’t match what’s indicated on the plans. The plans show a variety of thicknesses, like .006″, .012″, and more.
To make things a little more complicated, I’m replacing all the rigging line in the kit with line from Syren Ship Model Company . The kit line is fine, but Syren’s is way better. The sizes are not always exactly the same, so I went with what was close. The 0.008″ kit line was replaced with 0.008″ Syren line. The 0.021″ kit line was replaced with 0.018″ Syren Line. The 0.028″ kit line was replaced with 0.025″ Syren Line.
I decided to use these lines as follows:

Blocks, Hooks, Shackles and Splices
Knowing where lines go and what size they should be isn’t enough. The details matter. Each line has its own unique usage of blocks, hooks, shackles, splices, etc. Adding all these details accurately makes all the difference in the look of the model.
I’ll just touch on the basics here, and go into more detail about how I’m implementing each piece as I get further into rigging.
There are a number of pieces of hardware that go into the rigging. All these little bits and pieces have specific purposes. Some are supplied by the kit, while others have to be made from scratch.
Blocks are pulleys. (Some hardcore ship guys would probably cringe at that statement, but that is the simplest, easiest explanation).
Rigging lines are run through blocks to make things easier to pull and lift.
On a model ship, the blocks are not actually functional. They don’t have the little wheels. Instead, they are just small wooden pieces with holes drilled through for the lines. Depending on the ship, a kit might have many different sizes and types of blocks.

On the Bluenose, we have single, double, and triple blocks. A single block has one set of holes, representing one ‘wheel’ in the pulley. A double block as two sets, and a triple block has three sets.
The Model Shipways Bluenose kit provides blocks in a number of different sizes. I’m only using the triple blocks. All the others have been replaced by block from Syren Model Ship Company . Syren’s blocks are much higher quality.
Blocks can be attached in a number of different ways. I spent a lot of time going over the plans to determine how each block should be attached. Typically, a hook or loop is attached to the block, which is then attached to a mast/boom/gaff, or to another rigging line. I identified several different configurations:
- A block with a single hook attached.
- A block with a single loop attached.
- A block with a loop on both the top and bottom.
- A block with a hook on one end and a loop on the other.

Seizing a block and setting up the hook or loop is a skill that requires a lot of practice. Many modelers have come up with creative jigs and techniques for this.
Several places in the rigging call for hooks . These are fairly simple metal pieces with a ring on one side, and hook on the other. I make mine by bending brass wire.

Shackles are a little more complex. A shackle allows a line to be secured in place, but removed at any time by removing the shackle’s bolt. There are a number of ways to make them. I’ve made some for the bowsprit , and my technique is covered there.

Deadeyes are typically round pieces that are used to secure the shrouds. I installed some of these when I put the chain plates on . Working on the deadeyes is one of my least favorite parts of rigging.
Deadeyes come in pairs, and each pair is held together by a lanyard. This allows the lines to be adjusted to achieve the right tension. Getting them all straight, tight, and even is a pain.

Securing the Lines
To secure the lines to all this hardware, a few different techniques are used. On my first build, I simply tied knots for everything. This time, I’m trying to do things better. My usage of these techniques will not be accurate . In many cases, I’m going to use simple versions of splices and seizings.
Eye Splices
I’ve written about eye splices before. An eye splice is a loop in the end of the line, created by splicing the line back onto itself. Eye splices are much easier to do before the line is attached (in any way) to the ship. Try to do all your eye splices in advance.

Some places call for eye splices that have to be done in place on the ship. In these cases, I’ll be ‘faking it’, but simply seizing the line to itself, wrapping it with thread, and hoping nobody notices.
Seized Loops
A seized loop is common on a model ship. The end result is similar to an eye splice in that it creates a loop, but this technique allows you to tighten the line in place. The line is looped around whatever it is being attached to, pulled tight, then tied to itself with thread.

Lanyards are used in a few places there things need to be pulled tight, but remain adjustable. There are two main types of lanyards on the Bluenose.
The lanyards for the deadeyes are done in the traditional method. There are many diagrams on how to do this. The lanyard is run through the holes in the upper and lower deadeye, they tied off on the shroud.
In other places, like the spreader lifts, lanyards are used to pull the lines tight. For these, I’ll tie the lanyard to the line, then loop it through whatever it is being attached to several times (eye bolt, bail, etc.). Once I’ve got a few loops, I’ll tie it off again.

So, What Next?
Now that I have a plan for the rigging, it is time to get everything I can installed on the masts. The goal is to get everything as complete as it can be before installing the masts.
Unfortunately, it is really hard to document and illustrate this as I go. Also, it would be a little confusing for someone jumping in later looking for assistance with a particular line (they’d see one end of it installed now, and the other end installed much later).
So, to make it easier I’m not going to document the rigging prep I’m doing on the masts. Instead, I’ll jump forward to once the masts are mounted, and fully document each line as I finish it.
Prepping all the rigging on the masts went fairly quickly, taking about a week. Once the prep work was done, all the lines were labeled (I printed some labels). Then I installed the masts.
Serious modelers will tell you not to glue your masts in – the rigging should hold it up if you do it right. The advantage of that is that if you need to remove the masts in the future (repairing damage several years from now), you can.
I’m not good enough at rigging to pull that off, so I glued my masts in place.

Rigging lines and hardware installed on the masts. Each line is coiled and labeled.
The coiled and labeled rigging lines look like a mess, but they are actually pretty well organized. Each line is identified by the number from my spreadsheet as well as its name.

Messy, but still organized.
Now all I have to do is finish attaching all this stuff.
- Click to share on Twitter (Opens in new window)
- Click to share on Facebook (Opens in new window)
- Click to share on Reddit (Opens in new window)
- Click to share on Tumblr (Opens in new window)
- Click to share on Pinterest (Opens in new window)
- Phantom NY Pilot Boat
- Model Ship Kit Database
Copyright © 2018 SuburbanShipModeler.com The text, photos, and content are copyright of this site unless otherwise noted.
Photos were taken by the author unless otherwise noted. All brands and trademarks referenced are the property of their respective owners.
Discover more from The Suburban Ship Modeler
Subscribe now to keep reading and get access to the full archive.
Type your email…
Continue reading
Nylet. Fine Sails & Quality Products ~ 92 Years
Welcome to the 2024 nylet website: everything for the model yachtsman. world-wide mail order service since 1958., welcome to the 2024 nylet website. nylet 92 years . the oldest established international master sailmakers, since 1932. everything for the model yachtsman. creating the very finest sails. tradition - craftsmanship - innovation. established 1932. 92 years since our firm's founding ethos "fine products, quality first". nylet racing sails are used the world over. makers of model sails to the national maritime museum cornwall. sails made by special commission for collectors & museums. every sail suit carefully made to your special order either in synthetic sailcloth, or for the vintage or classic yacht we make fine sails in cotton. large range of yacht fittings, wires, screws, tools etc. our fast world-wide mail order service (since 1958) is open for business. scroll down for more, or go to top toolbar to click on other pages. thank you for visiting our website, we hope you will find our product listings useful. iom sail rig kits, plus other class rig kits. replacement kit sails such as fairwind, seawind, victoria, etc. sails made for 200 different designs (see the "150 sails" list) and which include the classic - vic smeed's starlet and star baby, also wild duck (plan sold by sarik hobbies) and the recent eventide. prompt despatch from stock of large range of mast & deck fittings, aluminium tubing (incl stiffer 7075), wires & cordage, screws, tools, booklets & other quality products for model yachts, see price list (over 500 items). nylet racing sails with our "wind catching" shape - all sails cut specially to order and designed to enable your yacht to respond to varying *wind conditions, sails you can be proud of to compliment your model racing or cruising yacht. the very finest cotton sails manufactured for sailing yachts and display models. sails with wind catching shape and that extra sparkle. cross-reference listings of fittings in section e of our price list with the online "fittings & photos" page. full size sailmakers and contractors to the admiralty 1932-1966. 1772. silk mercers established in high holborn, london - 8 generations - 252 years of working with fine cloths. model & miniature makers spanning 4 centuries and 12 generations, with an example of our early 18th century work held in the british museum, london. slide & click on any of the 7 links below, or click any link on top bar. this is just one of 35 pages on our website., product & price list.
PRICE LIST - your first stop - approx. 500 items (fully searchable pdf file).
Quick guide to Sails
IOM, M-class, Ten Rater & other sails. Replacement kit sails - Fairwind, Voyager 2, Victoria, Seawind (over 150 other standard sail suits available).
Our Sailmaking Service in detail
Fine 'vintage' style cotton sails.
Creating the Finest Sails for Vintage & pond model yachts, Nylet cotton sails are specially made to order.
IOM rig carry bags & IOM carbon-fibre fin sets, ballast.
Sail rig carry/stowage bags; lead ballast; high quality c.f. fins/rudders.
Nylet 'How To' booklets
A range of 'How to' booklets, the BB3 aspects of fitting out model yachts.
Rig & deck fittings, wires etc.
Prompt despatch on our large range of quality rig & deck fittings (see photos), cordage, wires, stainless steel screws & nuts, brass wood screws, tools, etc.
Vintage yacht restoration
Your vintage model yacht can be carefully restored in our workshop.
Mast & boom tubing
Range of aluminium mast & boom tubing (incl 7075 grade).
Yacht sail winches
Sail winches to suit 36 inch, IOM, Marblehead, 6M, 10R & A-class.
Nylet. Master Sailmakers - Quality First. Established 1932. Click the "contact us" button to email your enquiry and for phone numbers/email/business hours & other/holiday dates.
View more photos of nylet sails, download our order form here., welcome - accueil, bienvenido, velkommen, welkom, tervetuloa, willkommen, benvenuto, velkommen, bem-vindo., nylet ~ master sailmakers ~ "quality first". 2 generations, 108 years of experience. 92 years of model sailmaking (including 35 years full size sailmaking). at nylet we don't just 'make' sails, we create sails, we breathe life into the sailcloth in order that they might be shaped by the wind. using technological advances in materials coupled with innovation, expertise and tradition over 92 years to bring you the very finest model sails. all sails are made specially to your order; please phone us and/or email sail plan, drawing for a quotation. see price list for 'standard' racing sails, iom sails and replacement kit sails (plus three sail pages with full info)., everything for the model racing yachtsman since 1932. world-wide mail order service since 1958. prompt despatch on fittings and stock items. quality mast & deck fittings, sails of all types, screws & nuts etc. accessories, aluminium tubing, iom rig bags and more. fast world-wide mail order service. please click on our price list before enquiring (500 items). over 200 sail designs available. makers of model sails to the national maritime museum cornwall., a warm welcome to our customers and new visitors to our website. if you have logged on recently then please refresh your browser to enable updated pages to be displayed correctly. this website contains approx 35 pages including help/info/tips files. clickable links also on top bar. we are working to bring you nylet products via our long established prompt world-wide mail order service. full details on our dedicated mail order page. we wish all our customers good health and happy sailing., about us; also making your order..
We hope you will find our services and products useful in your model yachting hobby. Our mail order service commenced in 1958 and we have been despatching our products world-wide since then.
Our PRICE LIST gives you instant access to almost 500 items so please refer to this firstly before enquiring. And please note there is no VAT tax (we do not charge VAT). Having firstly visited the list of products to see what we offer, the other dedicated pages on this site are to assist you with further info on sails, aluminium mast/boom tubing, rig & deck fittings (with photos), wires & cordage, screws & bolts etc., sail winches, tools & accessories. To access all other pages and products as well as our "help" pages either click on the individual (sliding) carousel links "read more" or via the top bar. There are some 35 pages on this website (including help files with useful tips). All other pages can be accessed using the drop down menus at the very top of each page.
Nylet are the longest established professional model sailmakers in the world, manufacturing full size sails from 1932 to 1965, and also model yacht sails in cotton from the early 1930's onward. 108 years of experience - 2 generations. We have been exporting our products world-wide since 1958 and offer a comprehensive model sailmaking service including yacht sails made in white Dacron, also racing scrim, and IOM sail rig kits, plus replacement kit sails, also Dacron Heritage sewn sails in 1950's/60's style. For some 35 plus years we have again manufactured finely finished Premium 'vintage' style cotton sails. We offer a large range of rig & deck fittings, wires & cordage, a huge selection of screws, nuts etc, sail numerals, accessories and hardware for modern racing yachts. Also sail winches, and much, much more. For products and prices click on (top bar) "all pages" and select from the drop down list. Please also see customers comments on the various pages. News - Range of sail winches for most yachts, see dedicated winch page; for prices refer to our products & price list in section M (prices start at around £100). Just a note about our sails. As it says on the "sail" pages Nylet sails are finished and are complete with batten stiffeners (where necessary) and all eyelets etc etc. A few customers ask if they are complete - seems some Chinese "kit" sails are not fully finished (I use the word "sails" loosely here!). We are Master Sailmakers and have been for 92 years , so you are purchasing the best. Please read our 3 sail pages for fuller details.
NYLET, a family business (since 1832), has moved with the times over 3 centuries and for many years been run on a mail order basis. We are thus able to focus on orders from home and abroad enabling us to effect a brisk turnaround on stock items. On a personal note, a milestone - in 2024 I celebrate 58 years of model sailmaking (taking over from my late father in 1981) and am pleased to say that I take great pleasure in my work, every sail I make is given equal attention to detail. Our skills represent some 108 years of sailmaking experience when taken together with my late father, who taught me most of what I know. It might actually be 118 years if I reckon his early years working for his father (a keen yachtsman) and making sails for the dinghy he constructed in the mid 1920's (before making sails commercially). Our family firm (originally known as J.Parsons) was established in 1832, 5 generations ago and originally being chandlery supplies and manufacturing canvas goods, sheeting, tilts etc. for narrowboat hauliers as well as farmers, then later in the marquee trade and in turn manufacturing full size sails as well as model sails from the early 1930's. We are proud that in our family business we can say this is some 192 years of manufacturing.
How to order and pay . VISA, MASTERCARD & PayPal accepted, or electronic bank transfer (BACS). Please email or phone with your order. FOR DELIVERY times and making/putting up your order please see relevant info pages.
Les visiteurs de la France s'il vous plait cliquer sur "bienvenue". Los visitantes procedentes de Espana, por favor haga clic en "bienvenue".
Today - Racing sails in scrim and film, Dacron sails & Heritage sewn Dacron sails. Nylet Finest 'Premium' cotton sails, fittings etc. 2016 - Frank Parsons marked his 50th year of model sailmaking. 1966 - Coloured Terylene racing sails. 1932 - Commencement of full size and model sailmaking. 1834 - Founding of the family firm, J.Parsons (canvas goods manufacturers). 1772 - My 4th gt grandfather, Michael, a Silk Mercer in High Holborn, London, working with fine cloths. 1738 - My 5th gt grandfather, Michael Compigné, Goldsmith, London, a specialist miniature maker for private customers, items made in gold & silver. 1620 - My 8th, 7th & 6th gt grandfathers, Clockmakers in Normany, London, and Winchester. From 1620 to 2022, over 400 years of the finest craftsmanship. 400 Plus Years of Tradition
Sails made by Special Commission for Collectors & Museums. Nylet IOM racing sails finely manufactured in racing scrim, white Dacron and satin film. Also replacement kit sails; Classic Varnished Terylene sails, also "Heritage" 1960's style sewn white Dacron sails made exclusively by Nylet. Also Premium 'Vintage' style cotton sails. Any size sails, of any type, made to your drawings or templates. Just a note, sail suits are often wrongly referred to as "sets". In nautical parlance sails are a "suit" whether that be 2, 3 or 4 sails (or more) for a yacht or a working boat, or a ship of the line such as HMS Victory where a dozen or more sails may be involved. All our sails are priced as a suit.
Makers of model sails to the National Maritime Museum Cornwall.
*Note: Wind conditions within sail type & design parameters.
Please note, we are not a "shop" (we have been asked). Phone us to chat, always happy to help.
The Nylet website is often updated weekly; updated May 2024
SOME Testimonials
Thank you for the BB3 booklet - a mine of information.
Thank you for such excellent service again, quality goods sent at lightning speed. A credit to how things should be done.
I had various recommendations of who to get sails from but the other day I saw a yacht with your sails and it just shone out, the shape looked beautiful, so I decided there and then to contact you.
Thanks Frank, sails arrived, what a work of art! They are incredible!
The fittings arrived in record time and I am really grateful to you for such a superb service.
I was pleased to receive my new IOM sails today, they are very good indeed just what I wanted, possibly the best I have ever had, good workmanship.
Many thanks for the superb Seawind sails that arrived this morning. I really appreciate the speed of processing of the order, and the precision of the finished sails.
Sails received with thanks. Great quality and great fit!
The M-class sails arrived and absolutely fantastic, really pleased and more than happy to recommend your workmanship.
The Voyager sails arrived in perfect condition and look beautiful. Thank you very much for the nice work!
Just to let you know that the new IOM sails work very well, thank you. I had 2x1st, 2x2nds,2x3rds, and 1 fourth. So I came first overall after 7 races.
I live on the coast of NSW in Australia. Some time ago I bought Spirit No.2751 (the one featured on your site). I am currently racing the boat here in Australia in several IOM fleets. The elliptical rudder works perfectly and the boat is at full potential now, points higher than the TS2 and the Topiko. Neither are faster off the wind.... Thanks for a great boat, I have never felt another IOM that glides to windward like the Spirit 3. All your efforts are appreciated here.
I just wanted to say a really big thank you for the lovely suit of Dacron Heritage (sewn) sails you have made for my vintage 4 foot model J Class sloop. I have put the sails on the spars and they look superb! They are beautifully made as I expected them to be, but in all fairness it is actually better than I had even hoped for.
Sails have arrived safely and look fantastic. Very many thanks.
Many thanks, order arrived today, superb service as always.
Just a note to thank you for phoning me with the expected delivery of the Dragon sails. They came the same day! I have to say that they look stunning and beautifully made with lovely details.
Safely received! Thanks for the great service.
Hope you are doing well, again, thank you for the (cotton) sails. They turned out beautifully.
I immediately rigged my 36"-class and was happy about the perfect fit of the (cotton) sails. They are wonderful and I am happy. Thank you very much!
Sails arrived this morning, as promised; they are a work of art - the real thing! Whatever else people say about the barge, they will say "who made her sails?"
Sails have arrived safely. But what a superb job, my old girl will be the best dressed yacht at any of our VMYG meetings. Wonderful work of the very highest standard as always from you, I cannot thank you enough.
I've never won anything before with my One metre (IOM) yacht but with your sails newly fitted I won the series of races. An excellent job, marvellous, thank you.
Hi. Sails arrived today, very impressed. Thank you.
I received my sails today....PERFECT...arrives safely. Perfect fit and I look forward to sailing with the new sails!!!!!! THANKS,
Received the sails, many thanks - as usual, quality better than expected!
Hi Frank, The One Metre sails are looking great.
Hi Frank thanks for another great (sail) job.
Thank you for your most attentive service, my best regards.
Dear Frank, the sails arrived safely on time, as promised. Superb quality and workmanship, as ever.
more comments from satisfied customers
Just a quick email to let you know the J class sails arrived in perfect condition and look amazing. I will of course send you some pictures when the boat is finished.
Hi Frank. The sails arrived today - they look great. I very much look forward to getting them rigged and tried out. I've already taken trophies with the sails you made for my 10 rater so hoping for more of the same.
The (Seawind) sails have arrived, the only thing I can say is - WOW. What a difference compared with the standard sails.
Absolutely magnificent (cotton) sails!
Congratulations for your sails! They look perfect and the belly looks fine and regular. Many thanks for the high quality of your work.
Many thanks for the most efficient service.
Sails received with thanks. You are a true craftsman.
Looking forwards to receiving the (Mascotte) sails, your workmanship always gives me pleasure.
Many thanks for the first class service you always give, items arrived this morning so that's my bank holiday weekend sorted!
Sails arrived this morning, superb as usual, thanks again.
Beautiful suit of sails arrived safe this morning, thank you.
Hello Frank, the sails arrived yesterday and are super thanks. I attach a photo of them fitted to my yacht.
Thanks for the BEAUTIFUL (cotton) SAILS which arrived today. What fantastic work. Amazing. Well worth the wait! I've fitted the sails to the spars. Fantastic. My goodness you are a skilled and talented man. I saw the shape you had made before fitting and understood why you did so, but only when rigged did it all make sense. Amazing. And those tiny brass eyelets... I took the yacht to my sister this morning. What a thing of beauty, was the unanimous cry. Forgot to get a picture for you in all the excitement... watch this space. I am so grateful to you, and will be coming back for more!
Thanks for your great service and friendly advice.
Order arrived this morning (next day), all OK, excellent service.
Just arrived, perfect delivery! Thank you Frank, and have a nice Weekend!
Many thanks for the prompt reply (directing me to the price list). Lots of goodies there!
The items arrived in the post today, all Ok. Thank you for the quick and excellent service, its nice to know that small orders like mine are given the same service as larger orders.
Hi Frank, (cotton) sails have arrived, they are perfect, you did a lovely job, will send you a pic when on the boat.
Just received my glorious suit! Magnificent! The tablings..... marvellous!!!... the stitching lines, the overall shape, every detail, all very beautiful indeed! I can't tell you how delighted I am. You must understand, the wind has always held a magical place in my heart and the thin membrane with which we apply our feeble human attempts to have it do our way over an equally mysterious sea..... alchemy indeed. I hold this suit in my hands and it all comes alive again. You sir, are a Wizard of Dacron. Thank you for your brilliant work, I raise a glass to you Sir,
Really thanks again for your great products and service!
The sails arrived safely yesterday and look amazing. I am very pleased with the result and they will make the yacht look smarter than she has ever done.
Hello Frank. Thank you for all your help, the sails, mast and fittings are all first class and Starlet is sailing beautifully.
Amazing. I wish all British businesses ran on your lines!
Hi Frank, sails (Nottingham J) arived safely this morning, very pleased, they are very well made and look beautiful. Merry Christmas.
Thanks Frank, wonderful service.
- Vanquish 65
- Mini Maniac
- RG65 Appendages
- Maniac MK II
- IOM Appendages
- Marblehead Class
- Marblehead Appendages
- RT65 Ragnarok
- RT65R Armageddon
- RC65 Adrenaline
- ST65 Sowelu
- Mini40 / F48 Class
- Nightmare X
- Nightmare MK VIII
- MultiOne Class
- FireDragon 1000
- DIY Sail Winch
- Rig Building
Rig building


Beginner’s Guide: How To Rig A Sailboat – Step By Step Tutorial
Alex Morgan
Rigging a sailboat is a crucial process that ensures the proper setup and functioning of a sailboat’s various components. Understanding the process and components involved in rigging is essential for any sailor or boat enthusiast. In this article, we will provide a comprehensive guide on how to rig a sailboat.
Introduction to Rigging a Sailboat
Rigging a sailboat refers to the process of setting up the components that enable the sailboat to navigate through the water using wind power. This includes assembling and positioning various parts such as the mast, boom, standing rigging, running rigging, and sails.
Understanding the Components of a Sailboat Rigging
Before diving into the rigging process, it is important to have a good understanding of the key components involved. These components include:
The mast is the tall vertical spar that provides vertical support to the sails and holds them in place.
The boom is the horizontal spar that runs along the bottom edge of the sail and helps control the shape and position of the sail.
- Standing Rigging:
Standing rigging consists of the wires and cables that support and stabilize the mast, keeping it upright.
- Running Rigging:
Running rigging refers to the lines and ropes used to control the sails, such as halyards, sheets, and control lines.
Preparing to Rig a Sailboat
Before rigging a sailboat, there are a few important steps to take. These include:
- Checking the Weather Conditions:
It is crucial to assess the weather conditions before rigging a sailboat. Unfavorable weather, such as high winds or storms, can make rigging unsafe.
- Gathering the Necessary Tools and Equipment:
Make sure to have all the necessary tools and equipment readily available before starting the rigging process. This may include wrenches, hammers, tape, and other common tools.
- Inspecting the Rigging Components:
In the upcoming sections of this article, we will provide a step-by-step guide on how to rig a sailboat, as well as important safety considerations and tips to keep in mind. By following these guidelines, you will be able to rig your sailboat correctly and safely, allowing for a smooth and enjoyable sailing experience.
Key takeaway:
- Rigging a sailboat maximizes efficiency: Proper rigging allows for optimized sailing performance, ensuring the boat moves smoothly through the water.
- Understanding sailboat rigging components: Familiarity with the various parts of a sailboat rigging, such as the mast, boom, and standing and running riggings, is essential for effective rigging setup.
- Importance of safety in sailboat rigging: Ensuring safety is crucial during the rigging process, including wearing a personal flotation device, securing loose ends and lines, and being mindful of overhead power lines.
Get ready to set sail and dive into the fascinating world of sailboat rigging! We’ll embark on a journey to understand the various components that make up a sailboat’s rigging. From the majestic mast to the nimble boom , and the intricate standing rigging to the dynamic running rigging , we’ll explore the crucial elements that ensure smooth sailing. Not forgetting the magnificent sail, which catches the wind and propels us forward. So grab your sea legs and let’s uncover the secrets of sailboat rigging together.
Understanding the mast is crucial when rigging a sailboat. Here are the key components and steps to consider:
1. The mast supports the sails and rigging of the sailboat. It is made of aluminum or carbon fiber .
2. Before stepping the mast , ensure that the area is clear and the boat is stable. Have all necessary tools and equipment ready.
3. Inspect the mast for damage or wear. Check for corrosion , loose fittings , and cracks . Address any issues before proceeding.
4. To step the mast , carefully lift it into an upright position and insert the base into the mast step on the deck of the sailboat.
5. Secure the mast using the appropriate rigging and fasteners . Attach the standing rigging , such as shrouds and stays , to the mast and the boat’s hull .
Fact: The mast of a sailboat is designed to withstand wind resistance and the tension of the rigging for stability and safe sailing.
The boom is an essential part of sailboat rigging. It is a horizontal spar that stretches from the mast to the aft of the boat. Constructed with durable yet lightweight materials like aluminum or carbon fiber, the boom provides crucial support and has control over the shape and position of the sail. It is connected to the mast through a boom gooseneck , allowing it to pivot. One end of the boom is attached to the mainsail, while the other end is equipped with a boom vang or kicker, which manages the tension and angle of the boom. When the sail is raised, the boom is also lifted and positioned horizontally by using the topping lift or lazy jacks.
An incident serves as a warning that emphasizes the significance of properly securing the boom. In strong winds, an improperly fastened boom swung across the deck, resulting in damage to the boat and creating a safety hazard. This incident highlights the importance of correctly installing and securely fastening all rigging components, including the boom, to prevent accidents and damage.
3. Standing Rigging
When rigging a sailboat, the standing rigging plays a vital role in providing stability and support to the mast . It consists of several key components, including the mast itself, along with the shrouds , forestay , backstay , and intermediate shrouds .
The mast, a vertical pole , acts as the primary support structure for the sails and the standing rigging. Connected to the top of the mast are the shrouds , which are cables or wires that extend to the sides of the boat, providing essential lateral support .
The forestay is another vital piece of the standing rigging. It is a cable or wire that runs from the top of the mast to the bow of the boat, ensuring forward support . Similarly, the backstay , also a cable or wire, runs from the mast’s top to the stern of the boat, providing important backward support .
To further enhance the rig’s stability , intermediate shrouds are installed. These additional cables or wires are positioned between the main shrouds, as well as the forestay or backstay. They offer extra support , strengthening the standing rigging system.
Regular inspections of the standing rigging are essential to detect any signs of wear, such as fraying or corrosion . It is crucial to ensure that all connections within the rig are tight and secure, to uphold its integrity. Should any issues be identified, immediate attention must be given to prevent accidents or damage to the boat. Prioritizing safety is of utmost importance when rigging a sailboat, thereby necessitating proper maintenance of the standing rigging. This ensures a safe and enjoyable sailing experience.
Note: <p> tags have been kept intact.
4. Running Rigging
Running Rigging
When rigging a sailboat, the running rigging is essential for controlling the sails and adjusting their position. It is important to consider several aspects when dealing with the running rigging.
1. Choose the right rope: The running rigging typically consists of ropes with varying properties such as strength, stretch, and durability. Weather conditions and sailboat size should be considered when selecting the appropriate rope.
2. Inspect and maintain the running rigging: Regularly check for signs of wear, fraying, or damage. To ensure safety and efficiency, replace worn-out ropes.
3. Learn essential knot tying techniques: Having knowledge of knots like the bowline, cleat hitch, and reef knot is crucial for securing the running rigging and adjusting sails.
4. Understand different controls: The running rigging includes controls such as halyards, sheets, and control lines. Familiarize yourself with their functions and proper usage to effectively control sail position and tension.
5. Practice proper sail trimming: Adjusting the tension of the running rigging significantly affects sailboat performance. Mastering sail trimming techniques will help optimize sail shape and maximize speed.
By considering these factors and mastering running rigging techniques, you can enhance your sailing experience and ensure the safe operation of your sailboat.
The sail is the central component of sailboat rigging as it effectively harnesses the power of the wind to propel the boat.
When considering the sail, there are several key aspects to keep in mind:
– Material: Sails are typically constructed from durable and lightweight materials such as Dacron or polyester. These materials provide strength and resistance to various weather conditions.
– Shape: The shape of the sail plays a critical role in its overall performance. A well-shaped sail should have a smooth and aerodynamic profile, which allows for maximum efficiency in capturing wind power.
– Size: The size of the sail is determined by its sail area, which is measured in square feet or square meters. Larger sails have the ability to generate more power, but they require greater skill and experience to handle effectively.
– Reefing: Reefing is the process of reducing the sail’s size to adapt to strong winds. Sails equipped with reefing points allow sailors to decrease the sail area, providing better control in challenging weather conditions.
– Types: There are various types of sails, each specifically designed for different purposes. Common sail types include mainsails, jibs, genoas, spinnakers, and storm sails. Each type possesses its own unique characteristics and is utilized under specific wind conditions.
Understanding the sail and its characteristics is vital for sailors, as it directly influences the boat’s speed, maneuverability, and overall safety on the water.
Getting ready to rig a sailboat requires careful preparation and attention to detail. In this section, we’ll dive into the essential steps you need to take before setting sail. From checking the weather conditions to gathering the necessary tools and equipment, and inspecting the rigging components, we’ll ensure that you’re fully equipped to navigate the open waters with confidence. So, let’s get started on our journey to successfully rigging a sailboat!
1. Checking the Weather Conditions
Checking the weather conditions is crucial before rigging a sailboat for a safe and enjoyable sailing experience. Monitoring the wind speed is important in order to assess the ideal sailing conditions . By checking the wind speed forecast , you can determine if the wind is strong or light . Strong winds can make sailboat control difficult, while very light winds can result in slow progress.
Another important factor to consider is the wind direction . Assessing the wind direction is crucial for route planning and sail adjustment. Favorable wind direction helps propel the sailboat efficiently, making your sailing experience more enjoyable.
In addition to wind speed and direction, it is also important to consider weather patterns . Keep an eye out for impending storms or heavy rain. It is best to avoid sailing in severe weather conditions that may pose a safety risk. Safety should always be a top priority when venturing out on a sailboat.
Another aspect to consider is visibility . Ensure good visibility by checking for fog, haze, or any other conditions that may hinder navigation. Clear visibility is important for being aware of other boats and potential obstacles that may come your way.
Be aware of the local conditions . Take into account factors such as sea breezes, coastal influences, or tidal currents. These local factors greatly affect sailboat performance and safety. By considering all of these elements, you can have a successful and enjoyable sailing experience.
Here’s a true story to emphasize the importance of checking the weather conditions. One sunny afternoon, a group of friends decided to go sailing. Before heading out, they took the time to check the weather conditions. They noticed that the wind speed was expected to be around 10 knots, which was perfect for their sailboat. The wind direction was coming from the northwest, allowing for a pleasant upwind journey. With clear visibility and no approaching storms, they set out confidently, enjoying a smooth and exhilarating sail. This positive experience was made possible by their careful attention to checking the weather conditions beforehand.
2. Gathering the Necessary Tools and Equipment
To efficiently gather all of the necessary tools and equipment for rigging a sailboat, follow these simple steps:
- First and foremost, carefully inspect your toolbox to ensure that you have all of the basic tools such as wrenches, screwdrivers, and pliers.
- Make sure to check if you have a tape measure or ruler available as they are essential for precise measurements of ropes or cables.
- Don’t forget to include a sharp knife or rope cutter in your arsenal as they will come in handy for cutting ropes or cables to the desired lengths.
- Gather all the required rigging hardware including shackles, pulleys, cleats, and turnbuckles.
- It is always prudent to check for spare ropes or cables in case replacements are needed during the rigging process.
- If needed, consider having a sailing knife or marlinspike tool for splicing ropes or cables.
- For rigging a larger sailboat, it is crucial to have a mast crane or hoist to assist with stepping the mast.
- Ensure that you have a ladder or some other means of reaching higher parts of the sailboat, such as the top of the mast.
Once, during the preparation of rigging my sailboat, I had a moment of realization when I discovered that I had forgotten to bring a screwdriver . This unfortunate predicament occurred while I was in a remote location with no nearby stores. Being resourceful, I improvised by utilizing a multipurpose tool with a small knife blade, which served as a makeshift screwdriver. Although it was not the ideal solution, it allowed me to accomplish the task. Since that incident, I have learned the importance of double-checking my toolbox before commencing any rigging endeavor. This practice ensures that I have all of the necessary tools and equipment, preventing any unexpected surprises along the way.
3. Inspecting the Rigging Components
Inspecting the rigging components is essential for rigging a sailboat safely. Here is a step-by-step guide on inspecting the rigging components:
1. Visually inspect the mast, boom, and standing rigging for damage, such as corrosion, cracks, or loose fittings.
2. Check the tension of the standing rigging using a tension gauge. It should be within the recommended range from the manufacturer.
3. Examine the turnbuckles, clevis pins, and shackles for wear or deformation. Replace any damaged or worn-out hardware.
4. Inspect the running rigging, including halyards and sheets, for fraying, signs of wear, or weak spots. Replace any worn-out lines.
5. Check the sail for tears, wear, or missing hardware such as grommets or luff tape.
6. Pay attention to the connections between the standing rigging and the mast. Ensure secure connections without any loose or missing cotter pins or rigging screws.
7. Inspect all fittings, such as mast steps, spreader brackets, and tangs, to ensure they are securely fastened and in good condition.
8. Conduct a sea trial to assess the rigging’s performance and make necessary adjustments.
Regularly inspecting the rigging components is crucial for maintaining the sailboat’s rigging system’s integrity, ensuring safe sailing conditions, and preventing accidents or failures at sea.
Once, I went sailing on a friend’s boat without inspecting the rigging components beforehand. While at sea, a sudden gust of wind caused one of the shrouds to snap. Fortunately, no one was hurt, but we had to cut the sail loose and carefully return to the marina. This incident taught me the importance of inspecting the rigging components before sailing to avoid unforeseen dangers.
Step-by-Step Guide on How to Rig a Sailboat
Get ready to set sail with our step-by-step guide on rigging a sailboat ! We’ll take you through the process from start to finish, covering everything from stepping the mast to setting up the running rigging . Learn the essential techniques and tips for each sub-section, including attaching the standing rigging and installing the boom and sails . Whether you’re a seasoned sailor or a beginner, this guide will have you ready to navigate the open waters with confidence .
1. Stepping the Mast
To step the mast of a sailboat, follow these steps:
1. Prepare the mast: Position the mast near the base of the boat.
2. Attach the base plate: Securely fasten the base plate to the designated area on the boat.
3. Insert the mast step: Lower the mast step into the base plate and align it with the holes or slots.
4. Secure the mast step: Use fastening screws or bolts to fix the mast step in place.
5. Raise the mast: Lift the mast upright with the help of one or more crew members.
6. Align the mast: Adjust the mast so that it is straight and aligned with the boat’s centerline.
7. Attach the shrouds: Connect the shrouds to the upper section of the mast, ensuring proper tension.
8. Secure the forestay: Attach the forestay to the bow of the boat, ensuring it is securely fastened.
9. Final adjustments: Check the tension of the shrouds and forestay, making any necessary rigging adjustments.
Following these steps ensures that the mast is properly stepped and securely in place, allowing for a safe and efficient rigging process. Always prioritize safety precautions and follow manufacturer guidelines for your specific sailboat model.
2. Attaching the Standing Rigging
To attach the standing rigging on a sailboat, commence by preparing the essential tools and equipment, including wire cutters, crimping tools, and turnbuckles.
Next, carefully inspect the standing rigging components for any indications of wear or damage.
After inspection, fasten the bottom ends of the shrouds and stays to the chainplates on the deck.
Then, securely affix the top ends of the shrouds and stays to the mast using adjustable turnbuckles .
To ensure proper tension, adjust the turnbuckles accordingly until the mast is upright and centered.
Utilize a tension gauge to measure the tension in the standing rigging, aiming for around 15-20% of the breaking strength of the rigging wire.
Double-check all connections and fittings to verify their security and proper tightness.
It is crucial to regularly inspect the standing rigging for any signs of wear or fatigue and make any necessary adjustments or replacements.
By diligently following these steps, you can effectively attach the standing rigging on your sailboat, ensuring its stability and safety while on the water.
3. Installing the Boom and Sails
To successfully complete the installation of the boom and sails on a sailboat, follow these steps:
1. Begin by securely attaching the boom to the mast. Slide it into the gooseneck fitting and ensure it is firmly fastened using a boom vang or another appropriate mechanism.
2. Next, attach the main sail to the boom. Slide the luff of the sail into the mast track and securely fix it in place using sail slides or cars.
3. Connect the mainsheet to the boom. One end should be attached to the boom while the other end is connected to a block or cleat on the boat.
4. Proceed to attach the jib or genoa. Make sure to securely attach the hanks or furler line to the forestay to ensure stability.
5. Connect the jib sheets. One end of each jib sheet should be attached to the clew of the jib or genoa, while the other end is connected to a block or winch on the boat.
6. Before setting sail, it is essential to thoroughly inspect all lines and connections. Ensure that they are properly tensioned and that all connections are securely fastened.
During my own experience of installing the boom and sails on my sailboat, I unexpectedly encountered a strong gust of wind. As a result, the boom began swinging uncontrollably, requiring me to quickly secure it to prevent any damage. This particular incident served as a vital reminder of the significance of properly attaching and securing the boom, as well as the importance of being prepared for unforeseen weather conditions while rigging a sailboat.
4. Setting Up the Running Rigging
Setting up the running rigging on a sailboat involves several important steps. First, attach the halyard securely to the head of the sail. Then, connect the sheets to the clew of the sail. If necessary, make sure to secure the reefing lines . Attach the outhaul line to the clew of the sail and connect the downhaul line to the tack of the sail. It is crucial to ensure that all lines are properly cleated and organized. Take a moment to double-check the tension and alignment of each line. If you are using a roller furling system, carefully wrap the line around the furling drum and securely fasten it. Perform a thorough visual inspection of the running rigging to check for any signs of wear or damage. Properly setting up the running rigging is essential for safe and efficient sailing. It allows for precise control of the sail’s position and shape, ultimately optimizing the boat’s performance on the water.
Safety Considerations and Tips
When it comes to rigging a sailboat, safety should always be our top priority. In this section, we’ll explore essential safety considerations and share some valuable tips to ensure smooth sailing. From the importance of wearing a personal flotation device to securing loose ends and lines, and being cautious around overhead power lines, we’ll equip you with the knowledge and awareness needed for a safe and enjoyable sailing experience. So, let’s set sail and dive into the world of safety on the water!
1. Always Wear a Personal Flotation Device
When rigging a sailboat, it is crucial to prioritize safety and always wear a personal flotation device ( PFD ). Follow these steps to properly use a PFD:
- Select the appropriate Coast Guard-approved PFD that fits your size and weight.
- Put on the PFD correctly by placing your arms through the armholes and securing all the straps for a snug fit .
- Adjust the PFD for comfort , ensuring it is neither too tight nor too loose, allowing freedom of movement and adequate buoyancy .
- Regularly inspect the PFD for any signs of wear or damage, such as tears or broken straps, and replace any damaged PFDs immediately .
- Always wear your PFD when on or near the water, even if you are a strong swimmer .
By always wearing a personal flotation device and following these steps, you will ensure your safety and reduce the risk of accidents while rigging a sailboat. Remember, prioritize safety when enjoying water activities.
2. Secure Loose Ends and Lines
Inspect lines and ropes for frayed or damaged areas. Secure loose ends and lines with knots or appropriate cleats or clamps. Ensure all lines are properly tensioned to prevent loosening during sailing. Double-check all connections and attachments for security. Use additional safety measures like extra knots or stopper knots to prevent line slippage.
To ensure a safe sailing experience , it is crucial to secure loose ends and lines properly . Neglecting this important step can lead to accidents or damage to the sailboat. By inspecting, securing, and tensioning lines , you can have peace of mind knowing that everything is in place. Replace or repair any compromised lines or ropes promptly. Securing loose ends and lines allows for worry-free sailing trips .
3. Be Mindful of Overhead Power Lines
When rigging a sailboat, it is crucial to be mindful of overhead power lines for safety. It is important to survey the area for power lines before rigging the sailboat. Maintain a safe distance of at least 10 feet from power lines. It is crucial to avoid hoisting tall masts or long antenna systems near power lines to prevent contact. Lower the mast and tall structures when passing under a power line to minimize the risk of contact. It is also essential to be cautious in areas where power lines run over the water and steer clear to prevent accidents.
A true story emphasizes the importance of being mindful of overhead power lines. In this case, a group of sailors disregarded safety precautions and their sailboat’s mast made contact with a low-hanging power line, resulting in a dangerous electrical shock. Fortunately, no serious injuries occurred, but it serves as a stark reminder of the need to be aware of power lines while rigging a sailboat.
Some Facts About How To Rig A Sailboat:
- ✅ Small sailboat rigging projects can improve sailing performance and save money. (Source: stingysailor.com)
- ✅ Rigging guides are available for small sailboats, providing instructions and tips for rigging. (Source: westcoastsailing.net)
- ✅ Running rigging includes lines used to control and trim the sails, such as halyards and sheets. (Source: sailingellidah.com)
- ✅ Hardware used in sailboat rigging includes winches, blocks, and furling systems. (Source: sailingellidah.com)
- ✅ A step-by-step guide can help beginners rig a small sailboat for sailing. (Source: tripsavvy.com)
Frequently Asked Questions
1. how do i rig a small sailboat.
To rig a small sailboat, follow these steps: – Install or check the rudder, ensuring it is firmly attached. – Attach or check the tiller, the long steering arm mounted to the rudder. – Attach the jib halyard by connecting the halyard shackle to the head of the sail and the grommet in the tack to the bottom of the forestay. – Hank on the jib by attaching the hanks of the sail to the forestay one at a time. – Run the jib sheets by tying or shackling them to the clew of the sail and running them back to the cockpit. – Attach the mainsail by spreading it out and attaching the halyard shackle to the head of the sail. – Secure the tack, clew, and foot of the mainsail to the boom using various lines and mechanisms. – Insert the mainsail slugs into the mast groove, gradually raising the mainsail as the slugs are inserted. – Cleat the main halyard and lower the centerboard into the water. – Raise the jib by pulling down on the jib halyard and cleating it on the other side of the mast. – Tighten the mainsheet and one jibsheet to adjust the sails and start moving forward.
2. What are the different types of sailboat rigs?
Sailboat rigs can be classified into three main types: – Sloop rig: This rig has a single mast with a mainsail and a headsail, typically a jib or genoa. – Cutter rig: This rig has two headsails, a smaller jib or staysail closer to the mast, and a larger headsail, usually a genoa, forward of it, alongside a mainsail. – Ketch rig: This rig has two masts, with the main mast taller than the mizzen mast. It usually has a mainsail, headsail, and a mizzen sail. Each rig has distinct characteristics and is suitable for different sailing conditions and preferences.
3. What are the essential parts of a sailboat?
The essential parts of a sailboat include: – Mast: The tall vertical spar that supports the sails. – Boom: The horizontal spar connected to the mast, which extends outward and supports the foot of the mainsail. – Rudder: The underwater appendage that steers the boat. – Centerboard or keel: A retractable or fixed fin-like structure that provides stability and prevents sideways drift. – Sails: The fabric structures that capture the wind’s energy to propel the boat. – Running rigging: The lines or ropes used to control the sails and sailing equipment. – Standing rigging: The wires and cables that support the mast and reinforce the spars. These are the basic components necessary for the functioning of a sailboat.
4. What is a spinnaker halyard?
A spinnaker halyard is a line used to hoist and control a spinnaker sail. The spinnaker is a large, lightweight sail that is used for downwind sailing or reaching in moderate to strong winds. The halyard attaches to the head of the spinnaker and is used to raise it to the top of the mast. Once hoisted, the spinnaker halyard can be adjusted to control the tension and shape of the sail.
5. Why is it important to maintain and replace worn running rigging?
It is important to maintain and replace worn running rigging for several reasons: – Safety: Worn or damaged rigging can compromise the integrity and stability of the boat, posing a safety risk to both crew and vessel. – Performance: Worn rigging can affect the efficiency and performance of the sails, diminishing the boat’s speed and maneuverability. – Reliability: Aging or worn rigging is more prone to failure, which can lead to unexpected problems and breakdowns. Regular inspection and replacement of worn running rigging is essential to ensure the safe and efficient operation of a sailboat.
6. Where can I find sailboat rigging books or guides?
There are several sources where you can find sailboat rigging books or guides: – Online: Websites such as West Coast Sailing and Stingy Sailor offer downloadable rigging guides for different sailboat models. – Bookstores: Many bookstores carry a wide selection of boating and sailing books, including those specifically focused on sailboat rigging. – Sailing schools and clubs: Local sailing schools or yacht clubs often have resources available for learning about sailboat rigging. – Manufacturers: Some sailboat manufacturers, like Hobie Cat and RS Sailing, provide rigging guides for their specific sailboat models. Consulting these resources can provide valuable information and instructions for rigging your sailboat properly.
About the author

Leave a Reply Cancel reply
Your email address will not be published. Required fields are marked *
Save my name, email, and website in this browser for the next time I comment.
Latest posts

The history of sailing – from ancient times to modern adventures
History of Sailing Sailing is a time-honored tradition that has evolved over millennia, from its humble beginnings as a means of transportation to a beloved modern-day recreational activity. The history of sailing is a fascinating journey that spans cultures and centuries, rich in innovation and adventure. In this article, we’ll explore the remarkable evolution of…

Sailing Solo: Adventures and Challenges of Single-Handed Sailing
Solo Sailing Sailing has always been a pursuit of freedom, adventure, and self-discovery. While sailing with a crew is a fantastic experience, there’s a unique allure to sailing solo – just you, the wind, and the open sea. Single-handed sailing, as it’s often called, is a journey of self-reliance, resilience, and the ultimate test of…

Sustainable Sailing: Eco-Friendly Practices on the boat
Eco Friendly Sailing Sailing is an exhilarating and timeless way to explore the beauty of the open water, but it’s important to remember that our oceans and environment need our protection. Sustainable sailing, which involves eco-friendly practices and mindful decision-making, allows sailors to enjoy their adventures while minimizing their impact on the environment. In this…
The Ultimate Guide to Sail Types and Rigs (with Pictures)
What's that sail for? Generally, I don't know. So I've come up with a system. I'll explain you everything there is to know about sails and rigs in this article.
What are the different types of sails? Most sailboats have one mainsail and one headsail. Typically, the mainsail is a fore-and-aft bermuda rig (triangular shaped). A jib or genoa is used for the headsail. Most sailors use additional sails for different conditions: the spinnaker (a common downwind sail), gennaker, code zero (for upwind use), and stormsail.
Each sail has its own use. Want to go downwind fast? Use a spinnaker. But you can't just raise any sail and go for it. It's important to understand when (and how) to use each sail. Your rigging also impacts what sails you can use.

On this page:
Different sail types, the sail plan of a bermuda sloop, mainsail designs, headsail options, specialty sails, complete overview of sail uses, mast configurations and rig types.
This article is part 1 of my series on sails and rig types. Part 2 is all about the different types of rigging. If you want to learn to identify every boat you see quickly, make sure to read it. It really explains the different sail plans and types of rigging clearly.

Guide to Understanding Sail Rig Types (with Pictures)
First I'll give you a quick and dirty overview of sails in this list below. Then, I'll walk you through the details of each sail type, and the sail plan, which is the godfather of sail type selection so to speak.
Click here if you just want to scroll through a bunch of pictures .
Here's a list of different models of sails: (Don't worry if you don't yet understand some of the words, I'll explain all of them in a bit)
- Jib - triangular staysail
- Genoa - large jib that overlaps the mainsail
- Spinnaker - large balloon-shaped downwind sail for light airs
- Gennaker - crossover between a Genoa and Spinnaker
- Code Zero or Screecher - upwind spinnaker
- Drifter or reacher - a large, powerful, hanked on genoa, but made from lightweight fabric
- Windseeker - tall, narrow, high-clewed, and lightweight jib
- Trysail - smaller front-and-aft mainsail for heavy weather
- Storm jib - small jib for heavy weather
I have a big table below that explains the sail types and uses in detail .
I know, I know ... this list is kind of messy, so to understand each sail, let's place them in a system.
The first important distinction between sail types is the placement . The mainsail is placed aft of the mast, which simply means behind. The headsail is in front of the mast.
Generally, we have three sorts of sails on our boat:
- Mainsail: The large sail behind the mast which is attached to the mast and boom
- Headsail: The small sail in front of the mast, attached to the mast and forestay (ie. jib or genoa)
- Specialty sails: Any special utility sails, like spinnakers - large, balloon-shaped sails for downwind use
The second important distinction we need to make is the functionality . Specialty sails (just a name I came up with) each have different functionalities and are used for very specific conditions. So they're not always up, but most sailors carry one or more of these sails.
They are mostly attached in front of the headsail, or used as a headsail replacement.
The specialty sails can be divided into three different categories:
- downwind sails - like a spinnaker
- light air or reacher sails - like a code zero
- storm sails

The parts of any sail
Whether large or small, each sail consists roughly of the same elements. For clarity's sake I've took an image of a sail from the world wide webs and added the different part names to it:

- Head: Top of the sail
- Tack: Lower front corner of the sail
- Foot: Bottom of the sail
- Luff: Forward edge of the sail
- Leech: Back edge of the sail
- Clew: Bottom back corner of the sail
So now we speak the same language, let's dive into the real nitty gritty.
Basic sail shapes
Roughly speaking, there are actually just two sail shapes, so that's easy enough. You get to choose from:
- square rigged sails
- fore-and-aft rigged sails
I would definitely recommend fore-and-aft rigged sails. Square shaped sails are pretty outdated. The fore-and-aft rig offers unbeatable maneuverability, so that's what most sailing yachts use nowadays.

Square sails were used on Viking longships and are good at sailing downwind. They run from side to side. However, they're pretty useless upwind.
A fore-and-aft sail runs from the front of the mast to the stern. Fore-and-aft literally means 'in front and behind'. Boats with fore-and-aft rigged sails are better at sailing upwind and maneuvering in general. This type of sail was first used on Arabic boats.
As a beginner sailor I confuse the type of sail with rigging all the time. But I should cut myself some slack, because the rigging and sails on a boat are very closely related. They are all part of the sail plan .
A sail plan is made up of:
- Mast configuration - refers to the number of masts and where they are placed
- Sail type - refers to the sail shape and functionality
- Rig type - refers to the way these sails are set up on your boat
There are dozens of sails and hundreds of possible configurations (or sail plans).
For example, depending on your mast configuration, you can have extra headsails (which then are called staysails).
The shape of the sails depends on the rigging, so they overlap a bit. To keep it simple I'll first go over the different sail types based on the most common rig. I'll go over the other rig types later in the article.
Bermuda Sloop: the most common rig
Most modern small and mid-sized sailboats have a Bermuda sloop configuration . The sloop is one-masted and has two sails, which are front-and-aft rigged. This type of rig is also called a Marconi Rig. The Bermuda rig uses a triangular sail, with just one side of the sail attached to the mast.
The mainsail is in use most of the time. It can be reefed down, making it smaller depending on the wind conditions. It can be reefed down completely, which is more common in heavy weather. (If you didn't know already: reefing is skipper terms for rolling or folding down a sail.)
In very strong winds (above 30 knots), most sailors only use the headsail or switch to a trysail.
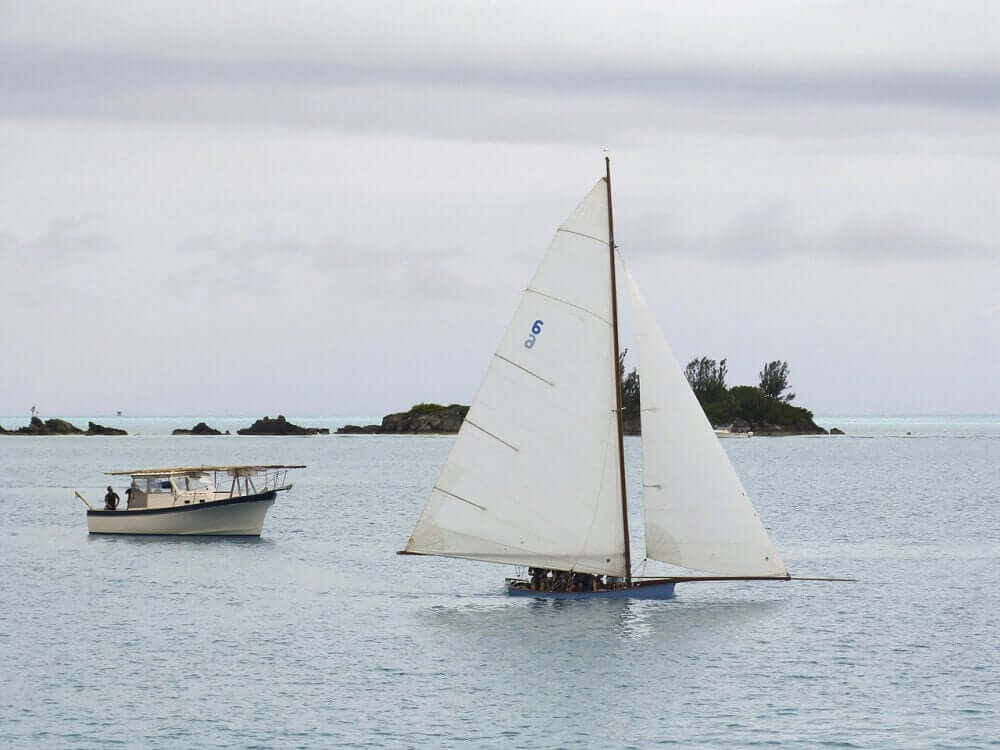
The headsail powers your bow, the mainsail powers your stern (rear). By having two sails, you can steer by using only your sails (in theory - it requires experience). In any case, two sails gives you better handling than one, but is still easy to operate.
Let's get to the actual sails. The mainsail is attached behind the mast and to the boom, running to the stern. There are multiple designs, but they actually don't differ that much. So the following list is a bit boring. Feel free to skip it or quickly glance over it.
- Square Top racing mainsail - has a high performance profile thanks to the square top, optional reef points
- Racing mainsail - made for speed, optional reef points
- Cruising mainsail - low-maintenance, easy to use, made to last. Generally have one or multiple reef points.
- Full-Batten Cruising mainsail - cruising mainsail with better shape control. Eliminates flogging. Full-length battens means the sail is reinforced over the entire length. Generally have one or multiple reef points.
- High Roach mainsail - crossover between square top racing and cruising mainsail, used mostly on cats and multihulls. Generally have one or multiple reef points.
- Mast Furling mainsail - sails specially made to roll up inside the mast - very convenient but less control; of sail shape. Have no reef points
- Boom Furling mainsail - sails specially made to roll up inside the boom. Have no reef points.
The headsail is the front sail in a front-and-aft rig. The sail is fixed on a stay (rope, wire or rod) which runs forward to the deck or bowsprit. It's almost always triangular (Dutch fishermen are known to use rectangular headsail). A triangular headsail is also called a jib .
Headsails can be attached in two ways:
- using roller furlings - the sail rolls around the headstay
- hank on - fixed attachment
Types of jibs:
Typically a sloop carries a regular jib as its headsail. It can also use a genoa.
- A jib is a triangular staysail set in front of the mast. It's the same size as the fore-triangle.
- A genoa is a large jib that overlaps the mainsail.
What's the purpose of a jib sail? A jib is used to improve handling and to increase sail area on a sailboat. This helps to increase speed. The jib gives control over the bow (front) of the ship, making it easier to maneuver the ship. The mainsail gives control over the stern of the ship. The jib is the headsail (frontsail) on a front-and-aft rig.
The size of the jib is generally indicated by a number - J1, 2, 3, and so on. The number tells us the attachment point. The order of attachment points may differ per sailmaker, so sometimes J1 is the largest jib (on the longest stay) and sometimes it's the smallest (on the shortest stay). Typically the J1 jib is the largest - and the J3 jib the smallest.
Most jibs are roller furling jibs: this means they are attached to a stay and can be reefed down single-handedly. If you have a roller furling you can reef down the jib to all three positions and don't need to carry different sizes.

Originally called the 'overlapping jib', the leech of the genoa extends aft of the mast. This increases speed in light and moderate winds. A genoa is larger than the total size of the fore-triangle. How large exactly is indicated by a percentage.
- A number 1 genoa is typically 155% (it used to be 180%)
- A number 2 genoa is typically 125-140%
Genoas are typically made from 1.5US/oz polyester spinnaker cloth, or very light laminate.

This is where it gets pretty interesting. You can use all kinds of sails to increase speed, handling, and performance for different weather conditions.
Some rules of thumb:
- Large sails are typically good for downwind use, small sails are good for upwind use.
- Large sails are good for weak winds (light air), small sails are good for strong winds (storms).
Downwind sails
Thanks to the front-and-aft rig sailboats are easier to maneuver, but they catch less wind as well. Downwind sails are used to offset this by using a large sail surface, pulling a sailboat downwind. They can be hanked on when needed and are typically balloon shaped.
Here are the most common downwind sails:
- Big gennaker
- Small gennaker
A free-flying sail that fills up with air, giving it a balloon shape. Spinnakers are generally colorful, which is why they look like kites. This downwind sail has the largest sail area, and it's capable of moving a boat with very light wind. They are amazing to use on trade wind routes, where they can help you make quick progress.
Spinnakers require special rigging. You need a special pole and track on your mast. You attach the sail at three points: in the mast head using a halyard, on a pole, and on a sheet.
The spinnaker is symmetrical, meaning the luff is as long as its leech. It's designed for broad reaching.

Gennaker or cruising spinnaker
The Gennaker is a cross between the genoa and the spinnaker. It has less downwind performance than the spinnaker. It is a bit smaller, making it slower, but also easier to handle - while it remains very capable. The cruising spinnaker is designed for broad reaching.
The gennaker is a smaller, asymmetric spinnaker that's doesn't require a pole or track on the mast. Like the spinnaker, and unlike the genoa, the gennaker is set flying. Asymmetric means its luff is longer than its leech.
You can get big and small gennakers (roughly 75% and 50% the size of a true spinnaker).
Also called ...
- the cruising spinnaker
- cruising chute
- pole-less spinnaker
- SpinDrifter
... it's all the same sail.

Light air sails
There's a bit of overlap between the downwind sails and light air sails. Downwind sails can be used as light air sails, but not all light air sails can be used downwind.
Here are the most common light air sails:
- Spinnaker and gennaker
Drifter reacher
Code zero reacher.
A drifter (also called a reacher) is a lightweight, larger genoa for use in light winds. It's roughly 150-170% the size of a genoa. It's made from very lightweight laminated spinnaker fabric (1.5US/oz).
Thanks to the extra sail area the sail offers better downwind performance than a genoa. It's generally made from lightweight nylon. Thanks to it's genoa characteristics the sail is easier to use than a cruising spinnaker.
The code zero reacher is officially a type of spinnaker, but it looks a lot like a large genoa. And that's exactly what it is: a hybrid cross between the genoa and the asymmetrical spinnaker (gennaker). The code zero however is designed for close reaching, making it much flatter than the spinnaker. It's about twice the size of a non-overlapping jib.

A windseeker is a small, free-flying staysail for super light air. It's tall and thin. It's freestanding, so it's not attached to the headstay. The tack attaches to a deck pad-eye. Use your spinnakers' halyard to raise it and tension the luff.
It's made from nylon or polyester spinnaker cloth (0.75 to 1.5US/oz).
It's designed to guide light air onto the lee side of the main sail, ensuring a more even, smooth flow of air.
Stormsails are stronger than regular sails, and are designed to handle winds of over 45 knots. You carry them to spare the mainsail. Sails
A storm jib is a small triangular staysail for use in heavy weather. If you participate in offshore racing you need a mandatory orange storm jib. It's part of ISAF's requirements.
A trysail is a storm replacement for the mainsail. It's small, triangular, and it uses a permanently attached pennant. This allows it to be set above the gooseneck. It's recommended to have a separate track on your mast for it - you don't want to fiddle around when you actually really need it to be raised ... now.

Why Use Different Sails At All?
You could just get the largest furling genoa and use it on all positions. So why would you actually use different types of sails?
The main answer to that is efficiency . Some situations require other characteristics.
Having a deeply reefed genoa isn't as efficient as having a small J3. The reef creates too much draft in the sail, which increases heeling. A reefed down mainsail in strong winds also increases heeling. So having dedicated (storm) sails is probably a good thing, especially if you're planning more demanding passages or crossings.
But it's not just strong winds, but also light winds that can cause problems. Heavy sails will just flap around like laundry in very light air. So you need more lightweight fabrics to get you moving.
What Are Sails Made Of?
The most used materials for sails nowadays are:
- Dacron - woven polyester
- woven nylon
- laminated fabrics - increasingly popular
Sails used to be made of linen. As you can imagine, this is terrible material on open seas. Sails were rotting due to UV and saltwater. In the 19th century linen was replaced by cotton.
It was only in the 20th century that sails were made from synthetic fibers, which were much stronger and durable. Up until the 1980s most sails were made from Dacron. Nowadays, laminates using yellow aramids, Black Technora, carbon fiber and Spectra yarns are more and more used.
Laminates are as strong as Dacron, but a lot lighter - which matters with sails weighing up to 100 kg (220 pounds).
By the way: we think that Viking sails were made from wool and leather, which is quite impressive if you ask me.
In this section of the article I give you a quick and dirty summary of different sail plans or rig types which will help you to identify boats quickly. But if you want to really understand it clearly, I really recommend you read part 2 of this series, which is all about different rig types.
You can't simply count the number of masts to identify rig type But you can identify any rig type if you know what to look for. We've created an entire system for recognizing rig types. Let us walk you through it. Read all about sail rig types
As I've said earlier, there are two major rig types: square rigged and fore-and-aft. We can divide the fore-and-aft rigs into three groups:
- Bermuda rig (we have talked about this one the whole time) - has a three-sided mainsail
- Gaff rig - has a four-sided mainsail, the head of the mainsail is guided by a gaff
- Lateen rig - has a three-sided mainsail on a long yard

There are roughly four types of boats:
- one masted boats - sloop, cutter
- two masted boats - ketch, schooner, brig
- three masted - barque
- fully rigged or ship rigged - tall ship
Everything with four masts is called a (tall) ship. I think it's outside the scope of this article, but I have written a comprehensive guide to rigging. I'll leave the three and four-masted rigs for now. If you want to know more, I encourage you to read part 2 of this series.
One-masted rigs
Boats with one mast can have either one sail, two sails, or three or more sails.
The 3 most common one-masted rigs are:
- Cat - one mast, one sail
- Sloop - one mast, two sails
- Cutter - one mast, three or more sails
1. Gaff Cat

2. Gaff Sloop
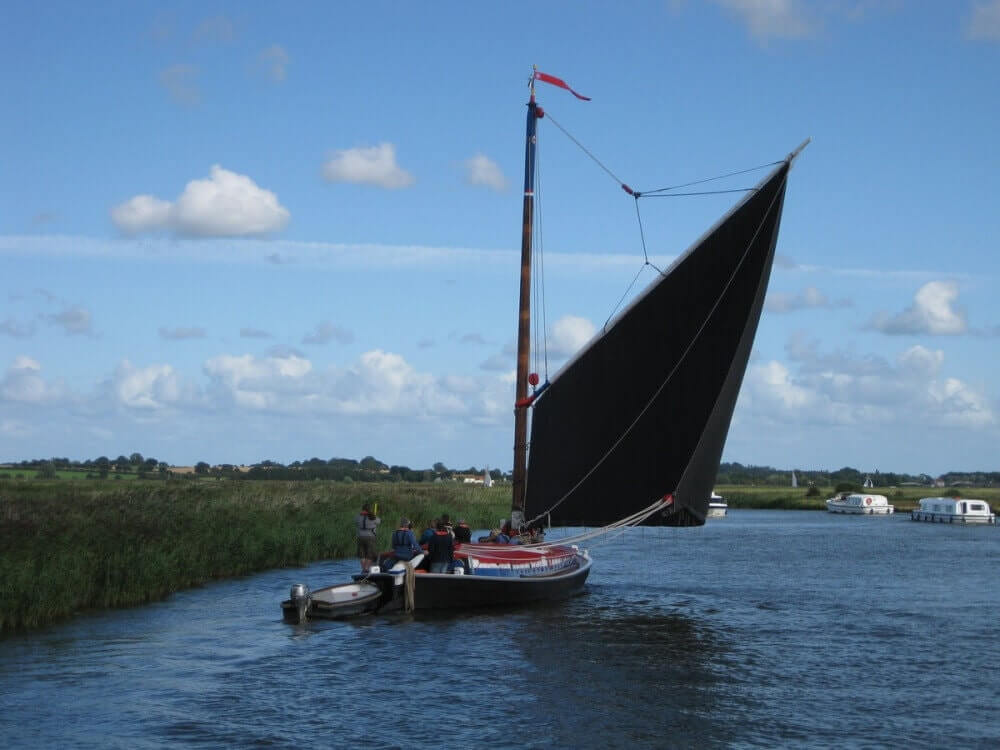
Two-masted rigs
Two-masted boats can have an extra mast in front or behind the main mast. Behind (aft of) the main mast is called a mizzen mast . In front of the main mast is called a foremast .
The 5 most common two-masted rigs are:
- Lugger - two masts (mizzen), with lugsail (cross between gaff rig and lateen rig) on both masts
- Yawl - two masts (mizzen), fore-and-aft rigged on both masts. Main mast much taller than mizzen. Mizzen without mainsail.
- Ketch - two masts (mizzen), fore-and-aft rigged on both masts. Main mast with only slightly smaller mizzen. Mizzen has mainsail.
- Schooner - two masts (foremast), generally gaff rig on both masts. Main mast with only slightly smaller foremast. Sometimes build with three masts, up to seven in the age of sail.
- Brig - two masts (foremast), partially square-rigged. Main mast carries small lateen rigged sail.

4. Schooner

5. Brigantine

This article is part 1 of a series about sails and rig types If you want to read on and learn to identify any sail plans and rig type, we've found a series of questions that will help you do that quickly. Read all about recognizing rig types
Related Questions
What is the difference between a gennaker & spinnaker? Typically, a gennaker is smaller than a spinnaker. Unlike a spinnaker, a gennaker isn't symmetric. It's asymmetric like a genoa. It is however rigged like a spinnaker; it's not attached to the forestay (like a jib or a genoa). It's a downwind sail, and a cross between the genoa and the spinnaker (hence the name).
What is a Yankee sail? A Yankee sail is a jib with a high-cut clew of about 3' above the boom. A higher-clewed jib is good for reaching and is better in high waves, preventing the waves crash into the jibs foot. Yankee jibs are mostly used on traditional sailboats.
How much does a sail weigh? Sails weigh anywhere between 4.5-155 lbs (2-70 kg). The reason is that weight goes up exponentially with size. Small boats carry smaller sails (100 sq. ft.) made from thinner cloth (3.5 oz). Large racing yachts can carry sails of up to 400 sq. ft., made from heavy fabric (14 oz), totaling at 155 lbs (70 kg).
What's the difference between a headsail and a staysail? The headsail is the most forward of the staysails. A boat can only have one headsail, but it can have multiple staysails. Every staysail is attached to a forward running stay. However, not every staysail is located at the bow. A stay can run from the mizzen mast to the main mast as well.
What is a mizzenmast? A mizzenmast is the mast aft of the main mast (behind; at the stern) in a two or three-masted sailing rig. The mizzenmast is shorter than the main mast. It may carry a mainsail, for example with a ketch or lugger. It sometimes doesn't carry a mainsail, for example with a yawl, allowing it to be much shorter.
Special thanks to the following people for letting me use their quality photos: Bill Abbott - True Spinnaker with pole - CC BY-SA 2.0 lotsemann - Volvo Ocean Race Alvimedica and the Code Zero versus SCA and the J1 - CC BY-SA 2.0 Lisa Bat - US Naval Academy Trysail and Storm Jib dry fit - CC BY-SA 2.0 Mike Powell - White gaff cat - CC BY-SA 2.0 Anne Burgess - Lugger The Reaper at Scottish Traditional Boat Festival
Hi, I stumbled upon your page and couldn’t help but notice some mistakes in your description of spinnakers and gennakers. First of all, in the main photo on top of this page the small yacht is sailing a spinnaker, not a gennaker. If you look closely you can see the spinnaker pole standing on the mast, visible between the main and headsail. Further down, the discription of the picture with the two German dinghies is incorrect. They are sailing spinnakers, on a spinnaker pole. In the farthest boat, you can see a small piece of the pole. If needed I can give you the details on the difference between gennakers and spinnakers correctly?
Hi Shawn, I am living in Utrecht I have an old gulf 32 and I am sailing in merkmeer I find your articles very helpful Thanks
Thank you for helping me under stand all the sails there names and what there functions were and how to use them. I am planning to build a trimaran 30’ what would be the best sails to have I plan to be coastal sailing with it. Thank you
Hey Comrade!
Well done with your master piece blogging. Just a small feedback. “The jib gives control over the bow of the ship, making it easier to maneuver the ship. The mainsail gives control over the stern of the ship.” Can you please first tell the different part of a sail boat earlier and then talk about bow and stern later in the paragraph. A reader has no clue on the newly introduced terms. It helps to keep laser focused and not forget main concepts.
Shawn, I am currently reading How to sail around the World” by Hal Roth. Yes, I want to sail around the world. His book is truly grounded in real world experience but like a lot of very knowledgable people discussing their area of expertise, Hal uses a lot of terms that I probably should have known but didn’t, until now. I am now off to read your second article. Thank You for this very enlightening article on Sail types and their uses.
Shawn Buckles
HI CVB, that’s a cool plan. Thanks, I really love to hear that. I’m happy that it was helpful to you and I hope you are of to a great start for your new adventure!
Hi GOWTHAM, thanks for the tip, I sometimes forget I haven’t specified the new term. I’ve added it to the article.
Nice article and video; however, you’re mixing up the spinnaker and the gennaker.
A started out with a question. What distinguishes a brig from a schooner? Which in turn led to follow-up questions: I know there are Bermuda rigs and Latin rig, are there more? Which in turn led to further questions, and further, and further… This site answers them all. Wonderful work. Thank you.
Great post and video! One thing was I was surprised how little you mentioned the Ketch here and not at all in the video or chart, and your sample image is a large ship with many sails. Some may think Ketch’s are uncommon, old fashioned or only for large boats. Actually Ketch’s are quite common for cruisers and live-aboards, especially since they often result in a center cockpit layout which makes for a very nice aft stateroom inside. These are almost exclusively the boats we are looking at, so I was surprised you glossed over them.
Love the article and am finding it quite informative.
While I know it may seem obvious to 99% of your readers, I wish you had defined the terms “upwind” and “downwind.” I’m in the 1% that isn’t sure which one means “with the wind” (or in the direction the wind is blowing) and which one means “against the wind” (or opposite to the way the wind is blowing.)
paul adriaan kleimeer
like in all fields of syntax and terminology the terms are colouual meaning local and then spead as the technology spread so an history lesson gives a floral bouque its colour and in the case of notical terms span culture and history adds an detail that bring reverence to the study simply more memorable.
Hi, I have a small yacht sail which was left in my lock-up over 30 years ago I basically know nothing about sails and wondered if you could spread any light as to the make and use of said sail. Someone said it was probably originally from a Wayfayer wooden yacht but wasn’t sure. Any info would be must appreciated and indeed if would be of any use to your followers? I can provide pics but don’t see how to include them at present
kind regards
Leave a comment
You may also like, 17 sailboat types explained: how to recognize them.
Ever wondered what type of sailboat you're looking at? Identifying sailboats isn't hard, you just have to know what to look for. In this article, I'll help you.

How Much Sailboats Cost On Average (380+ Prices Compared)
Own your first boat within a year on any budget.
A sailboat doesn't have to be expensive if you know what you're doing. If you want to learn how to make your sailing dream reality within a year, leave your email and I'll send you free updates . I don't like spam - I will only send helpful content.
Ready to Own Your First Boat?
Just tell us the best email address to send your tips to:
RC Sailboat Rigging Setup- Briefed in 17 Easy Steps
Table of Contents
Introduction
To build a model sailboat, you’ll need a lot of time, patience, and talent. Remote control sailboat beginners should start by altering or fixing a pre-existing model. It is possible to create a quicker and more sophisticated sailboat by rigging an existing model.
What to do for the rc sailboat rigging setup ?
Tether the retaining bolt and wire mainsail luff. Insert the mast stub and slide the entire main boom assembly. Push the masthead and backstay crane. Adjust the sail to match the mast reinforcement ring. Attach the eye in the mainsail clew. Close the hooks. Set the backstay’s length to the right.
To get the overall understanding, read the entire article.
Things to Bring
- Stitching Device
- Sailboat Controlled via Remote
- Thread Made From Polyester
- Fisherman’s Spectra Line
- Dacron Sails
- Utility knife
Procedure for Rigging
Use these rigging guidelines to their full extent. This ensures that the boat will sail with the qualities and performance that its creators intended. You can also check the RC dirt oval setup guide to ease your work.
Step 1: Replace Old Sails
Remove and replace the old sails. Cut out the new main and headsails from Dacron. Measure the old ones from the model and add a half-inch on each side to the new measurements. Tether the retaining bolt.
Step 2: Wire Mainsail with Eyelets
All six eyelets on the mainsail luff should have wired mainsail luff rings attached to them.
Step 3: Place the Mast Stab
Be careful not to get the plastic collar’s bevelled edge. Insert the mast stub into the bottom of the mast.
Step 4: Slide Main Boom
From the bottom, slide the entire main boom assembly onto the mast stub.
Step 5: Slide Rings Under the Mast
Starting at the luff of the mainsail, slide all rings beneath the mast one at a time.
Step 6: Assemble Plug
Push the masthead and backstay crane. Assemble the plug into the mast. Cut a 250mm Dyneema length and tie the mainsail’s head to the backstay crane.
Step 7: Layout the Sail
Adjust the sail to match the mast reinforcement ring at its highest point. The sail’s head may readily swivel. Poles are sheeted out at an angle of 80 degrees when the boat’s sailing with the breeze.
Step 8: Attach the Cunningham
Attach the Cunningham (downhaul) as demonstrated by cutting a 300mm length of Dyneema. Tie a cord to the eye in the gooseneck fitting’s uppermost eye.
Step 9: Tie Bowsie’s Eye
Follow this path: First, tie one end to a Bowsie’s eye. Then, tie a second Bowsie’s eye; finally, tie a third Bowsie’s eye.
Step 10: Attach the Mainsail Clew
Attach the eye in the mainsail clew (bottom right corner) to the mainsail clew using a line.
Step 11: Close the Hook
Close the hook’s open end with thin-nosed pliers. Keep your sail from falling off while you’re out on the water.
Step 12: Replace the Sail If Needed
If you need to replace the sail, simply use a flat-bladed screwdriver to pry it open once again.
Step 13: Cut Dyneema
For the Backstay, cut a 900mm length of Dyneema. The Backstay Crane’s end hole has a loop where you can tie a piece of string.
It’s time to attach one of our 6mm stainless steel rings to its bottom end. Using a Mast Socket, insert the mast and the rigged Mainsail into the hull.
Step 14: Attach the Loop
Once you’ve cut a 500mm piece of Dyneema, tie a loop in one end. Weave the other end through the first small gaps in a Bowsie. Then throw the rim at the bottom of the Backstay.
Finish it back at the Bowsie. Using a metal hook in the Transom (rear edge of the hull), attach the loop to the backstay. Then put the Bowsie nearly halfway along the bottom rope and secure it.
Step 15: Tighten the Leech
To allow the leech (back edge) of the main to twist a little, lightly tighten the compression strut. Such that the leech (back edge) is under mild tension. Adjust the Cunnigham such that the luff of the sail is just slightly strained.
Step 16: Adjust the Position of the Rings
Set the backstay’s length to the right. A spacing of roughly 25 millimetres between the boom tube’s centre. Achieve the sail foot midway by adjusting the position of the silicon rings (SR5) and the mainsail clew hook.
Step 17: Connect the Foresail
Use the spectra fishing line to loop between the grommet and the eyebolt. Connect the foresail to the top of the mast before the mainsail.
To make use of the foresail, equip the boat’s bow with a second, shorter boom. Connect the sail’s grommets to the short boom’s front and back eye bolts with spectra lines.
You can check these suggested rigging tools. You need these tools for rigging setup-
Apply a few drops of thin CA adhesive into the Dyneema cord at the point of the cut. Then cut through it at an angle. The cut end will be firm and pointed, making it simple to weave through the Bowsies.
A dollop of thin CA adhesive applied to the knot can help keep it in place. Once you’ve tied it, trim any extra rope.
Don’t use hot gun glue as it doesn’t stick to this type of surface. If you take the time to secure all knots now, you’ll have a long-term reliable vessel.
Tips for Better Setup
A Dacron sleeve should be added where the lines come into contact with the hulls or plastic parts. Because Spectra is extremely powerful and can shred into the material.
Ask sailmakers for scraps or old, ripped sails that you may use to build the remote control boat sails. Only if they are willing to part with them.
There are a few things to keep in mind when it comes to rigging more sophisticated rigs. Like double mast designs or using spinnakers until you’ve gained some experience in the activity. Always clean your RC boat as you clean your RC car to avoid rusting.
How tight should the rigging on a sailboat be?
If you push or tug on them, they shouldn’t wiggle about too much. So make sure they’re snug. Tighten them up if they’re still slack or floppy.There is no need to tighten any of the other shrouds after the cap shrouds are in place. Because they follow in consecutive order.
What’s the simplest way to sail a boat?
The Lateen Rig is a great starting sailboat. It only requires 2 ropes in its basic form.The Lateen Rig is one of the most basic sailing rigs. A spar, boom, and mast are all part of this rig. As are a single jib sheet and mainsheet.
How much does it take to replace a sailboat’s rigging?
Re-rigging a sailboat can cost anything from $1,000 to $5,000. Re-rigging a 40-foot boat with wire is estimated to cost roughly $100 per foot. Which includes the round-trip costs of hauling, launching, and unstepping the rig (about $2,500).
Final Words
We’ve discussed here in detail on the rc sailboat rigging setup. This should help with the rigging setup, and we sincerely hope it does.
OK, so the above may look a little daunting. You’ll be able to recall this procedure with ease after completing it five or six times. Be familiar with and comfortable with your tools, settings, and methods.
The very best to you!
Travis Murray
Leave a Comment Cancel reply
Save my name, email, and website in this browser for the next time I comment.

- Join Newsletter & Get 10% Off Your First Order
Join / Login
Guide to masts, yards & booms on model ships.
- Updated on: 18th January 2021
- Written by Gary Renshaw
In this post we will be considering the various masts and yards used on a wooden period model ship and their fittings. We will also examine techniques to taper the masts and yards.
It is important to construct the masts and yards and attach all the associated fittings to your model. This will make the whole assembly process easier.
The masts on smaller vessels were one piece or made up of two sections the lower mast and the topmast. In larger vessels, the masts were made up of three sections— lower mast, topmast and topgallant mast.
On real ships, the masts were made from multiple pieces of timber that were shaped to be interlocked together which provided great strength in the mast.
In modelling, the different mast sections are made from a single length of dowel. The dowel commonly used for masts and yards is usually either Ramin, birch, walnut or mahogany.
Where the respective mast sections are joined caps and cross trees and trestles are used the attach the mast sections together.
The lower mast rose to the trestle trees and cross trees on which was mounted the top. The top was a platform for various gear on which the crew worked. The trestle trees supported the heel of the topmast which rose through the cap of the lower mast.
The section where the lower mast and the top mast overlapped was called the doublings.
Above the topmast was rigged the topgallant mast. For larger vessels the next higher mast was the royal mast, then the sky sail mast and finally, for the largest of 19th century ships was the moon sail mast.
In this chapter, we will limit our discussion to the three masts presented in Figure 1.

The front and side elevations of the mast sections are identified in Figure 1.
It is most important to assemble the masts and fit all eye pins and blocks before fixing the mast to the model. The location of all eye pins and blocks on the masts will be presented on the plans in the kit.
Each of the parts is presented in more detail below.
Mast Structures
Trestle trees & cross trees.
Trestle trees are two strong bars of timber fixed horizontally fore-and-aft on each side of the lower masthead, to support the topmast, lower cross-trees, and mast top. Smaller trestle trees are fitted on the topmast head to support the topgallant mast and topmast cross-trees.
The Cap was a strong thick block of wood with two large holes through it, one square and the other round. The cap was used to confine two masts together when one is erected at the head of the other in order to lengthen it.
Mast cheeks were fitted fore-and-aft either side of the lower masthead. The trestle trees rested on the top of the mast cheeks.
Wooldlings
Woodlings were iron hoops or heavy rope lashings to reinforce the mast.
Strengtheners (or fish)
Strengtheners were lengths of timber lashed to three sides of the mast to give added strength and flexibility to the mast.

Masts on Vessels
Sailing vessels had from one to several masts. Generally though the wooden model ship kits you will most commonly encounter will one, two or three masts. The bowsprit on a vessel is another form of mast projecting out from the bow of the vessel. Bowsprits will be dealt with separately later in this chapter. For a vessel with one mast the mast was simply called the Mast

For a vessel with two masts—starting from the bow they are called Fore Mast and Main Mast. The main mast is always the taller.

For a vessel with three masts—starting from the bow they are called Fore Mast, Main Mast and Mizzen Mast. The mizzen mast is always the shortest mast.

The bowsprit on a vessel is another form of mast projecting almost horizontally out from the bow. On small vessels the bowsprit was a single length of timber. On larger vessels there were extensions to the bowsprit called the jib-boom and flying jib-boom. The various extensions to the bowsprit were joined by a cap and rope gammoning.
The bowsprit was used to support a range of rigging which will be discussed in the Rigging chapter.
On some vessels a small yard called the Spritsail Yard was attached to the underside of the bowsprit.
Also on some vessels a short gaff-shaped spar is fixed perpendicularly under the cap of the bowsprit. This is called the Martingale or Dolphin Striker. It is used to guy the jib-boom in place.

Yard Identification
A yard is a long cylindrical length of timber suspended from the mast of a vessel to spread a sail.
The yards were named according to where they were attached to the mast. For example:
- The yard attached to the lower mast was named the Yard.
- The yard attached to the top mast was named the Top Yard.
- The yard attached to the topgallant mast was named the Topgallant Yard.
- For larger vessels the higher yards were named accordingly.
Then the yards were further named according to the mast to which they were attached. For example the yards on the foremast of the vessel in Photo 5 were named Fore Yard, Fore Top Yard and Fore Topgallant Yard.
Yards on the main mast were named Main Yard, Main Top Yard and Main Topgallant Yard.

A yard was fitted with a range of parts. These are presented in Figure 5 along with their respective purpose.
Block: Used as part of running rigging to adjust the angle of the yard.
Jeer Blocks: Larger blocks used to raise the yard. Smaller yards may have one block.
Pendant & Block: Used as part of the running rigging to adjust the angle of the yard.
Foot Rope Stirrup & Foot Rope: Stirrup used to support the foot rope. Sailors would use the foot rope for support as they moved along the yard to furl or unfurl the sail. The foot ropes were always left slack.
Studding sail yard Studding sail yard: Used to extend beyond the yard end and have the studding sails attached. Studding sails were used in fair weather to add additional sail area to the vessel.

Refer to your kit plans to determine the dowel size and length for each yard. Shape accordingly and fit all the parts to each mast.
Boom and Gaff
The boom and gaff replace yards on fore-and-aft rigged sails. For a schooner, the boom and gaff hold the fore and mainsails. For a square rigged vessel the boom and gaff support the driver sail.

The boom and gaff are often tapered at one end only. The boom and gaff are secured to the mast by a yoke. The jaw of the yoke encircles approximately half the circumference of the mast and are secured by the use of parrel beads tied at each end of the yoke jaws.

Tapering Masts, Yards and Booms
In a wooden model ship kit you will be supplied with dowels of various diameter to make these parts. The dowel commonly used for masts and yards is usually either, ramin, birch, walnut or mahogany.
Check your dowels for straightness . Sometimes you may find a length of dowel has warped in which case it will need to be replaced.
In your set of kit plans you will find drawings with all the dimensions for the respective lengths of masts and yards. Be careful with these drawings as sometimes they are not to scale. The drawings will always identify the name of the item, its length and the relevant diameter at each end.
The dowels in a kit are very rarely pre-cut to their required lengths. So It is most important that for a particular diameter dowel you identify all the items that have to be cut from the lengths provided in the kit. Sometimes in a kit you will have more than one length of dowel of the same diameter but it will be of different lengths. If you are not careful when cutting your mast or yard lengths from this diameter dowel you may find yourself short. To avoid the chance of this happening use a pencil to mark out on the dowel the lengths to be cut. Only when you are sure you will be able to make all the parts required from the stock of dowel supplied will you then cut your dowel lengths.
The masts and yards have to be tapered. There are a number of ways to taper the masts and yards
The ideal way to taper the dowels is to use a lathe. This however is an expensive option. If you do choose to use a lathe it is most important to follow the lathe manufacturer’s safety instructions at all times, wear a safety face mask or safety glasses, ear protection and make sure any long hair is tied safely back and loose clothing is made secure.
A less expensive alternative to the lathe is to use a variable speed pistol drill placed in a bench vice. Make sure to set the drill speed at mid-range. The same lathe safety principles apply to using this method.
When using a lathe to taper your dowels first use a flat file followed by medium grade sandpaper. Continually stop the lathe and use a vernier caliper to take measurements . Use the sandpaper to make fine adjustments to the required diameter. Finally use a fine grade sandpaper to finish off the dowel.

A simple and cost effective way to taper the dowels is to use a mini plane. By continually applying the plane to the dowel to create a number of flat sides and then using a coarse sandpaper to finish the tapering an excellent job can be achieved. Continually checking the diameter with a vernier calliper and finishing off with a fine grade sandpaper will ensure the correct diameters are achieved.

Learn The Art Of Building A Model Ship
Get started in wooden model ship building today
Join 18,543 other modelers to hear about specials, new products and modeling tips
- Become a Member
- Modeling Hub
- Model Ship Building
- Maritime History
- Affiliate Program
Information
- Terms & Conditions
- Privacy Policy
Copyright © 2023 Modelers Central. ABN: 31 114 830 732
- Claim 10% Off First Order
- Get 5% off ALL orders with a Membership
- Gift Vouchers
- Help & Advice
Modelers Central. 2023, All rights reserved.
- Claim 10% Off Your First Order
- Get 5% Off All Orders With A Membership
Get 10% off
Your first order.
10% off applies only to full-price items. By providing your email address, you agree to our Terms & Privacy Policy
10% off applies only to full-price items. By providing your email address & mobile number, you agree to our Terms & Privacy Policy and consent to receive marketing messages from Modelers Central at the addresses provided. You can unsubscribe at any time by replying STOP.
- Masting, rigging and sails

- Remember me Not recommended on shared computers
Forgot your password?
Dummy's Guide to Rigging
By JRB9019 March 20, 2016 in Masting, rigging and sails
- Reply to this topic
- Start new topic
Recommended Posts
I have some fantastic books that tell me all about fixed and running rigging and give me lots of detailed information about every single rope. block, beley line that is needed.
What a pity that I almost don't understand a word!!!
Every book that I have seen is written in a technical manner and, although I have even tried to understand things through works such as The Elements and Practice of Rigging and Seamanship by the Historic Naval Ships Association, it's is really hard work.
Does anyone know if a simplified version that actually explains all the terms used in one go?
So, for example, if I wanted to know all about what 'ropes', blocks and beley points are used for each sail where could I look?
Before anyone suggests, I do have Lennarth Petersson's Rigging Period Ship Models which does show the lines and beley points, but it is still very difficult to understand what all the shown items are actually for - e.g. this is a line that is used to hoist / set / take down a sail.......
Any ideas anyone?
Many thanks.
- RichardG , AON , mtaylor and 3 others

Current Build:
H.M. Pickle by JRB9019 - JoTiKa - Scale 1:64 - Kit Build Log in progress
Link to comment
Share on other sites.

There are at least two books, '18th century rigs & rigging' by Karl Heinz Marquardt, and 'The masting and rigging of English ships of war' by James Lees (which I can see that you have borrowed from the library [must be a good one, to hold such titles] but perhaps not yet read) which deal with the matter stage by stage. They start with the masts and associated rigging, then the yards and associated rigging, and then the sails and associated rigging. They finish with sections on different types of blocks, and belaying.
Neither of them has a glossary, unfortunately, which would be helpful for you; but you will read about shrouds and stays in association with the masts, and braces, lifts and halliards in association with the yards; then sheets, tacks and buntlines in association with the sails. By the time you have read Lees' book, you should have a thorough knowledge of the basics. Deeper knowledge can only come from re-reading, drawing rigging diagrams, and from rigging models.
Lennarth Peterson's book, by the way, despite its title, only deals with the rigging of one particular ship at one particular period. So whilst it is very good for a model of this type, for earlier or larger vessels, it is a somewhat limited source.
All the best,
- EJ_L , Canute , AON and 4 others
Previously built models (long ago, aged 18-25ish) POB construction. 32 gun frigate, scratch-built sailing model, Underhill plans.
2 masted topsail schooner, Underhill plans.
Started at around that time, but unfinished: 74 gun ship 'Bellona' NMM plans. POB
On the drawing board: POF model of Royal Caroline 1749, part-planked with interior details. My own plans, based on Admiralty draughts and archival research.
Always on the go: Research into Royal Navy sailing warship design, construction and use, from Tudor times to 1790.
Member of NRG, SNR, NRS, SMS

I'm going to suggest zu Mondfeld's Historic Ship Models . There's a lot of good basic information in it including rigging. And it's usually very reasonably priced online.
- EricWilliamMarshall , Canute , tkay11 and 3 others
Mark "The shipwright is slow, but the wood is patient." - me Current Build: Past Builds: La Belle Poule 1765 - French Frigate from ANCRE plans - ON HOLD Tri ton Cross-Section
NRG Hallf Hull Planking Kit HMS Sphinx 1775 - Vanguard Models - 1:64
Non-Ship Model: On hold, maybe forever:
CH-53 Sikorsky - 1:48 - Revell - Completed Licorne - 1755 from Hahn Plans (Scratch) Version 2.0 (Abandoned)

From a complete landlubber to somebody who lives at least a lot nearer to a coastline: I understand you very well. But I'm afraid that you have to learn the ropes a bit.
However it's made easier by the fact that it's actually a kind of a matrix:
- you have the masts: fore, main mizzen
- you have the floors: ground floor, topmast, topgallant mast, royal
- you have sails: - square sails with top(head), sides(leach) and underside(foot)
- fore-and-aft sails with uppermost corner(peak), head, upper corner on mast(throat), mast side(luff), lower corner on mast(tack), foot, lower aft corner(clew) and aft side(leech)
- you have the yards: basically named as the sails
On each yard and each sail you have the same kind of lines.
- yards: lifts to hold them up, braces to turn them, truss and sling to fix them
- square sails: sheets to hold the lower corners(clews), clew lines to pull the clews up, bowlines to pull the sides of the sail forward, reef tackles to lift the sail towards the yard for reefing
- fore and aft sails: vangs to fix the gaff(replaces the yard), brails to pull the sail towards gaff and yard
Of course there are about a zillion more but those above should cover the most important. And if you know one rig, you know them all. I often find the books of the 'Anatomy of the Ship' series quite helpful. If you find one of a vessel which is close to the one you are building (perhaps Alert or Granado) it may help to see how those lines work together on a specific ship.
And if I'm completely desperate I find some solace in Patrick O'Brian's Stephen Maturin and his never ending struggle with the incomprehensible language of the sailors.
Yes, Wolfram zu Mondfelds book is a gem. But I have the German original and therefore the happiness to struggle with those expressions in two different languages!
- Ray1981 , RichardG , tkay11 and 5 others
current build:
The Naval Cutter Alert by flyer - Vanguard Models - scale 1:64
completed builds:
HMS Bellerophon by flyer - Victory Models - scale 1:72
Yacht America by flyer - Mamoli - scale 1:66 - with some alterations
Dolphyn Corel 1/50
Wasa Corel 1/75
La Gloire C.Mamoli 1/90
HM Bomb Vessel Granado JoTiKa HM Bomb Vessel Granado 1756 CC kit 1:64
Victory Models 1/64 HMS Pegasus by Flyer
HMS Pickle, my interpretation

I would love a book like that.
I am getting back to the rigging of my cutter after a long and somewhat unintended break.The problem is I read something, mostly understand it, but then can't remember it later. I'm using some home-grown software (a glorified notebook) to try and help me to be organized (see http://modelshipworld.com/index.php/topic/10451-first-time-rigging-being-organized/#entry313428 ).
I was never any good at foreign languages at school either.
- Canute , mtaylor and Ray1981
Current Build: Early 19th Century US Revenue Cutter (Artesania Latina "Dallas" - messed about)
Completed Build: Yakatabune - Japanese - Woody Joe mini
Member: Nautical Research Guild & Midwest Model Shipwrights

There is one book that I know of that explains almost every part of the ship and rig. Falconer's New Universal Dictionary of the Marine. My copy is a reprint of the 1815 edition.
That being said, learning the ropes just takes time and practice. Soon enough you will no longer be a landsman and you can earn your keep as an able bodied or ordinary sailor. Diligence, attention to detail, and hard experience will merit an assignment as a tops man in no time. Maybe even a promotion to petty officer.
Aye lad, that be the life of a sailor!!
- mtaylor , EJ_L , Ray1981 and 1 other
Laissez le bon temps rouler !
Current Build: Le Soleil Royal
Completed Build : Amerigo Vespucci
Many thanks to all of you.
Some wonderful and very helpful comments.
Peter , your list is very useful. Yes, I have noted the Anatomy of the Ship - I believe there is one of the Granado which will come in handy for my next build anyway. It was going on my Chrismas list - perhaps I might add it on the 2015 Christmas List and get it now as "someone forgot"!!!
RichardG , maybe I should write such a book then - one I understand the subject myself!!
I also like your spreadsheet idea for future reference. As you will see below, I have created a document that lists the information which is a start! Here's an extract:
Belay Side Description Fixed?
b1 Bow Rack Outer Jib Stay
b2 Bow Rack Schooner Stay
b3 Main Mast Main Topgallant Stay
b4 Forebitts crosspiece Foregaff topping lift
b5 Port Foregaff Blocks
b5 Starboard
Jersey City Frankie - I agree with the idea of drawings - I've actually started to do that.
Firstly, I have made a drawing of the bowsprit so that I understand the three foresails on my ship (PIckle).

I have also taken copies of my plans showing the Belay points. These are only listed as e.g. B1, B12 etc. so I have researched my instruction book so that I have been able to label each point with the correct name - that has helped a great deal. As I suggested in my log, I think it would help of the manufacturer added a table to those belay and rigging plans that actually lists the Belay points, where the rope comes from and what it actually is. I have created a document that lists the above information which is a shown above!
I have just made a drawing of the main and topsail - which is where all the problems start!!
...... and the reason for it all? Because I am wishing to add sails to my Pickle and therefore need to understand all the figging so that I can work out what additional rigging and belay points I will need - so that I can add them while I can still access the deck BEFORE I clutter the deck with Deck furniture and masts etc.......
Thanks for your help.
- JerseyCity Frankie , mtaylor , flyer and 4 others

Great thread some nice recommendations here I just ordered 2 of them.
18th century rigs and rigging
historic ship models
I hope those will help me with my Le Glorieux when starting with rigging. Anyhow it is pretty fun stuff to read so i think i will going to enjoy them.

I have purchased a couple of books already to help better understand ship rigging, "The Art of Rigging" by George Biddlecombe and "The Rigging of Ships: in the Days of the Spritsail Topmast, 1600-1720" by R.C. Anderson which deal specifically with the time period of my build, la Couronne. I have found both books to be useful so far though I will also check out some of the other suggestions that have been posted. I have rarely found one book with everything in it I need and often times information has changed as the years have gone by.
- Ray1981 , mtaylor , JesseLee and 3 others
"A Smooth Sea NEVER made a Skilled Sailor" - John George Hermanson
Current Builds - Royal Louis - Mamoli
Royal Caroline - Panart
Completed - Wood - Le Soleil Royal - Sergal - Build Log & Gallery
La Couronne - Corel - Build Log & Gallery
Rattlesnake - Model Shipways , HMS Bounty - Constructo
Plastic - USS Constitution - Revel (twice) , Cutty Sark .
Unfinished - Plastic - HMS Victory - Heller , Sea Witch .
Member : Nautical Research Guild

One of the best reference books I have come across is Young Sea Officer's Sheet Anchor by Darcy Lever. It is very complete...it is somewhat like the old Bluejackets Manual for new sailor in the US. Lever starts with the ropes, then the knots, then on to rigging and the like. If you stick with it long enough and build a ship big enough, you will even be able to learn how to sail your ship to the US. : - )
Seriously, it is very good and there is a very good dictionary of nautical terms at the very end. I recommend that you stay on board and continue building by going slowly, checking out every little piece of the puzzle (or model) as you go. As mentioned above, this is the place to be for encouragement and assistance. We were all where you are at one point or another.
- EricWilliamMarshall , Ray1981 , markjay and 2 others
PeteGee, I have actually used my Bluejackets Manual when I first started building ships. I also have pulled out my old Boy Scouts Handbook to remind myself how to tie a few knots. It is interesting to see what books that were not meant for model ship building can contain useful and relevant information.
- PeteGee and mtaylor
- 3 years later...

On 3/20/2016 at 3:12 PM, mtaylor said: I'm going to suggest zu Mondfeld's Historic Ship Models . There's a lot of good basic information in it including rigging. And it's usually very reasonably priced online.
Best book out there! It seems to be my go to.....
- BobG , thibaultron and mtaylor
Savannah, Georgia
Multi hobby nut.

Many of the historic works are also now available in digital format on the Internet. Some of the PDFs are searchable, which comes handy at times. Don't always trust Google, when they tell you that no digital version is available, keep searching. I noticed that Google often does not link digital versions, when someone offers reprints.
A very useful dictionary is Paasch's 'From Keel to Truck'. It was written at the end of the 19th century, but many of the basic terms and designs have not changed a lot over the past two hundred years: https://archive.org/details/bub_gb_pT4IAAAAQAAJ/page/n6/mode/2up
- EricWilliamMarshall , Robp1025 and mtaylor
panta rhei - Everything is in flux

14 hours ago, wefalck said: Many of the historic works are also now available in digital format on the Internet. Some of the PDFs are searchable, which comes handy at times. Don't always trust Google, when they tell you that no digital version is available, keep searching. I noticed that Google often does not link digital versions, when someone offers reprints.
When Google went on their mad scanning spree, usually the only PDF's you could get in a search was their's. Currently, I've had to dig down 3 or 4 pages or more in a search to find certain PDF's as the first pages are not what I wanted.
- EJ_L , Bob Cleek and tkay11
Join the conversation
You can post now and register later. If you have an account, sign in now to post with your account.

× Pasted as rich text. Paste as plain text instead
Only 75 emoji are allowed.
× Your link has been automatically embedded. Display as a link instead
× Your previous content has been restored. Clear editor
× You cannot paste images directly. Upload or insert images from URL.
- Insert image from URL
- Submit Reply
Recently Browsing 0 members
- No registered users viewing this page.
Modelshipworld - Advancing Ship Modeling through Research
SSL Secured
Your security is important for us so this Website is SSL-Secured
NRG Mailing Address
Nautical Research Guild 237 South Lincoln Street Westmont IL, 60559-1917
Model Ship World ® and the MSW logo are Registered Trademarks, and belong to the Nautical Research Guild (United States Patent and Trademark Office: No. 6,929,264 & No. 6,929,274, registered Dec. 20, 2022)
Helpful links.
- Articles Database
- NRG Home Page
- NRG Online Store
- Important: Our Guidelines
- Terms of Use
- Buildlog Index
About the NRG
If you enjoy building ship models that are historically accurate as well as beautiful, then The Nautical Research Guild (NRG) is just right for you.
The Guild is a non-profit educational organization whose mission is to “Advance Ship Modeling Through Research”. We provide support to our members in their efforts to raise the quality of their model ships.
The Nautical Research Guild has published our world-renowned quarterly magazine, The Nautical Research Journal, since 1955. The pages of the Journal are full of articles by accomplished ship modelers who show you how they create those exquisite details on their models, and by maritime historians who show you the correct details to build. The Journal is available in both print and digital editions. Go to the NRG web site (www.thenrg.org) to download a complimentary digital copy of the Journal. The NRG also publishes plan sets, books and compilations of back issues of the Journal and the former Ships in Scale and Model Ship Builder magazines.
Our Emblem ®
Nautical Research Guild ® and the NRG logo are Registered Trademarks, and belong to the Nautical Research Guild (United States Patent and Trademark Office: No. 6,999,236 & No. 6,999,237, registered March 14, 2023)
- Existing user? Sign In
- Latest Posts
- All unread content since my last vist
- Unread topics I have posted in
- Create New...
- standing rigging
- rope and line
- cams, cleats and clutches
- head sail gear
- roller furling
- main sail control
- mast hardware
- eye straps and pad eyes
- fairleads and bulls eyes
- anchor and docking
- miscellaneous hardware
- Alexander Roberts
- My Wishlist
Rigging Only is a full service rigging shop. All running rigging, standing rigging, life lines, w, are assembled right here in our shop. We know our products, and we deliver that expertise with every job we do. PLEASE SEE NOTES BELOW IN RED REGARDING EXTRA SHIPPING CHARGES.
NOTE : Some orders may incur additional shipping costs, particularly those items which are HEAVY or LONG. INCLUDES ALL FURLERS AND FURLER EXTRUSIONS AND LARGE QUANITIES OF WIRE ALSO MULTI PIECE SHIPMENTS
All prices are subject to change without notice.

Location & Hours

- Customer Service
- Order Tracking
- Your Account
- Store Policies & Info
- Privacy Policy
- Helpful Links
- Payment Methods
Shopping Cart: 0 Items
The global authority in superyachting
- NEWSLETTERS
- Yachts Home
- The Superyacht Directory
- Yacht Reports
- Brokerage News
- The largest yachts in the world
- The Register
- Yacht Advice
- Yacht Design
- 12m to 24m yachts
- Monaco Yacht Show
- Builder Directory
- Designer Directory
- Interior Design Directory
- Naval Architect Directory
- Yachts for sale home
- Motor yachts
- Sailing yachts
- Explorer yachts
- Classic yachts
- Sale Broker Directory
- Charter Home
- Yachts for Charter
- Charter Destinations
- Charter Broker Directory
- Destinations Home
- Mediterranean
- South Pacific
- Rest of the World
- Boat Life Home
- Owners' Experiences
- Interiors Suppliers
- Owners' Club
- Captains' Club
- BOAT Showcase
- Boat Presents
- Events Home
- World Superyacht Awards
- Superyacht Design Festival
- Design and Innovation Awards
- Young Designer of the Year Award
- Artistry and Craft Awards
- Explorer Yachts Summit
- Ocean Talks
- The Ocean Awards
- BOAT Connect
- Between the bays
- Golf Invitational
- Boat Pro Home
- Superyacht Insight
- Global Order Book
- Premium Content
- Product Features
- Testimonials
- Pricing Plan
- Tenders & Equipment

Second Gunboat 80 launched and named Agave
The second unit in the 24.7-metre Gunboat 80 series has been launched and named Agave . She now joins her sistership Highland Fling XVIII on the water, who sports a custom red exterior .
The cruising catamaran is said to "apply the latest race boat technology for the sailing lifestyle". This includes a wave-piercing bow and a coachroof-stepped mast, positioned further aft than previous Gunboat designs for a more balanced sail plan and centre of gravity.
Engineering is courtesy of VPLP Design in collaboration with the French shipyard. The model's "ultra-sleek look" is owed to Christophe Chedal Angaly whose design features a low profile, wraparound cabin top windows and long topside windows.
Agave has a custom spars package by Lorima that features a 31-metre rotating mast, a box boom with outriggers, a longeron and a crossbeam constructed in ultralight prepreg carbon fibre – as are the superstructure and bulkheads.
While interiors are undisclosed, the model is known for its spacious saloon and "bright and airy" cockpit, which houses accommodation for up to eight. This includes an owner's cabin with the potential for a separate office or lounge.
Agave is equipped with t-foils, said to reduce pitching "by around 30 per cent" in the Caribbean while increasing average speeds. She also benefits from upgraded rigging and deck hardware throughout, including titanium fittings.
More about this yacht
More stories, most popular, from our partners, sponsored listings.

Welcome the SS Badger on its first sail of the season, and more can't-miss events in Manitowoc this week
MANITOWOC – You can help welcome the S.S. Badger back to town on its maiden voyage of the season this week.
Plus, the Model Ships and Boats Contest returns to the Maritime Museum , it’s Member Swap Weekend at several local museums, mini golf opens at the Aquatic Center and several establishments offer live musical all weekend long.
Here’s your look at can’t-miss events in the Manitowoc area this week. For more events and live music schedules, go to https://www.visitmanitowoc.com/events/ .
1. Welcome back the S.S. Badger Lake Michigan Car Ferry
All are invited to join in celebrating the maiden voyage of the S.S. Badger Lake Michigan Car Ferry May 17.
In addition to viewing the 410-foot S.S. Badger make its first crossing of the sailing season from Ludington, Michigan, to Manitowoc, there will be entertainment from special guests including alpacas from LondonDairy Alpacas and more. The public is invited to attend the celebratory event at the car ferry's dock, 900 S. Lakeview Drive
In addition, S.S. Badger cups will be given away to attendees, while supplies last.
The S.S. Badger will arrive at noon and debark back for Ludington at 2 p.m.
For more about the first sailing, head to Visit Manitowoc’s website: https://www.visitmanitowoc.com/event/s-s-badger-lake-michigan-car-ferry-maiden-voyage-celebration/1143/ .
2. Attend the Model Ships and Boats Contest
Wisconsin Maritime Museum, 75 Maritime Drive, hosts the 47th annual Midwestern Model Ships and Boats Contest May 18-19.
Make plans to stop by to join in the celebration of maritime heritage and craftmanship.
Modelers hail from six states and are presenting an array of 30 meticulously crafted ships and boats.
This event is complete with judging, an awards ceremony and time for remote-controlled models to take the water.
The event runs 10 a.m.-4 p.m. May 18 and 10 a.m.-2 p.m. May 19.
For the full weekend schedule, visit https://www.wisconsinmaritime.org/event/midwestern-model-ships-boats-contest/ .
Mid-Mod convention: Manitowoc group plans Mid-Mod summer convention to celebrate Evergleam aluminum trees and more
3. Participate in Member Swap Weekend
It’s Member Swap Weekend from May 16 to 19.
This weekend encourages museum members to explore other museums across Manitowoc County with family, friends or anyone covered by the membership.
Throughout weekend, members of the following participating sites will be able to gain admission to the other participating museums free of charge:
- Farm Wisconsin Discover Center;
- Hamilton Wood Type and Printing Museum;
- Manitowoc County Historical Society;
- Rahr-West Art Museum;
- Rogers Street Fishing Village; and
- Wisconsin Maritime Museum.
4. Play a game of mini golf
Grab a friend and play a round or two of mini golf!
The mini golf course at the Manitowoc Family Aquatic Center , 940 N. 18th St., opens for the season May 18.
On both May 18 and 19, you can play from 10 a.m. to 7 p.m.
18 holes runs $5, and 36 holes costs $8.
For more information about the spring and summer mini golf schedule, visit www.manitowoc.org/mfac .
The pool will open for the season June 8.
History: Two Rivers’ Post Office opened in 1933. It remains one of the finest federal buildings of its size, style and age in the state.
5. Listen to live music
Enjoy the sounds of live music, great company and cold drinks across Manitowoc this weekend!
- The Glam Band takes the stage at The Wharf, 606 Quay St., at 6:30 p.m.
- Listen to Logan Spicer at The Wharf at 1 p.m.
- Groove Therapy performs at PetSkull Brewing, 1015 Buffalo St., at 4 p.m.
- Hear Newski live at Sabbatical Brewing Co., 835 S. 29th St., starting at 7 p.m.
- Listen to Diamonds in the Rough, The Music of John Prine, at PetSkull Brewing beginning at 2 p.m.
- The Dweebs hit the stage at The Wharf at 2 p.m.
Visit Manitowoc is the city of Manitowoc's Department of Tourism. Email [email protected] , call 920-686-3508 or go to Visit Manitowoc's downtown Visitor Center, 824 S. Eighth St., open 9 a.m. to 4 p.m. Mondays-Fridays (closed holidays). For more about upcoming events, follow @VisitManitowoc on Facebook, Instagram, X (formerly Twitter) and TikTok.
This article originally appeared on Manitowoc Herald Times Reporter: Welcome the SS Badger on its first sail of the season, and more can't-miss events in Manitowoc this week

IMAGES
VIDEO
COMMENTS
The art of rigging involves setting up the sails in a way that accurately represents the real-life counterpart, capturing the essence and beauty of sailing. In this article, we will delve into the secrets and techniques of sail rigging that will elevate the realism of your model to new heights. Unveiling the Secrets of Rigging: Techniques to ...
Install and rig the booms and gaffs. Make the sails based on the actual layout of my ship. De-rig the booms and gaffs, and remove them from the ship. Attach sails to the booms and gaffs as appropriate. Re-install the booms and gaffs, and their rigging. Add the additional rigging for each sail.
Rigging Line; Running Rigging; Turnbuckles & Rigging Screws; Variant boom; Gizmo Set; Rigging tools; Rig Kits. EC12 Rig Kit; IOM Rig Kits; ODOM Rig Kit and Hardware; RG65; Santa Barbara Rig Kit; Soling 50 Rig Kit; Star 45 Rig Kit; U.S. One Meter Rig Kits; Sailmaking Materials. Sail Identification; DF-95 & DF-65 . DF-65 Hatch & Battery Sets ...
Work from the centre of the ship out and try to avoid locking yourself into difficult positions. A Rigging Tool presented in the Tools section of our Catalogue will be helpful when rigging. The various names for the Running Rigging are presented below. Fore brace. Fore lower topsail brace.
PLEASE NOTE: THIS VIDEO HAS BEEN UPDATED WITH ENHANCED GRAPHICS AND IMPROVED SOUND. CHECK IT OUT HERE https://youtu.be/tRgWtPaCQQcA beginners guide to sailbo...
the history of the future. At the age of fifteen David Potter started sailing model boats at the world famous Birkenhead Model Yacht Club. In 2012 he decided to turn his passionate hobby into a business and launched Potter Solutions. As a qualified engineer, with a good eye for detail, he produces a range of equipment for the majority of radio ...
Gaff ketch - two-masted (mizzen), two mainsails, staysails, fore-and-aft rigged. Full-rigged ship or tall ship - three or more masts, mainsail on each mast, staysails, square-rigged. The first word is the shape and rigging of the mainsail. So this is the way the sail is attached to the mast.
Topsail schooner sail plans and rigging 1 2 3. By Dr PR, September 18, 2020 schooner rigging; Topsail schooner ... Period Scale Model Masting and Rigging Tables By DaveBaxt, March 24. 24 replies; 728 views; DaveBaxt; ... rigging and sails IPS Theme by IPSFocus; Theme . Dimension (Default) Uniform .
The Model Shipways Bluenose kit provides rigging line in a few different sizes: 0.008″ (very thin, like thread), 0.021″ (medium weight), and 0.028″ (thicker). These don't match what's indicated on the plans. The plans show a variety of thicknesses, like .006″, .012″, and more.
A beginners guide to sailboat rigging, including standing rigging and running rigging. This animated tutorial is the first in a series and covers sails, line...
World-wide Mail Order Service since 1958. WELCOME TO THE 2024 NYLET WEBSITE. NYLET 92 years. THE OLDEST ESTABLISHED INTERNATIONAL MASTER SAILMAKERS, since 1932. EVERYTHING FOR THE MODEL YACHTSMAN. CREATING THE VERY FINEST SAILS. TRADITION - CRAFTSMANSHIP - INNOVATION. Established 1932. 92 Years since our Firm's founding Ethos "Fine Products ...
Almost any material used for scale model sail making is, by definition, too thick. With furled sails, though, it's possible to compensate for that problem by reducing the sail's depth - and thus the size of the bundle. A favourite material for furled sails is "silkspan" tissue, subjected to a special (but quite simple) treatment.
Model ship rigging tutorials for beginners model ship makers
Rig Building Tips: IOM class rules don't allow rotating masts and the masts mostly used are without an internal track. The best mast is 12mm or ½" aluminum tube available at local hardware and metal stores. If you want to invest more you can order from RC yachting accessory dealers as well and save maybe 50g with the rig.
It has some sail plans for schooners and a few rigging diagrams. 8. I also have Underhill's Masting and Rigging the Clipper Ship and Oceanic Carrier (Brown, Son & Ferguson, Glasgow, Scotland, 1972). It is an excellent book with a tremendous amount of detail about sails and rigging.
Seamus107. Sometimes I cover about 1/4" of the end of a line with super glue and, when the glue dries, cut the tip at an angle to yield a sharp point. Usually I can then get the stiff, pointed tip through an appropriately sized hole. If the tip bends or frays, I re-cut a new point a little ways back and try again.
5. Secure the mast using the appropriate rigging and fasteners. Attach the standing rigging, such as shrouds and stays, to the mast and the boat's hull. Fact: The mast of a sailboat is designed to withstand wind resistance and the tension of the rigging for stability and safe sailing. 2.
The 5 most common two-masted rigs are: Lugger - two masts (mizzen), with lugsail (cross between gaff rig and lateen rig) on both masts. Yawl - two masts (mizzen), fore-and-aft rigged on both masts. Main mast much taller than mizzen. Mizzen without mainsail. Ketch - two masts (mizzen), fore-and-aft rigged on both masts.
Procedure for Rigging. Step 1: Replace Old Sails. Step 2: Wire Mainsail with Eyelets. Step 3: Place the Mast Stab. Step 4: Slide Main Boom. Step 5: Slide Rings Under the Mast. Step 6: Assemble Plug. Step 7: Layout the Sail. Step 8: Attach the Cunningham.
Rigs & parts | Sailboat RC
The front and side elevations of the mast sections are identified in Figure 1. It is most important to assemble the masts and fit all eye pins and blocks before fixing the mast to the model. The location of all eye pins and blocks on the masts will be presented on the plans in the kit. Each of the parts is presented in more detail below.
Lennarth Peterson's book, by the way, despite its title, only deals with the rigging of one particular ship at one particular period. So whilst it is very good for a model of this type, for earlier or larger vessels, it is a somewhat limited source. All the best, Mark P. Edited March 20, 2016 by Mark P.
Rigging Only is dedicated to providing quality sailboat hardware and sailboat rigging at affordable prices to sailors through out the world. Checkout View Cart (0) (508) 992-0434 ... we cannot provide estimates or build a replacement rig based solely on the model of your boat. Please call or see our Measurement Guides section for help on ...
The standard boat comes with a 39-hp diesel (upgradable to 56 hp), but a fully electric version is offered with a 25-kw electric motor and a reported 55 nautical mile range. Stay tuned for a full review, with more from the test sail, on this new model. LOA 41'2" LWL 37'9" Beam 14'1" Draft 6'9" (medium keel), 5'6" (shallow ...
15 May 2024• Written by Dea Jusufi. The second unit in the 24.7-metre Gunboat 80 series has been launched and named Agave. She now joins her sistership Highland Fling XVIII on the water, who sports a custom red exterior. The cruising catamaran is said to "apply the latest race boat technology for the sailing lifestyle".
Wisconsin Maritime Museum, 75 Maritime Drive, hosts the 47th annual Midwestern Model Ships and Boats Contest May 18-19. Make plans to stop by to join in the celebration of maritime heritage and ...
Crew and volunteers will continue the rigging and maintenance on the ship in preparation for the first several academic sail training ventures this summer. Additionally, The FNL's College History program with Mercyhurst University will take place later this month.