- BOAT OF THE YEAR
- Newsletters
- Sailboat Reviews
- Boating Safety
- Sailing Totem
- Charter Resources
- Destinations
- Galley Recipes
- Living Aboard
- Sails and Rigging
- Maintenance

How to Paint Sailboat Decks
- By Tom Zydler
- Updated: March 14, 2013
Painting a sailboat
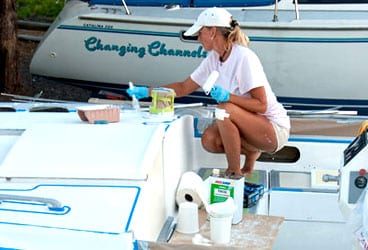
Janet Van Leuwen and Steve Van Wig own a Whitby 42. Looking at their beautiful, well-groomed ketch, you’d never guess it was built in 1982. The name on the stern, Lunacy , may be the only hint of the incredible amount of work that the couple has put into rejuvenating their boat. Bringing the decks and the coachroof top to their present glory was a large part of the project, as these tasks would’ve been on any glass boat more than 25 years old. This is how they did it. And frankly, this is how it should be done.
Before the couple could begin doing any prep work for painting, the deck hardware had to be removed. They needed access to tight spaces where the horizontal deck surface turned into vertical bulwarks, around the masts’ partners, near the windlass base, and so on. (They also removed the chainplates, which needed attention as a separate project.) Out came all stanchions, their bases, various padeyes, winches—anything and everything, in fact, that could obstruct the power sanders required to remove the worn-down, cracking, original nonskid pattern. Steve then used silicon sealant to plug all the fastener holes that would be reused; silicon repels paint, so the fastener locations would be visible when they began reinstalling the hardware.
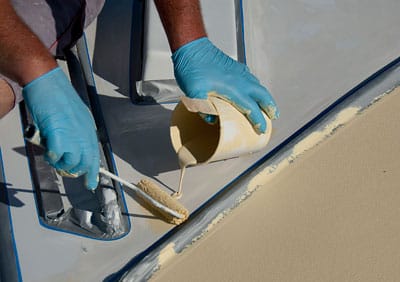
Donning breathing masks and kneepads, the couple spent days grinding the old surfaces with 80-grit discs. Using thick foam pads on machines running at high rpm prevented any gouging in the laminate. Smaller sanders (both round and square) helped them to negotiate tight turns; at times, they resorted to manual sanding blocks. Working with thickened polyester and epoxy resins, Steve filled several hairline cracks and dings. They then sanded this filler with 80-grit, then 100-grit, and finally 120-grit sandpaper to achieve a smoother surface before vacuuming up all the accumulated dust.
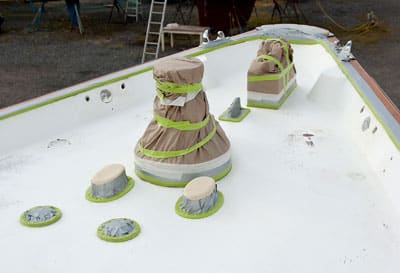
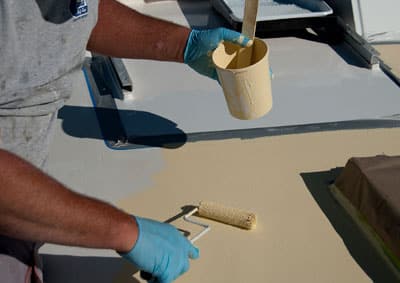
Next, to keep paint drips off teak handrails, the windlass, and the portholes, they masked these with heavy paper and tape. Right after the final wipe with a cleaning solvent, they took two days to roll and brush on two coats of epoxy primer, the base for the final topcoat. Over the next few days, the primed surfaces were sanded with 120-grit paper, followed again by vacuuming and hosing the resulting dust. Afterward, Janet cleaned all the surfaces with non-sticky tack cloths designed for multipart polyurethanes.

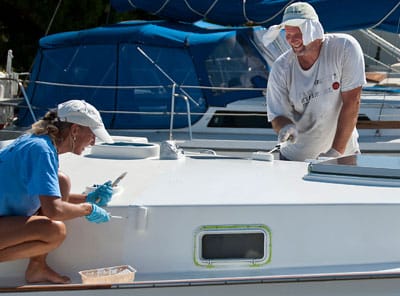
At this juncture, Steve identified and outlined the future nonskid areas, then spent a couple of days taping their inner edges with long-life 3M masking tape. At the corners, joining short lengths of tape on tight curves required meticulous care. After they wiped everything with cleaning solvent, they applied the first coat of multipart polyurethane to all the surfaces outside the future nonskid. Two more topcoat applications followed within allowable, 16-hour intervals. After sanding with 220-grit paper, dusting, using the tack rag, and wiping the solvent, they rolled and brushed on the fourth and final topcoat. The solvent-resistant, ultra-smooth, high-density foam-roller covers and quality brushes delivered the best finish. Working in the hot Florida sun required frequent additions of brushing reducer.
After allowing 48 hours to fully cure, they removed the masking tape. Fresh tape was then applied along the outside margins of the nonskid areas. All was ready for applying the nonskid coats. But first Steve spent a few days experimenting. He mixed his own color tints—too dark, and you couldn’t walk barefoot on the sun-heated deck; too white, and the deck glare was intolerable.
Also, he tested paint combined with various nonskid additives on scrap plywood; very coarse grit could damage human skin if a sailor knelt or fell on deck. He decided to combine equal amounts of coarse and fine grit. Significantly, this mixture prevented the coarse grit from settling down in the paint in lumps. On the big day, Steve and Janet mixed the activator with the paint base in a large container, added the correct nonskid grit, poured in the brushing reducer, and thoroughly stirred it all. After pouring small dollops within a taped area, Steve spread it out with a roller with Janet assisting, adding more paint or grit as necessary. She also wiped up Steve’s occasional paint drips with a solvent-soaked rag. The work went quickly and smoothly, though constant stirring of the paint/grit mixture was absolutely vital.
Twenty-four hours passed before heavy, late summer rain rolled in. By then, the paint had cured hard, and the coachroof was finished. They then repeated the whole operation to paint the deck. Nobody said rejuvenating a classic-plastic yacht would be quick or easy. But when the entire project was finished and Lunacy ‘s deck sparkled, the two sailors realized that all their meticulous efforts had been well worth it.
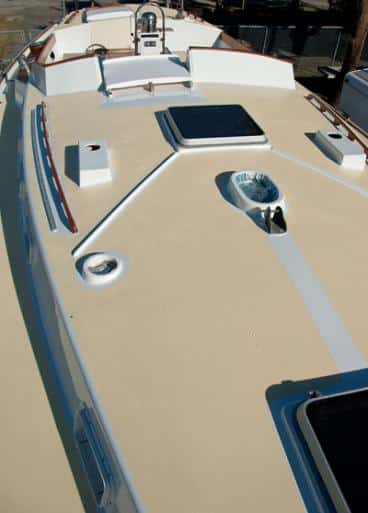
Steps:** 1. In preparation for the job, much of the deck hardware, including the stanchions, had to be removed. The remaining gear was carefully and completely covered and masked. 2. All the fastener holes were filled with silicon sealant, and the couple spent days grinding the old surfaces. Then Janet used a solvent wash to ensure a strong bond with the primer paint. 3. After dings and cracks were repaired and sanded, two coats of epoxy primer were applied. 4. Following another round of sanding, vacuuming, cleaning, and taping, the couple rolled and brushed on a fresh coat of Awlgrip topcoat. 5. After four coats of Awlgrip, it was time for the nonskid. First, Steve experimented with colors and grits. Once under way, he poured on a dollop of pre-mixed paint and spread it evenly. Note the paint stirrer, which was used to prevent the grit from settling. 6. Stirring frequently, to make sure the coverage was even in each masked area, Steve worked quickly and efficiently while Janet addressed small splashes with a solvent-soaked cloth. 7. Voilà! Once the masking tape was removed, the fresh decks fairly glistened.
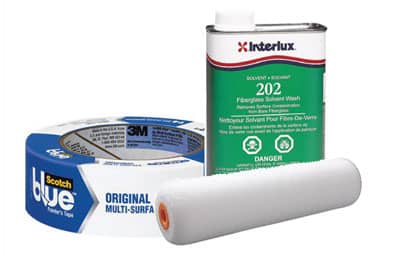
What You’ll Need: • Hook-and-loop sanding discs, sized to fit the sander pads • Sheets of sandpaper of grits 80, 100, 120, 180, 220, and 320 • 3M masking tape in widths of 1/2 inch (No. 256), 1 inch (No. 2090), and 2 inches (No. 225) • Gerson synthetic tack cloths • Roller frames and roller covers, with phenolic cores: ultra-smooth, high-density 4-inch and 6-inch roller covers (available from Home Depot; for the primers and topcoats) and Yellow stripe 3/8-inch nap (from West Marine; for the nonskid paint mixture) • Good-quality varnishing brushes • Cabisil (colloidal silica) thickening agent for making fairing putty with epoxy or polyester resin • Plastic putty knives • Interlux Fiberglass Solvent Wash 202 (for cleaning surfaces) • M.E.K. solvent (for cleaning all brushes) • Disposable paper/plastic pails of various sizes • A dozen wooden paint stirrers • Interlux Epoxy Primekote • Awlgrip topcoat (with Brushing Reducer and brushing converter) • Awlgrip Griptex nonskid additive (fine and coarse grades) • Ryobi and Makita random orbital sanders • Ryobi 6-inch palm polisher (used with a foam pad as a sander in complex spaces) • 3M breathing dust masks, ear protection, and solvent-resistant gloves
Longtime CW contributor Tom Zydler and his wife, Nancy, plan on spending this summer exploring the coast of Labrador aboard their Mason 44, Frances B .
- More: boat maintenance , How To , maintenance
- More How To

Adding Onboard Electronics? Here’s How To Get Started

7 Boating Safety Tips for Summer Cruising

How to Prep for a Diesel You Can Depend On

Anchoring in Paradise

Now For Sale: Leopard 45

The Long Way Around

Sailing to the Land of Shrimp

Swallow Tattoos and Sailors
- Digital Edition
- Customer Service
- Privacy Policy
- Email Newsletters
- Cruising World
- Sailing World
- Salt Water Sportsman
- Sport Fishing
- Wakeboarding

Boating Basics Online is reader-supported. When you buy via our links, we may earn a commission at no cost to you. Learn more
The Best Boat Deck Paints for Non-skid, Fiberglass & Wooden Deck
Written by J. Harvey / Fact checked by S. Numbers

No thanks to harsh elements like wind, rains, and extreme heat and cold, any boat is bound to show signs of wear and tear over time. Nowhere is this depreciation more obvious than in the paint coatings on our vessel, on the decks we regularly trudge. What’s good is that there’s always a remedy for a beaten up deck that’s becoming unsightly and deteriorating. There’s nothing that the best boat deck paint can’t polish up in no time. The icing on the cake is that these coats do more than beautify a boat. Some naturally impart non-skid perks that would make any Navy sailor green with envy. Others add years to your boat’s life by making it waterproof and dustproof. A few marine deck paints can even deliver all these things altogether, as proven by this review and buying guide.

- Decent traction
- Good self-leveling
- Outstanding protection
- Very easy to apply
- Decent drying time
- High-gloss and marine-grade
- Notably durable
- Excellent non-skid
- No undesirable odor
Table of Contents
1. Rust-Oleum 206999 Marine Topside Paint
2. totalboat wet edge marine topside paint, 3. totalboat totaltread non-skid deck paint, 4. kiwigrip kg10171r non-skid coating, 5. rust-oleum 207009 marine anti-slip additive, 6. durabak 18 textured non-slip coating, 7. kilz l394811 over armor smooth, 8. liquid rubber smooth polyurethane coating, 9. tuff coat ut-100 non-skid coating, 10. kilz over armor textured, 11. insl-x su031009a-01 sure step coating, 12. evercoat 853 skid-no-more rubberized coating, factors to consider when choosing boat deck paint, what is the best boat deck paint, how should i prepare my boat before painting, how do you paint a fiberglass boat deck, is anti-slip decking paint any good, best boat deck paint reviews.
- Excellent durability
- Strong smell
- Very easy to apply and manage
- Decent drying time and durability
- Doesn’t need a primer if a solid layer of paint is present
- Recommends xylene as thinner
- Limited availability
- Easy to use
- Smoother finish
- Proven durability
- Great traction
- Takes a while to dry
- A little expensive
- Comes with a roller for optimal application every time
- Relatively small amount of paint in every container
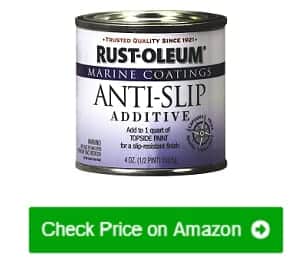
- Excellent slip resistance
- Easy to use with most paints
- Adds an extra layer of protection to boats
- Delivers great results even with minimal amounts
- A bit costly

- Delivers way more than what it promises
- Adaptable to most deck surfaces
- Ready to use and easy to apply
- Multiple attractive color options
- Very durable

- Budget-friendly
- Attractive finish
- Long-lasting coats
- Superior coverage
- Not that slip-resistant
- Needs to be thinned well
- Comes in many attractive colors
- Above-average durability
- Easy to prep and use
- Well worth the money
- Costs a lot per gallon
- Superb durability
- Great-looking finish
- Superb color options
- Easy to clean
- Non-hazardous to health and environment
- More expensive than most
- Excellent traction
- Satisfactory durability
- Feels smooth
- Performs well with one coat
- Quick-drying
- More costly than the Smooth version
- More difficult to apply than other paints
- Excellent coverage
- Amazing traction
- Lasts for a long time
- A bit expensive
- Strong odor
- Versatile on most surfaces
- Strong adhesion
- Great value for money
- Quite difficult to manage
- Unattractive colors

- Slip Resistance and Water Protection
The safest choice is always a paint that offers anti-slip because you need to be confident that you won’t slip or fall regardless of how much your deck gets wet. Not all anti-slip paints and additives are slip-resistant and vice versa. However, getting any of the two would always be a good step in the right direction. Waterproof paint not only tends to stay on longer but is easier to clean, too.
Paints that are UV resistant can resist most weather conditions and can handle the pressure of regular foot traffic and abrasions are what you should aim for if you want coats to last. Epoxy boat floor paint tends to be a safe option for this, but as my list above proves, you should also give other kinds of paint a try, even water-based ones.
- Color and Aesthetics
Your boat’s deck is often the one area of your vessel where you can flaunt your style. The colors you choose can either make or break that factor for you. If you want coatings that can hide the dirt and grime, then I suggest you choose darker ones. As much as possible, don’t let the color for boat decks depart too much from its overall theme.

Oftentimes, the paint products themselves would give you detailed instructions about how to prepare your boat to achieve optimal results. In most cases, I’ve discovered that it’s best to stick to these instructions. Otherwise, it’s always best to sand surfaces prior to application, especially if you’re doing a repaint and have to remove flaky stains and coats. It’s standard practice to make sure the surface is spick-and-span clean before you apply any paint product on it.
Besides a few unique steps you need to take, it’s not that much different from painting wood or metal surfaces actually. Make sure you keep the fiberglass clean and dry before applying any kind of paint. Let it dry in a place where it won’t be subject to further moisture or dirt. An important step you shouldn’t forget is to mask off the area you intend to paint. You can use a suitable painter’s tape for this to make sure the final finish won’t have irregular co. Paint for fiberglass boat decks usually requires a primer, but not always. Only use it if the specific paint product calls for it. With the area dried and masked off, you can now begin painting. After you’re done, you can now remove the tape and from there, it’s a waiting game till the coat you applied dries completely.
Yes, there’s no shortage of paints and additives that give the traction you want in your deck surfaces. However, not all of them last long and may need regular application over time. Some are so easy to apply that you won’t mind rolling a fresh layer should the previous coatings begin losing their grip. https://youtu.be/CFi3KRFSw_Y
The best boat deck paint can give you that much-needed Zen-like peace when out boating, fishing, or cruising. Why? Because you won’t have to worry about slips, falls, and a worn-out deck once you apply it. The products I’ve highlighted here can, more or less, help you attain that as long as you pinpoint the best ones for your purposes.

“I am James Harvey – founder of Boating Basics Online. It is established with the drive to help out first-time boaters, which are those desiring to explore their way through the water. So if you are new to boating, start from here with me. “
Better Sailing

Best Non Skid Boat Deck Paints
Painting your boat’s deck can be a challenging task. In this article, we will take a look at the Best Non-Skid Deck Paint for your boat or sailboat. For this article, I asked some boaters friends of mine, marine product professionals, and some online forum buddies of mine and well as my personal experiences with some of the following products.
A good non-skid boat deck paint provides a slip-resistant surface on your boat that is essential when you try to move on your deck even at the best of conditions. In foul weather, a non-skid coat of paint could be the difference between life and death. These anti-slip paints will increase friction and reduce the likelihood of a fall overboard.
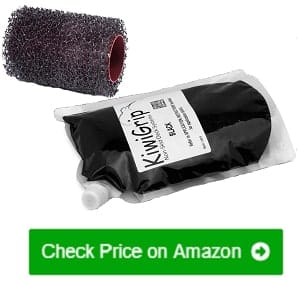
Kiwi Grip Non-Skid Deck Paint – Overall The Best Non-Skid Boat Deck Paint
If you’re DIYing it. Go with Kiwi Grip . It’s overall the best non-skid deck paint for your boat, and as long as you plan well, you can do a whole boat, including the cockpit, in about three sessions. But be warned, it’s expensive stuff. It costs around 150$ per gallon (4 Liters), and each gallon can of KiwiGrip can cover about 80 square feet.
I like the Kiwi Grip because it’s water-based, so easy to clean up and deal with. For the non-skid effect, you just use a special roller, no sand or crushed shell or whatever people add for the non-skid effect, which makes for an easy application. It probably the easiest material to work with to give your boat the desired non-skid effect.
It is a good idea to experiment on a piece of plywood before tackling your deck. Kiwi Grip is easy to mess up like just about anything! Practice makes almost perfect! But do not worry, even a bad Kiwi Grip job still works great; making it look pretty is about finesse and practice. A Blue Paper Masking Tape will be your best friend in this application, so you can make the edges perfect.
I had very good results with Kiwi Grip; follow directions carefully, don’t let it freeze, and practice, for the best possible results, apply the paint on a dry and hot day. Remember, you can always go over any part that isn’t perfect again. And last but not least, do not forget to wear a mask.

- Easy To Apply
- Great Non-Skid Effect
- Doesn’t look as good as some other options if not done carefully
TUFF Coat Non-Skid Coating
This type of paint is becoming very popular lately, and for a good reason, TUFF Coat is easy on your feet, highly durable, and has the added benefit of looking good as well. A friend of mine has used it for about 10 years now on his catamaran sailboat. He recoated once, 4 years ago, and is very happy with it. The two-part primer they have for it is very runny, so be careful with it. It sticks to itself great, though. It stretches a bit, which can hide minor Gelcoat cracking, and is very soft on the knees and bare feet because of the rubber particles.
For proper application, use a drill mixer to thoroughly stir and suspend all the rubber non-skid particles into the paint. Then, pour the coating into a paint tray and load your roller with enough paint. For maximum non-skid effect, you can use a paint roll similar to the one that is used for the Kiwi Grip application. That way, you will get the benefits of both the texture and the non-skid particles.
You will need around 1 Gallon of this stuff to cover 150 square feet of deck surface; per coat, 2 necessary, 3 recommended.

- Easy to apply
- Many colors
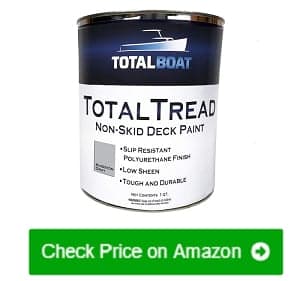
TotalBoat TotalTread Non-Skid Deck Paint
This is another single part nonskid paint for your deck, so you do not need to mix anything yourself. Just remember to stir very thoroughly before applying to ensure the solvents and non-skid particles are mixed in evenly, preferably with a paint mixer . This paint gives a flat finish with a non-slip texture, so if you do not like the texture that Kiwi Grip has, this is probably the way to go. It comes in 3 colors white, gray, and sand beige. To get a good result, you will need about two coats of paint, but if you decide that the desired effect is not there yet, you can add an extra coat for a more slip-resistant surface.
Before applying, make sure you clean the fiberglass properly with plenty of water and soap (let it dry) or prime first with TotalBoat Topside Primer. You can use both a brush or roller, but I would recommend rollers to get a more even result.
This product is very user friendly since the application is as straight forward as painting a wall at your home. As a pro tip, it is better to apply multiple thinner coats of paint instead of one or two thicker ones. Also, give the paint one or two days to dry before you apply another coat, depending on temperature and humidity.
Keep in mind that you will need around 1 Gallon of this stuff to cover 250 square feet of deck surface.

- Not very durable
- Doesn’t dry easily in humid and colder climates
Interlux Interdeck Slip Resistant Deck Paint
This is a one-part polyurethane paint with the non-skid particles already mixed in; just remember to shake the solution well before applying to make sure all the solvents and non-skid particles are mixed in evenly. Also, while you are applying the paint, keep stirring it often because the non-skid will settle down to the bottom of the container. Interdeck has a nice matt finish to reduce sun glare. It may be applied over any type of paint, but you should not apply it over clear epoxy. Clear epoxies must be primed with Epoxy Primekote 404/414 before applying. Make sure to go through and follow directions carefully to make sure you properly prepare and apply the paint. Also, make sure to put tape over the areas you do not want to apply the non-skid paint to get the best looking deck.

Awlgrip TopCoat With Griptex Non-Skid Additive
This what the professionals recommend when it comes to non-skid deck paints. However, you will have to use Awlgrip TopCoat and also use their Griptex additive. You mix the two products together, preferably with an Electric Paint Mixer , and then the solution can be rolled on.
My boat had previously painted with Awlgrip TopCoat With Griptex Non-Skid Additive. The boatyard this winter sanded it, primed, applied two coats of paint with rollers, then they sprinkled the Griptex with a salt shaker-type when the paint was still wet, vacuumed the loose Griptex particles off, and then rolled on two more Awlgrip TopCoat coats on. I found it smart and intuitive instead of mixing more material than you need and wasting it. Awlgrip with Griptex additive will look the best, but its grip is inferior to Kiwi Grip.
AwlGrip White Base With Crusted Walnut Shells
I have to say this is a very controversial way to apply a non-skid coat on your boat. However, a friend of mine has done it, and I have been on this boat, and I must say that the result is great. It feels good on your feet, it has the desirable non-skid effect and is also pretty affordable.
You apply it the same way you would apply the Griptex Non-Skid Additive to your AwlGrip TopCoat. The best way to apply it is to coat a thick layer of AwlGrip on your deck and then sprinkle the Crusted Walnut Shells on the wet paint; make sure to sprinkle the shells evenly. Let it rest overnight, and then vacuum the loose Crusted Walnut Shells off. Then, apply two more coats of Awlgrip TopCoat.
>>Also Read: Best Boat Coatings
Tips For Appling Any Non-Skid Paint On Your Boat
There are two types of people when it comes to preparing your deck for paint application. Many people sand their whole deck, and then they vacuum and clean it. The other ones just use a good deck cleaner and plenty of water to thoroughly degrease and clean the deck. That second way is ok if it is the first time you are applying a non-skid paint on your deck. However, you must remove all chips and peels from the deck’s surface. If you are reapplying, I would recommend removing the old coat first or at least sanding the old coat off as much as possible.
Pick a day that is not overly hot and sunny nor cold and cloudy. You do not want your paint to dry up too quickly nor to stay wet for two days straight. However, make sure to leave the paint cure at least for hours before you apply another coat.
Use a paint mixer drill attachment to stir the paint before each application, especially on two-part non-skid paints. I would recommend this on pretty much all the paints featured in this article, but you can get away without using one on the Kiwi Grip because there are no non-skid particles suspended on that type of paint.
Lastly, you will need a paint set that includes paint rollers, paintbrushes, and a paint tray. Also, get a Blue Paper Masking Tape to help you protect the non-skid areas and help achieve the best possible look.
Final Thoughts
The Best Non-Skid Boat Deck Paints is the Kiwi Grip, hands down; it is easy to apply and will get you the best result. To spruce up your boat’s deck with great functionality, you need to apply a new coat of non-skid paint. You’ll be able to change the color (Kiwi Grip comes in Black, Blue, Cream, Grand, and White) and dress it up while also adding a layer of protection to your deck’s surface. Old, dull fiberglass surfaces like your deck can become fresh and clean in very little time and effort. The Best Non-Skid Boat Deck Paint will also protect fiberglass surfaces from liquids, repel stains, and provide a nonslip surface for safe walking. Also, if your fiberglass has developed chips and spider cracks over the years, a coat of paint will cover them right up and your boat will appear as good as new.
Also, if you are not sure you want to paint your deck them you could consider a Non-Skid Self-Adhesive Foam Teak Marine carper for your boat.

Peter is the editor of Better Sailing. He has sailed for countless hours and has maintained his own boats and sailboats for years. After years of trial and error, he decided to start this website to share the knowledge.
Related Posts

The Ultimate Guide to Choosing the Best Fishing Line for Trolling

Lagoon Catamaran Review: Are Lagoon Catamarans Good?

Best Inboard Boat Engine Brands

Are O’Day Sailboats Good? A Closer Look at a Classic Brand
- Buyer's Guide
- Destinations
- Maintenance
- Sailing Info
Hit enter to search or ESC to close.

Step-By-Step Guide: How To Paint A Sailboat Like A Pro
Alex Morgan
Painting a sailboat can be a rewarding and creative endeavor that not only enhances the appearance of your vessel but also offers protection against the harsh marine environment. Whether you’re a seasoned sailor or a novice boat owner, knowing how to paint a sailboat is a valuable skill. This comprehensive guide will take you through the step-by-step process of painting a sailboat, from gathering the necessary materials to applying the final touches.
To start, you’ll need a few essential materials for the painting project. These include:
1. Paint: Choose a marine-grade paint that is specially formulated for boat surfaces to ensure long-lasting durability.
2. Primer: Apply a suitable primer to create a smooth and uniform surface for the paint to adhere to.
3. Brushes and Rollers: Use high-quality brushes and rollers designed for marine applications.
4. Sandpaper: Prepare the boat’s surface by sanding it to remove any existing paint or imperfections.
5. Tape and Drop Cloths: Protect areas that you don’t want to paint by using tape and cover the surrounding surfaces with drop cloths.
Before diving into the actual painting process, it’s essential to prepare the sailboat properly. This involves a few key steps:
1. Cleaning the Surface: Remove dirt, grime, and any other contaminants from the boat’s surface using a suitable cleaning solution.
2. Repairing Any Damage: Inspect the boat for any cracks, chips, or other damage. Repair these areas using the appropriate techniques and materials.
3. Sanding the Surface: Smooth out the boat’s surface by sanding it with progressively finer grits of sandpaper. This helps the paint adhere better and provides a uniform finish.
Next, apply a primer coat to ensure proper adhesion and longevity of the paint job. Consider these steps:
1. Choosing the Right Primer: Select a primer that is compatible with the type of paint you’ll be using and suitable for the boat’s material.
2. How to Apply Primer: Follow the manufacturer’s instructions and apply the primer evenly across the entire surface of the sailboat. Use smooth, overlapping strokes for optimal coverage.
Once the primer has dried, it’s time to start painting the sailboat with the chosen paint. Keep these points in mind:
1. Selecting the Right Paint: Use a high-quality marine-grade paint that is specifically designed for boat exteriors and can withstand the effects of sun, saltwater, and other environmental factors.
2. Applying the Paint: Apply the paint using consistent and even strokes, following the manufacturer’s instructions regarding drying times and the number of coats required.
Add the finishing touches to complete the painting process:
1. Adding a Clear Coat: Consider applying a clear coat for added protection and a glossy finish. Ensure the clear coat is compatible with the paint used for the main coat.
2. Cleaning up: Clean your brushes, rollers, and any other painting equipment with the appropriate solvents, and dispose of any waste materials responsibly.
By following these steps, you can achieve a professional-looking paint job on your sailboat and enjoy the benefits of a visually appealing and protected vessel.
1. Painting a sailboat requires specific materials such as paint, primer, brushes and rollers, sandpaper, and tape and drop cloths. 2. Before painting, it is important to prepare the sailboat by cleaning the surface, repairing any damage, and sanding the surface. 3. When applying primer and paint, choosing the right products and following the correct application techniques are crucial for a successful outcome. 4. After painting, adding a clear coat and cleaning up are essential finishing touches to ensure a professional and long-lasting result.
Materials Needed for Painting a Sailboat
When it comes to painting a sailboat, having the right materials is crucial. In this section, we’ll dive into the essential items you’ll need to get started on your sailboat painting project. From paint and primer to brushes , rollers , sandpaper , and tape , we’ll explore each of these elements and how they play a role in achieving a successful paint job. So, grab your supplies, and let’s sail into the world of sailboat painting!
Painting a sailboat requires choosing the right paint for a successful and long-lasting finish. Here are some important points to consider:
1. Type of paint: Choose from marine enamel, polyurethane, or epoxy paint, as each type has its own advantages and suitability for different surfaces.
2. Durability: Opt for paint specifically formulated for marine use, with high UV resistance and excellent adhesion properties to withstand sun, saltwater, and abrasion.
3. Color selection: Select a paint color that suits your preferences and matches the overall aesthetics of your sailboat. Consider that darker colors absorb more heat and lighter colors may stain easily.
4. Finish: Decide between glossy or matte finishes. Glossy finishes are more reflective, durable, and easy to clean, while matte finishes provide a subtle and natural look.
5. Application method: Choose the application method that best suits your skill level and project size. Common methods include brushing, rolling, or spraying.
6. Coverage and drying time: Check the paint’s coverage rate and consider the number of coats needed. Also, take note of the drying time between coats, as it affects the project timeline.
7. Compatibility: Ensure the chosen paint is compatible with the primer and existing paint layers on your sailboat to prevent issues like peeling or bubbling.
8. Environmental considerations: Look for eco-friendly and non-toxic paints to minimize the impact on the marine environment.
When painting a sailboat, the primer is a crucial element to achieve a professional and long-lasting finish. Here are the key points to consider about primer:
Choose the Right Primer: It is important to select a marine-grade primer specifically designed for sailboats. This type of primer adheres well to various surfaces such as fiberglass, wood, and metal.
Apply the Primer: Make sure the surfaces are clean, dry, and free from any contaminants. To achieve a thin and even coat, you can use a brush or roller. Pay special attention to joints and areas that have been previously repaired. Allow the primer to dry completely before proceeding further.
Always remember that using the correct primer plays a crucial role in obtaining a smooth and durable paint finish on your sailboat. So take your time to choose the right primer and follow proper application techniques for optimal results .
3. Brushes and Rollers
When painting a sailboat, it’s crucial to have the appropriate brushes and rollers for a seamless and professional finish. Here are some crucial factors to consider:
1. Choose brushes and rollers of excellent quality that are suitable for the type of paint being used. Synthetic bristle brushes are effective for water-based paints , while natural bristle brushes are perfect for oil-based paints .
2. Take into account the size of the brushes and rollers. For intricate work and smaller areas, opt for smaller bristle sizes. On the other hand, for larger surfaces, larger brushes and rollers provide greater efficiency .
3. Make sure that the brushes and rollers are thoroughly cleaned and free from any residual paint or debris before starting the painting process. This will prevent any unwanted texture or imperfections on the sailboat’s surface .
4. Utilize a paint tray or bucket to hold the paint and dip the brushes or rollers into it. This will ensure even distribution and prevent any excess dripping.
5. Apply consistent pressure and strokes when using the brushes and rollers. Start painting from one end and work your way to the other, maintaining a uniform coat by maintaining consistent pressure.
By carefully selecting the appropriate brushes and rollers and using them correctly, you can achieve a paint job on your sailboat that looks professional .
4. Sandpaper
When painting a sailboat, sandpaper is crucial in preparing the surface for a smooth finish. Here are important points to consider about sandpaper:
1. Grit selection: Choose the right grit based on the surface condition. For rough sanding or removing old paint, use a coarse grit (80 or 100). For finer sanding and smoothing, use a medium or fine grit (120 or 220).
2. Sanding technique: Hold the sandpaper firmly and sand in a circular or back-and-forth motion. Apply even pressure to prevent unevenness. Sand evenly across the entire surface to remove imperfections or roughness.
3. Progression: Start with coarse grit and gradually switch to finer grits. This smoothes the surface and achieves a professional finish. Clean the surface between grit changes to remove dust or debris.
4. Safety precautions: Wear goggles and a mask to protect against sanding dust. Work in a well-ventilated area or use a dust collection system to minimize airborne particles.
5. Surface evaluation: After sanding, inspect for smoothness and uniformity. If rough spots or imperfections are visible, resand those areas before priming and painting.
The first documented use of sandpaper dates back to 13th-century China. Crushed shells, seeds, and sand were glued to parchment to create abrasive sheets. Over time, sandpaper production techniques evolved, and it became widely used in various industries for surface preparation, woodworking, and finishing applications. Today, sandpaper continues to be an essential tool for achieving smooth surfaces in painting and other projects.
5. Tape and Drop Cloths
When painting a sailboat, the use of tape and drop cloths is essential to protect areas from paint. Here are some important points to consider:
Choose painter’s tape to create clean lines, avoiding regular masking tape.
Prepare the surface by cleaning and drying it to ensure proper adhesion.
Carefully apply the tape along the edges, pressing firmly for good adhesion.
Use drop cloths or plastic sheets to protect surfaces from paint spills or splatters.
Overlap the tape slightly for smooth, clean edges and prevent paint seepage.
Remove the tape at a 45-degree angle when the paint is dry to the touch but not fully cured.
Following these steps will help you effectively use tape and drop cloths while painting a sailboat, ensuring a professional look and protecting desired areas.
Preparing the Sailboat for Painting
Get ready to transform your sailboat into a work of art! In this section, we’ll dive into the crucial steps of preparing your sailboat for painting. From cleaning the surface and repairing any damage to sanding it down, we’ll cover everything you need to know to ensure a smooth and long-lasting paint job. So grab your brushes and let’s get started on this exciting journey of turning your sailboat into a masterpiece .
1. Cleaning the Surface
When cleaning the surface of a sailboat before painting, it is important to follow these steps for thorough cleaning .
Start by removing any loose or flaking paint using a scraper or wire brush.
Next, wash the surface with a mild detergent or boat cleaning solution to effectively remove dirt, grease, or grime .
Rinse the surface thoroughly with clean water to ensure all cleaning solution residue is removed.
Take the time to inspect the surface for any stubborn stains or marks .
If needed, utilize a specialized boat hull cleaner to effectively eliminate them.
To create a smooth and even surface for paint adhesion, gently sand the surface with fine-grit sandpaper .
After sanding, wipe down the surface with a clean cloth or sponge to eliminate any dust or debris .
If you come across areas with mold or mildew , treat them with a mildew remover and allow it to sit for the recommended time before rinsing.
Ensure that the surface is completely dry before proceeding with painting or other preparation steps .
By diligently following these steps, you can guarantee that the sailboat’s surface is thoroughly cleaned and ready for painting , ultimately resulting in a professional and smooth finish .
2. Repairing Any Damage
To effectively repair any damage on a sailboat, follow these steps:
1. Assess the damage: Carefully inspect the sailboat for any cracks, scratches, or holes in the hull or deck.
2. Gather necessary materials: Make sure you have epoxy resin, fiberglass cloth, sandpaper, and a putty knife on hand.
3. Clean the damaged area: Use a mild detergent and water to remove any dirt, grime, or loose particles.
4. Sand the damaged area: Lightly sand the area to create a smooth surface for the upcoming repairs.
5. Apply epoxy and fiberglass: Follow the manufacturer’s instructions to prepare and apply the epoxy resin to the damaged area. Place layers of fiberglass cloth, ensuring complete coverage.
6. Sand and smooth the repair: Once the epoxy cures, carefully sand the repaired area for a smooth finish that seamlessly blends with the surrounding surface.
7. Prime and paint: If necessary, apply primer before painting to ensure proper adhesion. Then, paint the area to match the rest of the sailboat.
8. Clean up: Dispose of waste materials properly and clean your tools and work area.
By following these steps, you can expertly repair any damage on a sailboat while maintaining its structural integrity and overall appearance.
3. Sanding the Surface
To achieve a smooth and uniform surface, it is important to properly sand the boat’s surface. Gather all the necessary materials, including sandpaper of different grits ( 60 , 120 , and 220 ), a sanding block or power sander, and safety goggles . Before starting, make sure to protect areas that you don’t want to sand by using masking tape or drop cloths .
Begin the sanding process by using 60 grit sandpaper. This will effectively remove rough spots, peeling paint, or any previous coatings. When sanding, use a circular or back-and-forth motion with even pressure. It is crucial to avoid aggressive sanding that could potentially damage the boat’s structure.
Continuously check the surface for smoothness and evenness. Once the desired level has been achieved, switch to 120 grit sandpaper. This will further refine the surface and eliminate any remaining imperfections. Repeat this process with 220 grit sandpaper to ensure a completely smooth and uniform surface.
After sanding, ensure that the surface is thoroughly cleaned. Use a vacuum or tack cloth to remove any dust and debris. Take the time to inspect the sanded surface for any areas that may require additional sanding or touch-ups before moving forward with the painting process.
Throughout the entire sanding process, it is crucial to prioritize safety. Always remember to wear safety goggles and a mask to protect yourself from any airborne particles and dust that may be generated while sanding.
Applying Primer on the Sailboat
Applying primer on a sailboat is a crucial step in the painting process, ensuring a smooth and durable finish. In this section, we’ll dive into the essentials, from choosing the right primer to the step-by-step application techniques . So grab your brushes and get ready to give your sailboat the perfect foundation for a flawless paint job!
1. Choosing the Right Primer
Choosing the Right Primer
When painting a sailboat, selecting the appropriate primer is crucial for achieving a smooth and durable finish. Here are the steps to follow in choosing the right primer:
Assess the surface: Inspect the sailboat’s surface for damages such as cracks, dents, or peeling paint before choosing a primer.
Determine the surface type: Different sailboats may have fiberglass, wood, or metal surfaces. Select a primer designed for the specific surface.
Consider the environmental conditions: Take into account the climate and weather conditions the sailboat will be exposed to. Choose a primer with excellent corrosion resistance if the boat will be in harsh conditions or saltwater.
Choose the right primer type: There are epoxy primers, self-etching primers, and high-build primers available. Consider the needs of your sailboat and choose a primer with good adhesion and durability.
Consult professionals: Seek advice from paint specialists or experienced boat painters if unsure about which primer to choose.
By following these steps, you can ensure you choose the right primer for your sailboat, leading to a successful painting project.
Sailboat painting has a long-standing tradition in maritime culture. In the past, sailors used a mixture called “ship paint” consisting of tar and natural materials. This protected the boats from rot and deterioration and improved their performance in the water. Nowadays, sailors have a wide range of primers and paints designed specifically for sailboats. The right primer choice is critical for preserving and enhancing the beauty and functionality of sailboats. So, when embarking on a sailboat painting project, take the time to carefully choose the right primer for a successful outcome.
2. How to Apply Primer
To properly apply primer on a sailboat, follow these steps on how to apply primer:
1. Clean the surface: Before applying primer, it is important to ensure that the sailboat surface is thoroughly cleaned and free from any dirt, dust, or debris. To clean it effectively, use a mild cleaner or soap and water.
2. Repair any damage: Take a close look at the sailboat to identify areas that require repair. If you find any cracks, dents, or holes, use a suitable filler or epoxy to fix them.
3. Sand the surface: To create a smooth and even surface for painting, lightly sand the entire area that needs to be primed. Make sure to use fine-grit sandpaper and remove any loose or peeling paint.
4. Choose the right primer: Selecting the appropriate primer is crucial. Look for a primer that is specifically designed for boats and marine surfaces. Consider factors such as the type of paint, boat material, and any requirements specified by the manufacturer.
5. Apply the primer: Before applying the primer, stir it thoroughly to ensure proper consistency. Apply a thin and even coat of primer using a brush or roller. Work in small sections, and make long, smooth strokes along the natural lines of the boat.
By following these steps, you can effectively apply primer to your sailboat, creating a smooth and durable base for the paint.
Painting the Sailboat
Painting the Sailboat is where the real magic happens! Get ready to transform your plain sailboat into a work of art. In this thrilling section, we’ll dive into the nitty-gritty details of painting your beloved vessel. Discover the secrets to selecting the perfect paint that not only adds a pop of color but also protects your boat from the harsh elements. Then, we’ll uncover the techniques for applying the paint like a pro, ensuring a flawless finish that will make heads turn. Get ready to unleash your creativity and make your sailboat truly shine!
1. Selecting the Right Paint
Selecting the Right Paint
– Type of paint: When selecting the right paint, it’s important to consider the options available such as marine enamel paint , epoxy paint , and polyurethane paint . Each type has its own set of advantages and disadvantages, so it’s important to choose the one that best suits your needs and budget.
– Compatibility: Making sure that the paint you choose adheres well to the sailboat’s surface is crucial. This will help ensure a long-lasting and durable finish.
– Color: The color you choose for your paint should not only be based on your personal preference, but also on how well it complements the overall aesthetic of the sailboat. It’s also important to consider how the color will be affected by sunlight and weathering over time.
– Durability and resistance: In a marine environment, it’s essential to select a paint that is formulated to withstand the harsh conditions. Look for paint options that offer UV resistance , saltwater resistance , and resistance to scratches and abrasions.
– Application method: Depending on the paint you choose, different application methods may be required. Some paints may need to be sprayed, while others can be applied with a brush or roller. It’s important to choose a paint that aligns with your level of expertise and the equipment you have available.
– Budget: Consider your budget when selecting the right paint. Different paints come at different price points, so it’s important to choose one that offers a balance between quality and affordability.
2. Applying the Paint
To apply paint on a sailboat, follow these steps:
– Preparation: Clean and dry the surface before applying paint. Remove dirt, dust, or grease using a cleaning solution and cloth.
– Tape and protect: Mask off areas that you don’t want to paint, such as windows or hardware, using tape. Cover surrounding areas with drop cloths to prevent accidental splatters.
– Primer: Apply a coat of marine-grade primer to the sailboat following the manufacturer’s instructions. Allow the primer to dry completely.
– Select the paint: Choose a marine-grade paint suitable for the sailboat’s material. Consider durability, weather resistance, and color. Follow the recommended applicator type.
– Application: Apply paint to larger areas of the sailboat first using a roller or brush. Use smooth, even strokes for a uniform finish. Work in sections, moving from one part to another.
– Second coat: Assess if a second coat is needed once the first coat has dried. Apply a second coat following the same technique for a vibrant and long-lasting finish.
– Clean up: Clean brushes and rollers according to the paint manufacturer’s instructions. Dispose of used materials properly.
By following these steps, you can effectively apply paint to your sailboat and achieve a beautiful and protective finish.
Finishing Touches
The Finishing Touches section is where we add the final elements to our sailboat painting, giving it that extra dose of awe-inspiring sophistication . In this part, we’ll dive into two key sub-sections: Adding a Clear Coat and Cleaning up . Prepare for the exhilarating moment of applying the clear coat, which not only enhances the colors but also protects the artwork for years to come. Plus, we’ll share some neat tips on how to clean up any stray brushstrokes or smudges effortlessly. Let’s make this sailboat masterpiece shine !
1. Adding a Clear Coat
To incorporate the provided keywords naturally in the provided text, the rewritten text can be as follows:
To add a clear coat to a painted sailboat and ensure long-lasting protection for your sailboat, follow these steps:
Ensure the painted surface is clean and completely dry .
Use a high-quality clear coat designed for marine applications , specifically for adding a clear coat.
Apply the clear coat in thin , even layers using a brush or spray gun .
Allow each layer to dry completely before applying the next layer, contributing to the process of adding a clear coat.
Cover the entire surface of the sailboat with the clear coat for maximum protection , fulfilling the purpose of adding a clear coat.
Check for any drips or uneven spots and sand them down before adding more coats, which is an essential part of adding a clear coat.
Follow the manufacturer’s instructions to determine the number of coats needed, a vital step in successfully adding a clear coat.
Adding a clear coat to a painted sailboat is crucial for protecting the paint job from UV radiation , saltwater , and other damaging elements. By following these steps and using the appropriate materials for adding a clear coat, you can achieve a professional-looking finish and ensure long-lasting protection for your sailboat.
2. Cleaning up
Cleaning up after painting a sailboat is an important step that ensures a neat finish and maintains the longevity of your painting tools. To effectively clean your sailboat, follow these steps:
- Remove excess paint from brushes and rollers.
- Clean brushes and rollers with warm soapy water.
- Rinse brushes and rollers to remove soap residue.
- Allow brushes and rollers to air dry completely.
- Dispose of leftover paint or materials according to local regulations.
- Remove protective tapes and drop cloths from the sailboat.
- Collect debris or trash and dispose of properly.
- Wipe down the sailboat with a clean cloth to remove dust or particles.
- Inspect the area for touch-ups or missed spots and make necessary corrections.
- Store brushes, rollers, and other painting materials in a clean and dry place for future use.
These steps will help you incorporate the cleaning up process into your sailboat painting routine effectively. Sailors have always taken pride in keeping their vessels clean for efficiency and well-being. Proper cleaning techniques have been passed down through generations to preserve sailboats. Today, sailors continue to adhere to these principles to honor the traditions of the sea.
Some Facts About How To Paint A Sailboat:
- ✅ Painting your sailboat is essential for its safety and protection. (Source: Life of Sailing)
- ✅ The paint acts as a barrier against salt, barnacles, and rotting, keeping your sailboat well-maintained. (Source: Life of Sailing)
- ✅ Painting your sailboat yourself can save you money and allow you to acquire a valuable skill. (Source: Life of Sailing)
- ✅ The frequency of painting depends on the type of paint and the amount of time your boat spends in the water. (Source: Life of Sailing)
- ✅ Choosing a sailboat paint that contains copper provides biocidal properties, preventing the attachment of sea life. (Source: Life of Sailing)
Frequently Asked Questions
How important is painting a sailboat for its safety and protection.
Painting your sailboat is essential for its safety and protection. The paint acts as a protective layer, guarding against saltwater corrosion, barnacles, and rotting. It also adds an added layer of aesthetic appeal to your boat, making it stand out.
What are the benefits of painting a sailboat yourself?
Painting your sailboat yourself offers several benefits. It allows you to save money as you won’t have to hire a painting contractor. It provides an opportunity to learn a valuable life skill. It allows you to add your creative flair and personalize the paint job according to your preferences.
Which paint brands are recommended for painting a sailboat?
When painting a sailboat, it is recommended to choose paint brands that contain copper. Copper acts as a biocide, preventing the attachment of sea life to the boat’s hull. This helps in maintaining the boat’s performance and reduces the need for frequent cleaning and maintenance.
What is the frequency of painting a sailboat?
The frequency of painting a sailboat depends on the type of paint used and the amount of time the boat spends in the water. Bottom paint, which protects the hull, should be applied annually. On the other hand, top paint, which adds color and gloss to the boat, can be done every 3 years.
What are the necessary tools for painting a sailboat?
When painting a sailboat, you will need various tools such as sandpaper, paint, primer, brushes, rollers, paint thinner, and solvent. It is essential to have a well-ventilated workspace and ensure you wear safety gear such as a face mask, goggles, and gloves.
What is the process for painting a sailboat?
The process for painting a sailboat involves several steps. First, inspect the boat for any damage and make necessary repairs. Next, sand the surface using different grits of sandpaper to achieve a smooth finish. Then, apply a layer of primer to improve adhesion. Apply multiple coats of paint, allowing sufficient drying time and sanding between each coat for a glossy looking boat. Good luck!
About the author

Leave a Reply Cancel reply
Your email address will not be published. Required fields are marked *
Save my name, email, and website in this browser for the next time I comment.
Latest posts

The history of sailing – from ancient times to modern adventures
History of Sailing Sailing is a time-honored tradition that has evolved over millennia, from its humble beginnings as a means of transportation to a beloved modern-day recreational activity. The history of sailing is a fascinating journey that spans cultures and centuries, rich in innovation and adventure. In this article, we’ll explore the remarkable evolution of…

Sailing Solo: Adventures and Challenges of Single-Handed Sailing
Solo Sailing Sailing has always been a pursuit of freedom, adventure, and self-discovery. While sailing with a crew is a fantastic experience, there’s a unique allure to sailing solo – just you, the wind, and the open sea. Single-handed sailing, as it’s often called, is a journey of self-reliance, resilience, and the ultimate test of…

Sustainable Sailing: Eco-Friendly Practices on the boat
Eco Friendly Sailing Sailing is an exhilarating and timeless way to explore the beauty of the open water, but it’s important to remember that our oceans and environment need our protection. Sustainable sailing, which involves eco-friendly practices and mindful decision-making, allows sailors to enjoy their adventures while minimizing their impact on the environment. In this…
How To Paint A Sailboat: A Complete Guide

Last Updated by
Daniel Wade
June 15, 2022
Whether you’re new to owning a sailboat or not, you have likely put some thought into painting your boat yourself. It is important to keep your boat well painted as it can save you a lot of money in the long run. It can also save you a lot of money if you choose to paint your boat yourself.
Whether or not this is the first time you have painted your boat, you will still find this article useful. It has lots of tips and tricks for making sure you get the job done and get it done well. Hiring a professional may be easier, but there is a sense of pride and accomplishment in doing it yourself. If you use this article as a reference, you can’t go wrong.
Table of contents
Why is it important to paint your sailboat?
Painting your boat is not just an excuse to put some creative flair into your boat, it is an important process in keeping the boat safe. Safe from salt, safe from barnacles, and safe from damage. The paint acts as a vital protective layer, without it your boat will be vulnerable to all kinds of damage. If you have a wooden hull, this protective layer will keep the wood from rotting. It can also plug any minuscule holes that might allow sea life and salt to make its way into the body of the boat.
There is also, of course, the added benefit of having a boat that looks good . A boat is a point of pride and should be treated as such. Having a glossy looking boat is something to be proud of. Most boats are not painted far above the waterline, so it is even an opportunity to make your boat stand out. Some people also believe that painting a boat brings good luck. Unless of course, you paint it green, green is thought to bring bad luck. Whether or not you believe that is up to you.
What are the benefits of painting your boat yourself?
When it comes to painting your boat there are only two options. Hire a professional boat painting contractor, or bite the bullet and do it yourself. They both have their pros and cons, of course, but there is so much more to be gained by doing it yourself. First of all, painting your boat yourself is just as fun as it is difficult. Learning to paint is a valuable life skill that you won’t regret learning as early on in your sailing career as possible. If you can learn to paint your boat now, you will save yourself a small fortune in the long run.
Hiring a contractor is expensive, to say the least, it may be faster and easier overall, but the extra cost can make it simply not feasible. Or simply unappealing. If this is the first time you are painting your sailboat you will need to make a one-off purchase of all the equipment needed for prepping, painting, and finishing the boat. After these one-off purchases are out of the way, you will only need to buy paint and new rollers the next time. Even if you need to buy all the equipment brand new, it can be cheaper than hiring someone else to do the job for you.
How often do you need to paint your sailboat?
The general rule of thumb for painting your boat is that it will need bottom paint about once a year. This is when you will need to take the boat completely out of the water and give it a fresh new coat. If your boat spends all of its time in the water, it certainly needs painting at least once a year. The saltwater is so corrosive that you shouldn’t let your boat go without a fresh coat of bottom paint for more than 2 years. Even if your boat only spends half its time in the water, and the other half on land, you will find that its best to keep its coat topped up.
The top paint, or the above waterline paint, doesn’t need painting anywhere near as often. It isn’t in direct contact with the seawater so it simply isn’t going to get eroded down as much. The salty sea spray can still be damaging over time so this paint should be re-done every 3 years. It can be more or less frequent depending on use and personal preference. Some people like to do above waterline paint yearly, with the rest of their boat, but it isn’t necessary.
What are the best paints to use for your sailboat?
There are plenty of great brands of paint out there, in various colors and shades, so you won’t struggle for choice. There are some things you might want to look for in your paint . For example, you may have noticed that a lot of boats tend to have red hulls. This isn’t just a fashion statement, and while red is supposed to bring luck this isn’t the main reason either. The reason is that this red/orange paint is perfect for added protection along the bottom of your boat.
This red/orange paint is interestingly chosen because it is, of course, traditional; but mostly because of its copper. The copper is actually what gives the paint its red/orange color.
Copper is perfect for the bottom of your boat for several reasons. First, copper acts as a biocide. It stops worms from making their way into the hull if your boat is wooden. If it is metal or fiberglass, it still has the benefit of stopping barnacles and other sea life from attaching themselves deep into the hull of the boat. Copper is also strong enough to hold up to scraping.
Scraping is when you scrape barnacles and other sea life off the hull of your boat. Scraping is an important part of keeping your boat in good condition. It is important to check with the marina or port authority whether or not you are allowed to scrape. If you scrape without permission you may find yourself on the receiving end of a hefty fine. The reason is that they don’t want you introducing invasive species on to the marina floor. This is mostly a problem when you are coming from somewhere vastly foreign, not sailing from New York to Chicago for example.
How many coats of paint does a sailboat need?
When painting your boat it’s a good idea to think about how many coats of paint you are going to need. There is no exact number that is needed, it is mostly to do with how well protected your boat needs to be and how much time you have on your hands. Every coat takes time and attention to detail.
If you choose to do four coats of paint it is going to be time-consuming but very well protected. That being said, the minimum number of coats is two. One is not enough. If your boat only spends part of the time in the water, two to three coats are plenty.
If you are someone who lives on their boat full-time, or at least most of the time, you may want to do more coats. Three, maybe even four, might be ideal here. The reason is that first, your boat is going to experience way more wear and tear than one that is just an ocean part-timer. And second, taking out your boat (which is also your home) is a giant hassle. It is a tedious process, so doing it as infrequently as possible is probably in your best interest. More coats last longer. When you are sailing from place to place, finding somewhere to take your boat out of the water and perform this maintenance is inconvenient. You want to be doing it as little as possible.
What safety precautions do I need to take when painting my sailboat?
All paint can be toxic when inhaled. Even if it is “non-toxic” paint it is going to be harmful to your lungs. They aren’t meant to inhale anything but air, even non-toxic paint is going to be bad for them. This is why it is important to wear a face mask.
Your mask should be specifically for painting, not surgical masks or other cheap medial masks. They are not going to be strong enough, with a fine enough air filter. Whether you feel the need to wear eyewear is up to you during the painting process.
Before the painting begins, when you are scraping and sanding, it is a good idea to wear some goggles to keep debris and splinters out of your eyes. It is also a good idea to wear gloves. You don’t want to rough your hands up too much, they need protection from not only the paint but splinters and sharp pieces of metal.
Painting a boat can be dangerous work. Without taking the proper safety precautions you are putting yourself at unnecessary risk. This safety equipment costs just a few bucks and is equally important as any of the other tools needed to paint your boat.
What tools do I need to paint a boat?
There is more to painting your boat than just using paint and a brush . You will also need tough sandpaper , potentially an angle grinder or welder , paint, primer , brushes, paint rollers , paint thinner , and solvent. You will need to make sure you have all of these things before you start painting. You can pick any of these items up at a boating goods store.
It is a good idea to bring some buckets with you for filling with water, both for rinsing off your boat and your brushes. All of your safety equipment needs to be brought too.
If this is your first time painting your boat yourself, you may find you need to buy all of these things at once. That can be a lot to stomach when its all in one go, luckily, most of these tools and equipment can be reused. Besides, it is still going to be far cheaper than hiring someone to do it for you. All of this equipment is an investment in your boat.
How to paint a sailboat
Whether this is the first time you have painted your boat or not, you may find some of the tips in this next section useful. Painting your sailboat may be tricky at first, but over time you will get the hang of it. The problem with painting your boat is that it can be a very expensive mistake if you get it wrong.
It is important to read this guide carefully, take your time, and make sure you do the job properly. It may be slow going at first, speed will come over time. Once you have gathered all of your safety equipment and tools you are ready to get started.
The workspace
First of all, you need to ensure you have the right workspace. You cant paint your boat in the water so you are going to need to find somewhere to do your work. This is easy enough if you don’t live on your boat full time, take the boat to your house and do your painting on the driveway. If this isn’t an option because you don’t have space or live on your boat full time, you are going to need to rent somewhere. There are typically places affiliated with the marina that you can use. In some cases, these even come with a majority of the equipment you will need. This, of course, drums up the price a bit, but that’s unavoidable.
Your workspace needs to be well ventilated, or you risk making yourself very sick. Both from paint fumes, rubbing alcohol fumes, and fine matter from when you sand the hull down. This means painting your boat in your garage, if it even fits, is not always the best idea. If you do decide to paint outside, it is important to consider the chance of rain. Of course, your boat is pretty waterproof, but once you begin sanding rain might damage the wood if left to sit there.
Before you do anything else, it is important to look your boat over fully from top to bottom. You are looking for any bumps, scrapes, cracks and general damage. This damage is not going to be noticeable while the boat is in the water, so just before you paint it is one of the only times you get to have a close look. Once you have made note of all this damage, it is time to get to work repairing it. Depending on just how severe this damage is, you may want to get help with this next stage.
All of this damage needs to be repaired before anything else can take place. Painting over these damaged areas is just going to hide the problem temporarily, the next time it comes to painting you will find they are far worse. If you don’t deal with this now, they are going to snowball into complicated and expensive repairs.
After your repairs are done it is time to start sanding. This is very time consuming as you need to do it three times. Per coat. First, take the 600 grit sandpaper and make your way around the boat. It is best to use electrical tape to mark out a section at a time so you don’t keep losing your place. After you have finished with the 600 grit sandpaper, it is time to move on to 800, then 1200. This process is important so you will be painting on as smooth a surface as possible. It is then a good idea to wipe the surfaces of the boat down with a damp cloth to remove any of the dust and flakes of metal/wood. Otherwise, you end up painting over them.
You could wash the boat down with a hose but you want to avoid getting the boat unnecessarily wet now that the hull has lost its protective layer. If you are sanding down a boat with a copper paint bottom, you may find the sanding process difficult. Just do your best, it doesn’t need to be 100% perfect. It is important to get as much of the old paint off as possible. Your new paint won’t adhere to the old paint as well as it would to the boat hull itself.
Putting on a layer of primer is not 100% necessary but it is recommended. The idea is that you want your topcoat to adhere to the boat as well as possible, a layer of primer can help you do that. The primer needs to be painted on evenly all over the boat. If you only feel like doing below the waterline, that is fine too. It will save you a lot of time. Putting on the layer of primer is not the most time-consuming part, it is mostly the sanding down that you will have to do. You will need to sand down using the 600 grit paper, then the 800, then 1200. Just like last time. Your layer of primer needs to be as smooth as possible for the maximum adhesion.
Now comes the paint. It is recommended to do at least two layers of paint. One undercoat and one top. Some people choose to go as far as two layers of primer, two layers of undercoat, and three layers of topcoat. This is going to be very time consuming, remember you will need to sand down three times between each layer of paint. You can paint using a brush if you like but is far easier to use a roller. It is also far easier if you employ someone to help you with this stage. It could be your spouse, child, friend, or anyone. It doesn’t need to be a paid professional. It can take a long time to go through this process. Especially if you are effectively doing 8 layers of paint (including primer).
The fastest way to paint, especially if you are on your own, is to use a sprayer. They are easy to use, with a little practice. If you haven’t used one before you may find that you struggle to get an even coat. You should always paint in vertical stripes, not horizontal. Additionally, it is a good idea to have someone following after you with a small brush doing small touch-up jobs. Any unevenness will need to be sanded down and repainted. The whole painting process can take a week if you aren’t efficient.
Take pictures
It is a good idea to take pictures throughout the whole process. This is for future reference. For example, if you take pictures of the boat when you are assessing it for damage, you can compare them to after you have repaired or sanded the trouble spots down. If you cant see the trouble spots still, great! If you can, it will help you keep an eye on them after you have painted too. It’s a good idea to catalog all of these areas if they start to become regular problems you may want to have your boat looked at by a mechanic. You might also like to have a before and after picture for your blog, or just as a personal memento.
Hopefully, you now have all the theory needed to paint your boat. There is a lot more that goes into painting your boat than simply grabbing some paint and a brush. It takes planning, practice, and attention to detail. If you follow this guide you will have no trouble at all. If this is your first time painting your boat, don’t be disheartened if it takes a lot longer than you expected. Speed will come with time, it is far more important to get the job done right than get it done quickly. If you put the work in you will be painting like a pro in no time at all.
Related Articles
I've personally had thousands of questions about sailing and sailboats over the years. As I learn and experience sailing, and the community, I share the answers that work and make sense to me, here on Life of Sailing.
by this author
Repairs and Maintenance
Most Recent

What Does "Sailing By The Lee" Mean?
October 3, 2023

The Best Sailing Schools And Programs: Reviews & Ratings
September 26, 2023
Important Legal Info
Lifeofsailing.com is a participant in the Amazon Services LLC Associates Program, an affiliate advertising program designed to provide a means for sites to earn advertising fees by advertising and linking to Amazon. This site also participates in other affiliate programs and is compensated for referring traffic and business to these companies.
Similar Posts

How To Choose The Right Sailing Instructor
August 16, 2023

Cost To Sail Around The World
May 16, 2023

Small Sailboat Sizes: A Complete Guide
October 30, 2022
Popular Posts

Best Liveaboard Catamaran Sailboats
December 28, 2023

Can a Novice Sail Around the World?
Elizabeth O'Malley

4 Best Electric Outboard Motors

How Long Did It Take The Vikings To Sail To England?

10 Best Sailboat Brands (And Why)
December 20, 2023

7 Best Places To Liveaboard A Sailboat
Get the best sailing content.
Top Rated Posts
Lifeofsailing.com is a participant in the Amazon Services LLC Associates Program, an affiliate advertising program designed to provide a means for sites to earn advertising fees by advertising and linking to Amazon. This site also participates in other affiliate programs and is compensated for referring traffic and business to these companies. (866) 342-SAIL
© 2024 Life of Sailing Email: [email protected] Address: 11816 Inwood Rd #3024 Dallas, TX 75244 Disclaimer Privacy Policy
Service Locator
- Angler Endorsement
- Boat Towing Coverage
- Mechanical Breakdown
- Insurance Requirements in Mexico
- Agreed Hull Value
- Actual Cash Value
- Liability Only
- Insurance Payment Options
- Claims Information
- Towing Service Agreement
- Membership Plans
- Boat Show Tickets
- BoatUS Boats For Sale
- Membership Payment Options
- Consumer Affairs
- Boat Documentation Requirements
- Installation Instructions
- Shipping & Handling Information
- Contact Boat Lettering
- End User Agreement
- Frequently Asked Questions
- Vessel Documentation
- BoatUS Foundation
- Government Affairs
- Powercruisers
- Buying & Selling Advice
- Maintenance
- Tow Vehicles
- Make & Create
- Makeovers & Refitting
- Accessories
- Electronics
- Skills, Tips, Tools
- Spring Preparation
- Winterization
- Boaters’ Rights
- Environment & Clean Water
- Boat Safety
- Navigational Hazards
- Personal Safety
- Batteries & Onboard Power
- Motors, Engines, Propulsion
- Best Day on the Water
- Books & Movies
- Communication & Etiquette
- Contests & Sweepstakes
- Colleges & Tech Schools
- Food, Drink, Entertainment
- New To Boating
- Travel & Destinations
- Watersports
- Anchors & Anchoring
- Boat Handling
- ← How-To DIY
Deck Painting Tips
Advertisement
Here are two ways that you can make your deck a lot less slippery — a smart safety idea for all boaters, young and old.

The stripped old-style J/24 deck before we changed and repainted it. The deck (left) shows the final version after repainting.
Fiberglass is slippery when wet. But you know that, you've slipped on the deck of your boat a number of times. You meant to put nonslip tape on the worst spots, but you never got around to it. So what are your options?
Step 1: Buy 3M Slip-Resistant tape and glue it down. The problem with this approach is that the tape only comes in a few colors and stands out on the boat's deck. It will also collect dirt around the edges, and if it's not properly installed, the edges will lift.
Step 2: Use a pre-mixed product such as Interlux's Interdeck or Pettit's EZ-Decks to create a nonslip area. This is fine except that you might not be able to match the color of your deck exactly and may have to recoat the entire deck. In addition, you might need more grip than Interdeck provides. I've found that a deck coated with Intergrip nonslip particles lasts about three to six years (depending on use) before it needs recoating.
Step 3: Take a DIY approach and use a topside paint to match your boat paint exactly and add enough nonslip particles to be sure that you have exactly the right amount of grip without creating sandpaper that will do a job on your knees and behind. I've found that this method lasts longer than Interdeck or EZ-Decks.

Changes to the deck included fitting a new sliding companionway hatch and sea-hood, a Lewmar forehatch, and repairing rotted balsa core. After repainting, the finished job is shown above right, with some of the deck gear installed.
Painting Interdeck
Painting Interdeck is easy. To get started:
Step 1: Mask off the area to be painted. If desired, you can sand it to give the paint a better grip. Use 220- to 300-grit sandpaper.
Step 2: Wipe down with solvent to remove grease and dirt. For Interdeck, use 2333N solvent.
Step 3: Open the can and mix the paint well. If you wish to make the deck more nonslip, you can sprinkle Interlux's InterGrip onto the wet-paint layer or add it to the can of paint. InterGrip is a polymeric (it contains tiny plastic spheres) nonskid additive available from most chandleries.
Step 4: Roll the paint onto the area to be painted. Use a high-nap roller that can withstand marine paint. If you sprinkle the paint with Intergrip instead of mixing it into the paint, you'll need to cover the area with a second layer of paint.
Step 5: Wait until the paint is almost set up, then peel off the masking tape. Be sure to lift the tape clear of the deck as you peel it; there may be a little wet paint on the tape, and you need to keep it off the deck. Job done!
Step 6: Allow 24 to 48 hours before walking on deck.

Round all the corners using a small paint can or a coin to ensure that the finished job looks professional.
Get It Right
You can color match and make a longer lasting nonskid surface by doing the job slightly differently.
Step 1: Follow steps 1 and 2 above.
Step 2: Set up your paint. You can use Interlux's Brightside enamel (one-part), Perfection, Awlgrip topside paint (both two-part paints), Pettit's topside Yacht Enamel (one-part) or any of the other topside paints. Mix a flattener into the paint. A flattener will take the gloss off the paint, which is advisable because the sun can reflect off a high-gloss deck and make it difficult to see.
Step 3: Roll the paint onto the deck using a high-nap roller.
Step 4: While the paint is still wet, sprinkle it with Interlux's Intergrip or any other microsphere product. (You can use sand, but it will do what sandpaper does to clothes, knees, and shoes, plus the sand particles will eventually work their way out of the paint layer. You can also use crushed walnut shells, but they add a brownish cast to the paint and can be even harder on you and your clothes than sand.) To sprinkle the powder, make a few 1/8-inch holes in the top of the can with a metal fid or marlinspike. Hold the can about 18 to 30 inches above the surface and sprinkle away. No wind is a must when you do this or you'll find most of the Intergrip alongside the boat.
Step 5: Let the paint and Intergrip dry thoroughly. Now roll on another layer of flattened (non-glossy) paint over the nonskid area. This seals in the microspheres and makes the final layer look nice.
Step 6: Let the paint dry until it is almost set, then carefully peel off the masking tape.
Step 7: Allow 24 to 48 hours for the paint to set up hard before walking on it.
How To Install Nonslip Tape Where You Need It
Nonslip tape is usually installed over slippery areas such as on hatches, where it provides grip without blocking too much light. You can also install it on the edge of stairs, any sloping surface, and other areas where the danger of slipping is present.
Step 1: Make sure the area to be covered is clean. Use a proprietary cleaner recommended by the manufacturer to clean the clear part of any hatches. Don't use acetone, which might discolor hatch glazing.
Step 2: Decide where you want to put the tape. Use a grease pencil to mark off areas. Cut tape to length and use a coin to make quarter-circles at each corner. Trim corners around the quarter-circle to prevent them from lifting later.
Step 3: Peel the backing off the tape and press it onto the area to be covered. Press the tape down firmly (stand on it!) to make sure it adheres properly. That's it, you're finished!
Related Articles
The truth about ceramic coatings for boats.
Our editor investigates the marketing claims of consumer-grade ceramic coatings.
Fine-Tune Your Side Scan Fishfinder
Take your side-scanning fishfinder off auto mode, and you’ll be spotting your prey from afar in no time
DIY Boat Foam Decking
Closed-cell foam flooring helps make boating more comfortable. Here’s how to install it on your vessel
Click to explore related articles
Roger Marshall
Contributor, BoatUS Magazine
Roger Marshall is a writer and yacht designer who lives in Rhode Island.
BoatUS Magazine Is A Benefit Of BoatUS Membership
Membership Benefits Include:
Subscription to the print version of BoatUS Magazine
4% back on purchases from West Marine stores or online at WestMarine.com
Discounts on fuel, transient slips, repairs and more at over 1,200 businesses
Deals on cruises, charters, car rentals, hotel stays and more…
All for only $25/year!
We use cookies to enhance your visit to our website and to improve your experience. By continuing to use our website, you’re agreeing to our cookie policy.
Please verify you are a human
Access to this page has been denied because we believe you are using automation tools to browse the website.
This may happen as a result of the following:
- Javascript is disabled or blocked by an extension (ad blockers for example)
- Your browser does not support cookies
Please make sure that Javascript and cookies are enabled on your browser and that you are not blocking them from loading.
Reference ID: be6f0ab6-16c6-11ef-bb4b-ebfc5af17fb3
Powered by PerimeterX , Inc.
- New Sailboats
- Sailboats 21-30ft
- Sailboats 31-35ft
- Sailboats 36-40ft
- Sailboats Over 40ft
- Sailboats Under 21feet
- used_sailboats
- Apps and Computer Programs
- Communications
- Fishfinders
- Handheld Electronics
- Plotters MFDS Rradar
- Wind, Speed & Depth Instruments
- Anchoring Mooring
- Running Rigging
- Sails Canvas
- Standing Rigging
- Diesel Engines
- Off Grid Energy
- Cleaning Waxing
- DIY Projects
- Repair, Tools & Materials
- Spare Parts
- Tools & Gadgets
- Cabin Comfort
- Ventilation
- Footwear Apparel
- Foul Weather Gear
- Mailport & PS Advisor
- Inside Practical Sailor Blog
- Activate My Web Access
- Reset Password
- Customer Service

- Free Newsletter
Pearson Rhodes 41/Rhodes Bounty II Used Sailboat Review

Hallberg-Rassy 42 Used Sailboat Review

How to Perform Your Own Pre-Buy Inspection

Beneteau 323 Used Boat Review

Thinking Through a Solar Power Installation

How Does the Gulf Stream Influence our Weather?

Can You Run a Marine Air-Conditioner on Battery Power?

Preparing Yourself for Solo Sailing

Practical Sailor Classic: The Load on Your Rode

Anchor Rodes for Smaller Sailboats

Ground Tackle Inspection Tips

Shoe Goo II Excels for Quick Sail Repairs

Diesel Performance Additives

What Oil Analysis Reveals About Your Engine

The Best Tools for Bottom Painting

The Hidden Maintenance Problems That Can Ruin Your Day: Part 1

Bottom Paint 30-Month Update

Battle of the Teak Cleaners — Snappy Teak-Nu vs. Star Brite

Are E-bikes Worth the Extra Weight and Cost?

How to Select Crew for a Passage or Delivery

Preparing A Boat to Sail Solo

Re-sealing the Seams on Waterproof Fabrics

Waxing and Polishing Your Boat

Reducing Engine Room Noise

Tricks and Tips to Forming Do-it-yourself Rigging Terminals

Marine Toilet Maintenance Tips

Learning to Live with Plastic Boat Bits
- Inside Practical Sailor
Refinishing Your Boat’s Non-skid Deck

While the consequence of letting your varnish and hull paint to fade is usually no worse than a blow to your ego, you don’t want to let your non-skid deck paint lose its grip. More than a few cruises have been cut short because someone lost their footing on a slippery deck.
Refinishing your boat decks nonskid coating is a big project, but so are the payoffs. Not only does it make your deck look like new, it is a whole lot safer. Here some general tips to help you get more mileage out of a nonskid restoration. For additional research, I’ve posted links to our previous tests of non-skid deck products.
Proper Application
The secret to durable non-skid starts with proper application.
Surface prep: We all know proper surface prep can make or break coatings applications, but it also directly affects the coatings service life. Always follow makers recommendations.
To prime or not to prime? That depends on the deck substrate being painted and the type of paint being used. If the surface is bare wood or bare metal, plan to apply a coat of primer (and a sealer for wood). A one-part primer is often sufficient, but a two-part epoxy primer will offer more durability and hardness. If you are allergic to epoxy, there are some excellent polyurethane primers designed for cars that also have good track records in the marine environment ( PS is currently researching this further and would be interested in hearing from readers who have gone this route). Bare fiberglass requires a dewaxer, scuff sanding, and a coat of primer when applying most paints; however, some paints like Durabak and KiwiGrip recommend primers only for bare metal and wood.
Application: The surface must be clean and totally dry. After sanding, wipe it down with xylene, dewaxer, or acetone. Some paint makers warn against using solvents, so be sure whatever you wipe down with is compatible with the paint. The easiest paints to apply are those one-part paints that have the additive already mixed in. As long as the paint is thoroughly mixed, you can achieve a relatively even finish (see the cardboard trick described below for two-part paints).
When it comes to using a paint with a separate nonskid additive, we recommend combining the mix-in and broadcast methods to get the most uniform grit pattern. Mix the nonskid additive with the paint, roll it on with the recommended nap roller (usually 1/4″ – 3/8″ solvent resistant), and sift more aggregate on the paint while its tacky; once the paint dries, you can brush off the excess and apply a second coat in the same manner. You can make an aggregate shaker by poking a dozen or so holes in the lid of the can with an ice pick, then up-ending it to sprinkle the additive across the deck. Pre-mixed nonskid paint users can also broadcast nonskid additive atop coats of the pre-mixed paint for a more aggressive grip.
Two-part LPU paints like Awlgrip will generally last longer and stay cleaner than textured paints or one-part coatings, but these temperature and humidity-sensitive products can be more difficult to apply for a first-timer. If you are rolling, the makers generally recommend that the additive be sprinkled or sprayed on while the paint is still tacky to achieve an even covering. The excess additive is brushed and vacuumed away and then the surface is recoated with paint (no additive). Following the maker’s guidelines for spray application will generally achieve a more even result.
Although the maker of Awlgrip advises that Griptex, the designated texture additive, should not be mixed into paint when rolling paint, we have done this using a technique shared with us by a Florida boatbuilder who has used this on his own boats for years. If you want to go this route, you should do a few test runs.
The main problem with using a roller to apply LPU paint with the non-skid additive mixed is that the texture tends to clump. This problem is exacerbated by the narrow working window for applying with two-part paints. To avoid clumping and wasting paint, you can use a small sausage roller with a medium to fine fiber nap (3/8″-1/8″). Be sure the roller is solvent resistant. Foam roller covers are not recommended. Carefully measure the desired texture before adding it to the pre-mixed paint, and thoroughly stir the additive into the pre-mixed paint. Before painting, roll the roller across a sheet of cardboard to ensure the paint is evenly distributed across the roller.
To reduce paint waste, we used lint-free 1/8″ solvent-resistant mohair sausage roller covers used for working with marine paints and resins. You can use up to 3/8″ inch roller covers using this technique—but test first. These mohair rollers are lint-free, but to ensure there was no lint, we rolled them over the sticky side of our masking tape to remove an loose fibers.
Work in small section and change rollers frequently. We used a 50/50 mixture of fine and medium grit additive in our Awlgrip. We did not do this with coarse grit, which we assume, would produce more obvious clumping if the paint is not throughly mixed.
A final coat, without grit, sealed the surface. Be sure to keep the coats thin-multiple thin coats are preferred over one heavy coat-and plan to apply the paint when there is minimal humidity. On all but a few tiny sections, the result was an even non-skid that was indistinguishable from a spray-on coating. When we recoat, we will likely do the broadcast method recommended by the manufacturers to see how it compares.
If are looking at ways to prevent slipping on step pads, stairs, or work stations (at the base of the mast, for example) and are not yet ready to embark on a paint project, check out our report on report on non-skid tape .
Taping: Use only high quality masking tape designed for outdoor use. Do not exceed the manufacturer’s recommended service period, otherwise you’re in for a big job removing tape one fleck at a time. Ralph Naranjo evaluated all the leading tapes from the leading manufacturer 3M in his report 3M Masking Tape Matchup . He also included techniques on following tight curves, which are common on non-skid sections.
Curing: Follow the makers recommendation for dry time, and be sure to allow the paint to fully cure before subjecting it to foot traffic. This allows the paint to achieve maximum hardness, making it more abrasion resistant and longer lasting.
Mat Installation: If you’re installing a self-adhesive mat, application is a no-brainer. Just be sure its where you want it before you stick it to the deck; contact adhesives don’t allow the small wiggle adjustments that epoxies do in application.
Testers also learned a few application lessons the hard way when installing nonskid mats with two-part epoxy. The epoxy usually has about an hour of pot life before it becomes permanently stuck to whatever its touching, so clean up any errant epoxy with a solvent as soon as possible.
Its also best to decide on the mats exact location before mixing the epoxy; you can use paper templates to help in this process. Be sure to leave a lip around the mat edge that is free of glue; the epoxy will squeeze into the bare area when the mat is put in place.

Regular Maintenance
Boat bath: Nonskid paints and mats should be cleaned regularly to remove abrasive salt spray and dirt. Wash with standard, mild boat soaps ( PS, January 2013 ) or household cleaners and a soft- to medium-bristled brush. Steer clear of bleach and other chlorinated or acid-based cleaners as they can affect the paints color pigments and UV inhibitors. Be sure to rinse the decks well with fresh water, when possible.
Mold and Mildew: To prevent mold and mildew, you can lightly scrub the surface with an ammonia/detergent solution. To spot clean areas that are heavily soiled or show mildew, you’ll likely need to step up to more aggressive cleaner. Pettit recommends its Bio-Blue 92; the blend of cleaning agents and silica grit also can be used to de-wax or etch during surface prep. Durabak recommends fighting mildew and stains with a disinfectant like Lysol, and KiwiGrip advises using bleach or a mild acid solution to remove mold and mildew stains.
Wax Not: While waxing can breathe new life into topside paint, the paint makers we talked to do not recommend waxing painted nonskid. Most nonskid paints and bead/powder additives have UV protection built in, and the paint formulas include UV absorbers, making waxing unnecessary.
Touch-ups: Address any peeling or worn nonskid paint as soon as possible. Most of the nonskid paints we tested are easily repairable: A bit of scuff sanding, cleaning, and touch-up painting will keep the coating from meeting an early demise.
Longevity expectations
Nonskids life expectancy can vary based on type (paint vs. mats, and paint type), boat location (UV-saturated South Florida vs. overcast Seattle), and how it is cared for. In our non-skid surface tests , the soft-foam mats we tested did not weather as well as more rugged mats like Treadmaster-nor did some one-part paints, but they can be freshened up with a little sanding and a recoat. For example, Pettit reports that EZ-Decks should perform well in Florida for about three years before needing a recoat.
A properly applied two-part LPU should deliver at least five years before needing recoating—you could get as long as ten. Less viscous polyurethanes like Durabak and KiwiGrip claim to last a decade, but in our experience with Durabak, five years is the maximum in the marine environment.
Practical Sailor Non-skid Tests
Over the years, Practical Sailor has conducted dozens of test comparing painted-on non-skid exterior coatings. We’ve also compared the heavy-duty textured mats, including faux teak and cork, that are applied with adhesive. Three long-term tests of these coatings and mat products are still ongoing.
Here is a summary of what we found so far:
For long-term use, a two-part polyurethane (LPU) paint with a textured additive will provide the most durable exterior non-skid surface. Among the two-part LPU paint kits that scored the highest in our past tests were Awlgrip Griptex additive (with Interlux Perfection) and polypropylene beads (with Epifanes LPU). Triflex Treadmaster was our top contender among the adhesive mats, although it had become extremely hard, almost brittle, after 10 years.
Among the textured paint products, Durabak has since been eclipsed by Kiwigrip and Interlux Interdeck for durability.(See Do-it-Yourself Nonskid Options , PS November 2013, and Non-skid Ten Years After .) We are currently looking at two relatively new products on the market, Pettit Tuffcoat, a rubberized textured coating with a two-part epoxy primer. And TotalTread, from Totalboat, a ready-mixed, slip-resistant polyurethane non-skid deck paint with texturing agents. Tuffcoat is effectively a marine version of a product that is popular for coating the beds of pickup trucks, and TotalTread is representative of the moderately priced, easy-to-apply, non-skid coatings.
We are also working on a 10-year update on faux teak vinyl mats. So far, the results are very similar, and our long-term testing has not yielded any big losers or winners. The budget-priced Plasdeck and Permateek had slightly grippier surfaces in our initial test. The thicker Dek-King and Flexiteek products were slightly cooler. Testers were also impressed by the cork infused Marinedecks grip and durability.(See Synthetics Go Toe to Toe , PS December 2015).
Remember that non-skid surface is only one element to onboard safety. Even the grippiest deck is of little use if you have to creep around shrouds, hurdle over cockpit coamings, or move around deck with nothing to grab. As you ponder your non-skid options, consider taking inventory of your boat’s ergonomic features, as described in Tech Editor Drew Frye’s report, (“ Tall-step Syndrome ,” PS February 2016).
If you are in the market for a new or used boat, be sure to look at Ralph Naranjo’s report on cockpit ergonomics (“ A Practical Look at Cockpit Design ,” PS April 2012 ).
Finally, if you are looking into breathing new life into an old boat with a cosmetic makeover, our recently published 4-Volume e-book “ Painting Your Boat From Bottom to Top ,” compiles and updates more than a decade of research and hard-won experience on marine coatings.
RELATED ARTICLES MORE FROM AUTHOR
Leave a reply cancel reply.
Log in to leave a comment
Latest Videos

An Italian Go Fast Sailboat – The Viko S 35 |...

What Is The Best Folding Bike For Your Sailboat?

The No Expense Spared Antigua 60 Cruising Sailboat Soolaimon

How To Buy Sails – With Joe Cooper
- Privacy Policy
- Do Not Sell My Personal Information
- Online Account Activation
- Privacy Manager
- International Marine Coatings
- International Protective Coatings
How do you paint non-skid decks?
Although there is no single, universally proven deck surface that will prevent people from slipping on a boat deck, a low-cost, slip resistant finish gives added protection and can be easily applied. Find out how below.
Interlux now offers three solutions for refinishing a non-skid deck:
- Stir and apply Interdeck – a pre-mixed, slip resistant, single component, ready to use deck paint that can be applied over Prekote primer or Epoxy Primekote primer 404/414.
- Mix your own non-skid finish: any one of the Perfection or Brightside Polyurethane finishes can be transformed into a non-skid deck finish by the addition of Intergrip Polymeric non-skid compound 2398. Intergrip is made from small plastic spheres that have regular shape, low tendency to collect dirt and excellent non-slip properties. Once Intergrip has been added to paint general application directions are followed, except there is no need to sand between coats. Our two part polyurethane, Perfection, provides the most durable and long lasting finish for decks.
- Hand Broad casting method - while the first of paint is still wet, sprinkle the Intergrip as required to obtain the texture of your choice. It is best to put the Intergrip in a flour sifter or salt shaker to dispense the compound. Avoid heavy application which will not assist in providing a more slip resistant surface. After the paint has been allowed to dry overnight remove the excess Intergrip and apply the second coat of paint.
Paint your boat like a pro
Find the best products to keep your boat in great condition
Get all the support you need to paint with confidence
Benefit from our continuous innovation and scientific expertise
Select your country
Our products and guidelines are customised for each country. Please select yours below.

- Canada Canada
- United States United States

Asia Pacific
- Australia Australia
- New Zealand New Zealand
- Singapore Singapore

- België Belgium
- Hrvatska Croatia
- Danmark Denmark
- Suomi Finland
- France France
- Deutschland Germany
- Ελλάδα Greece
- Ireland Ireland
- Italia Italy
- Nederland Netherlands
- Norge Norway
- Portugal Portugal
- España Spain
- Sverige Sweden
- United Kingdom United Kingdom

Middle East & Africa
- South Africa South Africa
- Türkiye Turkey
Who's painting?
Choose one of the following to tailor the site to your needs.
- Join Insider
Follow This Old House online:
Site search, 5 best deck paints (2024 guide).
We may be compensated if you purchase through links on our website. Our Reviews Team is committed to delivering honest, objective, and independent reviews on home products and services.
An inviting and comfortable outdoor space starts with quality deck paint. Not only does deck paint bring color to your backyard, but we’ve also found that it helps protect hardwood decking against damage caused by foot traffic, sun exposure, varying temperatures, and inclement weather While applying a protective layer of paint to your outdoor areas is a good start to extend their usable lifespan, it’s important to select a deck paint that fits your climate, wood type, and personal preferences.
Overall, the price of deck paint can depend on the type, quantity, and brand, but you can usually expect to spend between $25-50 for a one-gallon can of deck paint. It’s important to note you may need more than one to cover your full deck with multiple coats. After examining over 50 of the top deck paints available and reading over 400 customer reviews, our top overall pick is the KILZ Interior and Exterior Latex Floor Paint , which covers 300-400 square feet and is designed for use on wood and concrete patios and walkways. Read our guide below for more of our top picks.

Best Overall KILZ Latex Floor Paint

Best for Pool Decks INSL-X Anti-Slip Paint

Best Deck Stain and Sealer Ready Seal Stain and Sealer
Top 5 Deck Paints
- Best Deck Paint Overall: KILZ Interior and Exterior Latex Floor Paint
- Best for Pool Decks: INSL-X Acrylic Anti-Slip Coating Paint
- Best Deck Stain and Sealer: Ready Seal Exterior Stain and Sealer
- Most Eco-Friendly Deck Paint: Montage Signature Eco-Friendly Indoor and Exterior Paint
- Best for Old Wood Decks: Rust-Oleum Marine Topside Paint
Compare Top Deck Paints
Best deck paint overall.

KILZ Interior and Exterior Latex Floor Paint
Prices taken at time of publishing.
- $47.98 at Amazon
What Are People Saying About KILZ Interior and Exterior Latex Floor Paint?
We found that customers who were happy with this product liked that it was easy to spread, didn’t dry up easily, and was not slippery. However, we also found that others felt that this product was less durable than they were hoping, and others said that it peeled off too easily.
Best Pool Deck Paint

INSL-X Acrylic Anti-Slip Coating Paint
- $52.99 at Amazon
What Are People Saying About INSL-X Acrylic Anti-Slip Coating Paint?
We noted that customers who were impressed with this deck paint said that it was easy to use, had a rich color, and dried quickly. However, our team also noted that some customers who left negative reviews said this paint had an uneven finish, and others said the color didn’t match what they were expecting.
Best Deck Stain and Sealer

Ready Seal Exterior Stain and Sealer
- $170.37 at Amazon
What Are People Saying About Ready Seal Exterior Stain and Sealer?
We noted that impressed customers liked this deck paint’s stylish design, straightforward application, and long-lasting results. On the other hand, we also found some customers that felt it wasn’t a good choice for high foot traffic, and others had issues with the packaging, saying it arrived damaged and was difficult to get out.
Most Eco-Friendly Paint

Montage Signature Eco-Friendly Indoor and Exterior Paint
- $27.99 at Amazon
What Are People Saying About Montage Signature Eco-Friendly Indoor and Exterior Paint?
Our research showed that customers who were impressed with this product liked that it had a large coverage area and how evenly it applied. Several others also were impressed with the texture and rich color. However, we did also find some customers that felt this paint didn’t match the color they were expecting, while others found that it had an overwhelming smell.
Best Deck Paint for Old Wood

Rust-Oleum Marine Topside Paint
- $27.98 at Amazon
What Are People Saying About Rust-Oleum Marine Topside Paint?
We found that customers who liked this product said it was long-lasting, durable, and dried quickly. However, we also found other customers who said this product was difficult to clean, and others said it did not cover as much area as advertised.
Best Deck Paint Brands
When shopping for deck paint for your next home improvement project, it’s important to select a reputable brand that’s known for delivering quality deck paint. Here are four top-rated brands we recommend keeping in mind when purchasing deck paint.
Behr is a renowned paint and stain brand that offers a wide range of products for both interior and exterior use. Its outdoor paints and stains are available in various finishes, colors, and sheens to match your desired look. BEHR products are widely available and easy to apply and maintain, making them a great choice for DIYers and professional painters.
Benjamin Moore
Benjamin Moore, a leading paint company that has served homeowners for over 100 years, provides exterior paint solutions through its owned and operated brands, including INSL-X. The company’s outdoor paint catalog is designed to cover a variety of surfaces like asphalt, metal, tile, and wood so that all of your home’s outdoor areas are protected.
KILZ is an American company that has provided paint and primer products for over 45 years. The brand is known for its quality exterior paints like the KILZ Interior and Exterior Latex Floor Paint, which is an all-purpose outdoor paint great for any deck or patio. To simplify the deck painting process, the company even offers an all-in-one paint and primer that cuts down on working time while delivering a long-lasting coat.
Providing rust- and water-resistant paints for almost 100 years, Rust-Oleum is a trusted paint company suitable for almost any outdoor area. Specializing in protective paints, the company is well-versed in creating high-quality, long-lasting paint that works for commercial and residential customers nationwide.
Sherwin-Williams
Ranked number one in customer satisfaction for interior and exterior paints by J.D. Power, Sherwin-Williams is a top-rated paint company that provides affordable and effective outdoor paints for your deck or patio. Offering exterior paints in a variety of sheens and formula bases, Sherwin-Williams has many options suitable for your outdoor area.
Additional Items You May Need for Painting Your Deck
An important first step to protecting your deck is selecting suitable paint. However, once the paint is picked out, our team found that a few additional items may be needed to prepare your deck for your next outdoor gathering.
In addition to a high-powered pressure washer , here are a few tools and accessories that’ll help you prepare, paint, and finish your deck.
Dumond SmartStrip Advanced Paint Remover
Check Price
If your wood deck is currently stained or painted, use a stain and finish stripper to prepare the wood for a fresh coat of paint. This paint remover from Dumond helps you do just that with its odor-free and biodegradable formula that removes existing paint layers. Once the remover has penetrated your deck, you can use a floor scraper to remove the deck’s peeling layer.
Yanyi Moldable Epoxy Glue
This easy-to-use epoxy glue is hand-kneaded and applied directly to any noticeable cracks or breaks in your deck’s surface to help you apply the paint evenly to the surface. After applying the epoxy, you’ll want to use sandpaper to polish any inconsistencies in your deck caused by the epoxy or weathered wood.
Scotch Exterior Surface Painter’s Tape
This painter’s tape is designed to adhere to rough outdoor surfaces, providing a protective boundary between your deck and finished surfaces like brick or siding. The product contains a strong adhesive that can stick to your deck for up to 10 days to last the length of your project.
Bates 11-Piece Home Painting Supplies
Equipped with roller frames, roller naps, paintbrushes, and a paint tray, this Bates painting kit comes with the necessary tools to apply your paint to decking boards, handrails, and stairs. To speed up the painting process, Bates offers a telesco p ing extension pole to help keep you upright and walking while painting wooden decks.
Factors To Consider Before Buying Deck Paint
When deciding on deck paint, it’s important you consider several factors to ensure you’re buying the best product for your specific needs. Start off with determining how much coverage you need and if you prefer water-based or oil-based paint. From there, you can narrow down your options by looking at the drying time, surface sheen, and protective qualities of each individual product. Read our buying guide below for more information on selecting the best deck paint.
How much coverage does deck paint typically provide?
Coverage refers to how much square footage a single can of paint covers. The amount of coverage provided depends on a variety of factors, including the painted surface’s texture and the tool used to apply the paint. Typically, coverage ranges between 200–500 square feet.
What is deck primer in relation to deck paint?
While the durability of your selected paint relies on its water or oil base, you can extend its life by preparing your deck with a primer. Primer is applied before your chosen paint and works to ensure the wood is protected and prepared for a finishing layer.
What is the typical drying time of deck paint?
The drying time of paint relies on several factors, like the type of paint and the outdoor temperature and humidity. Depending on the paint, dry times can range from four to 24 hours. To ensure that your paint dries properly, refer to the manufacturer’s instructions for information on optimal air temperature, humidity, and sun exposure.
What protective qualities does deck paint usually have?
Many outdoor paints contain additives that help protect the deck coating from wear and tear caused by high-traffic areas or poor weather conditions. One popular additive is acrylic paint, which increases flexibility and weather resistance. Paints contain different percentages of added acrylic, though more expensive paint usually consists of a higher percentage for a longer-lasting finish.
Other common additives in paint include UV ray- and mildew-resistant additives designed to target areas that receive direct sunlight or heavy rainfall.
What does surface sheen refer to in deck paint?
“Sheen” refers to a paint or finish’s glossiness, which can range from a dull, flat or matte finish to a shiny, high-gloss look.
Typically, flat finishes are used on large exterior wood surfaces to hide surface scratches and blemishes. High-gloss paints are easy to clean and are used mostly on decorative surfaces like doors or fixtures.
What are the differences between water-based and oil-based deck paint?
When using outdoor paint, your options include water- or oil-based products. Water-based paint, oftentimes referred to as latex or acrylic paint, has a more flexible consistency than its oil-based counterpart and is far easier to clean up. This allows the paint to maintain its look through seasonal changes in the wood and better remove trapped moisture.
While oil-based paints tend to crack and blister over time because of their inflexible nature, they’re more resistant to low temperatures than latex paint. Oil-based paints generally cover more surface area than their latex counterparts, so a second coat isn’t always required.
Deck Paint FAQ
How long should my deck paint last.
The number of years your paint lasts varies based on factors like where you live and surface usage, though multiple coats of high-quality exterior paint should last 10–15 years.
Should you paint or stain your deck?
The choice to stain or paint your deck comes down to preference. If you’re looking for a simple protective solution that requires minimal work, staining is a solid option. Deck stains are usually applied in a single coat and have a runny consistency that makes them easy to spread over wooden panels.
If you’re looking for a longer-lasting solution and don’t mind the added cost or work, paint may be a better option. Paint comes in a range of colors and usually creates an easy-to-clean surface that makes deck maintenance simpler.
Can you paint over existing deck paint?
Yes. However, it’s important to remove any cracking, bubbling, or peeling paint before a new coat is applied. This can be done using a paint scraper or sander and is an important pre-painting step that ensures the paint properly bonds to your deck.
Check out Mark Power’s step-by-step video tutorial below for thorough instructions on restoring your deck.
How We Selected the Best Deck Paints
To provide our readers with the best deck paint recommendations possible, we rely on several key sources of information to help guide our selection process.
Initial Research : Our research process began by generating a list of deck paints with a significant number of verified-buyer reviews and an average customer review rating of 4–5 stars. We looked at positive and negative reviews alike, focusing on information from both satisfied and critical buyers.
Expert Insights : Through our years of experience, we’ve learned that listening to what others have to say is key to building accurate, well-rounded articles. To complement our in-house expertise, our team looked at reviews and videos from trusted publications and independent testers, spoke with subject matter experts, and drew insights from reader contributions.
Final Product Selection : We then began fine-tuning our list by replacing older models with the latest versions and eliminating any discontinued models. From there, we pared the list down further by comparing each model’s feature set and selecting the best-in-class options for various buyers, budgets, and scenarios.
Why You Can Trust Us
This Old House has empowered homeowners and DIYers for more than four decades with top-notch home improvement advice in the form of television programs, print media, and digital content.
Our team focuses on creating in-depth product and service review content. To date, we’ve published countless reviews of garden, lawn, and outdoor products—from fertilizer and garden hoses to patio furniture and snow blowers.
Once we conclude our research, we craft a comprehensive, user-friendly article of recommended products and additional information to help our readers make the right purchase.
Questions or Comments?
To share feedback or ask a question about this article, send a note to our Reviews Team at [email protected] .
Next Up In Painting
- How Deck Stain Protects Wood
- Celebrating Craftsmanship | Stephanie’s Pro Image Painting
- How Paint Color Can Brighten A Room
- Two-Tone Kitchen Pantry Design
- Mauro’s Take on Paint Color Choice
- How to Paint Pine Paneling
Sign up for the Newsletter
Get the latest This Old House news, trusted tips, tricks, and DIY Smarts projects from our experts–straight to your inbox.

6 Best Boat Deck Paint – (Reviews & Buying Guide 2021)
Ah, imagine if the pirate ships a few centuries ago were able to paint their decks in various colors. Boating wouldn’t have been so gloomy, right? Luckily, today we can put whatever nuance we want on the floor of our boat, but to do so, we need to obtain the best boat deck paint available.
So here, we are giving you this extensive guide on how to purchase the right product but also how to carry out your deck painting project. Before you get to our tips, make sure you check out the reviews of boat deck paint that we have compiled because your project will be doomed without the most suitable paint for your needs.
Best Boat Deck Paint Comparison Chart
Best boat deck paints (new list 2021).
So, check out the paints that we have selected, but don’t assume that No. 1 may automatically be the best one.
1. TotalBoat Non-Skid Deck Paint

The finish won’t get scratched or wear away if you scrub it. Apart from applying this product on your boat deck, you can use it for stairs, docks, swim platforms, floors, and everywhere else you need secure foothold.
One galloon will be enough to cover 250 to 300 square feet. Keep in mind that it is advisable to apply two coatings to make the traction more efficient. You can use either a brush or a roller to put this paint on wood, fiberglass, or painted surfaces.
The product comes in four colors, which are suitable for boat decks.
- An advantage of this product is that it withstands not only the weather conditions but also scrubbing and cleaning.
- Since this paint is less abrasive than sand impregnated coatings, it is easier to sweep off.
- This deck paint is easy to apply and adheres well if the surface has been adequately prepared beforehand.
- You can cover around 300 square feet with one galloon, which is more than what similar products offer.
- The time needed for the paint to fully solidify is pretty long. It may take from 2 to 3 weeks, depending on the air humidity.
- As it has an oil base and it is pretty thick, the paint cannot be applied by spray gun unless you thin it.
2. Rust-Oleum Anti-Slip Additive

To understand the effect of this anti-slip better, you can imagine that you add fine white sand to the latex or paint. The texture of this product resembles pumice, which is the reason it makes the surfaces covered with it non-skid. You can be assured that the anti-slip features of this material will be active as long as the coating exists.
If you intend to apply the mixture of paint and this additive on waxed materials, you have to remove the wax first. Make sure that you have prepared the surface well, and it is clean and dry.
- Being mixed with paint or latex, this additive is easy to apply.
- This substance has proved to be durable – its anti-slip effect lasts as long as the coating does.
- The Rust-Oleum additive doesn’t change the color of the paint.
- You can put this product on floors to make sure that they are not slippery because it makes the surface it covers anti-skid
- If you add this additive to top coating, its grains may capture grime, which will make your deck look dirty.
- The surface covered with the mixture of paint and this anti-slip appears to be rough on bare feet.
3. Liquid Rubber Deck Sealant

There is no need to mix the paint with any other substances, and you can apply it by roller, sprayer, or brush. Thanks to its liquid rubber polyurethane formula, this coating makes the surface it covers resistant to water and UV rays.
The area that one gallon can cover is approximately 100 square feet. The manufacturers recommend applying from 2 to 4 coats, especially if the surface is waterproof. Keep in mind that due to the time required for the paint to dry, you cannot apply more than two coats per day.
Depending on how the coating is treated and on the weather conditions, its life expectancy can be from 5 to 10 years. Before applying the sealant, make sure that the surface is clean and dry.
- This product comes in a variety of colors.
- You will be surprised how easy it is to apply this sealant.
- Thanks to the liquid rubber it is made of, this coating bonds very well to the surface.
- Unlike similar products, this one dries quickly.
- You are not advised to apply this paint if the weather is too hot.
4. Kiwi Grip Non-Skid Deck System

The second reason is that it is very convenient to apply this coating using the KiwiGrip roller. Not only will you cover the surface with this tool with only one coat, but there won’t be any need for additional fillers. What is more, there won’t be any traces of shells, rubber particles, or sand on the covered surface.
The third reason which makes this product worthy is the fact that it is eco-friendly because it is water-based. This coating comes in 5 colors you can choose from.
- The product comes with a KiwiGrip 4-inch roller.
- You can save money using this material, as you will need only one coat of it.
- Its water base makes the Kiwi Grip eco-friendly.
- This substance makes the surface it covers anti-skid.
- As the KiwiGrip is not a sealed paint, you will have to prime any aluminum surface before you put the coating.
- If you want to have the non-skid effect that this product offers, you have to apply it only using the KiwiGri roller, which is a limitation as some people may prefer brushes or sprayers.
5. Rubberseal Liquid Rubber Coating

here are four colors you can choose from. If you need another color which is not offered, you can use elastomeric paint. Keep in mind that it is advisable to apply two coats of the rubber seal. Make sure that the surface is clean of dirt or residue and dry before you put the coating.
An advantage of this product is that it features elongation, which means that it will expand and contract with the expansion and contraction of the material it covers. Even though this coating has a slight odor, it is not unbearable. Since this rubber seal is water-based, it won’t bond to wood or any oil-based surfaces.
- This product has an EPA star rate, and it is resistant to UV exposure.
- You can easily apply the coating by roller, brush, or sprayer.
- Being pretty thick, this material adheres well to the surface and protects it from water.
- The manufacturer offers four colors of this coating.
- It takes around five days for the coat to be ready, and you need to make sure the weather is hot during this period.
6. Interlux Slip Resistant Deck Paint

Bear in mind that it is recommended to apply two coats of the paint for better results. Interlux is one of the manufacturers who offer very handy to use non-skid paints. The easiest way to do it is by roller. A disadvantage of this product is that the lighter colors get dirty quickly, and the dirt is hard to come out. This effect is caused by the small grains that the paint consists of, which gather grime.
- This Interlux paint is easy to apply and provides a good grip.
- You can walk safely on a floor covered with this material as it is non-slippery, but at the same time, it is not rough on your bare feet.
- Interlux offers four colors you can choose from.
- The paint doesn’t reflect the sunlight glare.
- The white paint gets dirty quickly because of the little grains that gather the dirt.
Importance of Having a Non-Skid Boat Deck

So how do we achieve that effect, and can it be a DIY project? It absolutely can be, and there are two main ways to have a non-skid deck.
- Use a can of designated non-skid paint
- Mix a non-skid additive with your color.
The latter will require you to purchase two materials while the former will allow you to deal with the whole project just by using a can of paint. Both options are worth exploring because we simply have to be aware of all the benefits of non-skid deck applications .
When we talk about the boat deck, the surface you are painting will likely be wood or fiberglass. Some people also go for rubber boat flooring.
The hull of the boat may be made of aluminum but definitely not the deck. Still, the body will also require painting, so you might as well jump to our reviews of the top paints for aluminum boats and see if you like our picks.
How to Paint my Fiberglass Boat Deck?

- Select the right paint
This is why we have compiled the reviews and the top list above. We suggest you pick one of the selections and go with it. If you go with a topcoat paint, you will also need to get an additive. The two-part polyurethane products eliminate the need to do so.
We will follow the steps of painting a deck using either of the options. Only towards the end, the stages differ from one another. There is also a third option which we will not outline – purchasing a paint which has been pre-mixed with some powders. We don’t have such a product on our list because we don’t think the quality is exceptional.
- Preparation
This is an essential part of your project. Ys, many people suggest that the actual application of the paint matters because inexperienced people can make it look ugly. While this is correct, experienced pros will also achieve poor results if they work on a poorly prepared surfaced.
Do you know what Marcus Aurelius said? The secret to all victory lies in the organization of the non-obvious. This is why we will devote a little bit more time to this stage of the project and will list some of the things you have to pay attention to.
- Start by deciding where you will conduct the whole paint job. We don’t suggest you do it outside. It is best if the boat can be indoors and even out of the water. Some vessels can have the panels of the deck removed. This will allow you to paint piece by piece and then have them installed back. In any way, find a shelter that is large enough and has sufficient amounts of airflow.
- Don’t paint early in the morning or late in the evening. We recommend you do that before noon because this is the optimal time for any paint to cure. During the evening, the moisture levels will rise and will slow down the process of drying.
- We at The Marine Mag know how to take care of a boat. Check out our boat detailing page for more info. Until then, remember that if you prepare things correctly, you will have less work after you finish painting. Masking is an integral part of the procedure, and you must be very careful with it. Make sure you do not leave any air under the tape and also be careful to create straight lines. We suggest not to don’t rush it.
- Become familiar with the instructions. Diluting your paint or not using the correct amount can result in disastrous outcomes. Don’t underestimate the information on the can. After all, the manufacturer will know best exactly how to mix the paint. They’ve conducted the tests for you.
We got a couple of tips related to sanding as well. This is also a crucial stage because if not done correctly, you will notice that the paint may look different in some areas. The good thing is that once you paint using a non-skid paint, you won’t need to sand for any subsequent paint project on that surface.
But if that’s the first time you are painting the deck, then roll back your sleeves and get to work. We recommend using an automatic sander. The ones that rotate in random directions are the best. No need to push hard – let the machine do the work. You can also use a palm sander, but such an item will be good for the edges or some hard-to-reach spots.
This is another tool on which you don’t want to go cheap. Use it generously because once the sander wears off, it’s really no good. Applying a new brand-new sander is always very useful, so once you feel like the paper is thinning, change it.
- Clean before you paint
After all the sanding and masking, you will surely see plenty of dust on the deck. Never neglect cleaning the area before you whip out the can of paint. Make sure you sweep or vacuum every little piece of dust because the filthy surface is impossible to paint, and your project will be a grandiose failure.
This is where we suggest you check out our pro reviews of the top boat cleaning brushes . You cannot own a boat without having a brush around. See the most popular products and pick one.
Applying the Paint on the Deck
And now we get to the meat of things. This is where the situation changes a little bit because you may have opted for a paint that has its own non-skid properties. Your other options are the classic one, where you will have to mix the paint with an additive. So let’s begin with that choice and outline the process of using a powder.
Using a non-skid additive with your boat deck paint
The exciting thing here is that this subsection is divided into even more possible choices and steps. They are all related to how you want to have the paint, and the additive mixed. You got three main choices.
- Paint the surface using your regular coat and then use a strainer to distribute the powder on the surface. You will have to wait for the paint to cure a little bit and then blow the powder that hasn’t stuck away. Then, apply the second coat and seal the powder between the two layers of paint.
- Your second option is to simply use your hand and spread the additive over the paint. This is similar to what you do when you season your food. You just have to be careful to distribute the material evenly.
- The trickiest option is to mix the additive and the paint before application. This will yield the best results, but it can also turn into a catastrophe. You must be sure you are aware of the proportions because otherwise you risk using too much or too little powder. In the first case, applying the mixture will be a nightmare as your roller or brush will likely get clogged with the additive. In the second case, you will barely achieve any non-skid effect.
Using a two-part paint where extra material is not required
Some paints (even on our list) do not require the use of powder to create non-skid substance. This is quite the advantage, and the whole project may turn out to be a simpler one.
- Use a brush and start applying the paint at a shallow angle. Put down as thick of a layer of paint as possible.
- This paint should come with a unique roller with an advanced grip. This is not your typical foam roller but a curly one, which is used only to create the texture. It is essential to remember that part. You don’t use the roller to distribute pain but only to texturize it. Go over the surface a few times and in different directions so that you can achieve a uniformed pattern.
- Wait for it to cure and remove the tape. You’re done!
This is where we will say “goodbye” only to hope to see you again in one of our other guides. The Marine Mag team is sure to have helped you in your search for the best boat deck paint . If you have any doubts regarding a specific product, by all means, read or reviews of boat deck paint once more.
Tell your friends and family about us and leave us a comment. Your feedback is much appreciated, and it makes us always move in the right direction. Thanks for reading!
Leave a Comment Cancel reply
Save my name, email, and website in this browser for the next time I comment.

Ridetheducksofseattle is reader-supported. When you buy through our links, we may earn an affiliate commission. Learn more
The Best Boat Deck Paints (Non-skid, Fiberglass, Wood & More)
Written by Anthony Roberts / Fact checked by Jonathan Larson

Unlike indoor areas, the boat deck is exposed to various elements such as rain, sun, and wind. The wear and tear of frequent sailing is another thing to worry about. So, it’s a good measure to settle for the best boat deck paint. To get it, you have to be certain of the following factors:
- Protection: A stunning finish is a normal thing to expect from boat floor paint. But it’s also crucial that it guarantees the safety of those who step on the boat’s floor. It needs to have water and slip resistance like epoxy boat floor paint. When the paint is not easily washed away, peeled, or cracked, it protects decks and surfaces well.
- To establish a slip-resistant surface, paint texture and formula are the components. Non-slip deck paint can also be applied to accessories like deck chairs where you can sit comfortably.
- Color: Color plays a big role in promoting a lovely finish that suits your deck. It won’t be hard to pick the one that you like since there’s a wide range of available colors. Just so you know, the white color will allow you to be barefooted since it remains cool even under the sun. When you choose dark-colored deck paint, it’s advisable to wear your shoes even onboard.
- Durability: The paint for the boat floor must be tough enough to bear foot traffic, UV rays, and rough weather conditions. For example, the best non-skid boat deck paint creates a durable finish that doesn’t cease to protect.
Now that you are aware of the factors that you have to take note of, look through these boat deck paint reviews to choose one that suits you.
TotalBoat Deck Paint
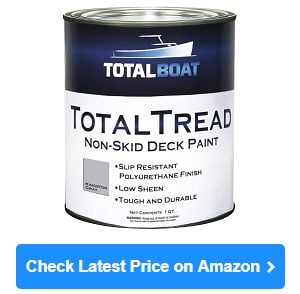
Jump to Review
Rust-Oleum 206999
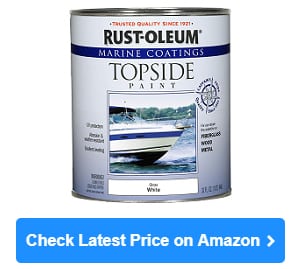
KiwiGrip Non-Skid Coating
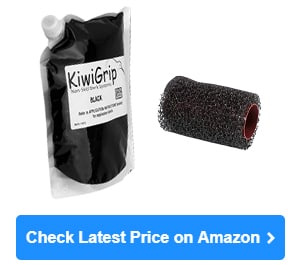
Table of Contents
1. TotalBoat TotalTread Non-Skid Deck Paint
2. rust-oleum 206999 marine topside paint, 3. kiwigrip non-skid coating, 4. totalboat 365399 wet edge marine topside paint, 5. liquid rubber smooth polyurethane deck coating, 6. rust-oleum 207009 marine anti-slip additive, 7. tuff coat ut-211 light gray non-skid coating, buyer’s guide, what kind of paint should i use on my boat deck, how should i prepare my boat deck before painting, how do i paint a fiberglass boat deck, how do i paint a wooden boat deck, top 7 boat deck paint reviews.
The tiny plastic beads make this stand out among anti-slip paints. They are way better than sand mixed and are so small you can’t easily spot them. Once the paint dries, you’ll be happy with a durable, textured surface. This is not only paint for fiberglass boat decks as it can adhere to wood, metal, aluminum, and previously painted surfaces, too.
The silica in this formula makes the finish easy on bare feet. I like how the surface isn’t slick after a water splash or rain. As mentioned, it’s durable so peeling and fading won’t occur. Although scrubbing is done for maintenance, I and my crew can still have a secure footing without compromising comfort.
I’m more than satisfied with its effect on the deck and cockpit of my boats. Hence, I used it in replacing the old Spalding basketball backboard that has been rotting for years. It made my son who’s crazy about basketball so happy! It’s been a year since I did this project, and this proves that it can protect the wood from warping.
Every purchase of this non-skid deck paint comes with gloves and a stir stick. Before application, it needs to be mixed properly. To ensure that I do it efficiently, I use a drill mixer. I must say that two coats are essential as the first one may show inconsistent layers, especially where the particles are only contained in a certain area. It’s fixed by the second coating.
- Creates a durable, textured finish
- Not slick even splashed with water
- No peeling and fading
- The tiny particles are not sharp
- Protects wood from warping
- Can revive and maintain a fiberglass
- Needs to be mixed well to achieve the desired result
- Two coatings are a must
I’ve heard from the boaters in my area that they use it for their boat hulls. The description recommends it for above the waterline use, so I ventured to have it on my deck. To my delight, it serves well as a boat floor coating. I was amazed when I saw it cover cracks and scratches. I love the smooth finish with a display of elegance too. On top of these benefits, it’s boat deck paint on a budget.
The gloss is just right because I think it can be slippery if it’s too glossy. It’s just my opinion on its finish that is akin to hard plastic. Apart from fixing and enhancing fiberglass, wood, and metal surfaces, it builds a protective layer against UV rays and bad weather conditions.
My boats and marine accessories are not the only ones that benefit from this quality deck paint. My once butterscotch-colored bathtub turned into its original white color after I applied it. It bonds well with the fake granite countertop in my kitchen. Therefore, it’s dependable for every painting job.
- Can cover cracks and scratches on fiberglass
- Smooth finish with enough gloss to not make surfaces slippery
- Creates a protective layer against UV rays and bad weather conditions
- Can be applied on fiberglass, wood, and metal surfaces
- Used in different painting jobs
- Levels well and can be sprayed or applied manually
- Needs to be thinned out to dry quickly
- Has a strong scent
Restoration of my 15-foot bass boat is a success because of this non-skid paint. I made the right decision of replacing the carpet on my deck with anti-slip decking paint. Aside from the bass boats and aluminum boats, this can bond on fiberglass surfaces. You may apply it on a wooden deck but you have to prime the area first. Also, it can stick on concrete.
I can say that this is the best paint for the boat deck because I can control the texture. I prefer just a little texture so it won’t be bothersome to my feet. Enough traction is what I need to prevent slipping and other accidents on wet decks. You can practice on a scrap piece to get the texture that you like.
There are black and pastel boat deck paint colors to choose from you. The light colors are selected so the non-skid properties are not destroyed. I’m even more impressed when I found out that it can cover scars and dings. Thus, I didn’t think twice about using it on my 30-year old boat that was not in use for many years. You don’t have to hesitate to include this in your kit to restore water vessels.
- Can be on metal, aluminum, fiberglass, and wood surfaces
- You can make your preferred texture
- Prevent slipping even though the deck is wet
- Covers scars and dings
- Good for water vessel restoration
- The need to move fast working under hot weather to be able to level the finish

The deck area is where people usually walk going back and forth. Due to this, I can be at ease with the durable and glossy finish of this product. It creates a beautiful layer that is resistant to scratches, abrasion, and chemicals. I can attest that this paint can last for many years and repainting doesn’t need to be done frequently. Most importantly, the durability gives me peace of mind.
The thick finish can let the old boats regain a new look. I even used it to correct the recent paint job done by the previous owner of the boat that I bought. After the vessel is painted, it stands out when it sits beside other boats.
Aside from being the paint for fiberglass boat floor, it’s applicable for metals, wood, and previously painted surfaces. So, you can have it as a pontoon deck paint. Several people use it to maintain their swimming pools in presentable condition. The manufacturer is right when introducing this as submersible because the paint stays the same even when it gets wet.
- Creates a durable and glossy finish
- Resistant to scratches, abrasion, and chemicals
- The thick finish is useful on old boats and fixing painted surfaces
- Can be on different surfaces
- Not easily tainted when it gets wet
- Can dry quickly
- It can sag or run when not applied thinly
I was desperately looking for marine paint for wood decks because of the substandard materials added by the builder to my deck. Since I don’t have a budget to replace the wooden parts, I opted for something like a composite deck. This is the right paint for my plans and I chose the texture light gray. There are various colors and you can also choose a smooth finish. It all depends on your preference.
It protects the deck very well despite the exposure to torrential downpours and tropical sun for a long period. That’s how dependable its thick layer is. It’s not the regular deck paints that flake off in a few years. I must say that its result can please boat owners. It can also be used on the dock kit that I assembled.
You may also apply it on concrete surfaces based on its efficacy on a couple of projects. To give a few examples, our balcony that looked gray and worn off is now wonderful. I tried so hard to stop the leaking in the stone garage when it rains. The issue was resolved after I used it on the cement deck over the garage. It’s a clear testimony that it covers surfaces completely.
- Various colors and types of finish
- Protective against torrential downpours and tropical sun
- Doesn’t flake off easily
- For wooden and concrete surfaces
- Can stop leaking
- Not slippery or too hot to step on even though it’s exposed to the sun
- More time for application
Safety concerns oblige me to get excellent deck paint for the aluminum boat. This product is the right candidate since it’s slip-resistant deck paint. But it can be on different boat decks as it can stick to other materials. Aside from being skiff or pontoon boat deck paint, it’s applicable for fiberglass, wood, and painted surfaces. As an additive, you can mix it with oil-based or latex paint.
You can expect longevity from its finish as it has survived high traffic. The anti-slip result is perfect for the boat’s deck and floor. No more fear of backflipping during damp mornings. This also assures my elderly mother that she can get on my pontoon without tripping. I also use it on her ramp. Our front door at home is no longer slippery after I mixed some of this with the cement paint.
As you can observe with the various applications, it’s indeed for interior and exterior use. When water and snow stay on the finish, I just sweep them off. It gives me relief to see that nothing bad happened. I thought that I needed to repaint the deck but fortunately, it’s not necessary when you have this waterproof paint.
- Survives high traffic
- Non-slip, waterproof coating to prevent accidents
- For interior and exterior use
- Not easily damaged by snow and rain
- Can be applied directly without mixing with oil-base or latex paint
- Application in small batches can be time consuming
It’s unquestionably marine-grade paint because of the finish that it makes. It has a non-skid additive in the form of recycled rubber tire granules. So, you can ditch the carpet that you use on your deck and spare yourself from the demands of cleaning. It’s an outstanding paint as I can make a durable coating that is slip resistant at the same time.
You may think that this is a boring kind of paint because of its inclination to durability. But it’s available in 15 shades so you can choose the one that spices up your boat’s look. When there are blemishes, scars, and stains on fiberglass surfaces, you can use it to cover those areas. Thus, it doesn’t only prevent surfaces from being slick and slippery but it enhances the appearance as well.
Apart from fiberglass boat decks, it has remarkable effects on aluminum boats. My fellow boater also painted this on the floor of an enclosed trailer. The effect is superb just like how it goes with the exterior surfaces. Furthermore, I’m surprised that it’s also great on wooden decks so it’s like sailboat deck paint too! With these revelations, the durable coating of this paint is versatile.
- Delivers a durable, non-slip coating
- Can hide blemishes, scars, and stains on fiberglass surfaces
- Has remarkable effects on various materials whether interior or exterior part
- Has resistance to impact
- Doesn’t have a strong odor
- Dries in just half an hour
- Application is time-consuming

Types of Boat Deck Paint
The market offers a wide range of marine deck paints. In terms of ingredients, the usual ones are oil-based paint, acrylics, and linear polyurethane. Some of these paints have ground rubber or tiny particles to create a non-skid finish.
Among the formulations, polyurethane paint proves to be great at resisting UV rays, water, solvents, and oils. High-quality paint protects the deck against harsh elements so your deck and boat won’t be easily damaged.
- These paints can fill up gaps and cracks. They can cover the effects of outdoor elements. Moreover, you may use it to fix the damaged and faded areas on different surfaces.
- Deck paints are available in various colors so you can choose one for aesthetic enhancement. Faded and aged colors can be replaced with ease.
- These paints protect wooden surfaces very well. They can repel UV damage, rotting, and molds. Thus, your wooden deck is in good shape as long as you cover it with reliable deck paint.
- Most boat owners would spread a carpet on the boat’s floor. However, you have to clean it from time to time. If you paint your deck with a good product, you can make a tough finish that requires effortless cleaning.
The kind of paint that you should use on your boat deck is the one formulated to protect against daily wear and tear. Furthermore, it must shield the deck and floor from foot traffic, harsh sunlight, water, and wind. It typically can eliminate flex damage and cracks caused by freezing. You can also find one that stops leaking issues.
If you’re worried about slipping issues because the deck is exposed to water and rain, choose paint that has slip resistance and is comfortable to bare feet.

Here are some necessary preparations so you can continuously paint your deck without interruptions.
- Remove all the hardware like plastic, aluminum window frames, and sliding doors. It must be done before starting to paint. For instance, the paint can mess up objects made of plastic.
- Just a brush of the paint can sometimes be wrong as you need to complete necessary repairs like rotting sections and damaged areas. It’s a crucial step to achieve the expected result.
- The temperature affects the outcome and drying time so you have to be conscious when you begin the painting process. Too much heat at noon is not good as well as late afternoon because cooling temperature and moisture in the air have unfavorable effects. A sunny day is an ideal time to paint.
- When you need to sand and vacuum the service, get rid of the dust and residue. You can make sure that there is no residue by smacking the surface with a towel. Then, sweep and vacuum if it’s still needed before you wipe the area with a clean cloth.
- Read the manufacturer’s instructions so your work won’t be interrupted. You may stop at one point and wonder about the next thing that you need to do. To avoid this, familiarize yourself with the necessary steps. It’s also a way to achieve the expected result.
- You may use a primer or not since it’s not a must for fiberglass boats. If you opt for a primer, you need to make sure it’s compatible with your chosen paint.
- When the layer of primer is done, you can lightly sand it before proceeding to the second coating. It’s advisable to begin painting two hours after the completion of the primer.
- Mix the paint as instructed by the manufacturer.
- Start painting on the edges as you go and you can work your way to the middle. You’ll also need to put tape on the edges of the area you intend to paint.
- Although it appears that the paint has dried, it’s best to let it sit for 24 hours or the time recommended by the manufacturer. Protect the surface from debris and bugs from sticking.
- Sanding the wooden surface is crucial to ensure that the paint adheres well and the result is great. You may use a disc sander or orbital sander. Sandpaper is also needed in some cases. The coarseness will depend on the wood condition. Pick the coarser one if there are a lot of undesirable spots to scrape.
- After sanding, you have to clean the area and get rid of the tiniest particles. You can use a vacuum to get rid of the dust.
- It’s recommended to use a primer for bare wood. A single coating is fine but the second coating is pretty good. Choose the metallic primer because it’s watertight.
- When applying the paint, you should follow the direction of the wood’s grain. Scratches that are caused by sanding won’t be obvious if you do it. Avoid over-applying and just put the right amount of paint in the brush or roller. It’s best to apply thinly.
- Drying is quick during warm days. While drying, make sure that nothing sticks on the surface.
Decks can be made of various materials. A single deck may have various components but with the best boat deck paint, you won’t need any other substance as it can adhere to different materials. The right paint protects your deck against sunlight, rain, snow, wind, water, and other harsh elements in the long run. It also prevents accidents that can occur from slippery boat floors.

Ten years of enjoying countless trips on boats never made me love them any less! So I am here to put all those experiences into good use for other boaters who want to have a safe and fun trip with their friends and families.
- Forums New posts Unanswered threads Register Top Posts Email
- What's new New posts New Posts (legacy) Latest activity New media
- Media New media New comments
- Boat Info Downloads Weekly Quiz Topic FAQ 10000boatnames.com
- Classifieds Sell Your Boat Used Gear for Sale
- Parts General Marine Parts Hunter Beneteau Catalina MacGregor Oday
- Help Terms of Use Monday Mail Subscribe Monday Mail Unsubscribe

painting my Catalina
- Thread starter mark rocco
- Start date Feb 11, 2019
- Catalina Owner Forums
- Catalina 22
So this past weekend i sanded down the free board on my Catalina 22. A few question. Do i use a roller and brush ?...any particular kind ?...I'll be buying the paint from Defender as that's were i bought the paint for the bottom last year. I also want to pain the top deck ...can i use the same paint ? I also would like to high-lite the top deck the same color i did the hull with. Can i use the same pain that i used on the hull "anti fouling " for that ?...thank you for any and all your thoughts.... Mark

mark rocco said: So this past weekend i sanded down the free board on my Catalina 22. A few question. Do i use a roller and brush ?...any particular kind ?...I'll be buying the paint from Defender as that's were i bought the paint for the bottom last year. I also want to pain the top deck ...can i use the same paint ? I also would like to high-lite the top deck the same color i did the hull with. Can i use the same pain that i used on the hull "anti fouling " for that ?...thank you for any and all your thoughts.... Mark Click to expand
jon hansen said: tom young here on sbo does a masterful job of all those projects on his vessel. he can steer you in a great direction for having a sweet finish. there are many options for sure. his recipe is a very good one. ask tom Click to expand
Thank you very much Tom. I now no how and what I need for this project Mark

greg_m said: Hi.. I used two part polyurethane paints to paint my entire hull. In SA the brand is known as "Interlux" - Perfection. You can check my thread on the application. It was a hell of a lot of work. Surface preparation: My panelbeater/car body repair friend drummed this into me... surface preparation is 90% of the work before painting and shows up 100% of the time when done crap! Primer coat: Did three coats of white two part primer coat with sanding to 120 grit between coats. Reason for that is I was promised by supplier that the foam rollers with the fine layer of mohair like bristles on were "perfect" for the job. They came free from the roller and made my boat look like it needed a new razor to shave with! Went over to plain white foam rollers and LOTS of them. As soon as they show signs of wierdness change them. Way cheaper than time wasted and fresh coat of expensive paint that needs to be sanded off again. Top coat: Did four coats of white two part top coat because had to sand the second coat right back due to wind borne dust and dirt landing on the wet surfaces... I was most pee'd off! We also decided to drop the "tip" part of the roll and tip method for the last two coats. That was definitely the game changer for me. Best quality foam rollers I could find and lots of them and no tipping. The phrase "less is more" is also very important... apply multiple THIN coats instead of trying to get thick coats on that will run! Roll slowly to avoid producing bubbles and don't over wet the roller. My finish came out super smooth and shiny. No signs of orange peel and no signs of brush strokes because I did not tip off the paint. I am very impressed and most visitors ask if I sprayed the surface! "Nope just plain old foam roller is all!" is my response. Good luck with your efforts and hope the job comes out fantastic! The deck... Oiy-vay... lots and lots of detail to do.... the hull was the easy part Click to expand
Project_Mayhem
The smoother the paint, the easier it will be to keep clean. The PO of my Starwind tipped and rolled the deck and applied non-skid additive. The boat gets much dirtier than others in the marina
Thank you much

I also am thinking about painting the top coat of my Catalina 22. What is the process to paint the non-skid? Do I have to sand it down or is there a paint that I can just roll over the existing non-skid? I purchased a quart of Kiwi Grip but if I do not need to sand it I would like to go that route. Also for the margins what is the preparation method that I need to use and what kind of paint do I need to use? I have to wait a few months to accomplish this because it is the winter time and the rainy season here.
Dug22 said: I also am thinking about painting the top coat of my Catalina 22. What is the process to paint the non-skid? Do I have to sand it down or is there a paint that I can just roll over the existing non-skid? I purchased a quart of Kiwi Grip but if I do not need to sand it I would like to go that route. Also for the margins what is the preparation method that I need to use and what kind of paint do I need to use? I have to wait a few months to accomplish this because it is the winter time and the rainy season here. Click to expand
That is what I will do then. Can the one part Acrylic enamel be tinted?
Hey Dough..this is what i got back...using a one part enamel " Bright Side or Easy poxy ".. using a foam roller and a bristle brush. and yes you can use the same paint for the top deck mark
Thanks Mark
Dug22 said: That is what I will do then. Can the one part Acrylic enamel be tinted? Click to expand

Milton.Audas

Attachments

Thank you Milton ....nice job. again thank you for the info and the pic!! Mark

Make sure you follow instructions on paint label faithfully. And I recommend not cutting corners on the thinners and brushing liquid.... using what the manufacturer recommends.. seriously. I had success with foam rollers and a foam brush for tipping... but the secret is to get the thinning correct for the most preferred dry time... too fast and the paint starts setting up before it lays out, too slow and it will affect the next over coat... READ THE INSTRUCTIONS!
Copy....thank you Joe
Mark, did you make your cockpit cushions? If so what size thickness of foam did you use and what kind, also were did you order it from?
- This site uses cookies to help personalise content, tailor your experience and to keep you logged in if you register. By continuing to use this site, you are consenting to our use of cookies. Accept Learn more…

- Boat Accessories
- Where to Buy
Special until May 31st: 35% off Teak Deck Sealant for the month of May. Use Code MAY24 at checkout. *restrictions apply
Free ground shipping in the Continental US for any orders over $150!
How To Paint A Fiberglass Boat Deck...
How to paint a fiberglass boat deck.

Painting the fiberglass on your boat hull can be a great way to improve its appearance and make it look brand new. But if your boat deck leaves a lot to be desired, that work can be for naught. That’s why Boat Life has put together this brief guide on how to paint a fiberglass boat deck. Use these simple steps to help ensure your boat looks as best as it can while still maintaining the quality of its fiberglass.
Step One: Clean, Rinse, Dry
This might not be the most fun step in the process, but if you want the entire process to go smoothly and easily, it’s essential. Clean off the boat deck with fresh water, and move the boat somewhere safe where it will have the opportunity to rinse, drain, and then dry without added debris falling on it. You’ll want to be somewhere well-ventilated to allow for a proper drying process. Start this step much earlier than you might imagine so you’re sure you’re working with a dry deck.
You may also have to remove many features off the top of your boat that might otherwise make painting labor-intensive. For that reason, don’t commit to painting until you’re sure you can devote adequate time to the full process.
Step Two: Mask Off the Painting Area
Apply specially-designed painter’s tape to the deck and make sure it adheres. When learning how to paint a fiberglass boat deck, it’s important to remember that fiberglass can be famously slippery, especially when it’s wet. That’s why it’s so important to adequately dry the entire deck.
Take your time here. If you want precisely painted corners and edges, that happens through masking off these edges. Think of this as the first step in a professional-quality coat of paint.
Step Three: Apply the Paint
Although there may be added steps if your fiberglass has a thick layer of gelcoat—and you can check out our post on preparing a fiberglass boat for painting —painting the boat deck is generally simpler. Once the area is dry, masked off and clear of a gelcoat, you’ll be able to apply paint directly.
You can also apply primer first, though that can depend on the individual type of paint you’re using. If you’re not sure what you’re using, speak with an expert and let them know which surface you’re going to be painting to ensure that your paint matches with the job.
Step Four: Remove the Tape and Wait
Once the paint is evenly applied, you’ll be able to remove the tape and have a look at what you’ve done. But you’re not technically done yet—not until you’re sure that the paint has adequately dried! Be sure that you don’t need to use your boat for a few days to ensure that your paint is where it needs to be before you use the boat deck again. Then re-attach any furnishings you removed and get ready to enjoy the boat again!
Keep Your Boat Looking Great

Liquid LifeSeal® Sealant 5.2 fl. oz. Clear

Stainless Steel Cleaner 16 fl. oz.
Related blogs, thanksgiving trivia.
Thanksgiving is one of America’s oldest and most loved holidays. Even though the story is steeped in a dark history […]
Detailing Your Boat
There’s nothing better than hitting the water in a beautiful boat. A warm summer day with the sun shining, there’s […]
How To Properly Clean Your Boat Trailer
We all know that cleaning your boat is important to not only keep it looking great, but to also ensure […]
All products proudly made in the usa

- Privacy Policy
6 Best Boat Deck Paint In 2023

Reviewed By Herb Benavent / Boating Editor

Best Boat Deck Paint Kit
KiwiGrip Non-Skid Deck System
Best large boat deck paint.

TotalBoat TotalTread Non-Skid
Best affordable boat deck paint.
Rust-Oleum Marine Topside
The top 6 boat deck paint in 2023.
- 1. KiwiGrip Non-Skid Deck System
- 2. TotalBoat TotalTread Non-Skid
- 3. Rust-Oleum Marine Topside
- 4. TUFF Coat UT-100 1 Gallon Non-Skid Coating
- 5. Durabak 18 Non-Slip Coating Deck Paint for Boats
- 6. Interlux Interdeck Slip-Resistant
If your boat deck started to fade and lose its grip, perhaps it’s time you repainted it and restored its former glory. More importantly, the best paint for the boat deck will also make your deck safer by adding a slip-resistant layer.
When choosing the right paint for your boat, you should think about a few things. The paint needs to be easy to apply, adhere well to the surface, resist weather conditions, and give you good traction whether it’s wet or dry.
In this article, we’re going to help you narrow down your choices. Our boat deck paint reviews will give you an insight into the best boat deck paints that will work fantastically on any deck surface. And, in the buying guide, you’ll learn about everything you should look for in high-quality paint.

Durable, eco-friendly, and easy to apply, Kiwi deck paint is one of the best all-around products that you’ll come across. It comes with a roller for faster application and, unlike most other products, even a single layer will provide good traction. Because of all this, it’s easy to see how the KiwiGrip paint got the top spot on the list.
With its water-based acrylic formula, KiwiGrip boat deck coating is great to work with. It comes as a one-party system, so you won’t have to mix anything. And, as we’ve mentioned, the formula is eco-friendly and contains no fillers, sand, or rubber flecks.
Application
To make your job easier, KiwiGrip includes a roller in the package that you can use to create both smooth and rough textures. A single layer will do a very decent job, and you’ll be able to cover about 20 square feet with a single liter. The material is spread out onto the deck and then the supplied roller “lifts” the top of it to create the perfect non-slip texture.
Performance and Looks
The performance is fantastic – it doesn’t slip and holds its own when exposed to saltwater and lots of sunlight. The KiwiGrip non-skid deck system is available in 5 stock colors and you can even add a tint if you want a custom one.
- Stand Out Features - Why We Love It
- KiwiGrip roller for easier application
- One-part system for convenient use
- Environmentally-friendly acrylic formula
- Adjustable texture (based on application technique)
Type: Water-based Acrylic Surfaces: Wood, Fiberglass, Epoxy, Concrete, Metal Volume: 1 or 4 liters Non-skid: Yes Coverage: 20 square feet per liter Curing time: 1h (touch), 24h (walk), 7 days (fully) Color(s): Black, Blue, Cream, Gray, White
Made using high-quality polyurethane, TotalBoat TotalTread marine deck paint promises excellent performance. It’s less abrasive than most similar products, adheres well, and doesn’t crack or peel in the sun, which is why we picked it as our favorite.
As we said, the formula is based on polyurethane that works equally well on fiberglass, wood, metal, and even previously painted surfaces. It’s even better in multiple layers, providing very reliable traction if you have two coatings.
The TotalTread boat floor paint is pre-mixed (easy to work with), and you can choose if you want to apply it with a brush or a roller. You’ll get detailed instructions on how to use it on different surfaces, and a single gallon can paint up to 300 square feet.
One of the best things about the TotalTread paint is its durability – it’s UV-resistant and perfectly safe to scrub without worrying about chipping or cracking. Lastly, you can get it in 4 basic colors that match most default deck colors.
- UV resistant formula won’t crack or peel in the sun
- Adheres well to almost any type of surface
- Easy to clean (safe for scrubbing)
- Large coverage with a single can
Type: Polyurethane Surfaces: Fiberglass, Wood, Metal, Previously Painted Surfaces Volume: 1 quart Non-skid: Yes Coverage: 250 to 300 square feet per gallon Curing time: 24h (walk), 2 weeks (fully) Color(s): Beige, Gray, Light Gray, White

If you’re looking for an affordable way to make your deck look new, Rust-Oleum marine topside paint is a perfect choice. It’s smooth, easy to use, and works equally well on metal, wood, or fiberglass. Because of this, it easily gives you the best value for your money.
The formula is oil-based, unlike all the other deck paints featured on this list. While it’s maybe less durable in harsh conditions, it’s probably the easiest to use. On top of this, it looks beautiful and elegant, with a smooth finish and great gloss retention.
Due to its consistency, this sailboat deck paint can even be applied with a spray too (in addition to a brush). A single can cover up to 100 square feet, and the paint will be dry to the touch in an hour or two. It doesn’t contain any non-slip components, so this goes on the pretty parts of the deck that you want to make shine.
Made to the highest standards, Rust-Oleum fiberglass boat deck paint shields your deck from fading, abrasion, and any type of damage. You have 9 color options to choose from, so it’s easy to find the one you like.
- The oil-based formula for easier application
- Dries to the touch within 2 hours
- Retains gloss and color for a long time
- Abrasion-resistant with excellent durability
Type: Modified Alkyd Surfaces: Fiberglass, Wood, Metal Volume: 1 quart Non-skid: No Coverage: 100 square feet (per can) Curing time: 1 to 2 hours (touch) Color(s): 9 colors available
Best High Traction Boat Deck Paint
Tuff coat ut-100 1 gallon non-skid coating.

Thanks to its rubberized formula, TUFF Coat UT-100 deck paint gives you fantastic traction even on a completely wet deck. This non-skid paint for boats is tough, durable, and works great on decks, docks, and many other surfaces.
Tuff Coat pays a lot of attention to product safety, so this top-rated paint for the boat deck is completely non-hazardous. Like we’ve mentioned, it contains rubber particles that give it an edge over other products.
A detail we like about UT-100 paint is that you can apply it with a spray, brush, or a roller. It gives the best results when you apply two coats, and you’ll get about 45 square feet from one can.
The performance is impressive regardless of conditions – it won’t peel or crack regardless of the temperature or sun exposure. And, most importantly, it gives your feet a fantastic grip so you can move around freely.
- The rubberized formula prevents slipping
- Water-based and completely safe to use
- Highly resistant to UV rays and weather conditions
- Suitable for almost all types of surfaces
Type: Water-based Surfaces: Fiberglass, Concrete, Wood, Aluminum, Steel Volume: 1 gallon Non-skid: Yes Coverage: 40 to 45 square feet in two coats (per gallon) Curing time: 24h (touch), 5-7 days (fully) Color(s): 8 colors available
Best Boat Deck Paint For UV Protection
Durabak 18 non-slip coating deck paint for boats.

For ultimate deck customization, there’s no better choice than the Durabak non-slip deck paint. It’s available in sixteen great-looking colors that will make your deck look better than ever. The quality is on-point too, as it’s the paint of choice for many professionals and the US Navy.
Thanks to the recycled rubber tire granules, Durabak 18 guarantees impressive traction in both dry and wet conditions. The base is polyurethane that not only looks great but also provides great protection to the deck underneath.
You have three choices when applying the Durabak 18 paintbrush, spray, or the special Stipple Roller. The paint works well on fiberglass boats, concrete, wood, and metal, and even adheres well to itself (great for small reparations).
Durabak 18 paint is strong but flexible at the same time, so it maintains quality level over many years. Combine this with the numerous color options we mentioned, and you have a really solid choice when it’s time to repaint your boat.
- Textured for even greater slip-resistance
- A huge number of color options (sixteen)
- Suitable to use even in direct sunlight
- Bonds well to itself for easy reparations
Type: Polyurethane Surfaces: Concrete, Wood, Fiberglass, Metal, Coated Surfaces Volume: 1 gallon Non-skid: Yes Coverage: 60 square feet in two coats (per gallon) Color(s): 16 colors available
Best All Surface Boat Deck Paint
Interlux interdeck slip-resistant.

Versatility is the best thing about the Interlux Interdeck marine deck coating – it works equally well on all surfaces. On top of this, it doesn’t slip, prevents glare, and looks fantastic.
With an addition of a fine mineral additive that chemically bonds to the paint, Interlux non-skid deck paint has increased strength and durability. The base is polyurethane with all its well-known qualities (good adhesion and slip-prevention).
The texture of this paint is really fine, making the application much easier compared to most others. You can use it straight from the can (no mixing required), and all you need is a brush or a roller.
We particularly like that this is a low sheen paint, meaning that you won’t have any glare on the boat surface. Interlux Interdeck is available in 4 different colors, allowing you to give your deck the look you always wanted.
- Mineral additives significantly increase durability
- The low sheen finish helps prevent sunlight glare
- Looks great (no peels or cracks) for many years
- Great to use on any material, even painted surfaces
Type: Polyurethane Surfaces: Any Volume: 1 quart Non-skid: Yes Color(s): Gray, White, Cream, Sand Beige
How To Choose A Boat Deck Paint – Buying Guide

While it doesn’t have much to do with performance, color is very important for most of us. Simply put, we want the deck to look nice and blend in. As you’ve had the chance to see, most manufacturers offer paints in many beautiful colors so finding the one you like is easy. If you are deciding between a color and a white deck, ask yourself if you want to be able to walk barefoot on your boat. A white deck will stay cooler in the sun and not burn your feet like a dark deck on a hot day would. If you are planning on a color, also look into getting some really good boat shoes in our other list.
An important task for the paint is protecting the deck surface. This includes everything from foot traffic in your boat shoes to blocking out UV rays. With this in mind, look for tough but flexible paints that won’t peel or crack (especially if you’re not using a boat cover).
You might also like: Boat Polishes
Water Resistance
Since a boat deck comes into contact with a lot of water, the paint needs to be water-resistant. Regular paint would quickly wash away, so we advise that you always buy specialized paint that can withstand weather conditions.
Non-Slip Coating
Providing good traction when walking is the most important job of your non-skid deck paint. Furthermore, it will make using accessories like deck chairs more enjoyable too. Regarding slip resistance, two things play a role – paint formula and texture.
The painting process isn’t particularly enjoyable, and most boat owners don’t want to do it every year. Paying attention to the aspects we mentioned will guarantee that the paint will last for many years. Good paints are water and slip-resistant, don’t peel or crack, and look fantastic even after many years.

Q: How Should I Prepare My Boat Before Painting?
Before you paint, make sure to remove all the imperfections from the surface (chips and peels). Afterward, degrease and clean the surface and let it dry. Doing this will make your painting job easier and make the result much better.
Q: What Other Accessories Will I Need Besides The Paint?
While most paints we featured are a one-party system, some paints require a primer to improve adhesiveness. Of course, you’ll also need a brush or roller to apply the paint. Lastly, you can use a boat polish to give your vessel some shine once the paint dries.
Q: How Long Does It Take For The Paint To Dry?
The paint should be dry to touch in around 1-2 hours, depending on the type of climate that you are in. However, it’s probably the best idea to avoid walking over it for 24 hours so you don’t ruin the coating.
Q: Can I Paint Over Gelcoat?
Yes, you can paint over gelcoat. If it’s not completely covered with large cracks, you can get fantastic results. However, it requires a bit more preparation that includes a thorough cleaning, using epoxy primer, and sanding the surface.
Q: How To Paint Fiberglass Boat Decks?
Painting fiberglass boat decks is fairly easy if you follow a few simple guidelines. Here’s what you should do:
- Clean the deck (remove debris, rinse with fresh water, leave to dry)
- Apply masking tape (mark the area that you want to paint)
- Paint the deck area
- Leave to dry (up to 7 days before you return elements).
Globo Surf Overview
Painting the deck is an important part of boat maintenance , even though you won’t do it often. Not only does it make your boat look like new, but it also gives you secure footing so you don’t slip. With the boat deck paints from our list, you’ll get that extra safety and enjoy a great-looking deck each time you set out.
More Boating Detailing Reviews:
- Boat Buffers
- Boat Waxes
More Paint Reviews:
- Pool Deck Paint
- PSS Shaft Seal
- Fendertex® Fenders
- Revolve Boat Hook
- Jefa Rudder & Rudder Bearings
- Jefa Autopilot Drives
- Jefa Steering
- Lecomble & Schmitt Autopilot Drives
- Lecomble & Schmitt Hydraulic Steering
- R&D Marine
- Crystal Prop
- Floor Anchor
- Clamp Jacket
- Shaft Retention Collar
- Machine Shop
- Max-Prop Reconditioning
Testimonials
- Schedule Virtual Meeting
- Company Info
- Boat Show Calendar
- Custom Colors
- Instructions
- Re-Coating Instructions
- How-To Videos
KiwiGrip Non-Skid Coating
Traction You Can Trust
KiwiGrip is a revolutionary, durable, non-skid coating that spreads quickly and easily with our proprietary roller, offering a beautiful, high traction surface. By varying the application technique, the texture can be adjusted from a rolled pleasure boat texture to an industrial aggressive work boat texture. As a homogeneous material, KiwiGrip doesn't suffer from the problems encountered with aggregate based products that use sand, walnut shells, beads, rubber fleck, or other fillers. Coatings with fillers tend to wear through, and the fillers fall out leaving an unsafe deck that's hard to clean and even harder to re-coat.
Applications
- Power Boats
- Pontoon Boats
- Aluminum Boats
- Paddle Boards
- Inflatables

RESIDENTIAL
- Wooden Decks

- Food Processing
- Loading Docks

PARKS & RECREATION
- Climbing Walls

Shop KiwiGrip

1 Liter (0.26 gallon)

4 Liter (1.06 gallons)
Coverage depends completely on application thickness and on the underlying surface.
Easy To Apply
You can achieve different levels of aggressiveness with KiwiGrip non-skid. In the video below we'll show you how to achieve a fine, mild, medium and aggressive texture.
New and improved packaging!
- Shake in pouch, squeeze, spread and roll to desired texture.
- Purge air from pouch and reseal for easy, safe storage.
- No risk of product loss in transit due to dented cans.
- Less plastic per liter than previous can packaging with roller cover.

KiwiGrip FAQ's
Want to know if you can apply KiwiGrip by yourself? How much will 1 liter of KiwiGrip will cover? How long does KiwiGrip take to cure? Check out our FAQ page for the answers to these questions and more.
Want to learn some tips and tricks with KiwiGrip? Then be sure to check our blog . Here are just a few articles.
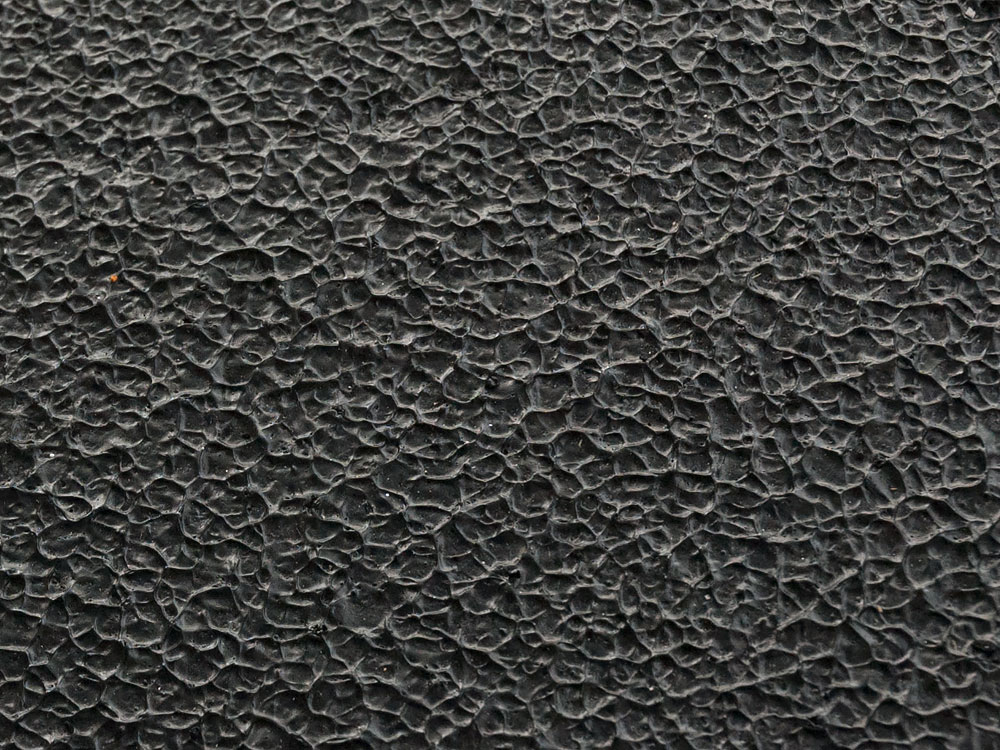
Achieving That Perfect Texture
Learn how to achieve different textures, from a very mild to a very aggressive texture.
Continue reading

Getting A Grip
By Stephen Perry in Good Old Boat Magazine
In the Jan/Feb 2011 issue of Good Old Boat Magazine, Stephen Perry shows you how to apply KiwiGrip to their Pearson 28.

Why KiwiGrip?
There are many marine nonskid products on the market to choose from, all with varying degrees of cost and difficulty to apply...

KiwiGrip Project Boat
The S/V Pazzo designed by Carl Schmacher and built by Oyster Marine is a renovated Lighwave, 48. Owned and operated by William Stiggelbout.
Customer Photos
Here are some images of KiwiGrip in action. Want to share your photos of KiwiGrip? Post it on Instagram and put #kiwigrip.
View this post on Instagram A post shared by Uventure Lifestyle (@uventure_lifestyle)
View this post on Instagram A post shared by Dennis Annotti (@dannotti)
A photo posted by Jared J Nellis (@jjnellis1) on Oct 17, 2016 at 11:19am PDT
Second round of non-skid #kiwigrip#woodenboats A photo posted by Jared J Nellis (@jjnellis1) on Oct 6, 2016 at 7:39am PDT
A photo posted by Inn at Tabbs Creek B&B (@innattabbscreek) on Apr 14, 2016 at 1:37pm PDT
A photo posted by @sail_kalina on Nov 2, 2016 at 11:43am PDT
A photo posted by Jared J Nellis (@jjnellis1) on Oct 16, 2016 at 5:27pm PDT
A photo posted by Ashleigh (Sailing Barnaby) (@ashleigh_erin13) on Jun 13, 2016 at 1:21am PDT
A photo posted by @sail_kalina on Oct 27, 2016 at 1:39pm PDT
A photo posted by Sea to Sky Sailing (@seatoskysailing) on Sep 28, 2016 at 3:56pm PDT
A photo posted by andrew veclotch (@andrewvec) on Apr 23, 2016 at 4:22pm PDT
A photo posted by andrew veclotch (@andrewvec) on Apr 23, 2016 at 3:54pm PDT
A photo posted by Makai Adventures (@makaiadventures) on Dec 13, 2015 at 11:07am PST
A photo posted by Jon Hulcher (@jmh_flyfishing) on Jan 25, 2015 at 2:19pm PST
A photo posted by Erick (@floriderp) on Jan 7, 2013 at 5:56pm PST
View this post on Instagram A post shared by Sailing Nandji (@sailing_nandji)
View this post on Instagram A post shared by Göteborgs Möbel&Marinsnickeri (@gbgmm)
View this post on Instagram A post shared by andrew veclotch (@andrewvec)
View this post on Instagram A post shared by ⚓️🛶⚓️ (@_joshmog)
View this post on Instagram A post shared by Delmarva Marine Solutions (@delmarvamarine)
View this post on Instagram A post shared by PasoLizzie (@lizleecitizenoftheworld) on May 2, 2020 at 3:48pm PDT
View this post on Instagram A post shared by Heather Maynard (@heathermaynard) on Mar 12, 2020 at 11:35am PDT
View this post on Instagram A post shared by Jacob & Eileen 🇸🇪 🇺🇸⛵️ (@_palmborg_) on Mar 30, 2019 at 7:02pm PDT
View this post on Instagram A post shared by Jacob & Eileen 🇸🇪 🇺🇸⛵️ (@_palmborg_) on Jan 21, 2019 at 6:50pm PST
View this post on Instagram A post shared by Draft Pick Fishing (@draftpickfishing) on Jul 5, 2020 at 10:38am PDT
View this post on Instagram A post shared by Kristine (@kristine_sailing) on Jul 4, 2020 at 10:18am PDT
View this post on Instagram A post shared by Blair and Jodi (@svwinddrift) on Jul 4, 2020 at 8:53am PDT
View this post on Instagram A post shared by Ondastar Nautica Recreio (@ondastar) on Jun 23, 2020 at 1:11pm PDT
View this post on Instagram A post shared by The Fugitive sailing (@thefugitivesailing) on Jun 17, 2020 at 8:28pm PDT
View this post on Instagram A post shared by Simple Sailing (@simplesailingdk) on Jun 5, 2020 at 5:28am PDT
View this post on Instagram A post shared by ⚓ ⛵ Never_Land_Again ⛵ ⚓ (@never_land_again) on May 31, 2020 at 6:12pm PDT
View this post on Instagram A post shared by russell rose (@russell_rose_detail) on Sep 18, 2020 at 1:53pm PDT
KiwiGrip has been applied to tens of thousands of boats worldwide. Here are are what a few of them have to say about KiwiGrip.
Applies easy and even every time! This product has made a great addition to our boats!
Thomas Huff | Purchasing Agent , Raider Boats
KiwiGrip was a dream to use. It is a quick, no-mess way of cleaning up tired old decks and applying a superior non-skid finish. It covered all of the spots where I have moved deck fittings and filled the unwanted holes with epoxy. They literally vanish under KiwiGrip. So far my KiwiGrip decks have endured record heat, kids, burning embers, beer, ice, snow, and sea otters without a mark. My next boat will also have KiwiGrip on the decks.
KiwiGrip was very easy to work with. I had to cover a badly damaged and blistered deck on my boat and after a mediocre fiberglass repair job on my part, I applied KiwiGrip over the deck and it covered all my imperfections and it looks and wears excellently. I have been recommending it to my friends.
Bill Thomas
We are very pleased with the results in our 9' Spindrift Nesting Dinghy. We will be using KiwiGrip from here on out when we need non-skid. Thanks!
William Connor
We are very pleased with the results, The deck looks great and a single coat covered the unevenly colored deck (mostly white with brown patches of epoxy where I'd made repairs). Here is a tip other customers might find helpful. I used a 4" plastic squeegee-type slotted trowel to evenly spread the goop before my wife rolled in the texture using the roller. It allowed me to spread an even layer and worked quite well. Thanks.
Gary Morgan-Gohlke
I wanted to share my Kiwi Grip story with you, as I just made my second purchase of the product. I just finished a complete re-finish of a small “Sunfish clone” for my son. The boat was in very poor shape when it was given to me. We worked together to completely re-do, including Kiwi Grip on the non-skid. I believe the results speak for themselves. I liked it so much that I am now going to re-do the non-skid on my Catalina 30!
Mark Hamilton
Find a kiwigrip dealer.

California man trolls city officials with 'artistic statement' after being asked to fence in his boat
A California boat owner became a local celebrity after he decided to stick it to city officials who asked him to build a fence around his boat.
Etienne Constable, a Seaside, California, resident, owns a boat that he had kept parked on a dirt patch on his property. In July 2023, officials asked him to build a proper driveway and to put up a 6-foot-tall fence that covered his boat.
In an interview with Fox News Digital on Monday, Constable explained that he "wasn't looking for a private property rights fight with the city," but disagreed with officials for thinking his boat was an eyesore.
50 BIZARRE LAWS THAT HAVE EXISTED OR STILL EXIST IN AMERICA
"There's some logic to the law about, you know, not having decrepit vehicles….and I figured, 'This is not unsightly.' I don't know why they would threaten me that way," he recalled.
"I just figured there's a First Amendment right of writing whatever statement I want, on whatever property I have," he continued. "So, yeah, just kind of standing up for myself."
READ ON THE FOX NEWS APP
Constable ended up complying with the city by building a fence, but he decided to have some fun with it by commissioning a life-like mural on the structure.
The art is arguably so realistic that, at a quick glance, it almost appears that the fence isn't there at all.
10 PRIVACY FENCE OPTIONS FOR YOUR DECK, PATIO OR BACKYARD
Constable explained that he wanted to avoid having an unattractive fence, opting for a look that was more appealing.
"I just thought, 'Here's a creative way to make a statement.' And it being an artistic statement, it's open to many interpretations, and I think that's part of the beauty of it," Constable explained.
Constable got in touch with a local artist named Hanif Panni, who happens to be his neighbor, to help bring the idea to life. The City of Seaside appeared to applaud Constable and Panni's creativity, according to a Facebook post on Saturday.
"Seaside resident got creative when complying to the municipal code to hide his boat with a fence," the post's caption read. "He turned lemons into lemonade and had his artist neighbor paint a hyperrealistic mural of the boat on the fence itself!"
"The result? A optical illusion and a whole lot of media attention," the post continued.
Constable admitted that his stunt got much more attention than he expected.
CLICK HERE TO SIGN UP FOR OUR LIFESTYLE NEWSLETTER
"I was ready for whatever reaction might come, although I certainly wasn't ready for this thing to go viral like it has… I didn't know how the city would react," he told Fox News Digital.
"I got a call from the acting city manager/police chief and he said, 'Dude, you're hilarious. I'd give you a high-five. I'd love to meet you someday. And, you know, if you need anything, let me know.'"
Constable, whose community is just outside of Monterey, says that the attention he's received from locals has been overwhelmingly positive.
"Ninety-nine percent of everybody else in this community thought it was hilarious, and [thought] that there's some silly laws on the books. Why do we make each other suffer in this way for whatever reason?" he said with a laugh.
If Constable did not conceal his boat, he would have had to pay a first offense fine of $100, The Los Angeles Times reported.
Fox News Digital reached out to Seaside Mayor Ian Oglesby for comment.
For more Lifestyle articles, visit www.foxnews.com/lifestyle .
Original article source: California man trolls city officials with 'artistic statement' after being asked to fence in his boat

IMAGES
VIDEO
COMMENTS
Then Janet used a solvent wash to ensure a strong bond with the primer paint. 3. After dings and cracks were repaired and sanded, two coats of epoxy primer were applied. 4. Following another round of sanding, vacuuming, cleaning, and taping, the couple rolled and brushed on a fresh coat of Awlgrip topcoat. 5.
Z Spar recommends using a 4-ounce (by weight) can to 1 quart of paint. One-pound cans of #M-612 Non Skid Compound, for use with 1-gallon paint containers, also are available. Priced at $10.99/4 ounces, the Z Spar product is expensive compared to the Interlux product at $19.95/quart. Pettit Skidless Compound.
KILZ Over Armor Textured. 11. INSL-X SU031009A-01 Sure Step Coating. 12. Evercoat 853 Skid-No-More Rubberized Coating. Factors To Consider When Choosing Boat Deck Paint. What Is The Best Boat Deck Paint. How Should I Prepare My Boat Before Painting. How Do You Paint A Fiberglass Boat Deck.
Painting your boat's deck can be a challenging task. In this article, we will take a look at the Best Non-Skid Deck Paint for your boat or sailboat. For this article, I asked some boaters friends of mine, marine product professionals, and some online forum buddies of mine and well as my personal experiences with some of the following products. A good non-skid boat deck paint provides a slip ...
boat maintenance. boat paint & solvents. non-skid deck paint. CONTACT WEST MARINE. Live Chat. 1-800-262-8464. Store Locator. Shop non-skid boat deck paint at West Marine, including marine paints in various colors, compounds, coatings and more. Get free shipping to home or stores!
1. Paint: Choose a marine-grade paint that is specially formulated for boat surfaces to ensure long-lasting durability. 2. Primer: Apply a suitable primer to create a smooth and uniform surface for the paint to adhere to. 3. Brushes and Rollers: Use high-quality brushes and rollers designed for marine applications. 4.
After you have finished with the 600 grit sandpaper, it is time to move on to 800, then 1200. This process is important so you will be painting on as smooth a surface as possible. It is then a good idea to wipe the surfaces of the boat down with a damp cloth to remove any of the dust and flakes of metal/wood.
Use 220- to 300-grit sandpaper. Step 2: Wipe down with solvent to remove grease and dirt. For Interdeck, use 2333N solvent. Step 3: Open the can and mix the paint well. If you wish to make the deck more nonslip, you can sprinkle Interlux's InterGrip onto the wet-paint layer or add it to the can of paint.
Repair and fair any dings or gouges in the hull or deck. Sand carefully and remove all dust. Apply primer, if necessary, and resand. Apply the finish paint with a partner, using roller and brush. Let each coat dry completely before lightly sanding for the next, laying on a minimum of two coats.
Its been our experience that an amateur can sand, clean, tape, and roll on a one- or two-part polyurethane nonskid paint and achieve very respectable results. In our last evaluation of nonskid paints (PS, Feb. 1, 2003), we favored Epifanes Nonskid Deck Coating and West Marines Nonskid Paint. Interlux and Pettit also offer one- and two-part ...
Clean the work area. Use Boat Cleaner to ensure the deck is as clean as possible before applying any paint. Vacuum up any dust or small pieces of debris on the deck, and also clean any sticky residue that may be present with Release Adhesive & Sealant Remover. Be sure to let the deck dry thoroughly before the painting process begins.
3. Paint at optimum times of day. If you're outside, paint in mid to late morning after the dew has evaporated, and in mid-afternoon. Avoid noontime when the sun is overhead and at its hottest, and late afternoon, when evening cooling and moisture can affect drying time and finish. 4.
4,638. Hunter 46 Point Richmond, CA. Apr 21, 2021. #7. Total Boat Total Tread non-skid paint preparation from the manufacturer: 1. Remove all surface contaminants including water, dust, wax, grease, and surface blush. 2. Wipe the surface with a clean, lint-free rag wetted with TotalBoat Dewaxer & Surface Prep.
Interdeck slip-resistant deck paint produces an excellent slip-resistant finish with a tough polyurethane resin that protects decks against everyday wear and tear. It contains a fine aggregate and applies easily to all to all substrates. Interdeck has a low-sheen finish to reduce sun glare. Available in White, Cream, Beige, Gray and Blue.
Wash with standard, mild boat soaps ( PS, January 2013) or household cleaners and a soft- to medium-bristled brush. Steer clear of bleach and other chlorinated or acid-based cleaners as they can affect the paints color pigments and UV inhibitors. Be sure to rinse the decks well with fresh water, when possible.
Interlux now offers three solutions for refinishing a non-skid deck: Stir and apply Interdeck - a pre-mixed, slip resistant, single component, ready to use deck paint that can be applied over Prekote primer or Epoxy Primekote primer 404/414. Mix your own non-skid finish: any one of the Perfection or Brightside Polyurethane finishes can be ...
Top 5 Deck Paints. Best Deck Paint Overall: KILZ Interior and Exterior Latex Floor Paint. Best for Pool Decks: INSL-X Acrylic Anti-Slip Coating Paint. Best Deck Stain and Sealer: Ready Seal Exterior Stain and Sealer. Most Eco-Friendly Deck Paint: Montage Signature Eco-Friendly Indoor and Exterior Paint. Best for Old Wood Decks: Rust-Oleum ...
Best Boat Deck Paints (New List 2021) So, check out the paints that we have selected, but don't assume that No. 1 may automatically be the best one. 1. TotalBoat Non-Skid Deck Paint. Thanks to being one part polyurethane, this paint makes the surface it covers durable and non-slippery.
This non-slip boat deck paint is ideal for aluminum boats, fiberglass boats, duck boats, and more. 7. Tuff Coat UT-211 Light Gray Non-Skid Coating. It's unquestionably marine-grade paint because of the finish that it makes. It has a non-skid additive in the form of recycled rubber tire granules.
Apr 3, 2015. 74. catalina catalina 22 Carolina beach NC. Feb 12, 2019. #13. Hey Dough..this is what i got back...using a one part enamel " Bright Side or Easy poxy ".. using a foam roller and a bristle brush. and yes you can use the same paint for the top deck. mark.
Step Two: Mask Off the Painting Area. Apply specially-designed painter's tape to the deck and make sure it adheres. When learning how to paint a fiberglass boat deck, it's important to remember that fiberglass can be famously slippery, especially when it's wet. That's why it's so important to adequately dry the entire deck.
4. TUFF Coat UT-100 1 Gallon Non-Skid Coating. 5. Durabak 18 Non-Slip Coating Deck Paint for Boats. 6. Interlux Interdeck Slip-Resistant. If your boat deck started to fade and lose its grip, perhaps it's time you repainted it and restored its former glory. More importantly, the best paint for the boat deck will also make your deck safer by ...
KiwiGrip is a revolutionary, durable, non-skid coating that spreads quickly and easily with our proprietary roller, offering a beautiful, high traction surface. By varying the application technique, the texture can be adjusted from a rolled pleasure boat texture to an industrial aggressive work boat texture. As a homogeneous material, KiwiGrip ...
A California man told Fox News Digital that he had a boat mural painted onto his fence after city officials demanded he build a barrier for his boat. The art attracted attention online.